


Paint defects on bodywork
Defects in the field of automotive painting (but also motorcycle and bicycle painting) are common, even ubiquitous. They can be controlled through experience and mastery of the specific techniques used in painting.
It is important to know how to recognise defects and understand the causes of these paint defects. Special terms exist in the painter's jargon to describe each defect.
Most defects can be corrected without having to reapply the paint. Some defects are too problematic, however, and it is therefore necessary to reapply the paint system from the bottom layers, removing the layers that have already been applied.
The causes of defects can include, for example, poor preparation of the substrate, failure to observe drying times, excessive thickness, or even poor conditions in the workshop.
This guide aims to assist you in reliably assessing paint defects, whether you are a professional painter or a private individual and applicator: each defect is illustrated with its possible causes and recommendations for correction.
Summary
Refinishing — Paint defects (in alphabetical order)
- Drips
- Water stains
- blurred, chalking, powdering
- Solvent blistering, micro-bubbles, degassing, pinholes
- Salt and pepper effect
- Orange peel
- Contours
- Hardener migration in polyester filler
- Sanding marks
- Dust/impurities in the base coat
- Dust/impurities in the clear coat
- Poor adhesion between base coat and clear coat
- Insufficient opacity
- Condensation blisters or water bubbles
- Frieze, paint wrinkling
- Candy migration
- Silicone crater, clear coat opening
- Dull appearance or variation in gloss, loss of gloss
- Poor adhesion to plastic parts
- Micro-holes in polyester filler
- Cracking, shrinkage
- Loss of gloss in varnish during drying
- Black or white marks on Chameleon paints
Identify, understand, prevent and correct defects in car body paint finishes
1. Drips
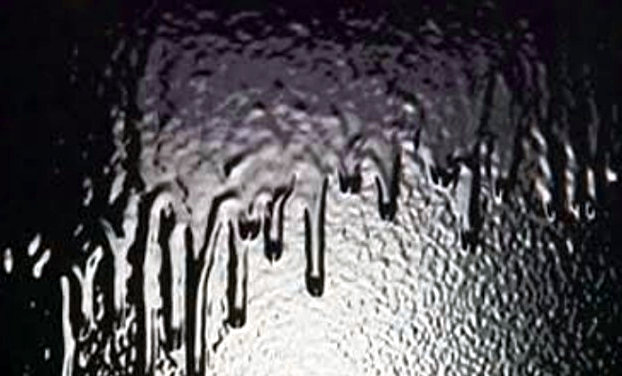
Possible causes :
- Product viscosity too low, poor spraying technique, insufficient flash-off time between coats
- Spray gun too close
- Incorrect spray pressure
- Product, substrate or booth temperature too low
- Inappropriate choice of hardener or thinner too slow
Prevention :
- Follow the recommendations in the technical data sheets.
- Check that the spray gun is in good working order.
- Heat the room and the products to approximately 20°C.
- Use the correct hardener/thinner combination.
- Keep the spray gun at a sufficient distance from the surface.
Correction :
- Sand using a mini sanding block, then polish.
- Or sand and repaint.
- You can cut the edge of the drip using a blade before sanding.
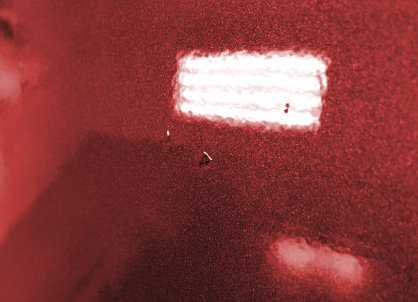
2. Water stains
Cause :
- Insufficiently dried varnish
- Excessive film thickness, drying time too short
- Unsuitable thinner
- Incorrect hardener dosage
- Incorrect hardener
Prevention :
- Follow the instructions in the technical data sheets.
Correction :
- Once completely dry, polish
- If necessary, sand and repaint
3. Blurred, chalking, powdering

Causes :
- Excessive viscosity / poor technique / flash off, incorrect booth temperature
- Angled position and excessive distance from the spray gun
- Incorrect spray pressure
- Inappropriate thinner
Prevention :
- Adjust the product correctly.
- Keep the spray gun parallel and perpendicular (90°) to the surface.
- Keep the spray gun at a distance of 10 to 20 cm maximum from the surface.
- Use a suitable spray gun assembly.
- Use the recommended thinners.
- Allow sufficient flash-off times.
- Follow the recommendations in the technical data sheets.
Correction :
- For classic base coats: use the ‘droplet’ technique before applying the varnish.
- Once completely dry, sand and repaint.
- For water-soluble base coats: apply an even finish to the wet base coat according to the technical data sheet.
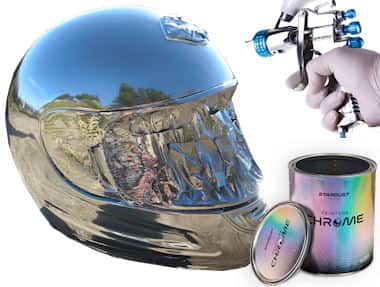
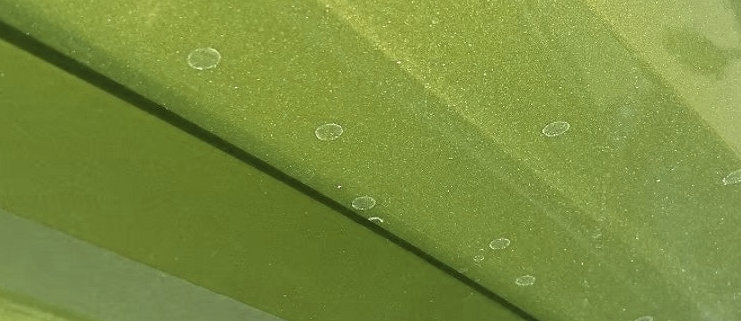
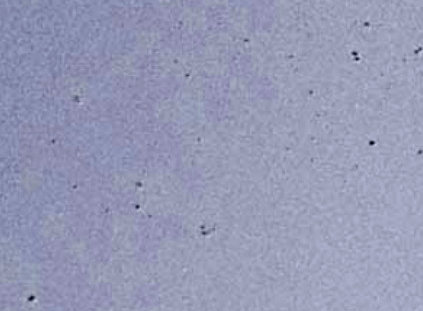
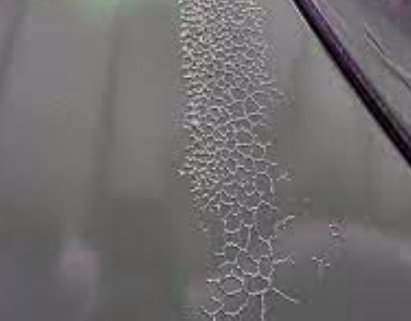
4. Solvent bubbles, micro-bubbling, degassing, pinholes
Causes :
- Partial drying of primer, filler or corners
- Solvents or trapped air escaping during drying or released during recoating
- Oven drying/baking without desolvation
- Application of too many coats/too much thickness
- Multiple layers of ‘millefeuille’ with or without sanding (chrome effects)
- Incorrect viscosity, spray pressure, flash-off time/drying times
- Excessive film thickness
- Inappropriate spraying technique
Prevention :
- Apply normal thicknesses (15-25°C), avoid hot temperatures.
- Observe the recommended time intervals between coats.
- Allow desolvation before baking.
- Use a slow thinner at high temperatures.
- Apply the recommended paint thickness.
- Check the oven temperature.
- Strictly follow the technical recommendations.
- Avoid covering a chrome or silver paint system with new coats and opt for sanding or stripping the underlying coats.
Correction :
- If within 24 hours: repaint without sanding.
- Otherwise: sand with ultra-fine Scotch Brite.
- Fill micro-holes with polyester filler or remove the finish and repaint.
- Sand, prime and then repaint.
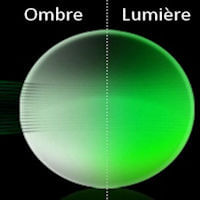
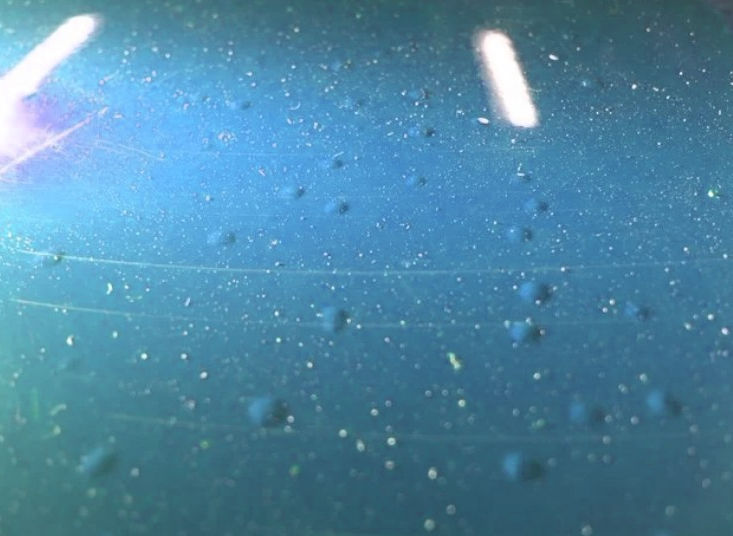
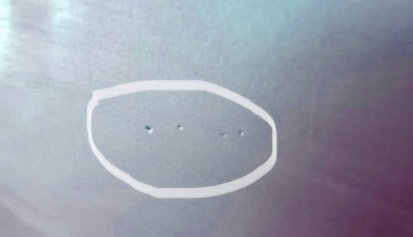
5. Pepper and Salt Effect

Causes :
- On a water-soluble base, too much moisture on a metallic base causes small black spots in light colours.
Prevention :
- Observe the dosages, pressure and spraying technique for the base coat.
Correction :
- This phenomenon often occurs after varnishing: sand and rework the base coat + varnish.
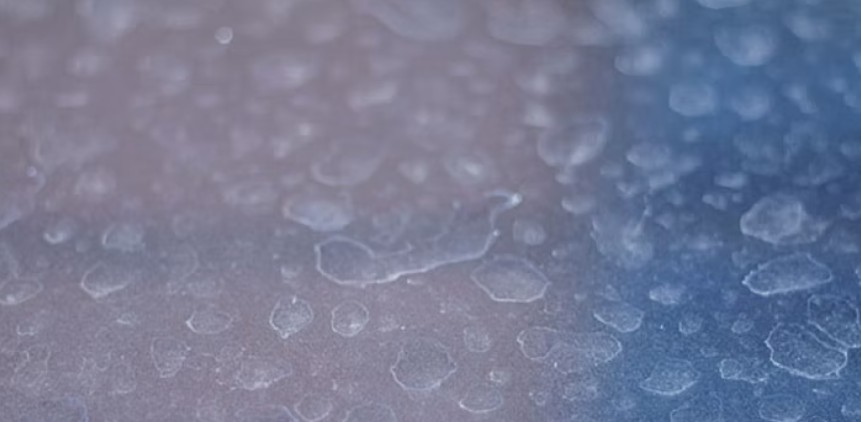
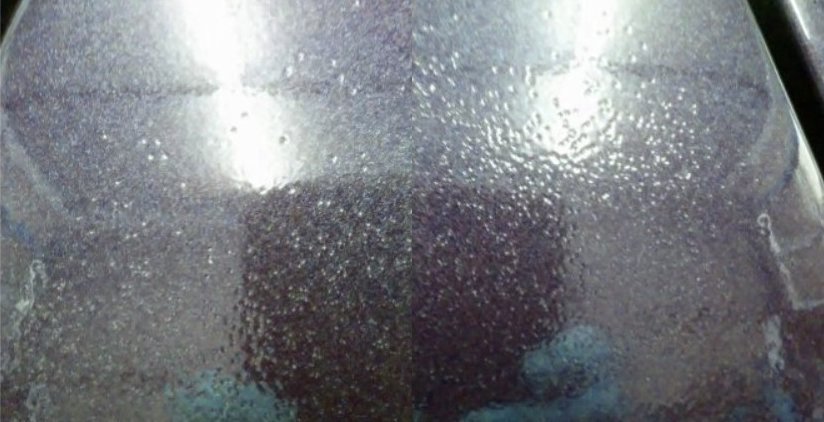
6. Orange peel
Causes :
- Incorrect pressure, viscosity, technique or application temperature
- Inappropriate thinners
- Poorly sanded surface preparation
- Incorrect spray gun settings and position
- Excessively high temperatures
Prevention :
- Follow the technical recommendations.
- Check the ambient temperature or choose a cooler time of day (morning).
- Check the position and distance of the spray gun from the surface (10-15 cm and 90° angle).
- Prepare and sand properly.
- Use the recommended thinners, especially slow thinners in summer.
- Avoid painting in extreme conditions (+25°C).
Correction :
- Sand and revarnish
- Or sand and then polish
7. Contours related to solvent penetration

Causes :
- Area sanded down to the substrate, not insulated
- Area sanded down through several layers
- Inappropriate insulation/primer
- Insufficient drying of the substrate
Prevention :
- Test the substrate with a solvent test.
- Insulate properly with 2K primer in several thin layers.
- Do not sand through the insulating layer.
Correction :
- Dry the varnish completely
- Sand the area, seal it, then repaint
8. Migration (bleeding) of the hardener into the polyester filler
Causes :
- Excess hardener
- Insufficient mixing
- Non-insulated filler
Prevention :
- Use precise measurements
- Weigh the hardener
- Mix thoroughly
- Use suitable insulation
Correction :
- Sand, insulate with sprayable polyester filler, prime and then repaint.
9. Scratches caused by sanding

Causes :
- Paper grain too abrasive
- Sanding of still-soft filler
- Insufficient insulation before applying the top coat
Prevention :
- Use the appropriate grit (P500 for primers and varnishes)
- Isolate the repaired area with 2K primer
- Ensure that the materials are completely dry
Correction :
- Sand correctly
- If necessary, insulate or remove the substrate and repaint
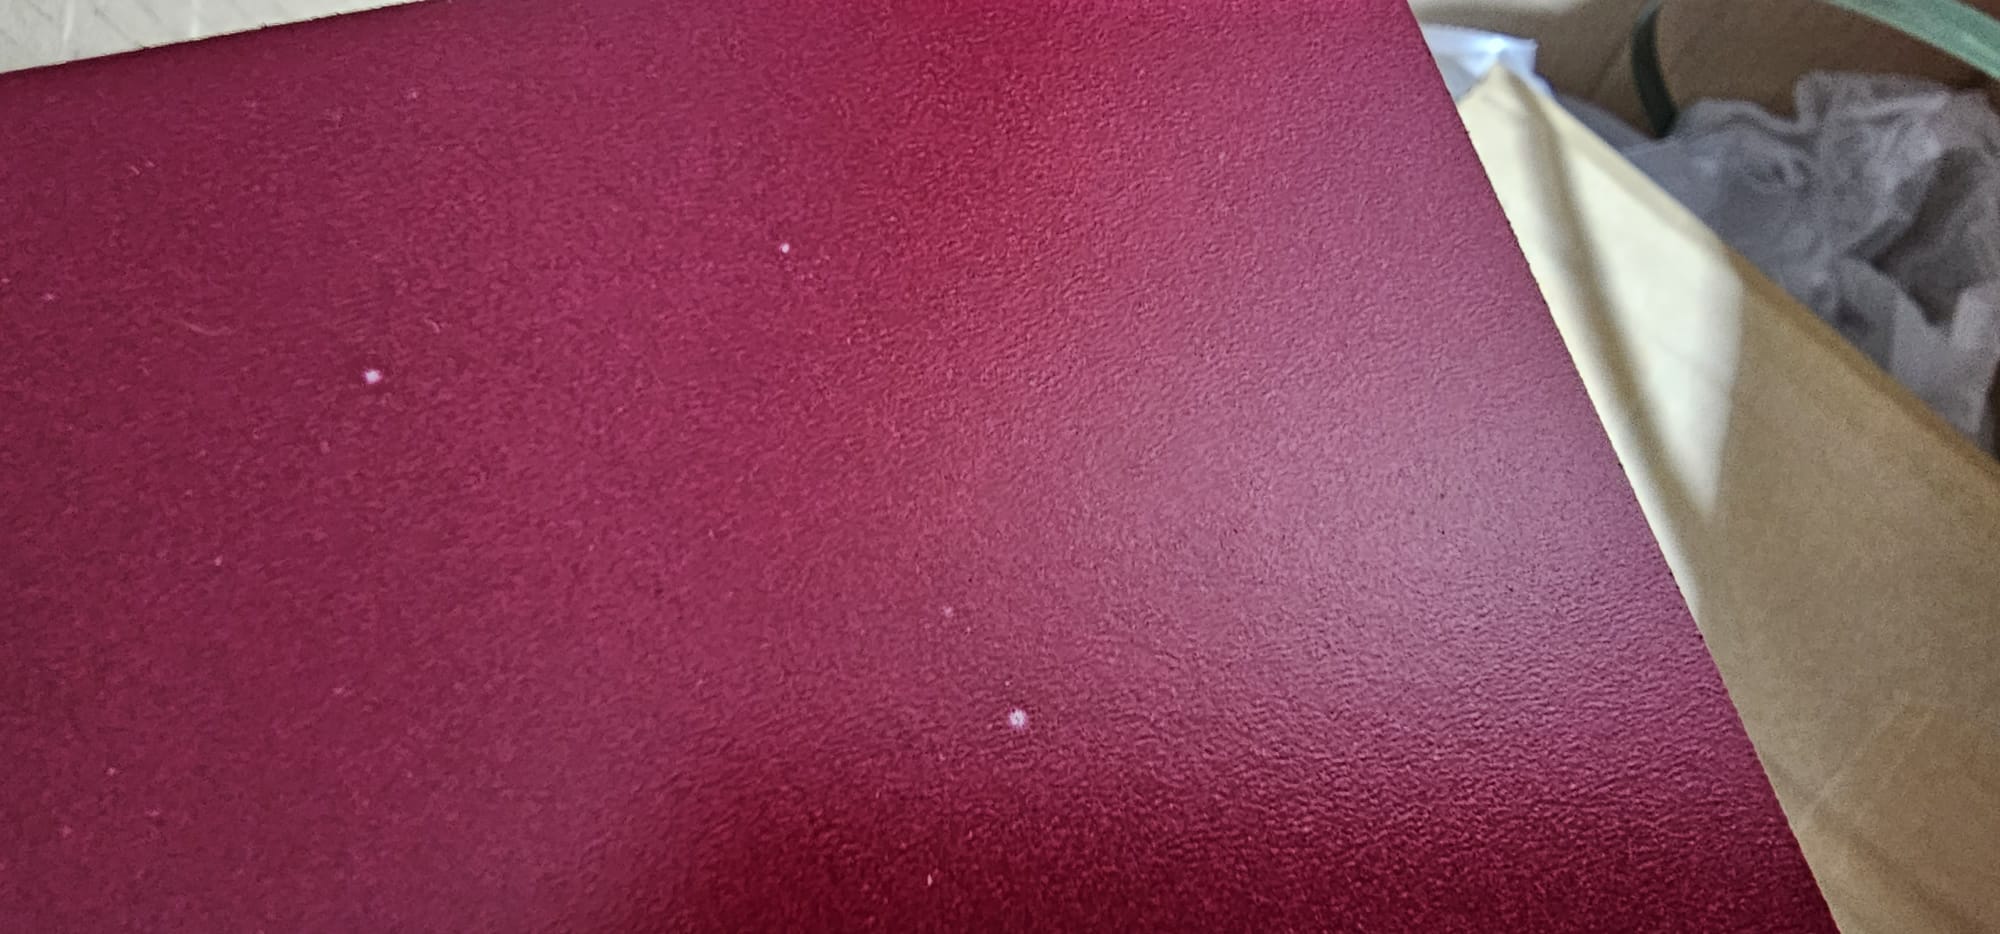
10. Dust/impurities in the base (two-coat paint to be varnished)
Causes :
- Dust ingress into soft film (ambient air or unfiltered base)
Prevention :
- Keep the cabin clean.
- Blow dust off floors/walls/corners at each stage of preparation.
- Wear lint-free overalls.
- Filter/tin the paint.
Correction :
- Sand with P500 dry or wet sandpaper, then touch up the base on the affected areas.
11. Dust/impurities in the varnish.
Causes :
- After application, the dust adheres to the film while it is still liquid.
Prevention :
- Maintain strict cleanliness in the cabin.
- Blow dust off the floors and corners of the cabin before varnishing.
- Wear lint-free overalls.
Correction :
- Sand/polish if the imperfection is superficial.
- Otherwise, reapply the varnish after sanding (P500 / P800).
12. Poor adhesion between base coat and varnish
Causes :
- Base coat or varnish too thick.
- Recoating beyond the wet-on-wet application time.
- Recoating after drying and sanding too finely.
- Intermediate/final flash-off times too long.
- Incorrect varnish/hardener ratio.
- Inappropriate varnish/thinner combination, system too fast.
Prevention :
- Follow the instructions in the technical data sheet regarding sanding grit (P500) and recoating time (generally 30 minutes for a solvent-based product and 24 hours for a water-based product)
- Observe the thickness of the base coat and varnish
- Observe the flash-off times
- Select and measure out the varnish, hardener and thinner correctly according to the technical data sheet
Correction :
- Sanding and repainting
13. Insufficient opacity

Causes :
- Non-uniform substrate (different background colours)
- Semi-opaque or semi-transparent paint
- Coat thickness too thin
- Excessive thinner
Prevention :
- Ensure a smooth, even surface (primer recommended for colour)
- Apply a sufficient thickness
- Avoid using too much thinner
Correction :
- Sand with P500, then apply the required number of coats of paint.
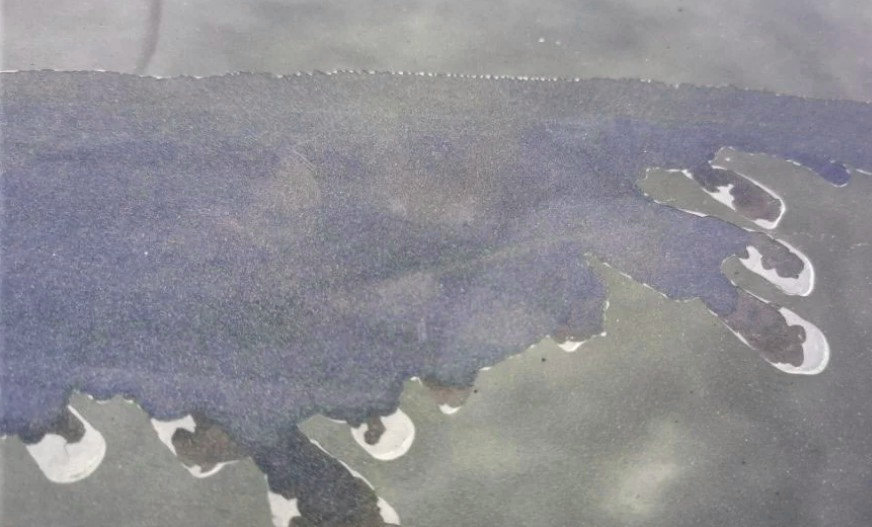
14. Moisture blisters or water bubbles
Causes :
- Sanding water residue in corners
- Contaminated compressed air
- Insufficient insulation of polyesters
- High humidity
- Poorly flash-offed or poorly polymerised water-soluble products
- Salt residue
Prevention :
- Remove external fittings.
- Blow and dry thoroughly.
- Check compressed air (maintain pipes and air compressor).
- Use or double air filters.
- Observe flash-off/cooking times for water-soluble products.
- Clean according to instructions.
Correction :
- Remove any contaminated finish by sanding with P500 sandpaper and repaint.
15. Frieze, paint wrinkling
Possible causes
- Chemical reaction between two incompatible layers.
- Presence of undissolved degreaser in the substrate.
- Application of a layer that is too thick.
- Coating of a substrate that is not yet completely dry.
- Use of a wet-on-wet system with an unsuitable hardener/thinner combination.
Prevention
- Avoid applying thick layers.
- Ensure that all products used are compatible and belong to the same system, and only use professional products.
- After applying a degreaser, remove it immediately with a clean cloth.
- Observe the recommended flash-off and drying times.
- Use the thinners and hardeners specified by the manufacturer.
Correction
- Remove the coating completely down to the bare metal.
- Any other partial solution is unstable and not guaranteed.
16. Candy Migration
Possible causes
- Mixing Candy into a single-component base
- Excessive dosage of Candy
- Using light colours on Candy
- Recoating after insufficient drying time
Prevention
- Mix Candy in two-component bases.
- Cover a single-component Candy base with a two-component varnish.
- Observe the maximum Candy dosage of 6% in bases and varnishes.
- Allow the paint to dry completely before recoating.
- Avoid applying light colours (e.g. white) over a Candy base.
Correction
- Apply a two-component varnish.
- Then repaint with the colour to cover the colour migration, then varnish.
17. Silicone crater, varnish opening
Possible causes
- Presence of contaminants in the substrate
- Poor substrate preparation
- Presence of surface tension
- Product contamination
- Use of incompatible or excessive additives in the paint or varnish
Prevention
- Eliminate the presence of contaminants in the workshop (silicone, waxes, etc.)
- Use a professional silicone degreaser before painting and varnishing
- Clean and rinse with water and a surfactant
- Apply one or two very thin ‘flash coats’ (bonding coats)
- Use an anti-silicone additive
Correction
- Sand the surface and reapply the paint or varnish.
18. Dull appearance or variation in shine, loss of shine

Possible causes
- Excessive film thickness or ambient humidity too high.
- Substrate sensitivity to solvents.
- Hardener incorrectly dosed or contaminated.
- Unsuitable solvents.
- Insufficient air circulation in the booth.
- Curing interrupted.
- Varnish applied too quickly.
- Polishing too early after drying.
- Poor spraying/spray gun position.
Prevention
- Follow the instructions in the technical data sheets.
- Paint at a temperature between 15 and 25°C.
- Hold the spray gun at a 90° angle to the surface and maintain a steady, regular speed and distance. Apply an even quantity/coverage.
- Seal the hardener containers tightly after use.
- Ensure good air circulation in the oven.
- Do not interrupt the baking cycle.
Correction
- If the defect is minor: sanding and polishing.
- If necessary: complete sanding and total refinishing.
19. Poor adhesion to plastic parts
Possible causes
- Insufficient preparation of the substrate
- Insufficient cleaning or drying (tempering)
- Absence of adhesion promoter or primer unsuitable for plastic
- Type of plastic
- Paint system unsuitable for plastic substrates
- Paint too thick and/or not flexible
Prevention
- Temper or heat plastic parts before cleaning and applying primer.
- Clean and degrease thoroughly.
- Wait for solvents to evaporate completely.
- Use an adhesion promoter suitable for the type of plastic.
- Apply the techniques and instructions for preparing plastics (flaming, sanding with abrasive sponges and thinners, anti-static application).
- Limit the thickness of paint and varnish layers.
- Add a flexibilising additive.
Correction
- Sand with an abrasive sponge, degrease and repaint.
- If adhesion is severely compromised: remove the coating and refinish.
20. Micro-holes in polyester filler
Possible causes
- Incomplete drying of the substrate.
- Lack of insulation with a 2K primer.
- Superficial sanding that does not remove pores.
Prevention
- Ensure that all preparation materials are completely dry.
- Sand the pores thoroughly or reapply a coat of filler.
- Finish with a fine finishing filler.
- Mix the filler thoroughly with the hardener to prevent air bubbles from forming.
- Apply the filler with a spatula perpendicular to the surface to limit the appearance of pores.
Correction
- Combler les micro-trous à l’aide d’un mastic pulvérisable.
- Poncer la zone puis procéder à une nouvelle finition
21. Cracks, shrinkage
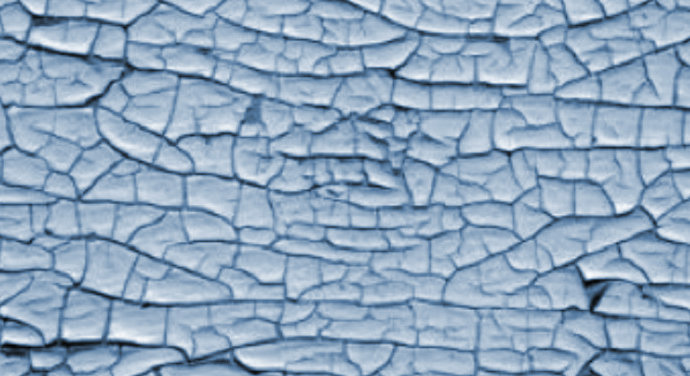
Possible causes
- Use of incompatible paints in the same system.
- Recoating without sanding on a dry surface.
- Application of too many coats/too thick a layer.
- Failure to observe the flash-off interval between coats.
- Product with high solids content, poorly homogenised.
- Excessive heat.
Prevention
- Apply to a sanded surface with sufficient abrasive grain.
- Apply the thickness recommended in the technical data sheet, without excess.
- Allow sufficient flash-off time between coats.
- Check that the product has been properly stirred/homogenised (avoid excess matting or fluorescent load).
- Check the ambient application temperature (15-25°C).
Correction
- Sufficient sanding and/or priming, sanding with P500 grit sandpaper, then repainting.
22. Loss of gloss in the varnish during drying
Possible causes
- Temperature too high
- Oven drying or IR baking too fast (without flash-off)
- Drying in a humid environment
- Use of an incompatible thinner
Prevention
- Allow evaporation time (flash off) as specified in the technical data sheet before oven drying/baking or IR lamp treatment.
- During drying, monitor the temperature and humidity – ensure a dry environment.
Correction
- Polishing
- Sanding and refinishing
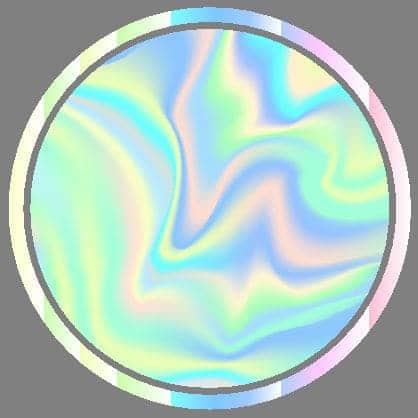
23. Black or white marks on chameleon and pearlescent paints, fish-eye effect
Possible causes
- Incorrect application, uneven and/or insufficient application (dark marks)
- Application of thick layers (white marks)
- Insufficient interval between layers (white marks)
- Excessive temperature
- Incorrect spray gun position (chalking)
Prevention
- Apply thin coats, avoid thick coats.
- Apply coats until the base is covered.
- During drying, monitor the temperature and humidity – ensure a dry environment.
- Check that the product has been properly stirred/homogenised. (pigment may have settled in the pot).
- Apply at moderate temperatures (15-25°C) and use a suitable thinner.
Correction of imperfections (black marks)
- Dry sanding with a fine abrasive sponge, then apply a few coats of paint
- On varnish: wet sanding with P500 abrasive, then apply a few coats of paint
Correction of imperfections (white marks)
- wet sanding with P500 abrasive, then apply a few coats of paint
How to paint a car
How to paint a motorbike
How to paint a bicycle
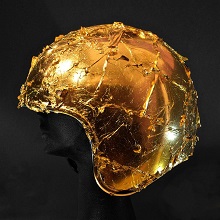
How to paint a helmet
How to paint a quad
How to paint a boat
How to paint a portal
How to paint a chassis?