


 How to hide and create graphics?
Masking techniques with adhesives represent one of the basic techniques of Custom personalization on automobile bodies, motorcycles, helmets and other vehicles or supports of all kinds.
Here is an article intended to present to you the basic rules and tips for adhesive masking techniques, but also a tutorial for creating complex graphics, always using masking with adhesive strips and lines.
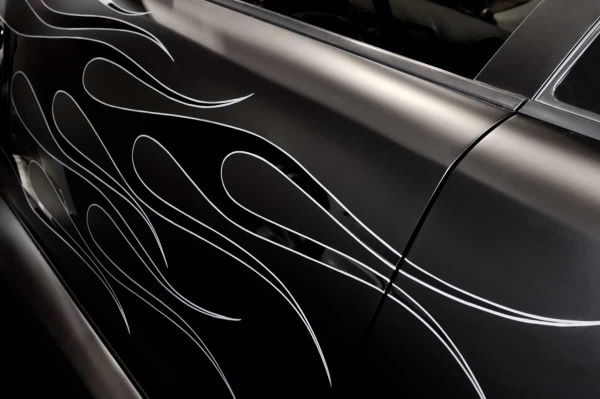
► Find the tutorial for creating this graphic with adhesive masks further down in the article.
Below are the tips (♣) and warnings (⚠):
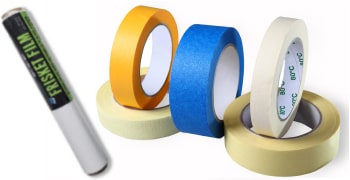
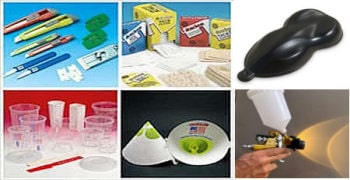
The different materials
♦ The classic 24mm / 48mm paper masking tape
♦ Thin and flexible PVC adhesive lines 1.5mm / 3mm / 6mm
♦ The transparent and repositionable adhesive film (30cm / 60cm)
♦ The liquid mask
♦ The scalpel
♦ Plastic tarpaulin
Masking on a fairing or bodywork allows you to:
1 ► Protect (hide) the areas that you do not want to paint.
2 ► Create decorations with areas of different colors.
3 ► Create more or less complex graphic decorations.
 The basic rules of adhesive masking on bodywork
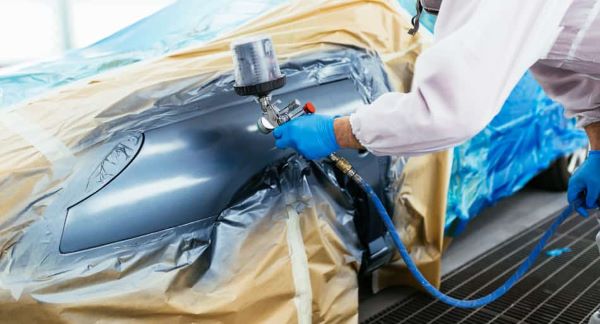
1 ► Protection of bodywork areas before painting
When painting a touch-up or a complete part, certain parts must be protected from spray paint.
Masking is carried out with paper adhesive tape, with careful application on all parts such as plastics, joints, handles, logos, caps, etc.
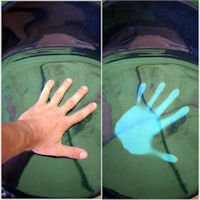
⚠ It's important to remove adhesives before the topcoat dries, i.e. no more than 30 minutes after topcoat application, otherwise the adhesive may stick to the topcoat and the varnish may peel off when the adhesive is removed. It is also advisable to wait about ten minutes before removing adhesives.
⚠ It is not recommended to leave adhesives placed on a bodywork for more than 24 hours. Likewise, heat sources or exposure to the sun of adhesives should be avoided.
♣ When glue residue is left on the bodywork, use degreaser to remove it. Do not use alcohol or thinner.
2 ► Create a decor with zones of different colors
To create a two-tone (or three-color, or more...) paint, it is necessary to follow certain important steps:
Step 1 ► Apply paint (first color, usually the lightest).
Step 2 ► Let the first layer of color dry completely.
Step 3 ► Sand with P500 paper.
Step 4 ► Apply the masking tape or adhesive line and apply light pressure with the palm of your hand.
⚠ Do not exert strong pressure on the adhesives.
⚠ Do not pull on the adhesives during installation, as this may cause shrinkage.
It is possible to use either economical paper adhesive tapes or flexible PVC lines: the precision of the delimitation after removal of the adhesive is satisfactory in both cases.
We prefer adhesive lines on curved parts and also to create curved lines. It is also possible to cut with a scalpel into the adhesive paper tape, on which a pattern has previously been drawn.
♣ Trick: when applying a very tight curve with an adhesive line, it is possible to apply a flame or a heat source for a short time to the surface of the adhesive line so that it retains its shape, without become detached or deformed.
♣ Tip: When spraying the second color, it is advisable to paint and direct the spray jet on the exposed area and avoid spraying directly on the edge of the adhesive. This is an effective technique for reducing the “staircase” phenomenon between the two paint areas.
How to make logos with adhesive masking
1 – It is possible to use paper adhesive tape, on which you can draw, then cut with a scalpel and delicately remove the logos or lettering;
2 – It's also possible to use transparent, repositionable adhesive film: for this, you can use a plotter printer to transfer the logo onto a computer screen. The advantage of this technique is that it can be scaled to any desired size. Place the film on the surface, then cut with a scalpel:
♣ Tip: remember to always spray the minimum amount of paint and aim at the center of the masking, avoiding the edges to reduce the phenomenon of unevenness.
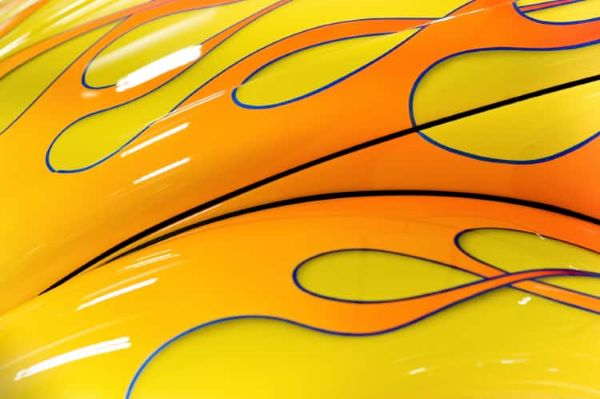
 3 ► Create more or less complex graphic decorations
It is possible to multiply the masking layers to create complicated graphic decorations. Below we present a technique for creating a Custom painting.
The line technique
To achieve a perfect color line, there are 2 possibilities:
1 – the first technique uses an application with a pinstriping brush. This is a manual application that requires some experience, with drawing a regular line. The perfect freehand gesture requires leaning on the surface of the bodywork with one finger. On large surfaces, it is essential to have previously applied a guide line which can be removed afterwards.
2 – the second technique is the easiest and gives the best results:
How to create a black body with a red line?
Apply a black background first? Then, lay 2 parallel lines and spray the color red? No ! this is not an optimal technique, first of all because it will be very difficult to lay perfectly parallel lines and secondly, because we should not apply a light color on a dark color (in this case, red is often a fairly transparent color with little coverage).
Here is the best technique:
Step 1 ► Apply a red color to the entire room or just to a strip or area of the room.
Step 2 ► Allow complete drying
Step 3 ► Proceed with sanding with P500 paper
Step 4 ► Lay an adhesive line whose width will be that planned for the red line
Step 5 ► Apply black color to the entire bodywork
Step 6 ► Remove the adhesive line
Step 7 ► Varnish
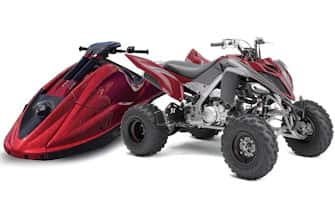
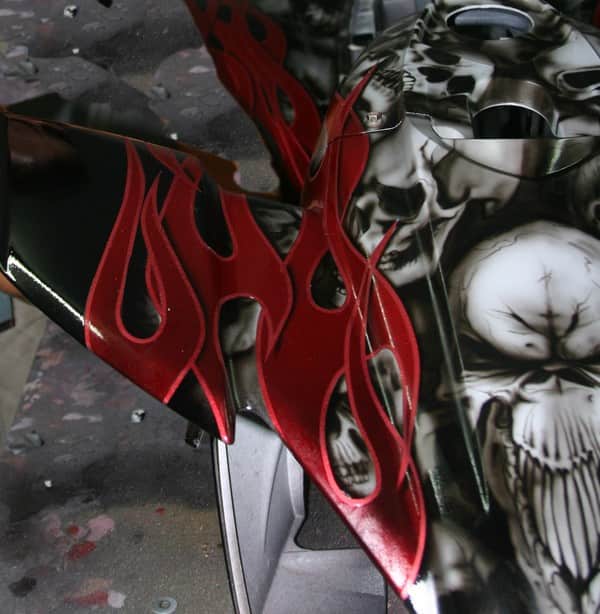
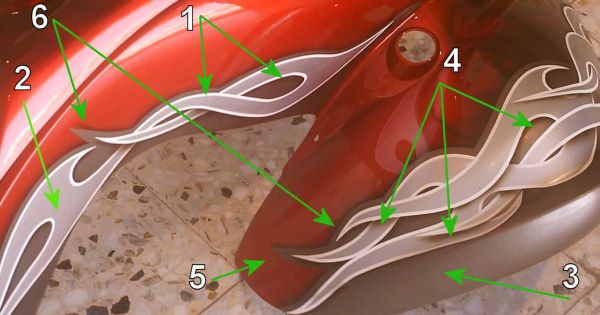
 Create a Custom painting with a complex Flaming type decor
Here is a custom painting done on a Quad, with Candy Red and stylized tri-color gray flames, with airbrush shading effect.
Step A ► Apply pure white primer or paint (1). Dry and sand with P500.
Step B ► Apply the thin adhesive lines to create the flaming.
Step C ► Apply light gray paint (2). Dry and sand with a gray abrasive sponge.
Step D ► Apply wide paper adhesive tapes to the PVC lines, cut with a scalpel, then remove the exterior and hide the light gray flames.
Step E ► Paint the dark gray color (3) to a width of 15 cm.
Step F ► Remove some adhesive from the light gray flames and paint the very light shading (4) with an airbrush and pure black paint.
Step G ► Tear off, remove all adhesives. Sand with a gray abrasive sponge.
Step H ► Apply adhesive lines and hide all dark gray, white and light gray flaming.
Step I ► Apply the color “Candy red” (5) with a layer of aluminum and layers of transparent red *
Step J ► Create light shading with pure black and an airbrush
Step K ► Remove all masking, then varnish.
*The application of several layers of aluminum and Candy red inevitably creates too significant a difference in height, with even visibility of the different layers on the edge. It will therefore be advisable to remove the masking, to sand off the excess thickness, before putting the masking back on the edge to create the black shadow which will erase all the defects visible after sanding.
Anti-leak technique
When PVC adhesive lines are laid and they intersect, a gap is created naturally caused by the thickness of the first line.
While spraying the paint, it seeps into this gap and a defect is visible after removing the adhesives.
The easiest way is to press with the tip of the nail to reduce this opening where the paint can seep through. When you have complex decorations, it can be difficult to ensure correction of all these overlapping areas.
♣ A very effective tip is to spray a small amount of transparent binder on the overlapping areas to ensure 0 risk of paint leaking.
How to do pinstriping?
How to make artistic airbrush drawings?
Special paints