


 How to apply putty to a painting?
Here is a family of products which is the first step among all support preparation techniques in the bodywork field, but not only.
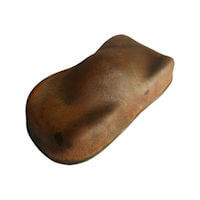
Putty is a thick paste whose use allows the filling and correction of significant surface defects. The putty is a charged resin which hardens during drying, without shrinking, thus allowing all imperfections to be filled and filled. It must then be sanded and primed.
Here is a complete 4-step tutorial for applying putty
Step 1 ► Prepare the surface: sand and degrease
Step 2 ► Mix the putty
Step 3 ► apply putty
Step 4 ► Sand the putty
The products and tools needed to use body filler
♦ Degreaser
♦ Metal or plastic spatula
♦ Sandpaper P180-P220-P320
♦ Sanding block
Application supports
Polyester or epoxy putties are products that can be applied to many types of supports and they are naturally designed to adhere directly to all metals.
It is therefore not necessary to apply an adhesion primer before applying the putty: the putty can be used directly on the bare sheet metal.
When should a putty be applied?
From a depth of 0.5 mm it is possible to use a putty. There is no limit to thickness. Below 0.5 mm, however, it is possible to use a primer. There is an intermediate solution between the primer and the putty: it is the sprayable liquid putty.
Choice of putty
♦ Traditional body putty: all-purpose
♦ Carbon putty: reinforced with carbon powder, it is used for bicycle frames
♦ Aluminum putty: reinforced with aluminum powder, it is used to reconstruct metal surfaces.
♦ Liquid putty: this is the only putty that can be sprayed with a paint gun. It is much more filling than a primer.
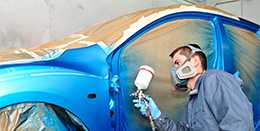
Tutorial: How can you use putty?
Step 1 ► Prepare the surface: sand and degrease
To ensure perfect adhesion of the putty to the surface, sanding is necessary. To properly adhere a heavy and thick product, you must choose the largest abrasive grain (P80-P120) in order to effectively scratch the metal surface or painted surface. Sanding should be carried out on an area extending beyond the defect.
Apply a degreaser to the surface to pick up sanding residue and to remove any traces of invisible contaminants.
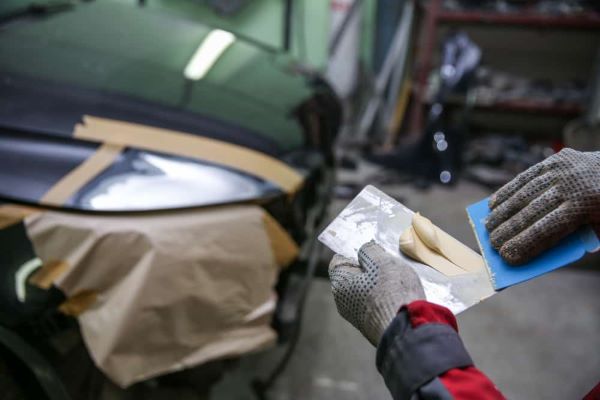
Step 2 ► Mix the putty
Take the putty using the metal or plastic spatula.
Place a drop of hardener from the plastic tube that contains the hardener.
The dose is approximate, it corresponds to approximately 2% of the putty content.
♣ Choose a reasonable quantity of putty, depending on the surface that must be treated. It is important to only mix as much putty as will be able to be applied within 1 to 2 minutes.
Using the 2 spatulas, mix the hardener with the paste. Continue mixing quickly by crossing the 2 spatulas, until the putty shows a homogeneous pink appearance.
The putty is a resin which will polymerize very quickly with its hardener (between 1 and 3 minutes maximum), so it must be applied as quickly as possible, before the mixture hardens and becomes unusable. The higher the ambient temperature, the faster the mixture will harden. It is possible to cool the putty before use to be able to apply the putty more peacefully.
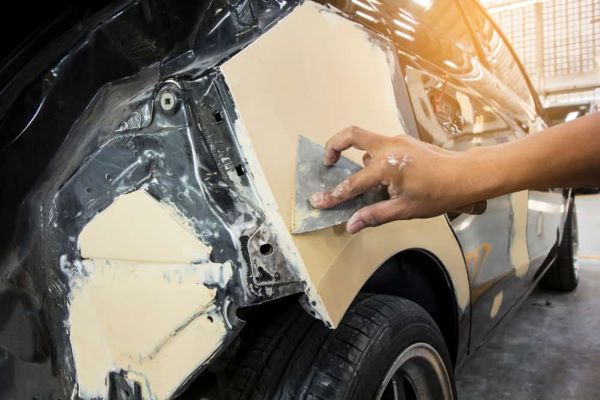
 Step 3 ► apply putty
Choose a size of metal or plastic spatula adapted to the size of the defect that must be repaired.
Apply the product to a larger area beyond the defect.
Apply the putty evenly using several juxtaposed and overlapping layers.
Favor a direct and generous application, in a single layer per area, with the same direction of application, then smooth to remove the excess. Avoid touching up the putty deposited several times.
In order not to have to restart the application due to a shortage, it is necessary to apply a sufficient thickness to allow abrasion of at least 20% of the dry thickness.
Vary the hand pressure, pressing harder on the areas around the defect and keeping the hand soft over the filling area.
During the very limited time of use of the catalyzed putty, you must try to recreate the surface as perfectly as possible (distribute, equalize, smooth), in order to limit the sanding work after hardening. The hardened putty is in fact very hard: it can be long and laborious to sand down excess material that is not level enough.
Clean the spatulas
After use, remember to scrape and clean your tools thoroughly to remove all traces of putty. Dirty spatulas won't do a good job.
Step 4 ► Sand the putty
It is not possible to paint directly onto putty, even after very fine sanding. There are always micro bubbles or imperfections on a dry putty. The stage of applying a primer is therefore important, between the putty stage and the final painting stage.
To save time, it is therefore possible to sand frankly, with a large abrasive gain, from type 180 to 320, because the primer will cover all the scratches.
We recommend using an orbital sander for mechanical sanding.
If sanding is done manually, it is important to use a sanding block to ensure flat sanding with good surface correction, both on curved and flat surfaces.
Is there a flexible putty?
No, there is no flexible putty and it is not possible to add flexibilizing additive to the putty.
When painting flexible surfaces made of sheet metal or plastic, it is possible to use a putty provided that the thickness is kept to a minimum, using sanding to reduce the thickness to the minimum necessary by abrasion.