


€5.21
(VAT incl.)
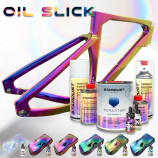
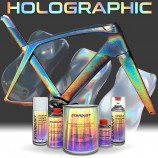
tapes for custom and nail artadhesive lines 2mmx20m7 chromes11 holographicin stock


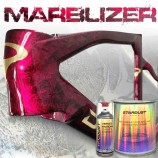
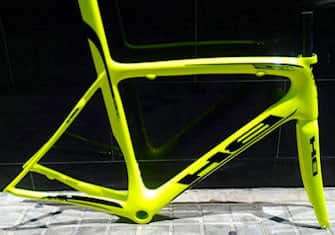
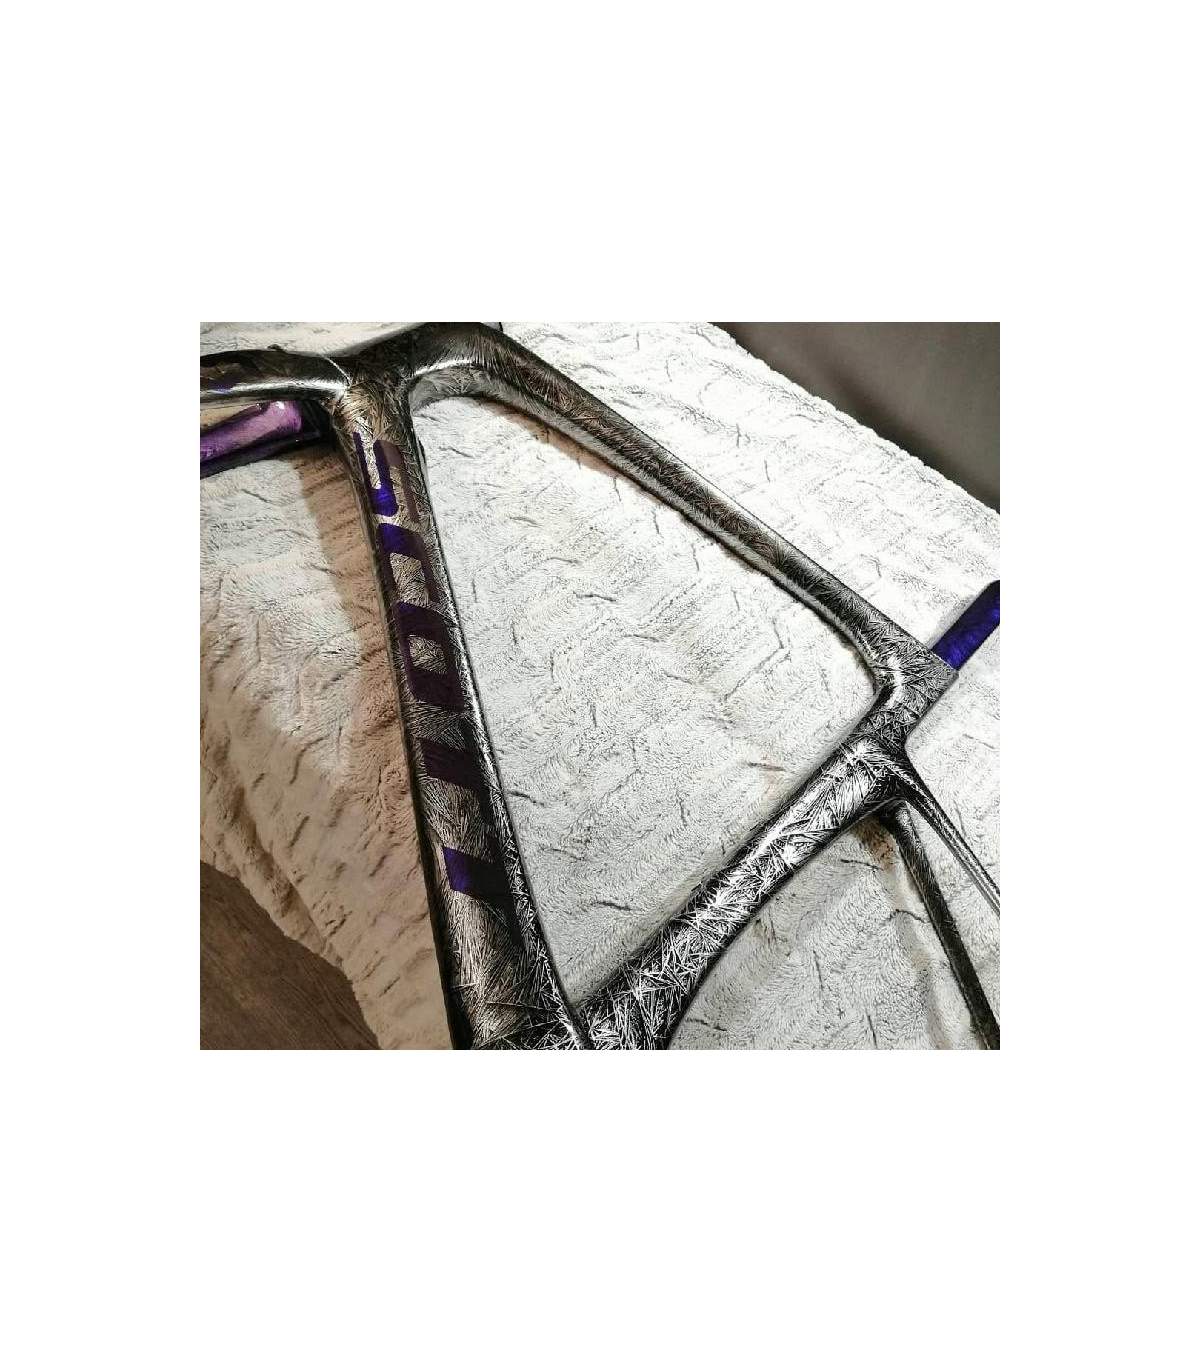
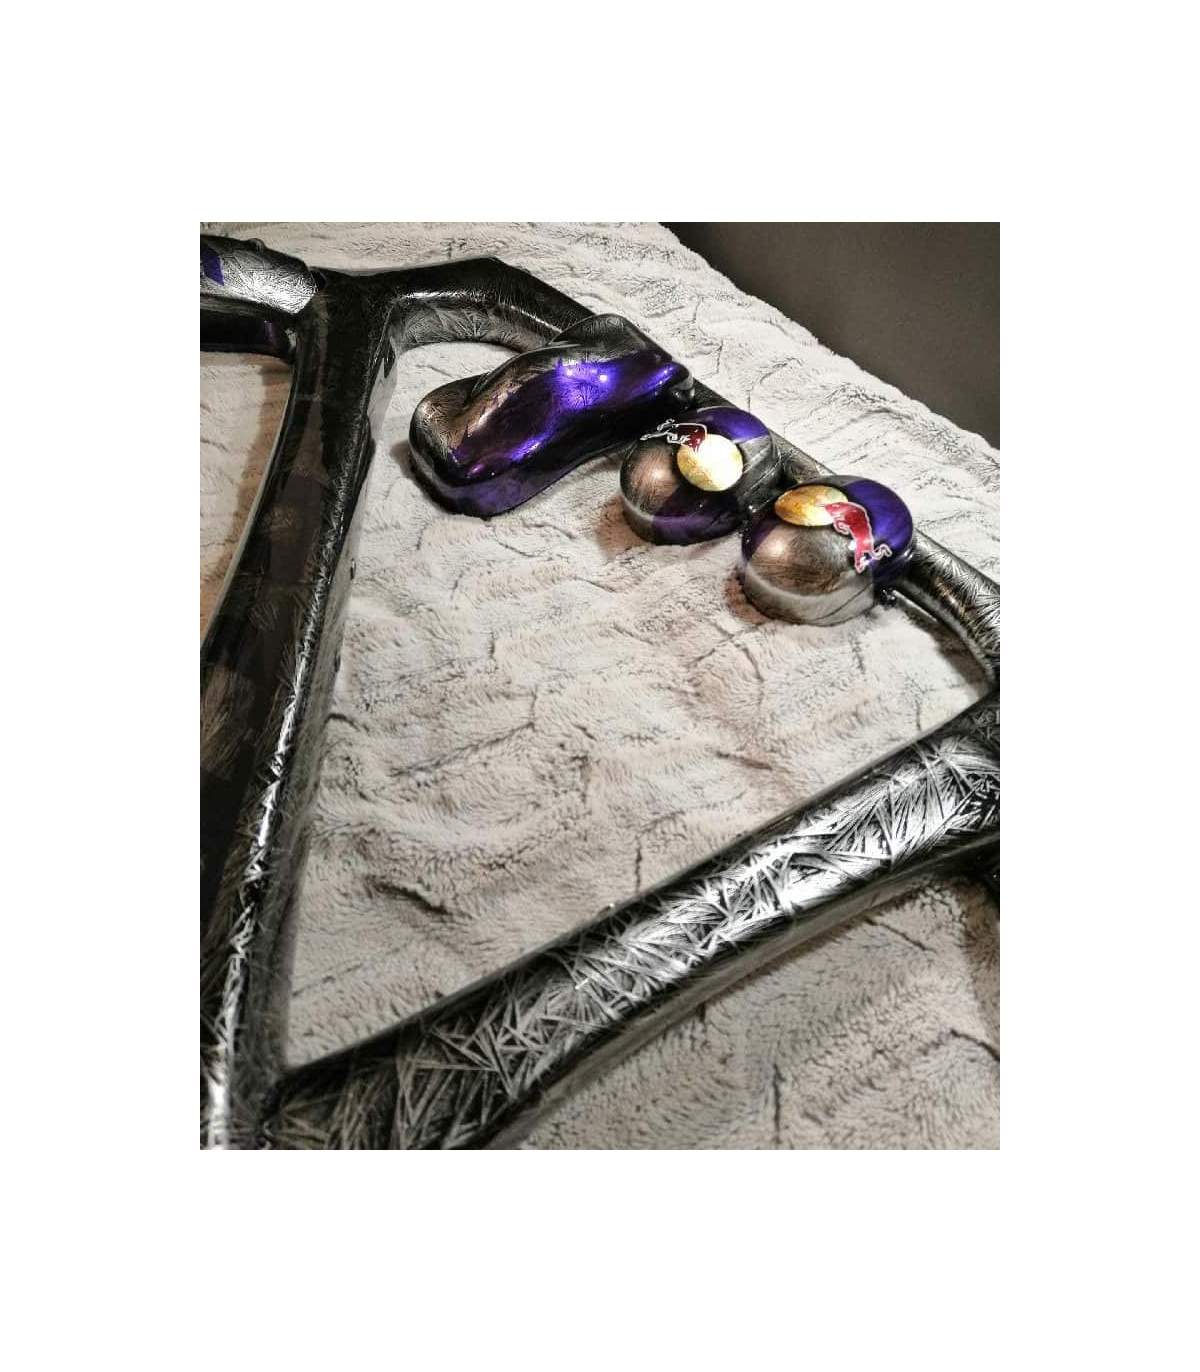
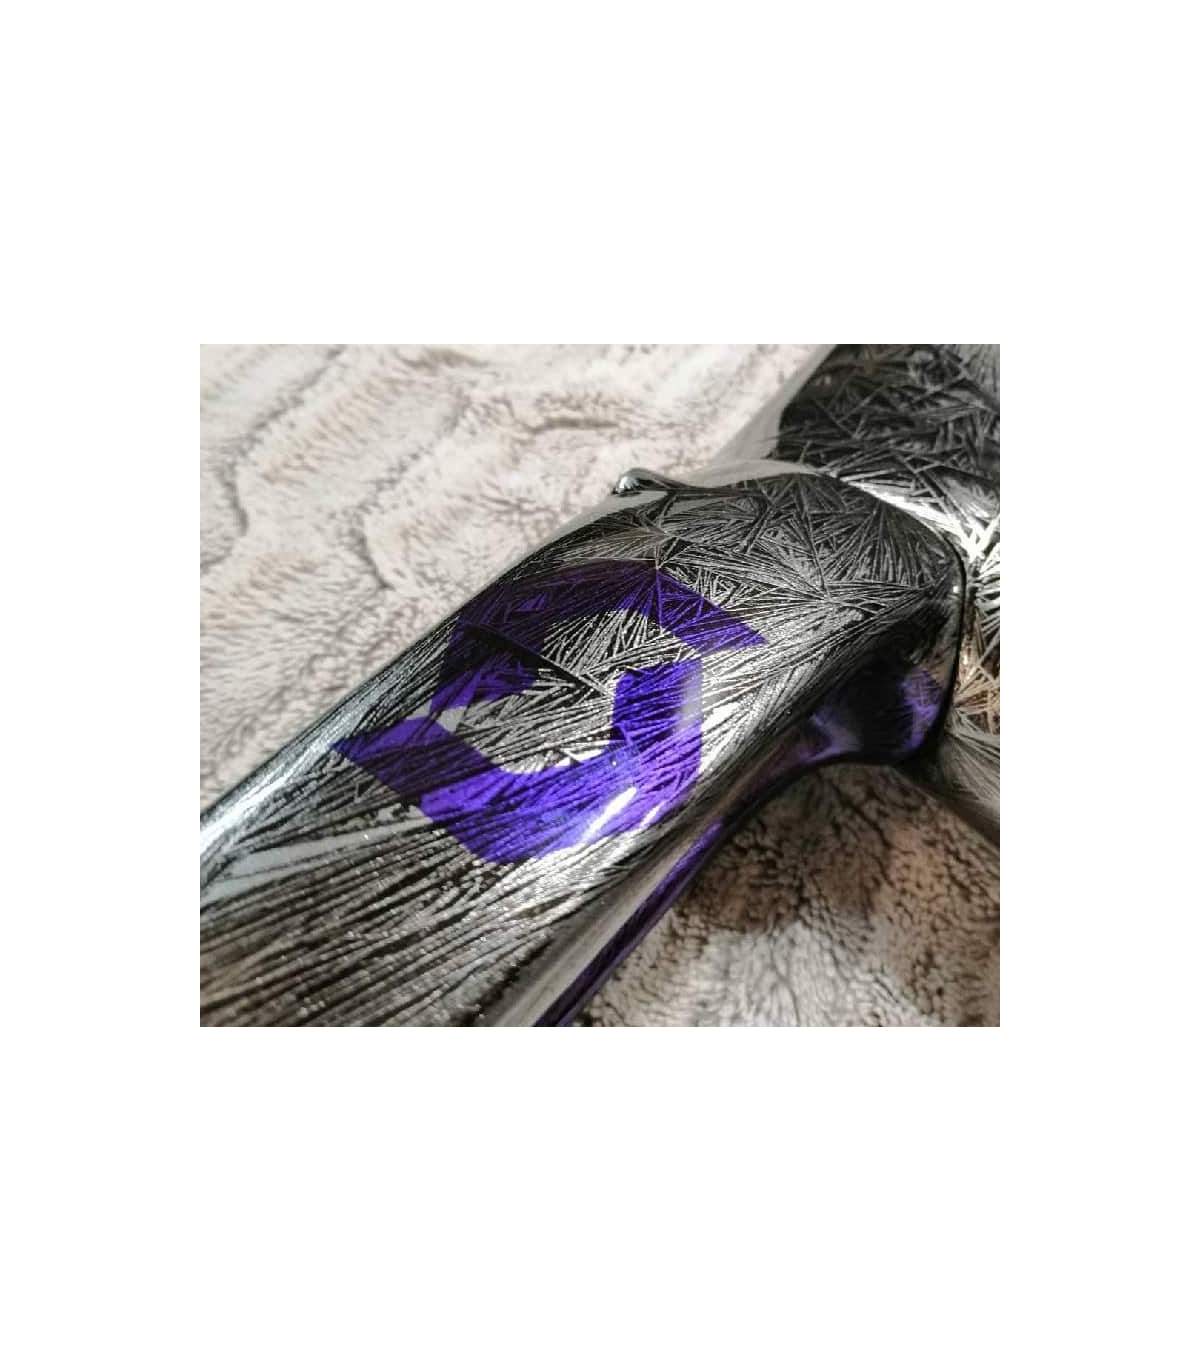
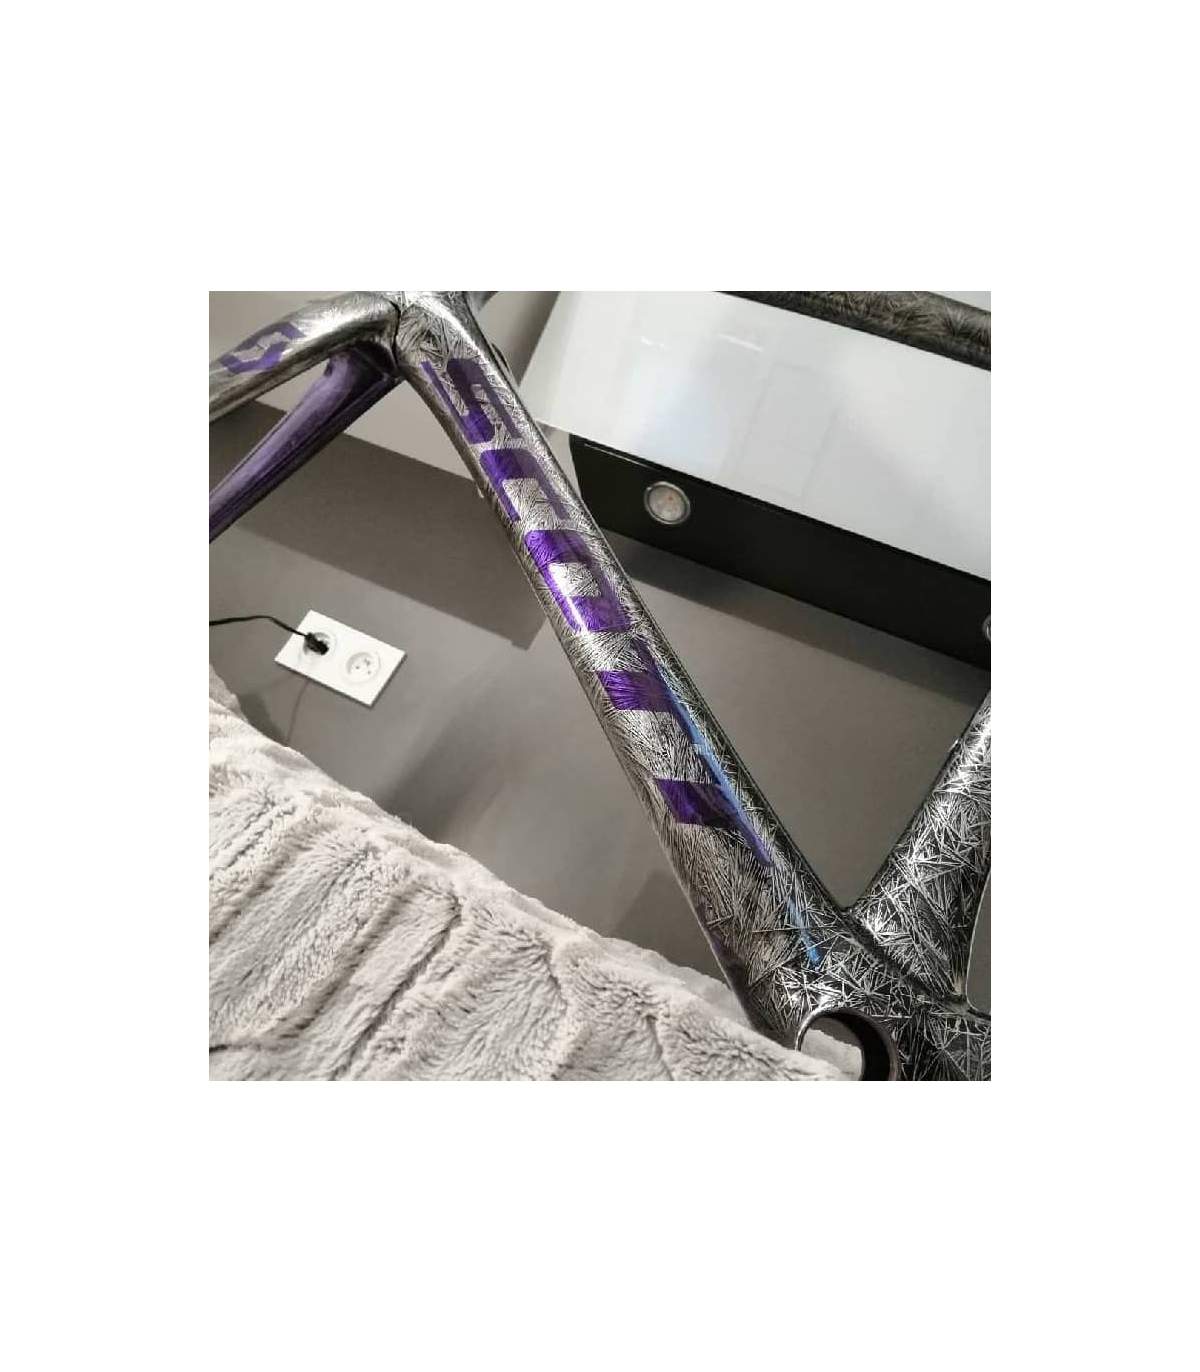
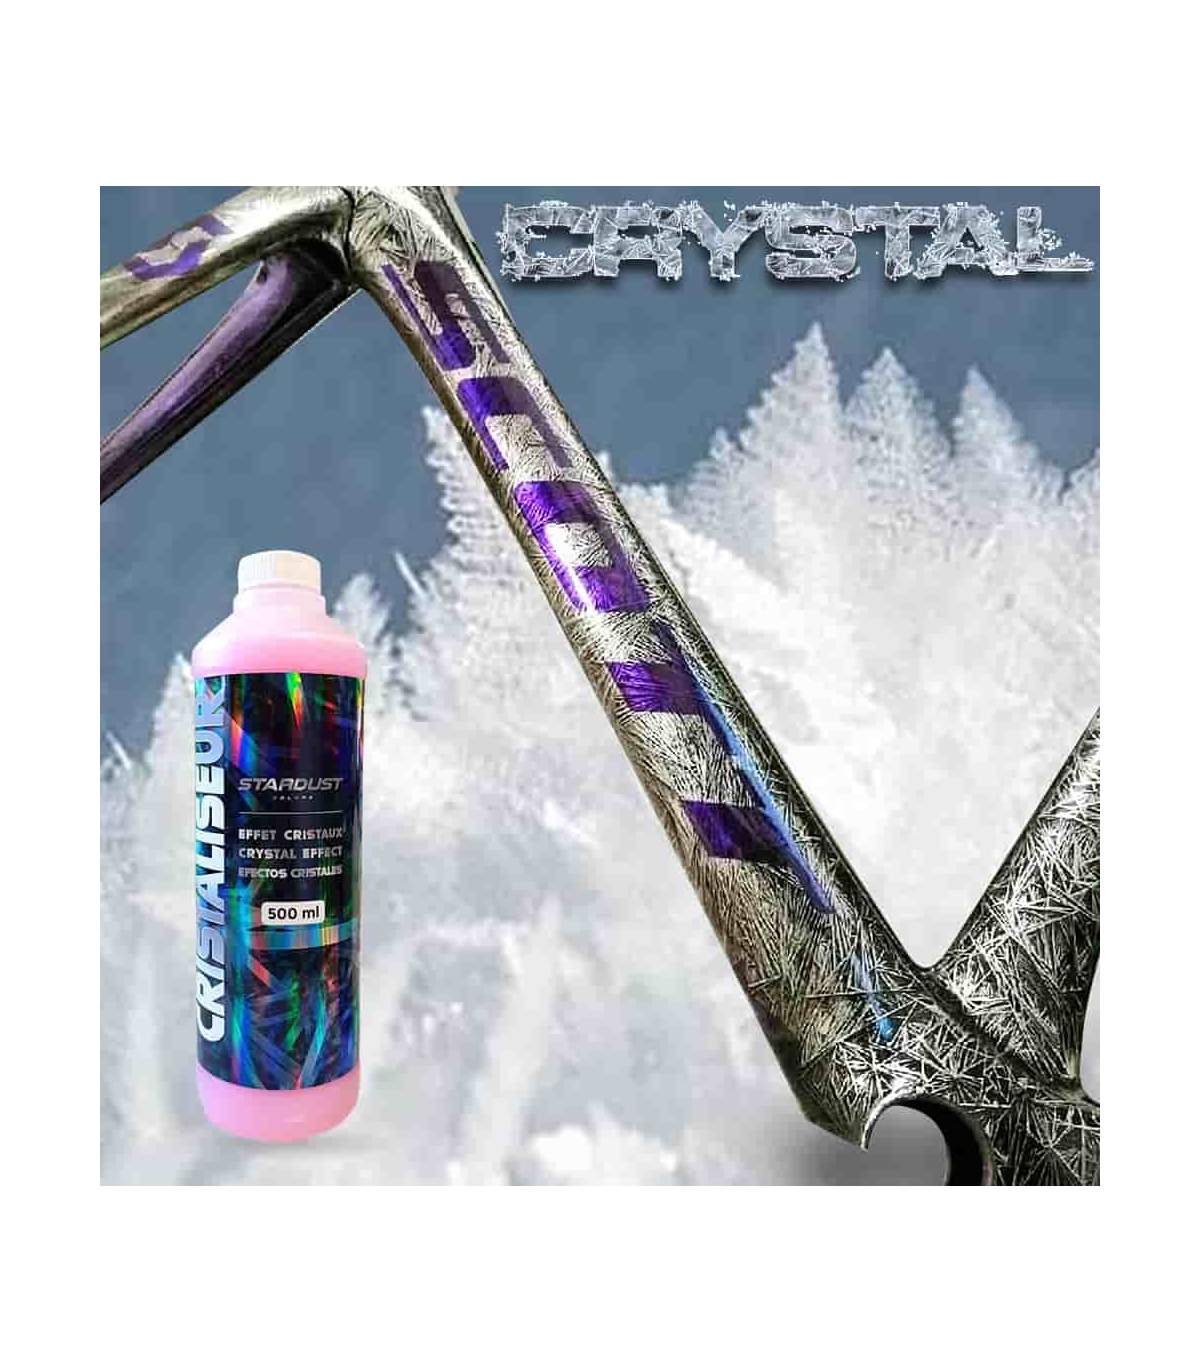
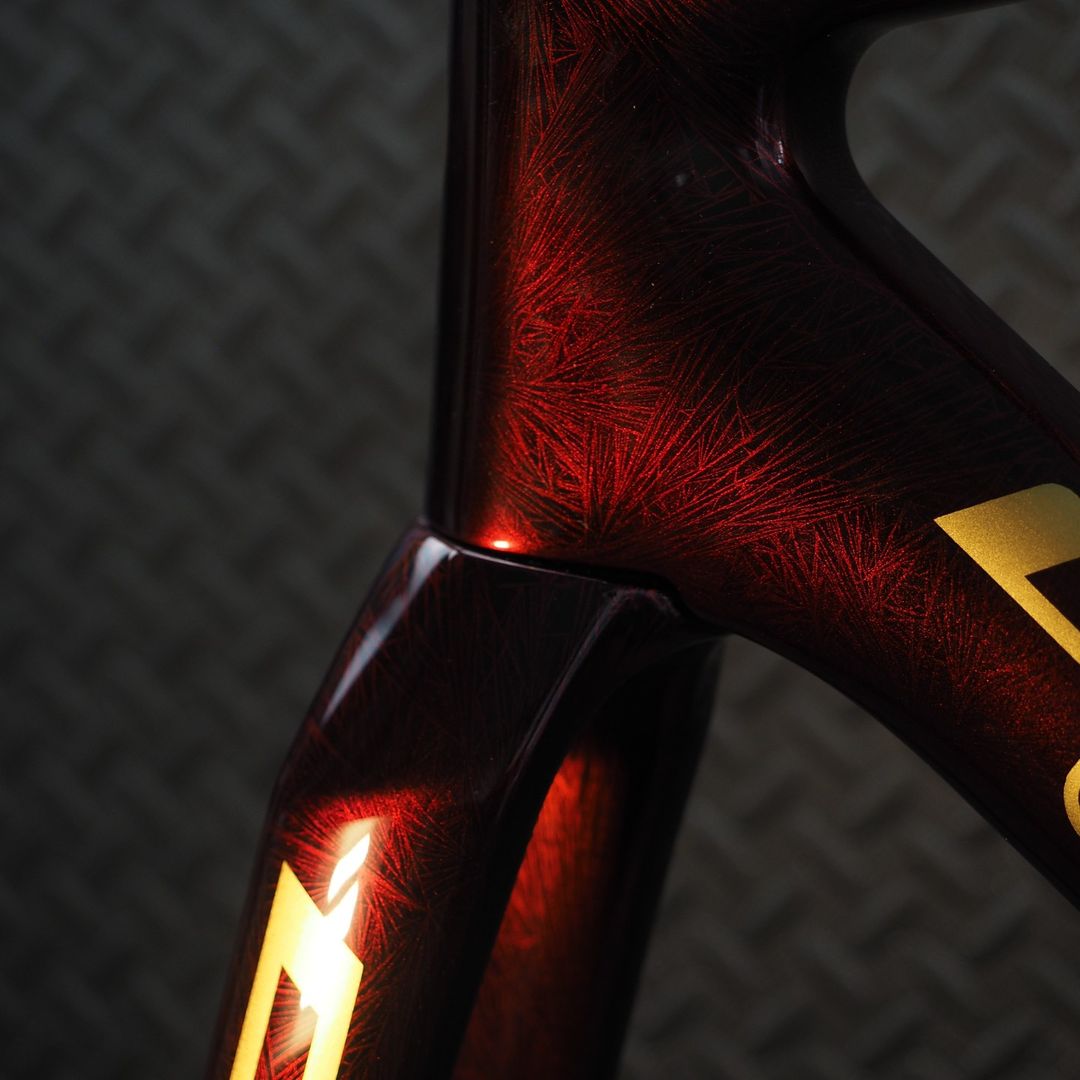
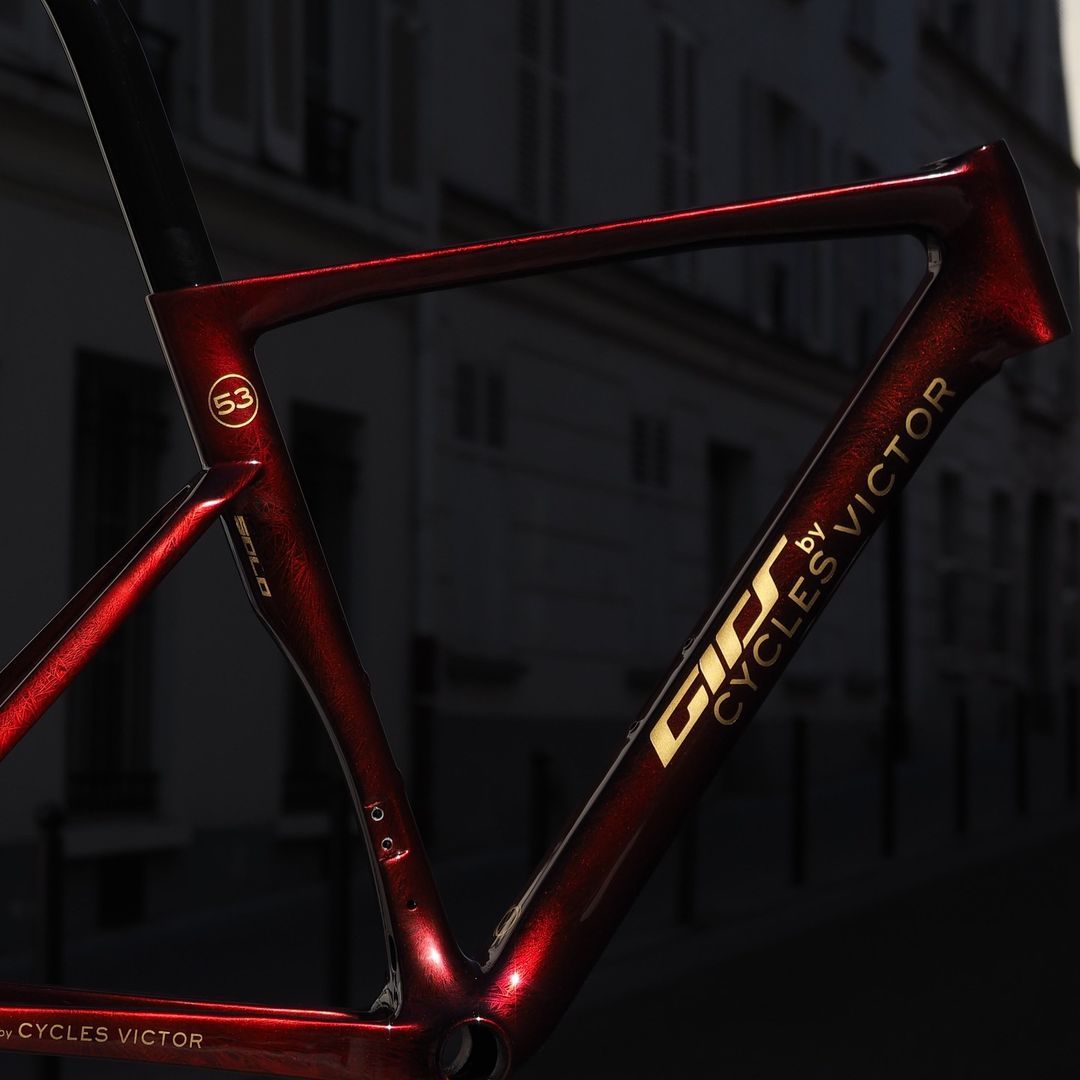
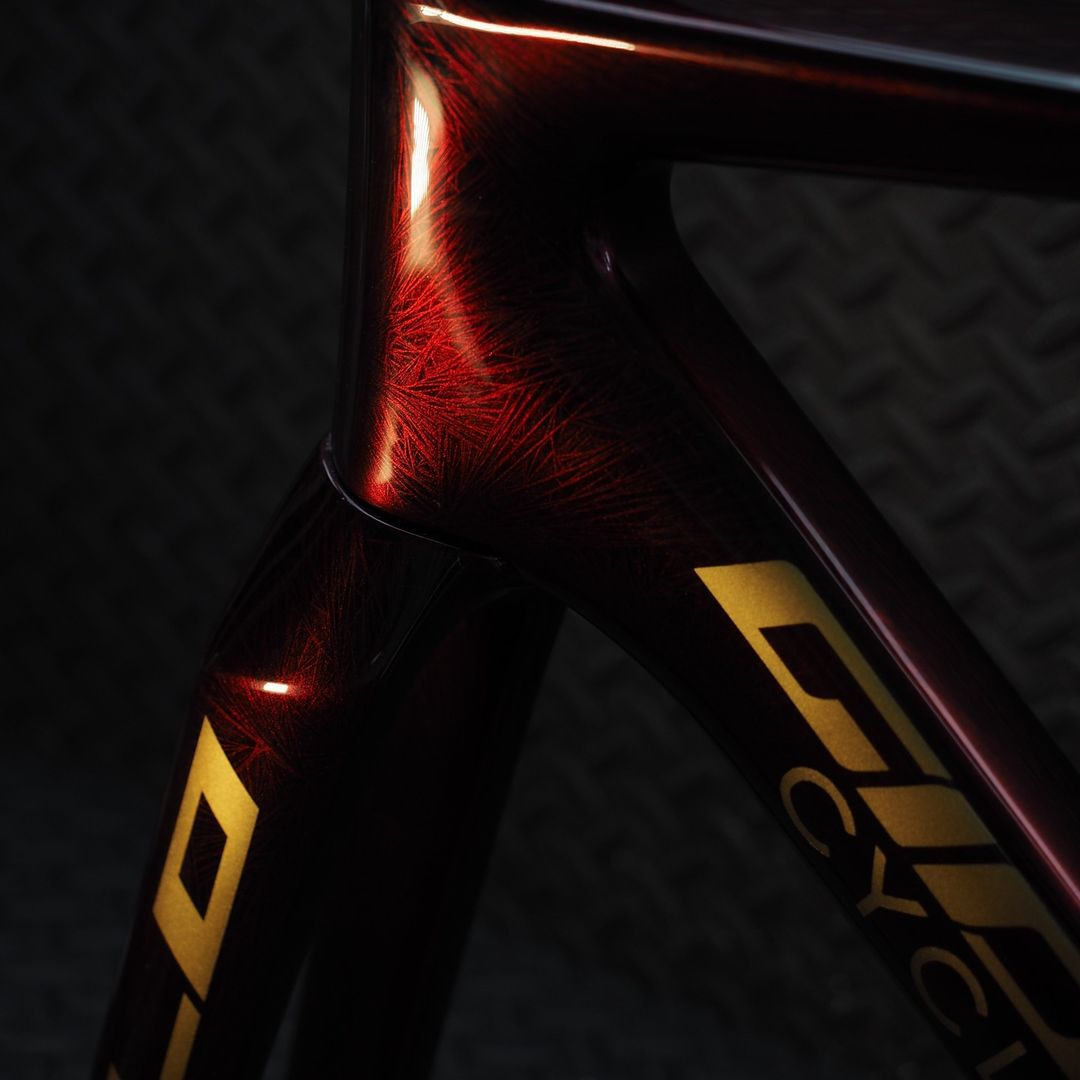
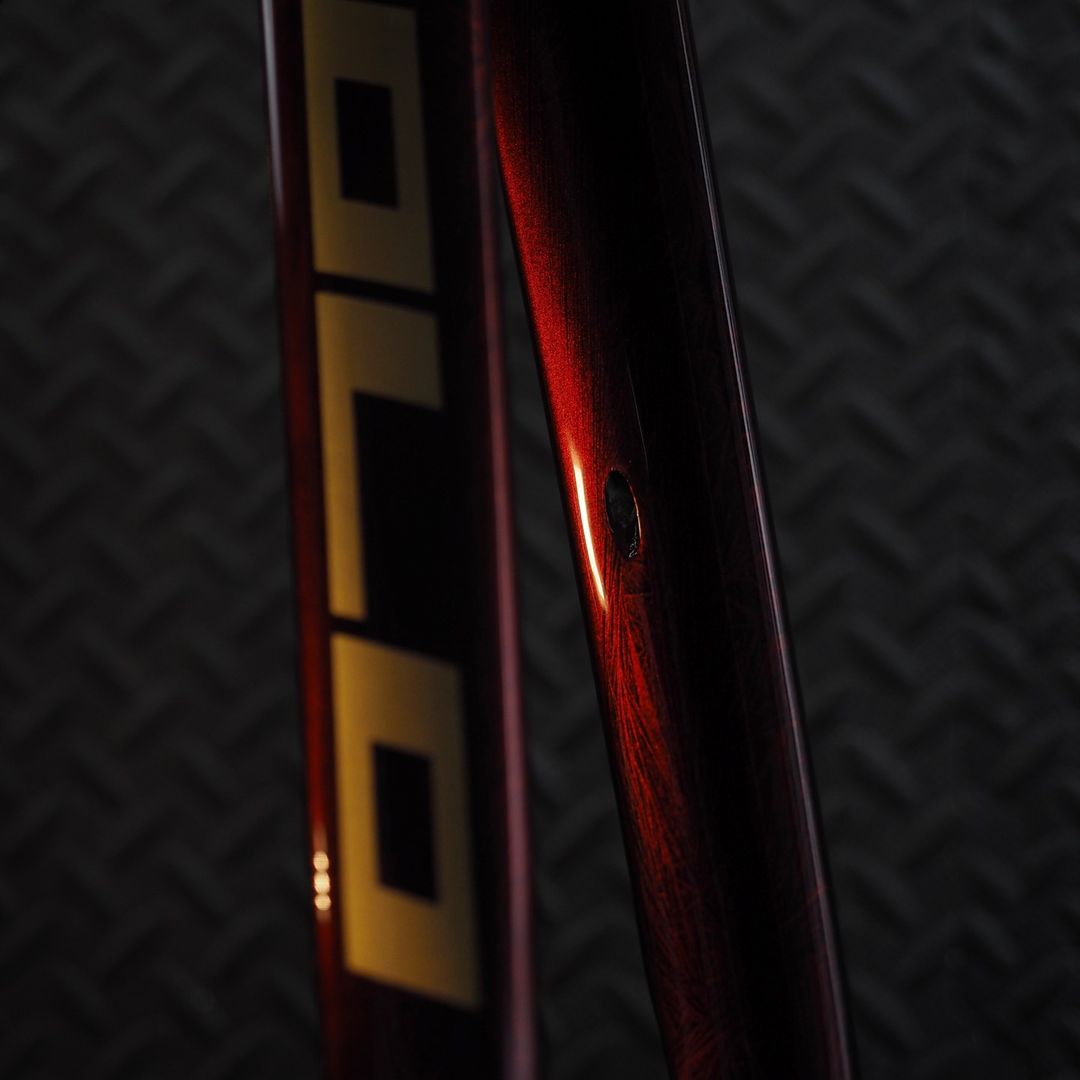
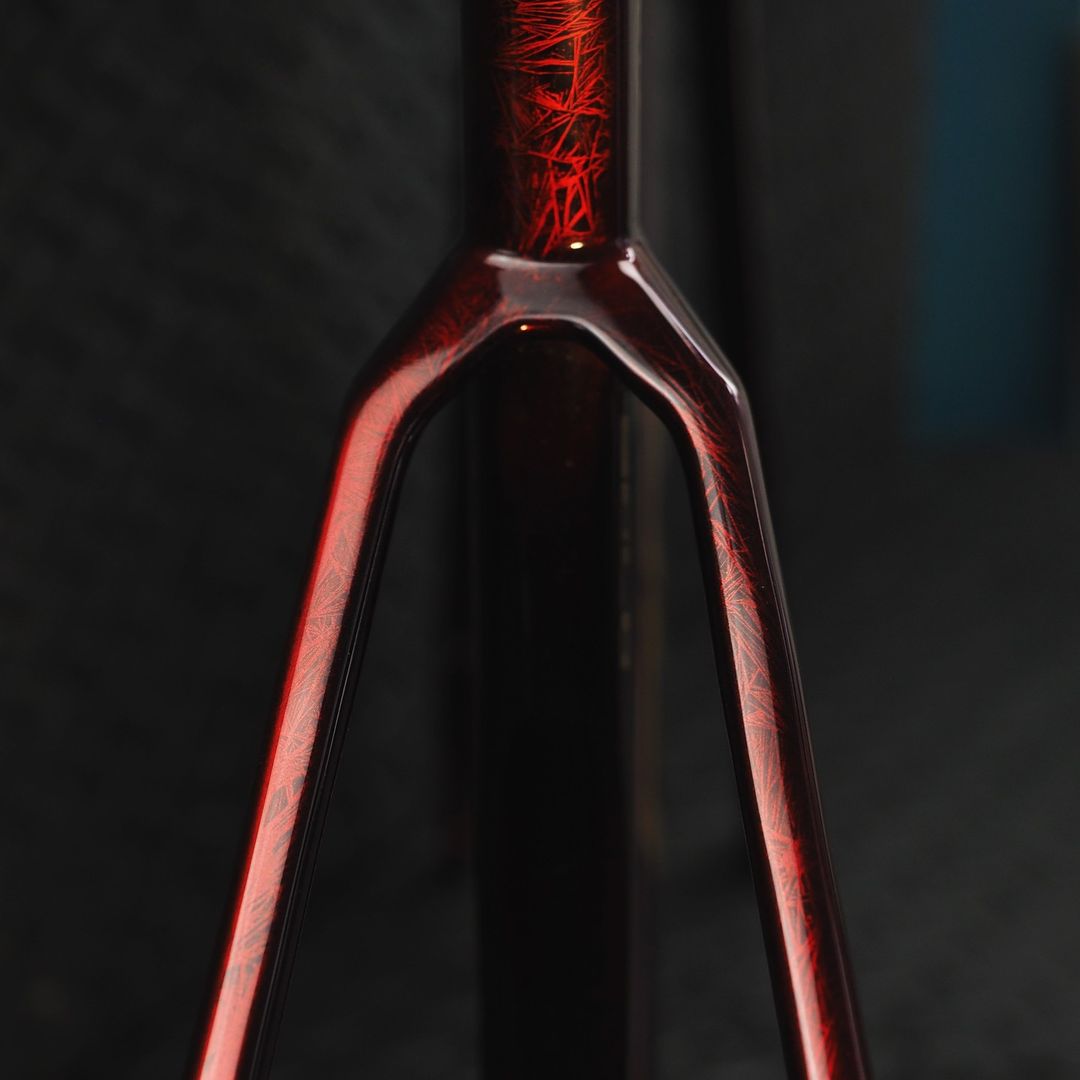
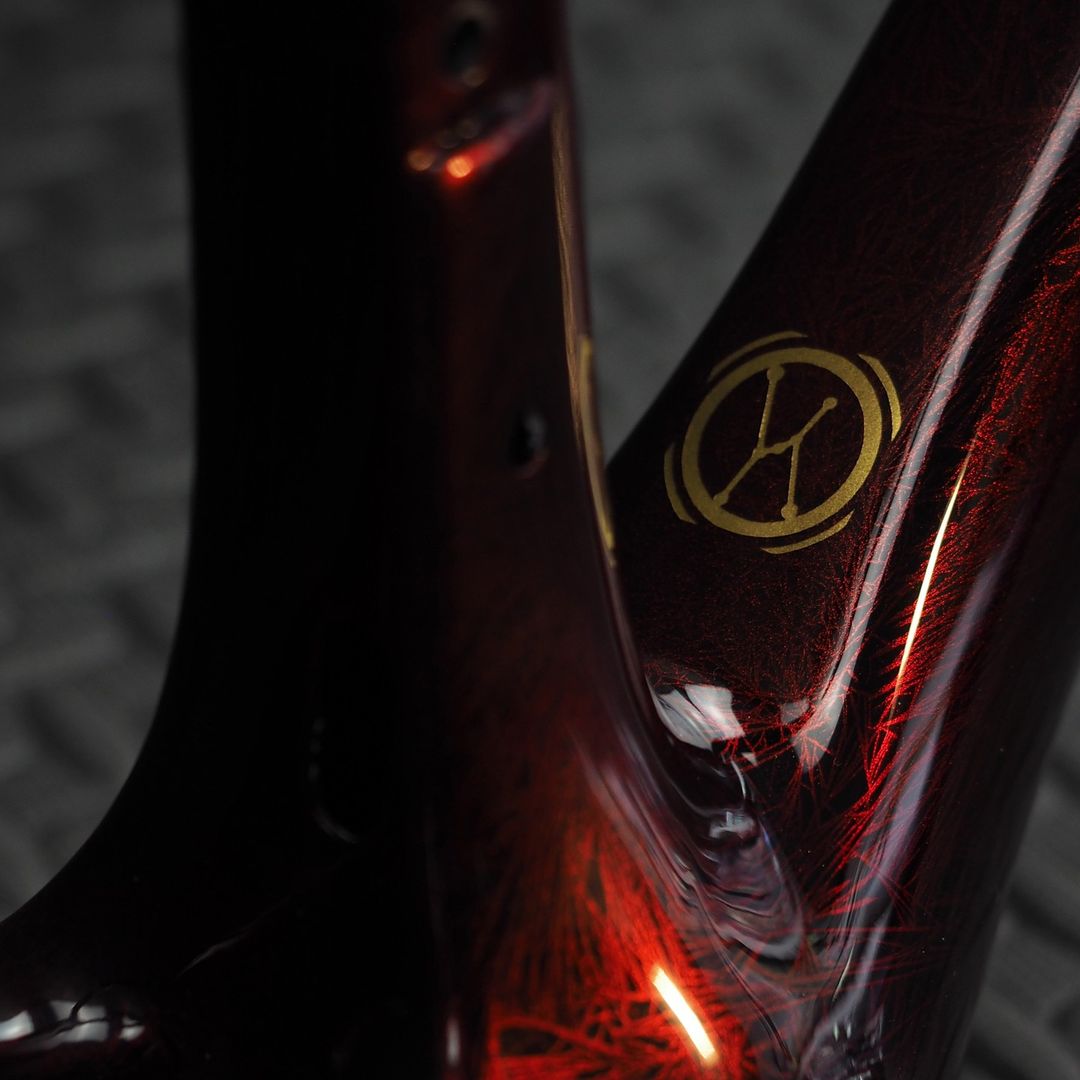
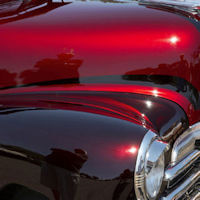
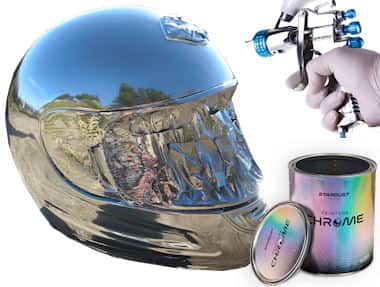
Crystallizer – Crystal effect bike paint
The Crystallizer effect creates crystallised patterns, which are then coloured with a Candy Clearcoat.
2 offers:
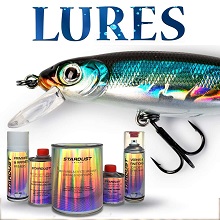
Aerosol kit
Kit in cans
48-hour delivery to a parcel pick-up point or to your home.
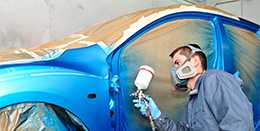
To achieve a Candy Crystallizer paintwork, it is necessary to follow a succession of stages, as this is a multilayer technique. The process is simple and can be carried out by any careful applicator, provided that the instructions below are followed precisely.
Check out our tutorial on “How to paint a bike”
Appearance :
Product (hardener) containing isocyanates with a free monomer content of less than 0.1%. (REACH Regulation (EU) 2020/1149)
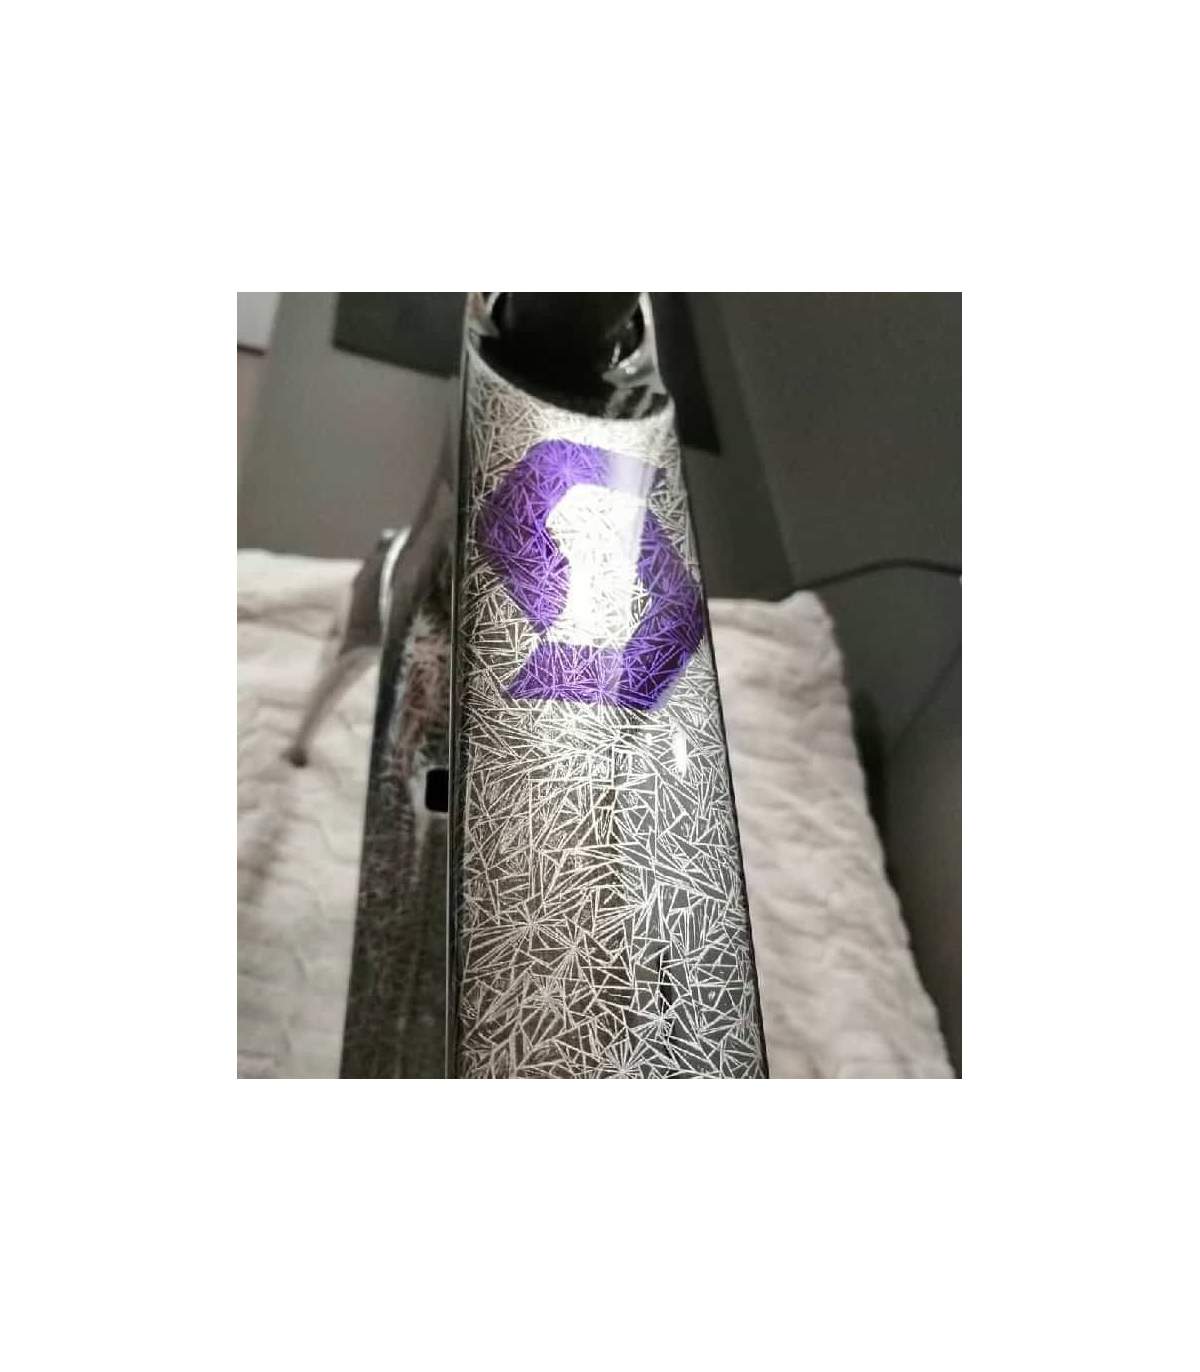
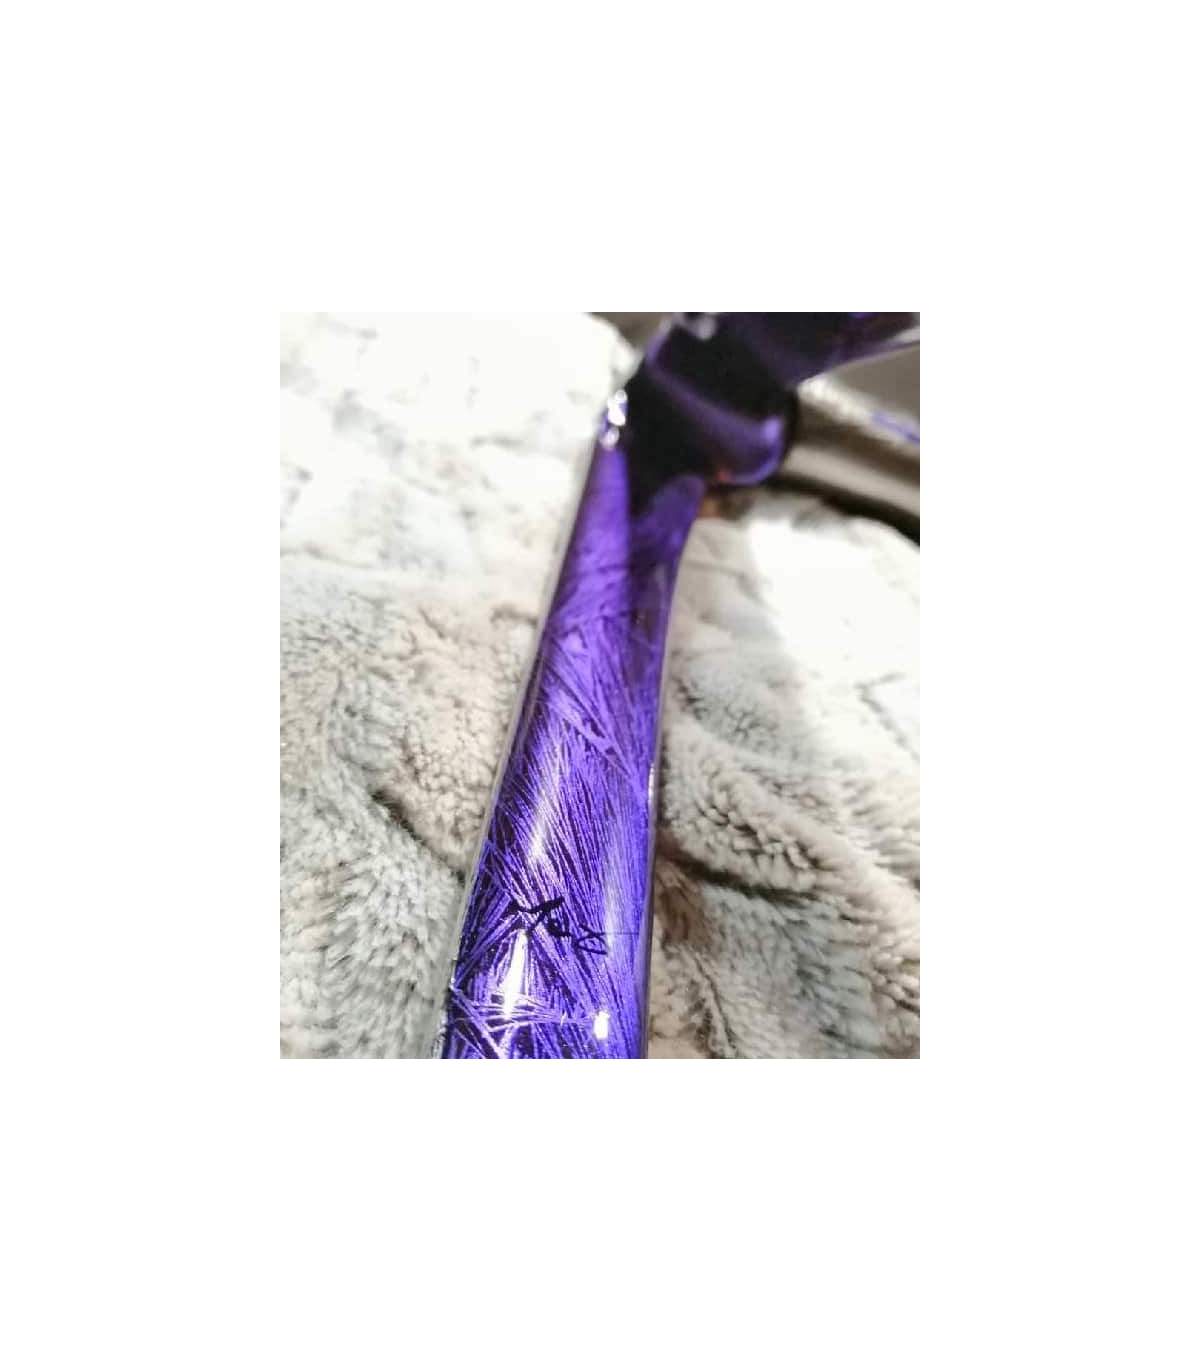
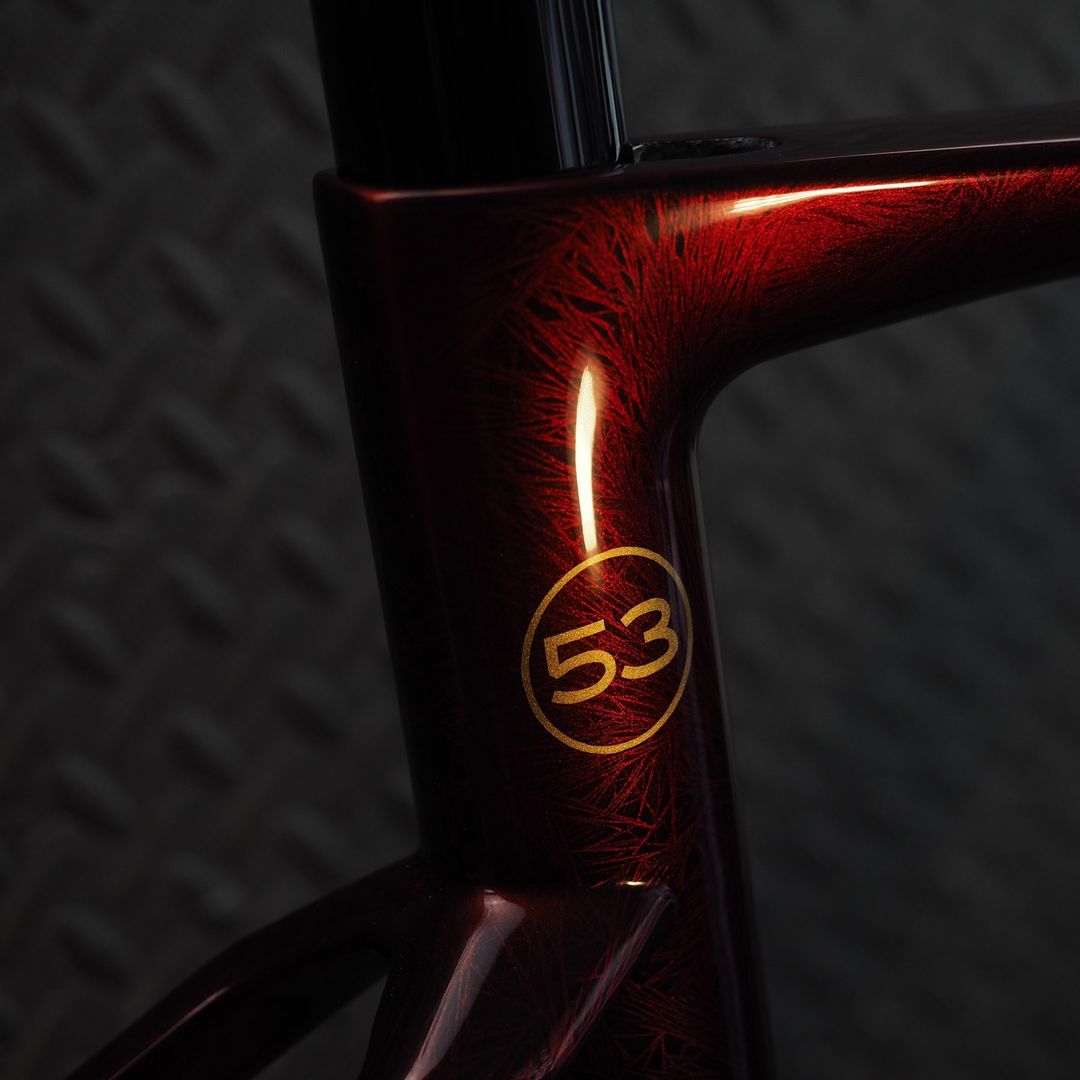
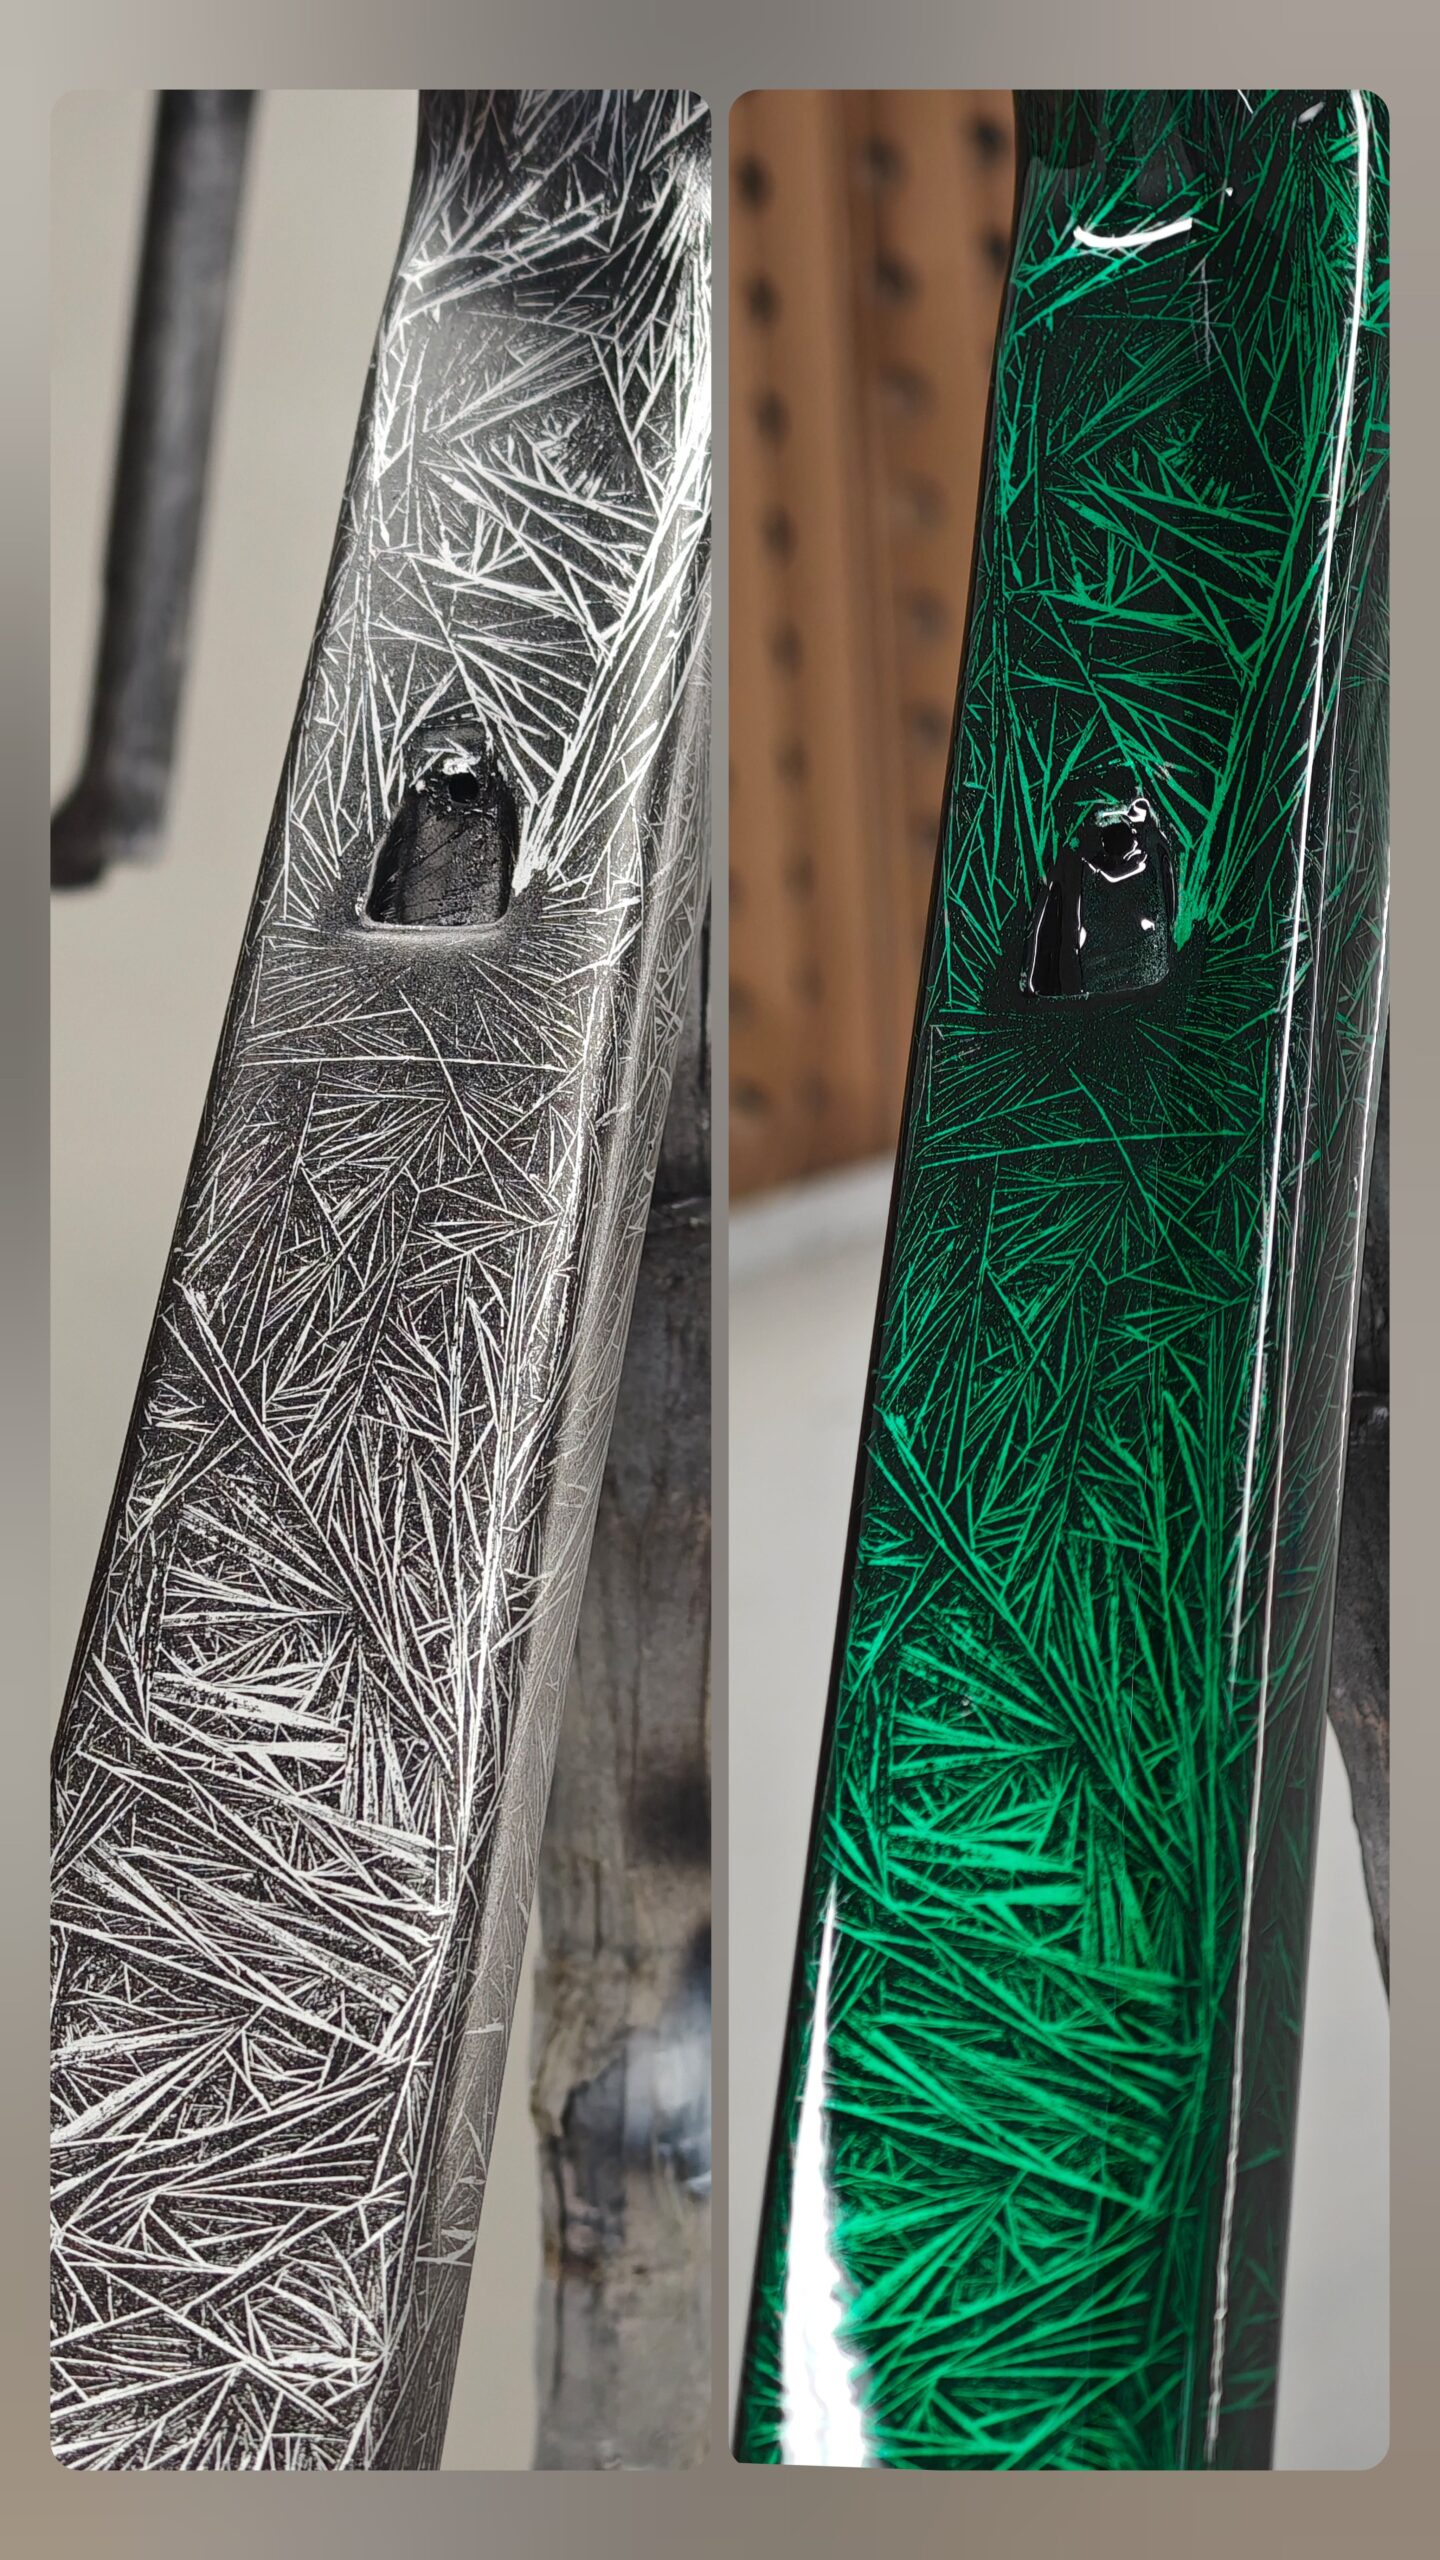
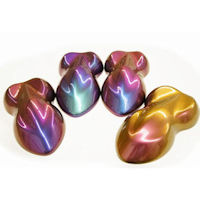
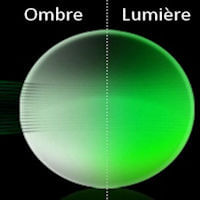
The Crystallizer creates patterns in the form of two-tone crystals (aluminium and black).
A transparent colour of your choice is then applied over this design using a Candy Clearcoat.
Content of the offers
Aerosol kit
2 aluminium paint sprays BC1
1 aerosol of ALUTC Clearcoat
1 Crystallizer Spray 500 ml
1 aerosol of black paint
2 aerosol cans of 2K UHS Candy* Clearcoat
2 sanding sheets: P500 and P800
Spray gun kit
500 ml aluminium paint BC1
250 ml of ALUTC clearcoat
1 Crystallizer spray 500 ml
125 ml black paint
Candy Clearcoat kit 850 ml (500 ml Candy clearcoat* + 175 ml hardener + 150 ml thinner)
2 sanding sheets: P500 and P800
* Colours to be chosen from the Candy colour list.
Choice to be confirmed by email after placing the order.
All included products are solvent-based paints.
The primer issue :
No primer is required if the frame surface is already painted.
If the frame is made of carbon or raw metal, an appropriate primer must be applied.
If the surface is uneven or has differences in level, it is necessary to apply a filling surfacer primer,
then sand with P400.
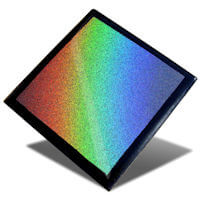
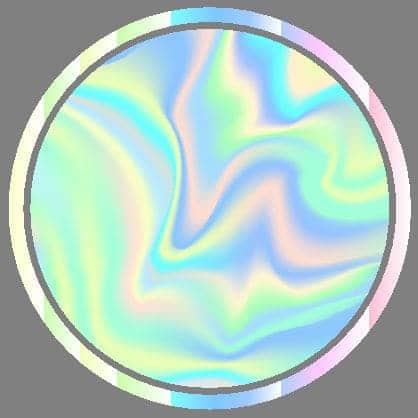
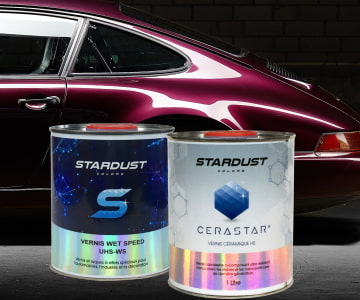
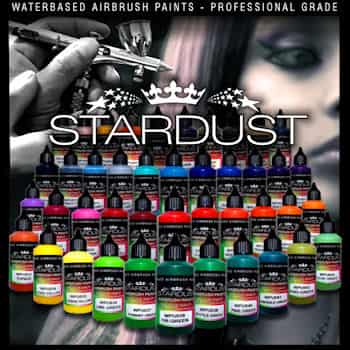
Choosing the Candy :
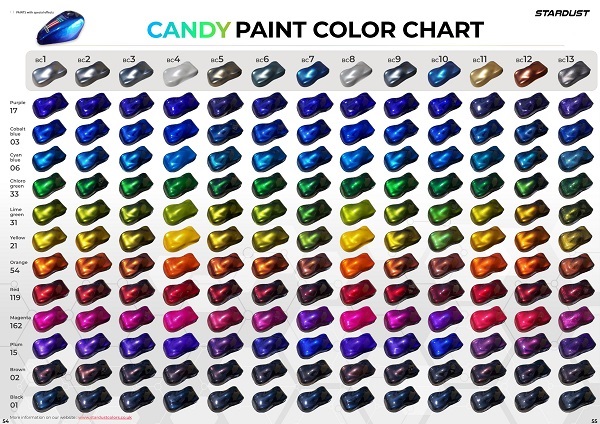
You will find on this page all the availbable transparent Candy colours. You can also find, at the bottom of the page, a downloadable PDF listing all Candy shades.
The high-definition colour chart PDF can also be downloaded below.
Candy crystallizer for bicycle : instructions for use
STEP 1 :
Application of aluminium paint (ready to use): Apply several light coats until full coverage is achieved. Aluminium paint is semi-transparent, so it is not recommended to apply it over a multicoloured background. In such a case, a dark primer or a few black veils of paint should be applied beforehand.
Drying time: 10 min.
STEP 2 :
Application of ALUTC clearcoat : (ready to use): Apply two thin coats to create a smooth background, as the crystals develop best on a perfectly smooth, non-glittery surface.
Drying time: a few hours.
Then sand with P800.
STEP 3 :
Application of the Crystallizer : (ready to use) : use): Apply a thick, even coat to cover all surfaces of the frame. Complete the application quickly. Do not apply a second coat. Allow to dry immediately in a dry, warm place to enable evaporation and crystallisation.
Drying time: 5 to 20 min.
STEP 4 :
Application of black paint : (ready to use) : Apply two thin coats to cover the dry Crystallizer. The aim is to achieve black shading to create contrast. Do not apply too much black — it must remain semi-transparent. In thin coats, black paint dries very quickly.
Proceed immediately to Step 5, within a maximum of 2 minutes.
STEP 5 :
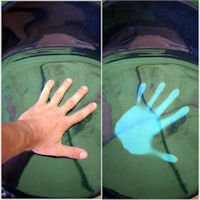
Wiping : Using plenty of water and an old dish sponge (the worn green side), gently rub the surface to remove the upper layer of black paint and reveal the crystals beneath.
Allow moisture to evaporate before continuing.
STEP 6 :
Application of the Candy Clearcoat:
Aerosol: Press the red button under the can to release the hardener and shake vigorously.
Spray gun: Mix 3 parts Clearcoat + 1 part hardener + 5–10% thinner.
Apply 2–3 coats, waiting 7–10 minutes between each.
Pot life of the mixed product: 30 minutes maximum.
Drying time: 12–24 hours.
Impact resistance can be improved by adding 1% of a plasticiser to the mixture.
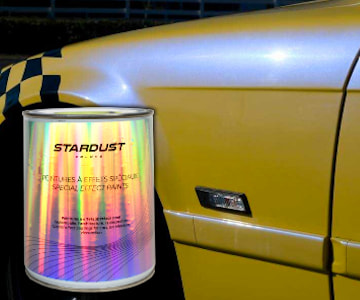
Stardust Colors elasticising additive
The paint then retains a degree of elasticity, enabling it to absorb impacts from stone chips without causing chipping or micro-cracks, as seen on the bumpers of heavy goods vehicles.
Question:
What is the waiting time between the crystal appearance phase and the black paint application phase — should we wait 24 hours?
Answer:
You only need to wait until crystallisation is complete. This may take 2 minutes at 35°C or 15 minutes at 20°C. It is not necessary to wait longer. It is possible to continue after 24 hours, but the crystallised surface must be perfectly protected from humidity, keeping it in a completely dry environment — otherwise, the crystals will "melt".
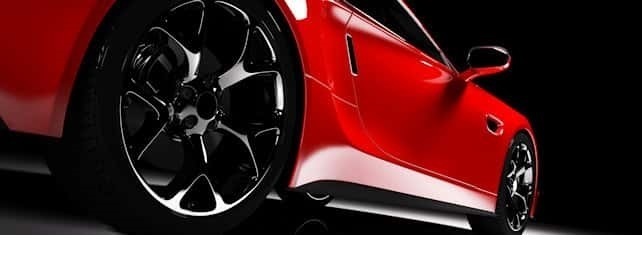
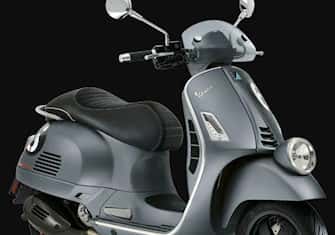
Find here our different complete CRYSTALLIZER paint kits:
► Scooter Spray Kit
► Car Kit
► Motorcycle Kit


.
.
.
.
.


.

.

Please sign in first.
Sign inWe use cookies. If you continue to use this website, we will assume that you are happy with it. Find out more