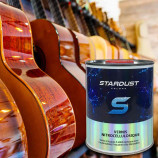
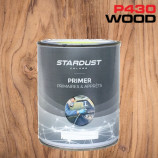
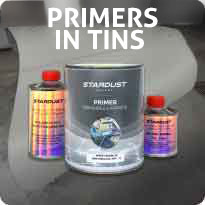
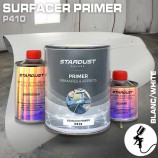
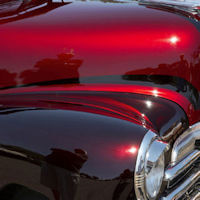
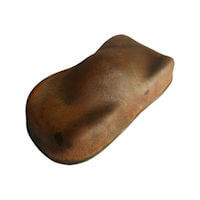
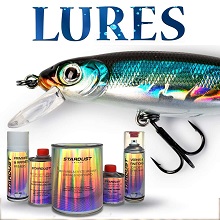
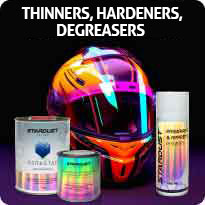
Delivery within 48-72 hours
Pay in 4x with no fees on purchases over £30
Get your online quote in less than 1 minute
Share your creations and receive vouchers
Earn loyalty points with every order
Return products within 14 days
5€ discount on your first order
€10 voucher for each referral
Subscribe to the newsletter: £5 discount
Click for more products.
No products were found.
PRIMERS, PAINTS & SPECIAL VARNISHES FOR
BODYWORK, DECORATION AND INDUSTRY

0

£0.00
Click for more products.
No products were found.

ESSENTIALS

Buying this product you will collect 960 Star-Points with our loyalty program. Your cart will total 960 Star-Points.
Thanks to your order,
Stardust is planting a tree.
treenation (Order from £50)

Metal Flakes Candy Glitter Paint for Guitars – Complete Spray Gun Kit

KCG-MF

Version designed for spray gun application

Custom Guitar Paint

Complete Glitter Paint Kit for Guitars

Choose any colour from the “Candy” range

Warning! Solvent-based and flammable effect paints

For professional use only

Read more Show less
£86.40 (VAT incl.)
Candy Colours
FLAKES STARDUST
Reference:
KCG-MF
Description

The complete glitter effect paint kit for guitars includes all the products needed to create a METAL FLAKES glitter finish with your chosen colour. The kit does not include primer*.

METAL FLAKES are thick polyester-based flakes that produce a unique reflective effect thanks to their coarse grain and metallic surface. The coloured “Candy” clearcoat technique further enhances these properties.

Application Summary – Three-layer System

  • Black or coloured base coat

  • Glitter coat

  • Colourless or « Candy » cleacoat

What’s included in the kit?

1 - Complete kit for spray gun application

- Black or coloured base coat* – (2 x 125 ml GRAPHIC Paint)

- 1 can of concentrated Metal Flakes pigment paste** (60 g) in your choice of colour

- Mini kit of UHS clearcoat (875 ml)

- 65 ml concentrated “Candy” dye in your chosen colour

See below (1) for all the steps and tips to customise your chosen colour.


WPU159 fine gloss varnish, applied and polished by @‌licheriguitars

Preparing the Surface and Primer

For raw wood, a 2K filling primer in spray or can form is essential. This seals the surface, penetrates the wood, and creates a thick, smooth layer ready for painting after drying and sanding.

If the guitar is already painted or varnished, you can paint directly after a light, superficial sanding to ensure proper adhesion.

Sand with P500 grit paper / dust / degrease / dry

Applying Glitter Paint to Guitars

1/ Kit for spray gun application

Requirements: an air compressor and a spray gun (1.4 mm nozzle or larger)

This technique mirrors that used on Harley-Davidson motorcycles: glitter application followed by a coloured clearcoat, which tints the flakes and enhances the vibrant, deep colour effect.

The final colour depends mainly on the coloured “CANDY” clearcoat, with its intensity determined by the number of clearcoat layers applied.

Step 1: Apply the base coat

This is a single-component “1K basecoat” paint ready for use.

Apply 2-3 coats, allow to dry for 30-60 minutes, then sand with P500 grit.

A black background GPH010 is automatically provided, for another base color, please communicate the choice by email after ordering.

* For a dark, deep effect, use a pure black base coat (e.g., black base + red flakes).

For a bright colour, use a vivid base coat similar to the flake colour (e.g., red base + red flakes).

Refer to the GRAPHIC colour chart

Graphic_Colorchart

Step 2: Mix Metal Flakes into the clearcoat

There is no strict mixing ratio. Simply add 5-30% by weight, depending on the desired coverage. Use just enough clearcoat to adhere the flakes to the guitar's surface.

Add hardener (33% or 1/3 of the clearcoat volume)

Add thinner (10-15% of the mix volume)

Exemple mix :

100 g clearcoat + 25 g Metal Flakes paste + 33 g hardener + 15 g thinner

150-200 g of mixture is sufficient to paint a guitar.

Use within 40 minutes of mixing.

Application : Spray from about 20 cm away, overlapping the glitter coats. Repeat until achieving the desired coverage or appearance.

For a black base, covering only 50% with flakes leaves some black visible, enhancing the depth after applying the coloured “Candy” clearcoat.

Metal Flakes Colour Choices :

Silver flakes are typically used, with the “Candy” clearcoat adding the colour. Coloured flakes can also be chosen, even with a coloured clearcoat on top..

Examples of combinations for a custom colour

Black base > silver flakes > red Candy clearcoat

Black base > red flakes > red Candy clearcoat

Red base > red flakes > red Candy clearcoat

Step 3: Apply the clearcoat

Prepare a fresh clearcoat mix, following a 100:33 ratio (3 parts clearcoat to 1 part hardener).

Add “Candy” dye: about 7%.

Add thinner: 0-10%

Exemple mix:

100 g clearcoat + 33 g hardener + 7 g concentrated “Candy” dye + 5 g thinner

Apply multiple coats, allowing 7-10 minutes between each coat.

Use within 60 minutes.

Touch dry: 3 hours – Fully cured: 16 hours

Touch dry: 3 hours – Fully cured: 16 hours

The colour depth depends on the number of coats. For a darker colour, apply more layers of “Candy” clearcoat.

Avoid exceeding three coats in one session. Wait 24 hours before applying a clear, non-coloured clearcoat for a smooth, glossy finish.

Thickness : METAL FLAKES may require 6-7 clearcoat coats for a perfectly levelled surface. While this is a challenge, it creates the unique and striking depth effect characteristic of this technique.

**Important Note on Pigment Paste : To comply with European regulations on microplastics, we provide a concentrated glitter pigment paste. This is easy to use and prevents microplastics from dispersing into the environment.

For professional use only : Follow all usage and safety instructions carefully before starting. Use protective equipment and air extraction systems. Products are harmful and flammable.

Read moreShow less
Product Details
KCG-MF
Attachments
Reviews
No comments
Questions(FAQs)
6 other products in the same category:

Menu

Settings