Mirror paint – NeoChrome, an innovation for the mirror industry

Mirror paint – NeoChrome, an innovation for the mirror industry

Similar to silvering, NeoChrome is a paint capable of creating a mirror on the surface of a glass pane.

Neochrome is made with a rare, non-toxic metal, and has a light reflection index similar to that of silver (Ag).

Application

The glass must first be cleaned of all contaminants. A mild water-based cleaner gives excellent results, as does isopropyl alcohol.

It is possible to use cerium oxide to polish the glass by removing micro-scratches and eliminating limescale deposits.

Mirror paint is best applied by spraying.

Two or three very thin coats on the glass provide opacity and a mirror effect.

The Art of Mirror: Unveiling the Production of Mirrored Furniture

The fine layer of paint evaporates quickly, leaving behind a metallic film less than 1μm thick.

After that, an opaque backing coat must be applied.

The yield is significant (10 m² / L).

The high light reflection index allows treatment of surfaces such as headlight reflectors.

NeoChrome is highly resistant to corrosion and UV, unlike silver.

Its ease and speed of application, along with its lower cost compared to silver, represent a true innovation for the mirror industry.

Application is also possible on materials other than glass, on the external face of opaque substrates.

StardustColors and its commitment to reforestation

StardustColors and its commitment to reforestation

StardustColors is a French company specializing in the manufacture and distribution of innovative paints, recognized for its expertise and environmental commitment*. Based in the south of France, it offers a wide range of special effects paints..

For several years, our team has been committed to converting as many of its offerings as possible to innovative formulations without organic solvents. By 2025, this represents 50% of our production and a new building constructed in 2021 is exclusively dedicated to water-based paints. Beyond its expertise in special effects, StardustColors stands out for a cause that is deeply close to its heart: reforestation.

Aware of the importance of forests for the preservation of biodiversity and the protection of animal and insect species, StardustColors has launched a bold initiative: planting a tree for each order placed**.

Every order from StardustColors directly contributes to the restoration of forest ecosystems around the world. This approach reflects the company’s deep commitment to a sustainable future, transforming each transaction into a concrete gesture for the planet.

By supporting reforestation projects, StardustColors participates in CO2 sequestration, soil protection and the creation of habitats for wildlife, while raising awareness among its customers about the importance of preserving our environment.

Our partner @Tree-Nation

To bring this initiative to life, StardustColors has partnered with Tree-Nation, an international platform dedicated to reforestation and the fight against climate change. Tree-Nation enables the planting of trees in various projects around the world, providing tools to track the environmental impact of each tree planted.

Through this partnership, StardustColors ensures that every order contributes to carefully selected reforestation projects, maximizing social, economic and environmental benefits for local communities and the planet.

The message from the Kogi Indians:

Guardians of the Sierra Nevada in Colombia call for respect for Mother Earth, considered sacred and alive. They denounce the destruction caused by modernity, such as deforestation and pollution, which threaten the planetary balance. They invite humanity, their “little brothers,” to reconnect with nature to preserve biodiversity and prevent collective extinction. Their message advocates harmony, solidarity, and responsibility towards the environment.


“Nature is watching you”:

Koko, a gorilla who was taught sign language, shared a poignant message for humanity in a video. She expressed her love for nature and humans, while lamenting human actions in the face of the destruction of the planet.

Koko delivered this message to humans before she passed away at the age of 46: “Nature is watching you,” and signed her name: “I am nature, Koko loves the Earth, humans are stupid, Koko is sad, save the planet.” Her urgent appeal urges us to protect the environment before it is too late.

* Support for animal welfare associations (@groingroin)
**Stardustcolors is committed to planting a tree for all orders of at least €50 including tax.

SCO Color System Chameleon/Opal

SCO Color System Chameleon/Opal

Paint combinations with color-changing effects

Some paints and special effects create a luminous color that changes depending on the viewing angle.

These chameleon paints create color by reflecting light. This phenomenon is made possible by the optical properties of certain chameleon paints made from synthetic mica. This reflection of luminous colors places itself in the background color.

The range of chameleon colors developed by StardustColors is certainly one of the largest in the world, with more than 44 color references (STANDARD range (20) and around twenty EXTREME colors (24)).

► There is a SEMI-OPAQUE type of chameleon paint and a TRANSPARENT type, as shown in the table below.

Stardust Chameleon Standard Series
Videos


Stardust Chameleon Extrem series
Videos

205 gold pink violetTRANS
L1009 ORIONIS Green Turquoise Blue Violet Red Orange
215 blue redTRANS
L1010 CENTAURI Tourmaline Orange Gold GreenTRANS
217 turquoise blue violetTRANS
L1020 DRACONIS Grey Green
225 gold green blueTRANS
L1022 POLARIS Red BlueTRANS


L1030 MAJORIS Aquamarine Silver
1001 green violetTRANS
L1040 RIGEL Green Violet Pink SilverTRANS
1002 turquoise pinklTRANS
L1050 AFRICA RED GREEN YELLOW
1003 orange greenTRANS
L1060 ANDROMEDA Violet Blue green gold
1004 blue greenTRANS
L1070 SAPPHIRE Blue VioletTRANS
1005 green violet orange

L1080 GAMMA LEONIS Gold GreenTRANS
1006 green silver violet

L1090 ​​NEBULAR Blue Gold GreenTRANS
1008 green brown

L1100 SIRIUS Blue Green
1345 turquoise violet pinkTRANS
L1210 ALPHA BOREALIS Green Blue VioletTRANS


L1230 EPSILON Turquoise Blue Violet Red Gold
82061 outremer blue violet red

L1280 SAGITTARII Blue Violet Red Gold
82062 turquoise blue violet red

L1830 HELIOS Red OrangeTRANS
82063 blue violet red gold

L1864 SCORPIUS Brown Gold Green BlueTRANS
82064 violet orange

L1866 ALDEBARAN Green Gold Pink
82065 red gold

L1868 ARCTURUS Green Gold Orange
82066 pink green

L1870 ANTARES Fire Orange GreenTRANS
OS32 green copper

L1890X PEGASUS Green Turquoise Blue Violet Red Orange G-Gold
CS32 green blue

HS1 HYPERSHIFT Black/orange Red/Gold


HS03 HYPERSHIFT Black/Violet Red/Gold


HS05 HYPERSHIFT Black/Blue

Chameleons should usually be applied on a black background.

Transparent chameleons, however, can create very interesting color effects when applied to white or even brightly colored or pastel backgrounds.

Basic colors (among 63 colors in the GRAPHIC range)

GPH001 Turquoise GPH011 Vivid red GPH022 Orange GPH061 Violet
GPH003 Vivid green GPH012 Pink GPH055 Grey GPH065 Orange
GPH005 Cyan Blue GPH013 Yellow GPH056 Amaranth  
GPH007 white GPH018 magenta GPH057 LILA  
GPH010 Black GPH020 Sienna GPH060 Ultramarine  

White Backgrounds
Chameleon colors are identified as “OPAL” when the background color is white or very light, making them resemble the color effects of certain seashells.
Find OPAL colors

Intermediate colors
When used as an undercoat, transparent chameleons create very interesting effects. The background color is little or not at all altered by the chameleon. The color-shifting reflection may only be visible under a direct light source; it remains invisible in the shade or under diffused light.

Black backgrounds and dark colors
They allow the chameleon to fully display its colors.
Find EXTREME colors

COLOR POSTERS
Three large-sized (A1 or A2) color chart posters showing all the transparent chameleon paints applied to different background colors of the SCO system
You can download the high-resolution images of these charts below, or order them in the Stardust poster category

It’s possible to create unique combinations on

  • bright colors such as orange, red, green, and yellow
  • light “pastel” colors
  • complex and subtle colors such as ochre, brown, and purple…
    ♣ Never use metallic or pearly bases; this will cancel out the pearlescent optical effect.
    Examples

L1210 ALPHA BOREALIS / OP121Q offers three cool-toned reflections: TURQUOISE BLUE VIOLET.
This is a highly transparent shade, among the strongest. It’s a great shade for creating contrasting effects (e.g., warm background/cool reflection).

L1864 SCORPIUS / OP864Q
This is a very powerful semi-transparent shade that creates colorful reflections ranging from PINK, ORANGE, GOLD to GREEN.

Economical Colors
There is a range of chameleon colors that are much more affordable than the EXTREM colors.
With highly effective colors such as:
♦ 215 BLUE RED
♦ 217 TURQUOISE VIOLET
♦ 225 BLUE GREEN GOLD
and finer, more subtle colors such as
♦ 1001 VIOLET GREEN and all the other references in the 1000 range.

The most remarkable SCO color combinations, coupled with Candy, have been grouped together in the LUNAR range, available very quickly.

Special recipe to achieve the color of the copper metallic rims SEAT CUPRA and FIAT 500

Special recipe to achieve the color of the copper metallic rims SEAT CUPRA and FIAT 500

Cupra is a manufacturer that belongs to the German Volkswagen group. Previously it was the sports division of the Spanish car manufacturer SEAT until 2018, when it became the successful brand we know today.

The ingredients of this success are high performance, affordable prices, but also innovation, style and talent. CUPRA models redefine racing, and today, in just a few years, it has become a recognized brand of sports cars .

How to reproduce the colours of CUPRA copper rims?

Design and colours are essential elements integrated into the CUPRA brand.
In this blog post, we present some special paint formulas developed by one of our customers to reproduce the effect colour of CUPRA rims..

There is a CUPRA metallic shade with the color code L27A named “CUP COPPER”

It is a solvent-based 1K basecoat, available in both can and aerosol format, it should be applied over a RAL 7040 grey primer.

There is also a similar color, copper-coloured shade, created using transparent tints

Below is a recipe developped by one of our professional automotive paint applicators.

This is a matte Candy finish, which can be applied directly to the metal rim (our matte clearcoat adhere to bare metal) or applied over an ultra-fine metallic base such as BC60

Special recipe: Seat Cupra Red Copper clearcoat

100g of extra matte varnish St822
20g hardener
25g thinner

4g of Candy “RootBeer 18”
2g of Candy “Gold C27”
2g of concentrated black tint*

Any concentrated opaque black tint can be used. This addition helps “break” excessive transparency.

Apply several coats until you reach the desired shade..

Special recipe: Fiat 500 Copper clearcoat

100 g of varnish (matte or glossy)
Hardener (20g or 33g depending on type)
Thinner

+
3.5g of pure Black tint (opaque tint)
6g of « Candy Root beer 18 »

Mix thoroughlyl!
Apply on aluminum base or raw rims
using several cross-coats , until the desired result is achieved.

How to clean an airbrush?

How to clean an airbrush?

How to clean an airbrush?

Whether it is a suction or gravity airbrush, single action or double action, and whatever the brand, it is advisable to clean your airbrush well immediately after use to prevent it from becoming clogged, completely or partially, and therefore to maintain perfect jet and spray quality.

For beginners in the difficult practice of airbrushing, we will notice that the phase of disassembly, cleaning, problem finding, reassembly, jet adjustment, occupies at least 80% of the time spent “doing airbrushing”: let them rest assured, it’s normal! Learning to disassemble and clean the airbrush is essential.

Aérographe

Cleaning is done manually with thinner, and tools (brushes, tips, compressed air). It can be done (when the paint is dry) with an ultrasonic cleaner.

AérographeAérographe

When to clean your airbrush?

– between each color: when changing color, simply empty the remaining paint and fill with cleaning thinner to purge the airbrush once or twice.

The purge is carried out either in a specially designed pot, or in the mini extraction cabin while it is running.

Purging is carried out either in a specially designed pot or in the mini extraction cabin while it is running.

Aérographe

– when the jet has a defect, the flow is jerky, bubbles form in the cup, or the jet goes sideways…

Basically whenever something goes wrong. Especially when doing precision work!

First, a quick check of the assembly and tightening of the airbrush parts, as well as their condition, will be carried out, then a complete purge will be carried out with a dose of thinner. If the anomaly is not resolved, then the airbrush will be completely disassembled, to quickly clean it with thinner. After reassembly, a good jet quality should be found.

Aérographe

-after use: normally with a purge repeated several times, without disassembly, you will find your airbrush in good working order the next day. If possible leave some thinner in the cup and in the airbrush.
Note: after using a two-component paint or varnish with hardener, it is very important to double the rinsing and brushing of all parts in contact with the product.

Deep cleaning

– regularly, after about twenty hours of use, it is necessary to carry out a deep cleaning, to remove the dried paint residues, with the most complete disassembly possible, and a soaking in a solvent thinner (or in the ultrasonic cleaner, for the best equipped airbrushers). Only the metal parts are put to stripping in the solvent pot, in a small strainer, so as not to lose the smallest parts, from 1h to 24h depending on the dirt. Plastic or rubber parts will not be soaked for more than 5 min.

Aérographe

This regular stripping is also valid in the case of using water-based paints or solvent-based paints.
Once the parts are soaked and the paint is well softened, we immediately proceed to brushing (with a brush rod or a toothbrush).

Aérographe

Aérographe
To clean the nozzle, use only compressed air, or a needle, with great care. Never use a scalpel, or force the nozzle.
You can also blow with compressed air to dislodge dirt in difficult places. Finally, re-dip the parts in a clean, clear thinner, and wipe the parts with a clean paper.

What should you use to clean your airbrush?

The solvent pot, for soaking parts, contains a universal liquid cleaning diluent of the bodywork type. Never acetone (too strong), no white spirit, or alcohol (too mild). The diluent in the pot can be used for a long time without being changed.

Aérographe

A distinction is made between a thinner to reduce the viscosity of paints and varnishes, and a cleaning thinner (less fine in quality and more aggressive)

We also differentiate between thinners for water-based paints and varnishes (example: Vallejo paints), and solvent-based thinners and varnishes (example: Graphic paints)

You absolutely cannot reduce or clean water-based paints with solvent-based thinners, and vice versa, otherwise you risk making mayonnaise!
However, it should be noted that only solvents can be effective on dried paints, whether they are water-based or solvent-based.

Find out how to clean your aeroplane using ultrasound

The least laborious and most effective way to remove paint residue from every nook and cranny.

Here is a selection of 2 ultrasonic cleaners and the details of how they work : Ultrasonic Cleaners Model GT F1 and SONIC D2

How to airbrush?
How to use an airbrush for modeling?
How to draw with an airbrush on canvas?
How to use an airbrush for body painting?
How to draw and paint with an airbrush on a body?
How to paint with an airbrush game figures and miniatures?

The varnishing of a guitar

The varnishing of a guitar

In our series of articles and tutorials on guitar painting, here is one of the most important topics, because it is that of finishing and protection: how to varnish a guitar.


6 steps to apply varnish to a guitar

Step 1 ► Prepare the support (depending on the different cases)
Step 2 ► Impregnate the wood
Step 3 ► Sand
Step 4 ► Apply varnish (different types and modes)
Step 5 ► Dry
Step 6 ► Polish

I invite you to find these steps with the complete and detailed instructions further down in the article, if you want to skip the general information.

I will also talk to you about the possibilities of adding a transparent tint to your varnish, and I will explain to you how to correct slight defects in the varnish.

Why varnish a guitar?

The varnish coats a guitar to protect it from all external aggressions, whether temperatures, humidity, scratches, dirt and all invisible dirt such as perspiration or grease. The varnish ensures effective protection of the wood of your guitar….
Particular care is dedicated to the finishing coat of musical instruments, which may be a lacquer or varnish. It is both a protective layer, a coat which gives the instrument a long lifespan, and it is also an aesthetic finish which adorns your instrument with a beautiful glossy layer, or sometimes even matte, depending on the tastes.
Certain varnishes are also believed to have natural acoustic qualities, because they allow better conduction of sound waves.

What varnish for a guitar

In this article, I will present to you here some solutions of products and methods for varnishing your guitar. From acrylic varnish, through nitro-cellulose varnish or 2-component polyurethane varnish, to epoxy glazing resin.
The woods that generally make up guitars, from the head, body or neck, are spruce, cedar, mahogany, rosewood, oak, maple. Most varnishes go well with the woods that make up the living instruments that are guitars.
You can choose according to your taste, according to the tools you have, and according to the possibilities offered by your workshop, solvent-free acrylic varnishes, single-component or two-component solvent-based varnishes, and I will also present to you an original solution with the resin glaze epoxy.

Are nitrocellulose varnishes really the best ones? Is this really a reality or a belief?
“Personally I only work at P.U. In my opinion, nitrocelluloses belong to the past, and I think that they have a hard life because of their desire to stick to what made the guitar famous: Fender and Gibson.
At the time polyurethanes were not yet well developed, and even though PU already existed, these iconic brands first used nitro. I had another one in my hands recently, a 95 Gibson whose varnish was a horror due to nitro which aged badly…
I think we still use and recommend nitro out of conservatism, or even snobbery. Afterwards it can be interesting for those who restore instruments to the original. It is also believed to have better acoustic quality, being more flexible it would let the instrument vibrate more than a P.U., for me this is quite ridiculous on an electric instrument.
And even on an acoustic, if a P.U varnish is well made it doesn’t muffle absolutely anything since it is only around 0.05 mm. »

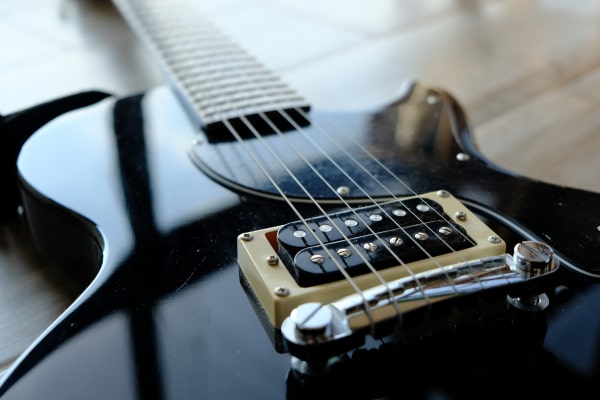
Methods of applying varnish to guitar bodies

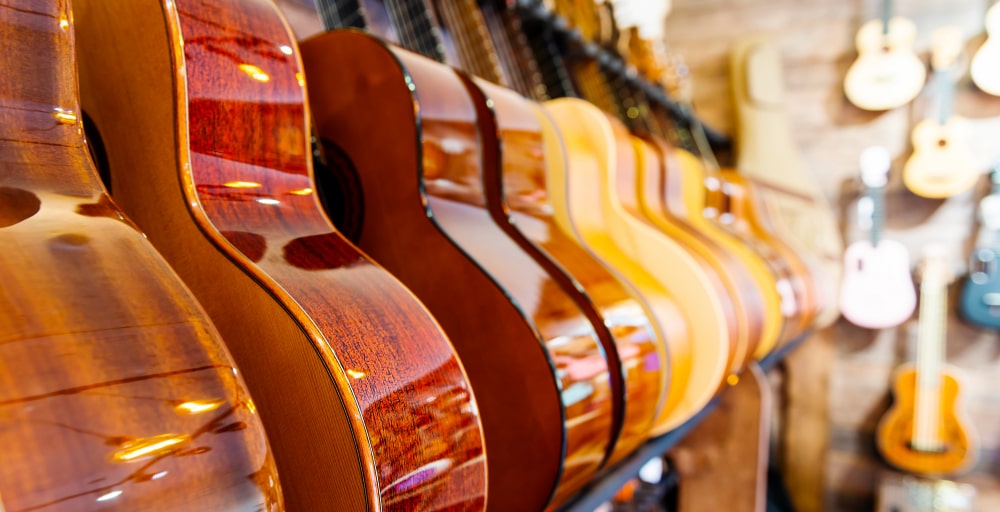
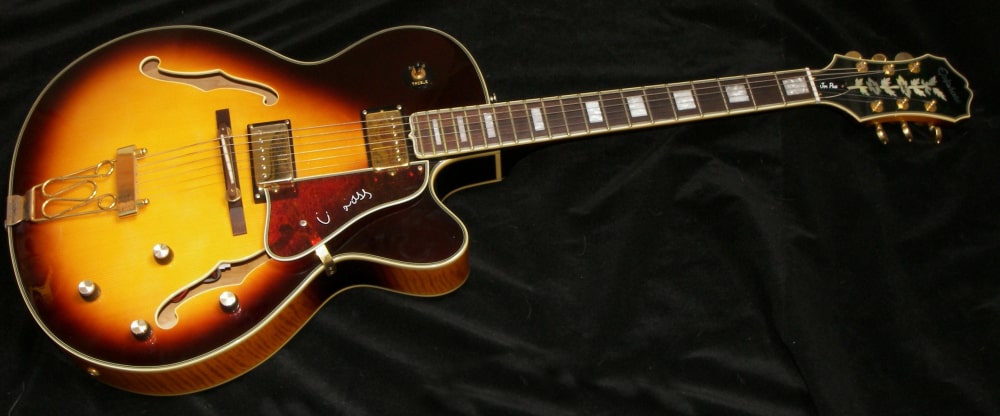
Varnish is a transparent, sometimes tinted, usually glossy layer composed of resins and polymers. Throughout the ages, different varnishes, different resin formulas, and different methods of application have been developed.
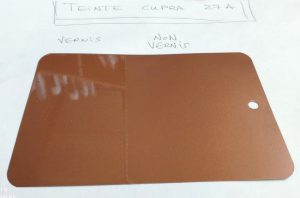
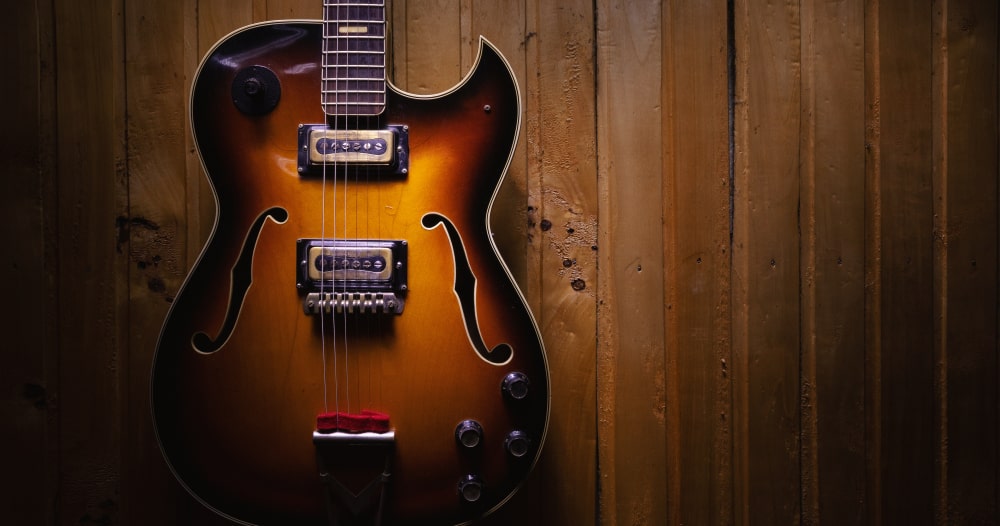
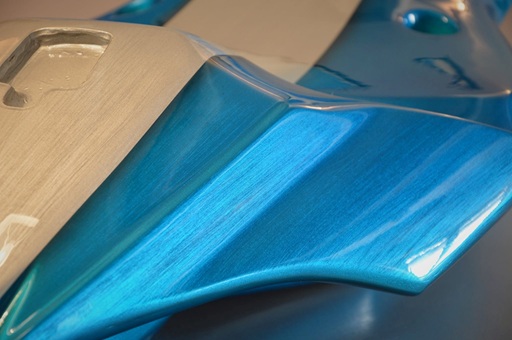
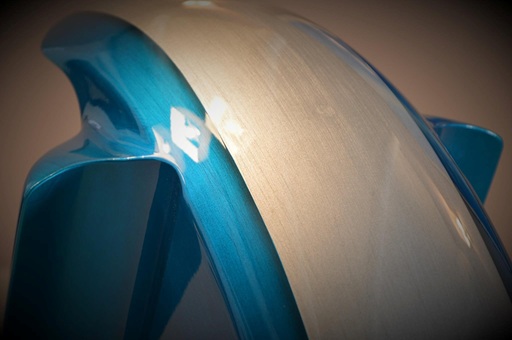
Glossy varnish enhances the texture, veins and grain of the wood, as well as its natural color, making it deeper.
The varnish is the most important step because it is the final touch. This is a delicate technique, because a varnish must always be perfectly successful. Today, old processes still exist, however there are modern products. To achieve a flawless varnish, you must know and respect the technical aspects of the product.

Products needed to varnish guitar

There are a number of clear lacquers that can achieve results that can be described as decent or superb.
It is of course preferable not to aim for economy, for such a small quantity of surface to be varnished and for a precious instrument, which we want to renovate or make last over time.
Without detour I advise you to use a professional product is a wise choice for those who want an easy application with good results, and without unpleasant surprises.

Acrylic varnishes
Thickness: 20-25 µm per dry layer / Brush and gun application
For those who prefer ecological and non-harmful products, to work quietly in their apartment, without the smell of solvent, then the first choice is to varnish a guitar with a water-based acrylic varnish. In the field of wood, this type of varnish is the most common. A guitar varnish in hydro acrylic formula is resistant, shiny, and light. It will harden little by little over the days and weeks, however it remains permanently flexible and not brittle. There is also a water-based polyurethane varnish which allows you to achieve a higher level of resistance: it is therefore a 2-component varnish which hardens by polymerization.
Glossy or matte acrylic varnish Aquamin and Aquacel
two-component glossy acrylic varnishvernis acrylique brillant bi-composant

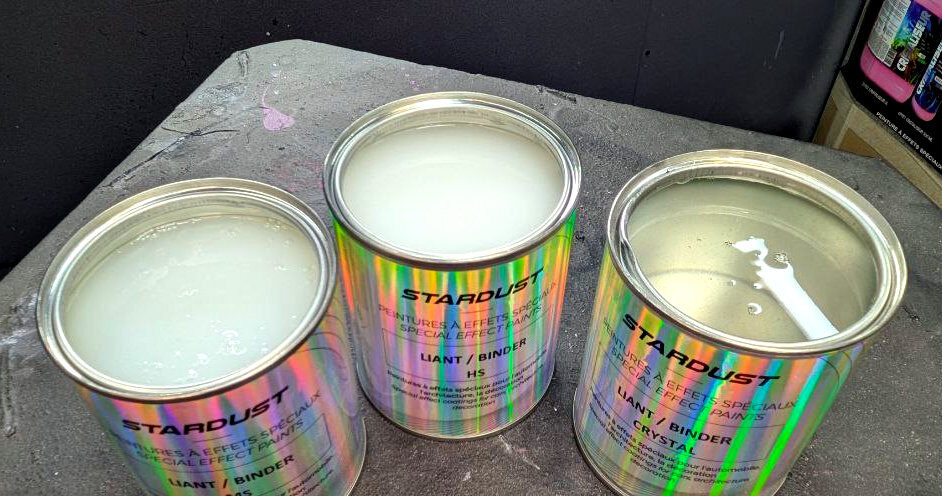
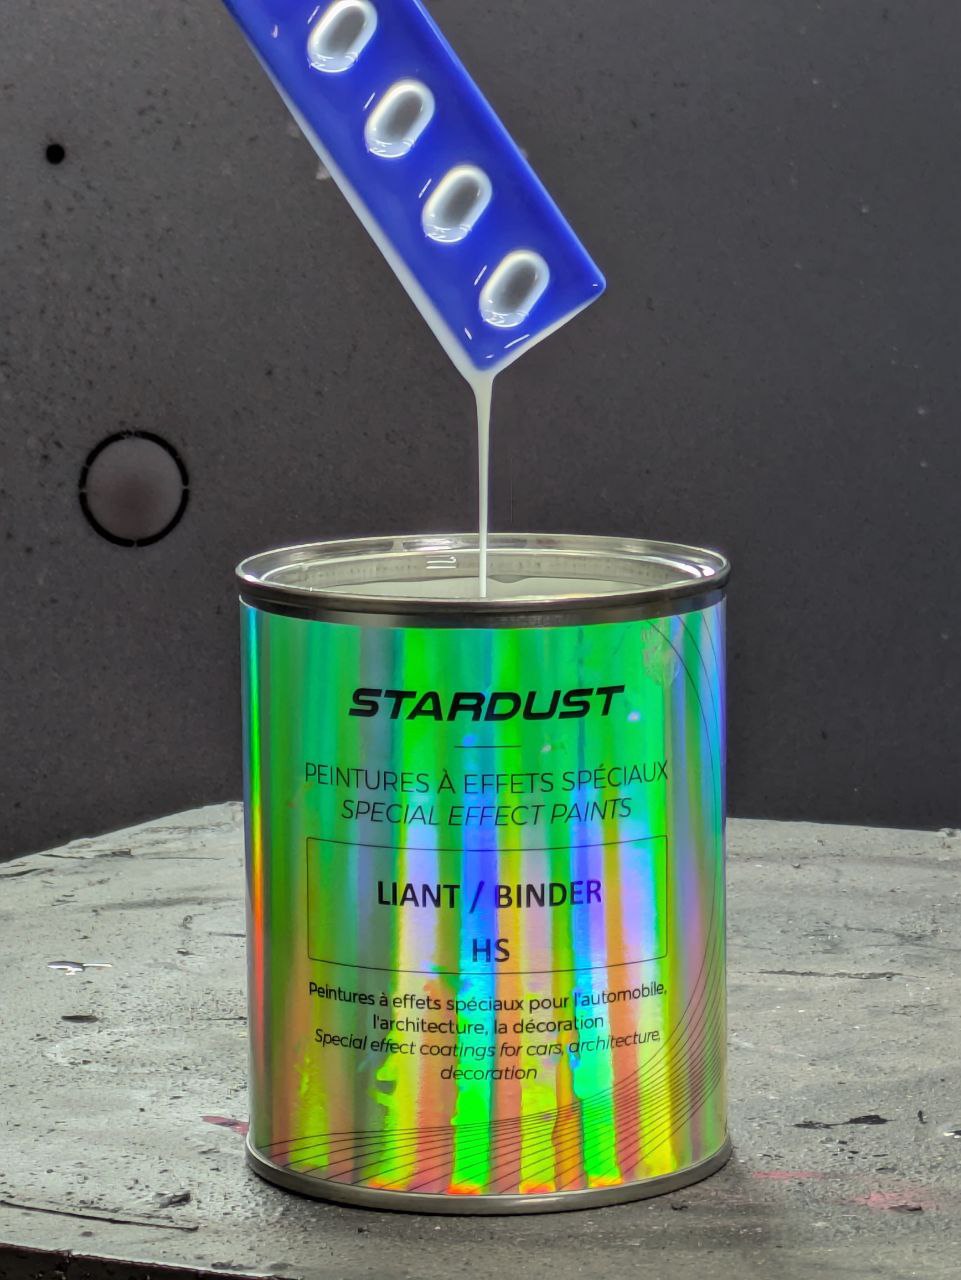
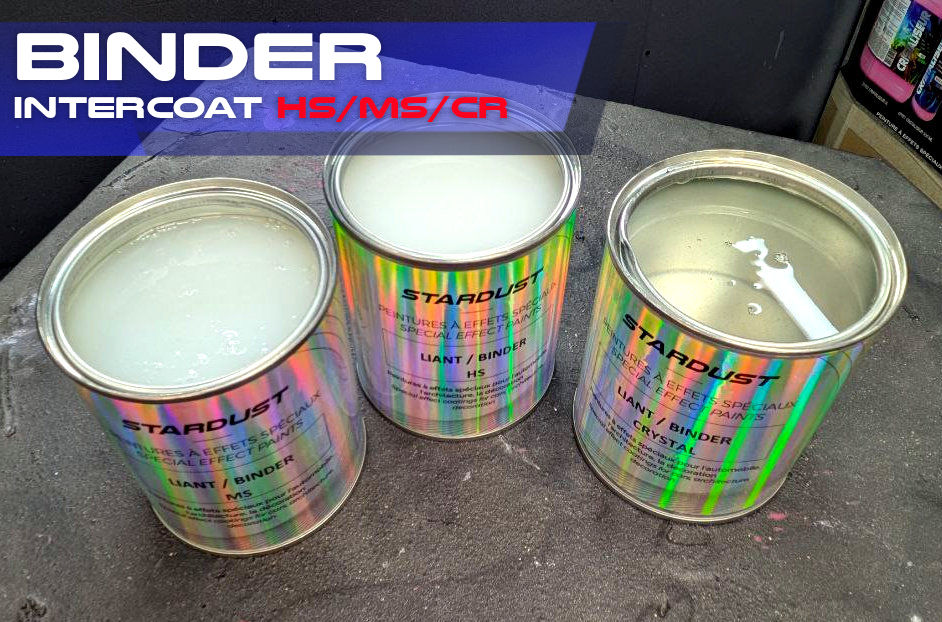
Epoxy resins for impregnation or glazing

Epoxy hydro impregnating resin/varnish
Thickness: 25µm per dry coat / Brush application
Here again these are odorless products which can be handled in the workshop without any particular protection.
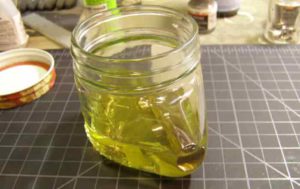
On raw wood, it is possible to impregnate it with a two-component water-based epoxy resin (Resoltech 1010) which can also be used as a very hard glossy varnish.
If one is looking for a glaze, with a deep wet effect, then the best product to achieve a significant thickness is resoltech’s 4000 epoxy resin varnish, which can create a huge thickness of up to 2 millimeters in a single coat, shiny and thick like a window. The epoxy resin is applied by pouring and it spreads itself because it is self-leveling. This glaze is probably not suitable for an acoustic guitar, it is more suitable for an electric guitar
Thickness: 1 to 3 mm per dry layer

Nitrocellulose varnishes
Thickness: 15µm per dry layer / Brush and gun application
Nitrocellulose varnishes for guitars are glossy solvent-based varnishes developed a long time ago, at the beginning of the 20th century. At the time, they wore the first automobiles. Unfortunately these were not varnishes that could resist UV or hydrocarbons. On the other hand, these are varnishes that are easy to use and dry by evaporating. They have long been used and favored by guitar manufacturers, for economic reasons and also because according to many musicians, this type of thin and flexible varnish offers the best natural properties of resonance and propagation of sound waves when applied. on guitar woods.
I invite you to discover our Nitrocellulose guitar varnish
The advantages of Nitro are simple application, no hardener, almost perfect tension, comfortable thickness and touch-ups are easy since the new varnish merges with the old one.
But it is also a defect, a finish which reacts to the slightest solvent is a capricious finish, traces or halos from contact with certain protective foams, complicated cleaning which can ruin the finish if the wrong product is used.
This is a varnish that will take months to harden completely. In short, in my opinion, it is not easy to choose such a finicky varnish, to cover an instrument that is handled often every day.

Polyurethane varnishes
Thickness: 25µm per dry layer / Brush and gun application
“A P.U. polish. is insensitive to solvents, extremely durable to handle, it is complicated to implement but frankly now with the products offered to us I do not see the point of doing without it…”
They are called 2C varnishes because they have 2 components and they harden by chemical polymerization rather than by evaporation and drying. These are solvent-based acrylic polyurethane varnishes for professional use (They are harmful and must be applied in a paint booth or with sufficient air extraction, and the applicator must wear a respiratory mask). They reach unrivaled levels of resistance in terms of hardness. They ensure and guarantee a very high level of resistance to abrasion, scratches, friction and even chemicals. This does not go without maintaining a natural flexibility which prevents them from becoming brittle and shattering over the years.
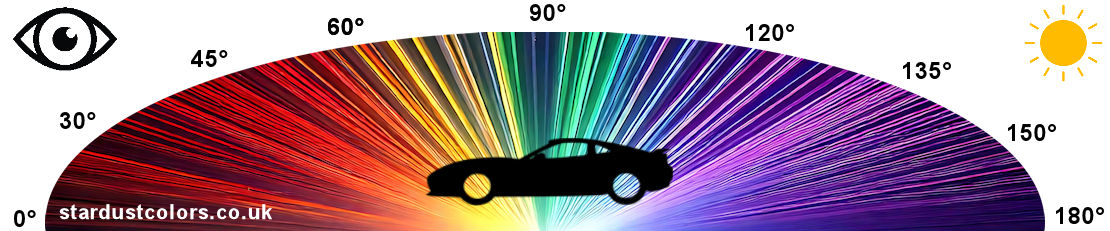
This type of varnish surpasses all other types of acrylic or cellulosic varnish in its shine. They easily show degrees of specular shine beyond 90°.
High gloss “wet look” finishes are ideal for “high polish” techniques.
My selection:

UHS830 glossy varnish kit
UHS830 two-component glossy aerosol varnish version
WetSpeed polish kit – quick versionkit de vernis WetSpeed – version rapide

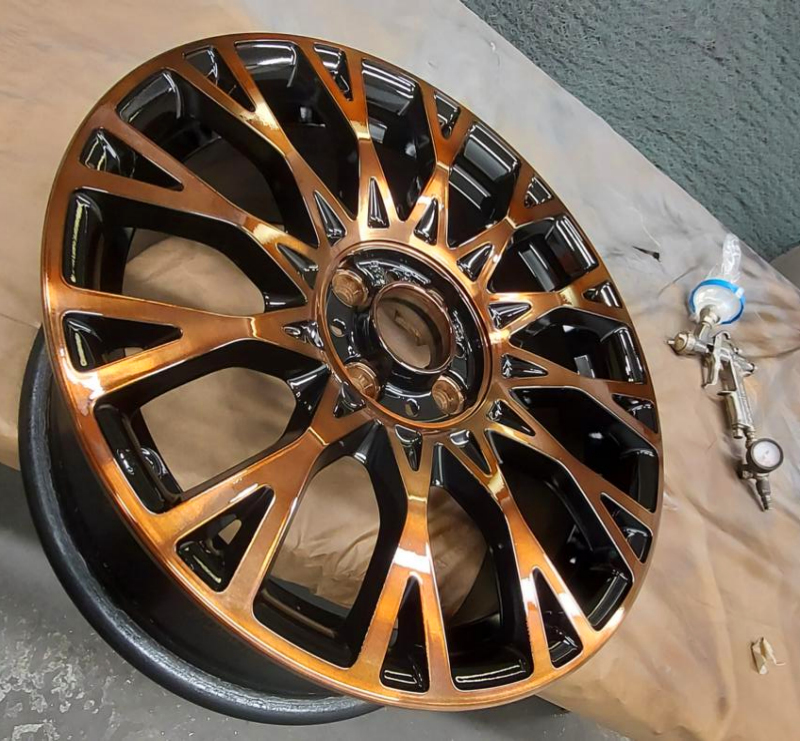
Finally, since we are talking about varnishes using bodywork, I could not end this chapter without presenting to you the best option for extreme finesse, maximum hardness and record shine, it is the ceramic varnish version X, and which dries completely in 45 minutes. Its finesse would not be unrelated to the quality of the sound obtained…

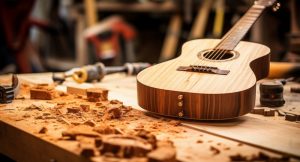
The 6 steps to varnish your guitar

Step 1 ► Prepare the Guitar Stand

If you are working on raw wood:

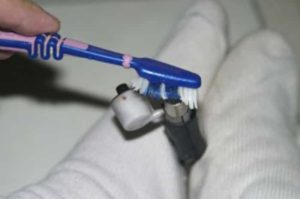
You will need to dry sand with P320 grit and a sanding block. Once sanding is complete, expel the dust with a blow gun and compressed air. If you do not have an air compressor at your disposal, then use a brush and rub vigorously to remove all micro dust and sanding residue.

On the body of your guitar with varnished wood:

Perform surface sanding with P500 abrasive grain.
I strongly advise against stripping (chemically) or even completely removing the coating by abrasion, except in the case where it is really in very poor condition and is peeling off.
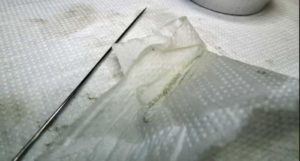
Once your varnish is sanded, use a little rubbing alcohol to degrease the surface with a clean cloth to remove sanding residue and also to degrease.

Step 2 ► Impregnate the wood


This step does not concern you if you are working on the varnished or painted guitar, that is to say with an old base sanded, degreased and dusted.
Bare wood is porous and absorbent, and as a result you need to block this bottom before you can properly varnish it.
If you apply a varnish directly to the wood, some of it will be absorbed, and irregularities and micro-bubbles will appear on the surface.

So apply a professional acrylic varnish or impregnating resin to the wood in 2 or 3 coats. Observe sufficient time between each coat to allow the varnish to penetrate into the wood and allow the water to partially evaporate.

The impregnation resin is a 2-component product, based on epoxy resin in a water emulsion. It is a product that will penetrate, block and harden the base.
I recommend the 1010 Resoltech impregnation resin that we offer.
It mixes with its hardener at a ratio of 1:1.
This type of water-based epoxy resin can be used both as an impregnation to prepare the wood of the guitar, but also as a glossy finishing varnish. Being a 2-component epoxy-based product, it is notably more resistant than a simple acrylic varnish.

Allow 12, 24 to 48 hours to dry thoroughly, depending on the number of coats you have applied for impregnation

Step 3 ► Sand

This step allows you to obtain a truly smooth and perfectly flat surface. The first layers of impregnating varnish made it possible to fill the crevices but also to create a leveling layer. This is the foundation to be able to apply the finishing varnish.

Sand superficially with P500* dry paper, without crossing!
Be careful not to sand too much on the edges and corners of the guitar parts so as not to cross over your impregnating varnish.

*It is not necessary or recommended to use a sanding sheet grit finer than P500. You don’t have to worry about visible scratches in your polish, whatever it may be. The P500 grain is sufficiently fine and it also creates maximum adhesion in which your varnish will be able to anchor itself.

Once the surface is sanded, I advise you to run your clean, dry hand over the surface of the varnished and sanded wood. Feel the texture with your fingers, and look for the slightest imperfection, look for areas that are not completely smooth and soft, or small grains remaining. Once this sanding is finished, remove all dust with a damp cloth, or use the compressed air blower.

Step 4 ► Apply varnish

The surface is clean, sanded, dry, degreased, and therefore you will be able to apply your varnish!

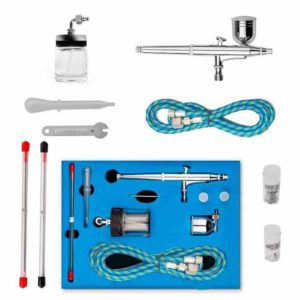
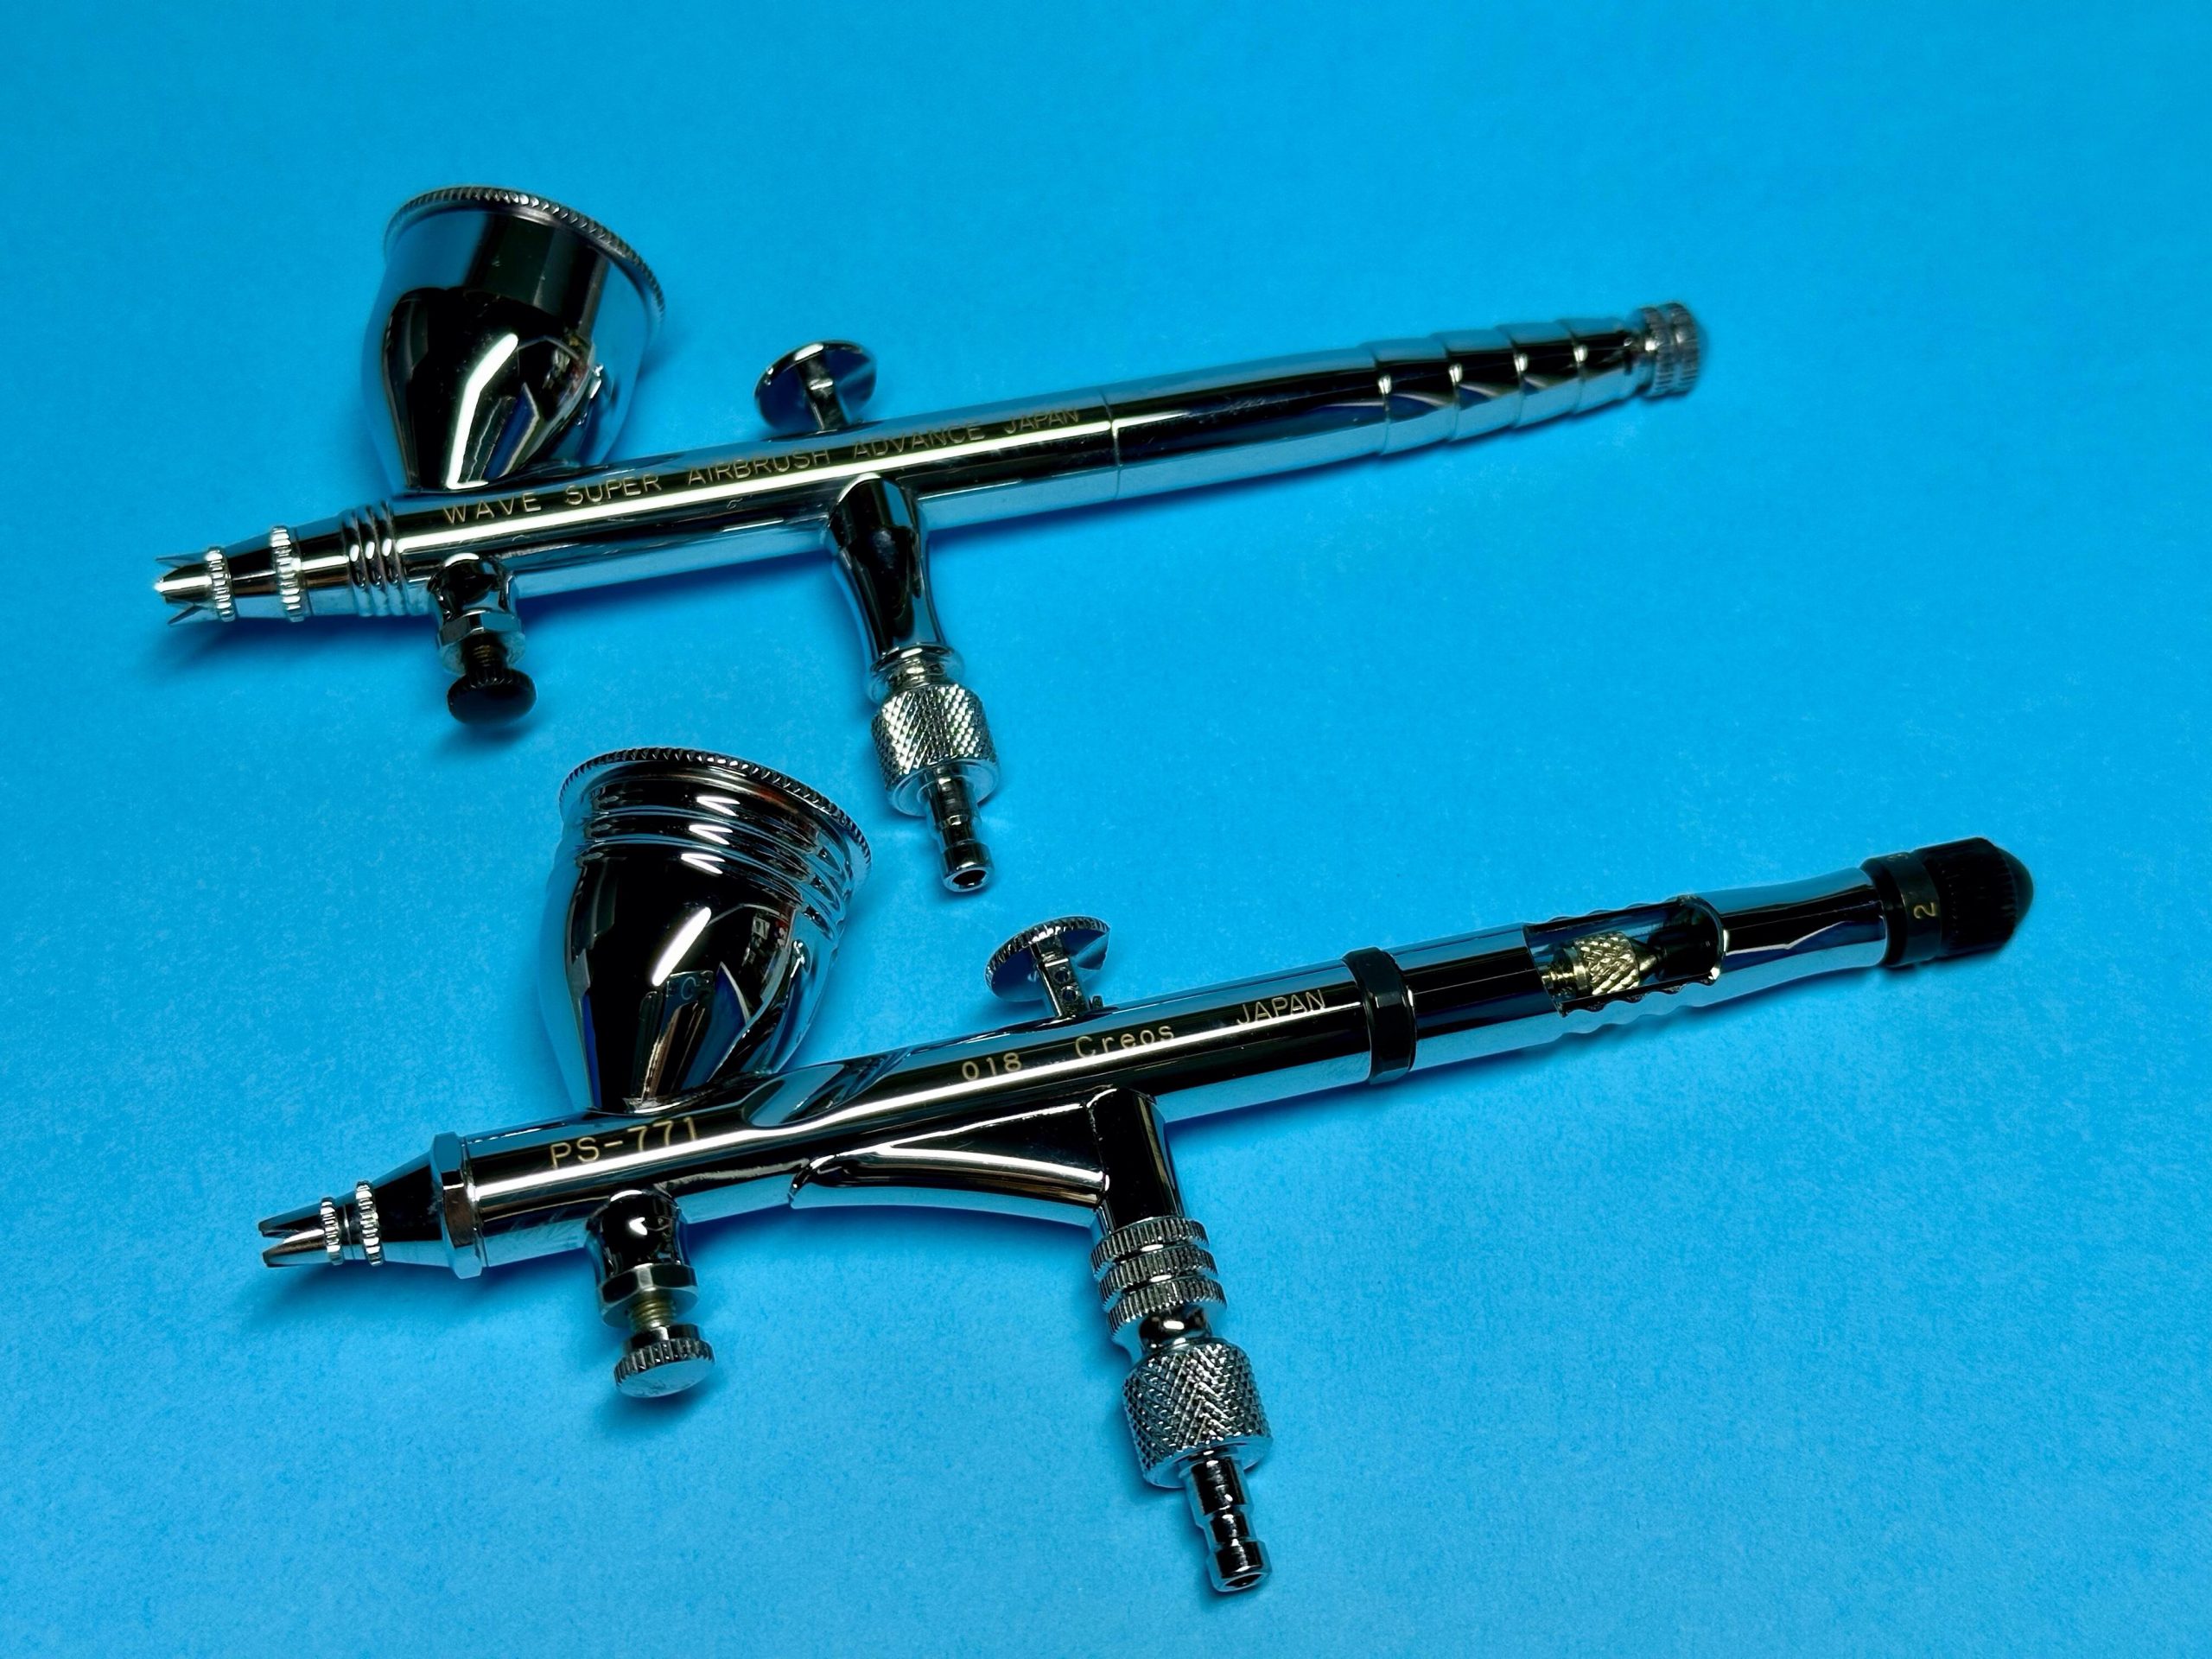
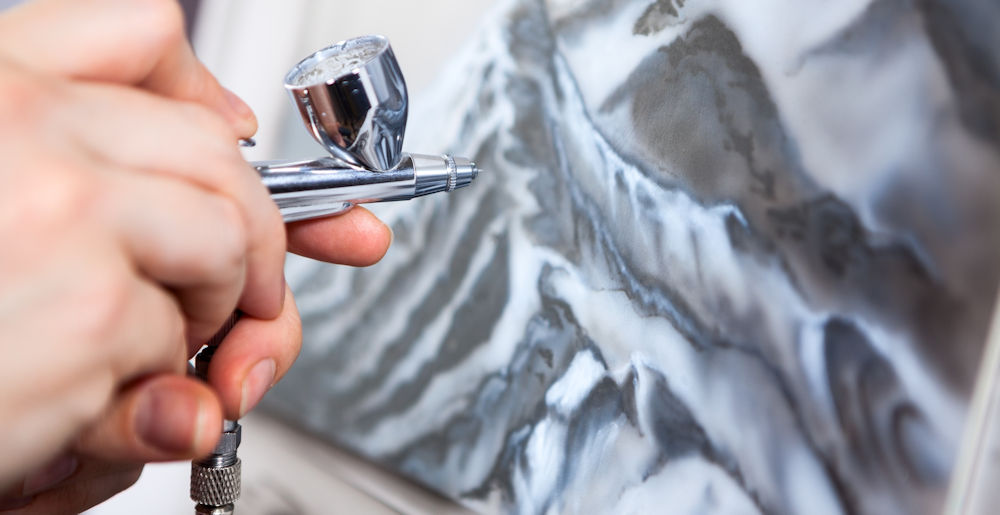
Brush, roller, airbrush or spray gun?

The best method of varnishing is with a paint gun.
You won’t be able to varnish with an airbrush, because it’s too small a tool for a guitar. Varnishing requires a certain flow of product to obtain a shiny and homogeneous layer.

If you paint with a brush or roller, then make sure to apply as thickly as possible to allow the varnish to self-smooth. For example, you can pour the varnish onto the surface of the guitar, and distribute it with the brush or roller.
The varnish is always applied in 2 coats: take care to wait until the first coat is sticky before applying the 2nd coat.

With the spray gun, we do not touch the surface because we spray and atomize the varnish from a distance of approximately 15 cm. This is ideal for obtaining a beautiful, shiny lacquered surface.

Applying acrylic varnish with a spray gun to a guitar

Use a pneumatic gun with a 1.4mm nozzle
You can dilute the varnish with up to 5% water.
Apply a thick coat, then allow 30 minutes to dry before applying a 2nd coat.

Applying a polyurethane varnish with a spray gun to a guitar

Start by preparing the mixture with a weighing scale.
Respect the mixing ratio between varnish and hardener as precisely as possible. Take careful note of the instructions on the product technical sheet and only mix the quantity necessary, as your mixture has a very limited shelf life (generally between 30 minutes and an hour)
You can add thinner up to 20%, only if necessary, for example if you are using a mini gun

Apply a medium coat, then allow 8-10 minutes for solvents to evaporate.
Apply a second and final coat (the final coat), and make sure it is thick enough to spread well over the surface to give a high-gloss wet look.

How to get a perfectly shiny spray varnish?

If you are varnishing a guitar, your goal is to obtain an ultra-glossy, thick, mirror-reflective varnish. However, it is also possible to obtain defects of lack or excess, which manifest concretely by drips or by a lack of shine.
Of course external conditions such as humidity, cold or heat can contribute to creating a lackluster varnish, however it is above all the quality of the varnish and the action of applying the varnish to the guitar that makes the difference.
The whole secret of successful varnishing lies in the “amount of varnish deposited on the surface” of the guitar: this amount of varnish results from the distance of the paint gun, the speed of movement and the angle of the gun. So keep your gun perpendicular, at a distance of 10 to 15 cm, and move your gun regularly without going too fast or too slowly.

Apply more layers

I do not recommend that you apply more than 2 coats, both in the case of an acrylic varnish and in the case of a solvent varnish. I mean 2 coats per session: applying 3 or 4 coats in one go will certainly produce a thicker coat, but will increase the risk of running, and will inevitably reduce the level of shine. This is called “burying” the varnish.

You will be able to obtain an ultra shiny and deep surface, by practicing repeated varnishing sessions, always allowing 24 hours of drying, by carrying out fine sanding, for example with P800 paper.

The best conditions for applying varnish to a guitar

I advise you to choose a day with a mild or warm temperature (Minimum 18°C), and a fairly low humidity level. If you use a polyurethane varnish and use it outdoors, be careful of dust by applying the varnish on a windless day and in a clean place. You can first fix the dust on the floor by vacuuming then with light watering. Of course, we are never safe from a small defect, a small particle, an insect which lands on the wet varnish, but it is not very serious, because we will see how to polish on a guitar varnish.

Step 5 ► Dry

Let the varnish dry and harden in a dry and gentle environment (24 hours at room temperature).
The drying time depends on the ambient temperature and also on the thickness of the type of varnish.
It is important to read the drying times detailed on the technical sheet. Some polyurethane varnishes dry thoroughly in 24 hours, and as an exception certain polyurethane ceramic varnishes dry thoroughly in 45 minutes.

In general It is possible to start handling and transporting the guitar after a few hours.

For assembly and commissioning of the guitar, I advise you to be patient and allow additional core hardening.

Acrylic or solvent-based varnishes naturally harden more and more during the first 7 days after application. It is normal that one can be marked with the nail if you press hard on the varnish.
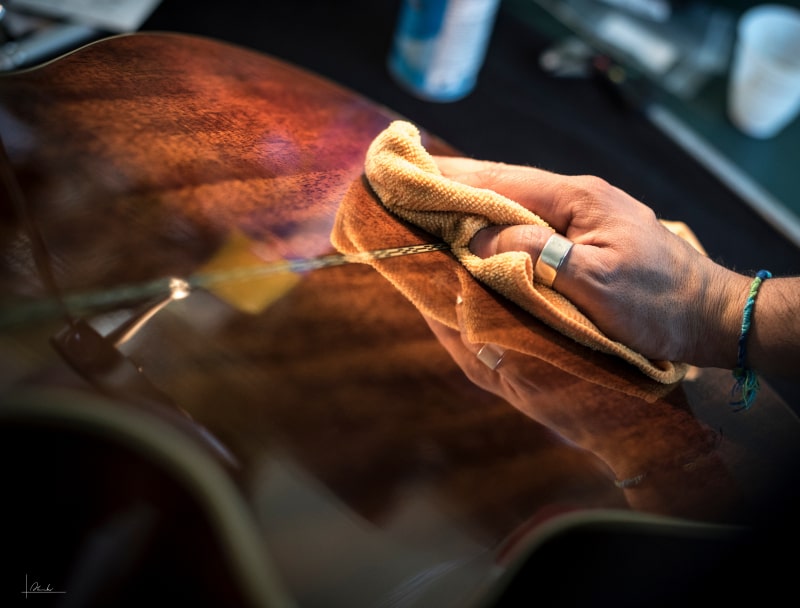
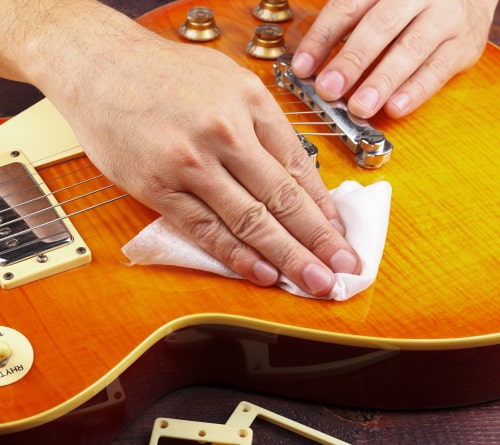
Step 6 ► Polish

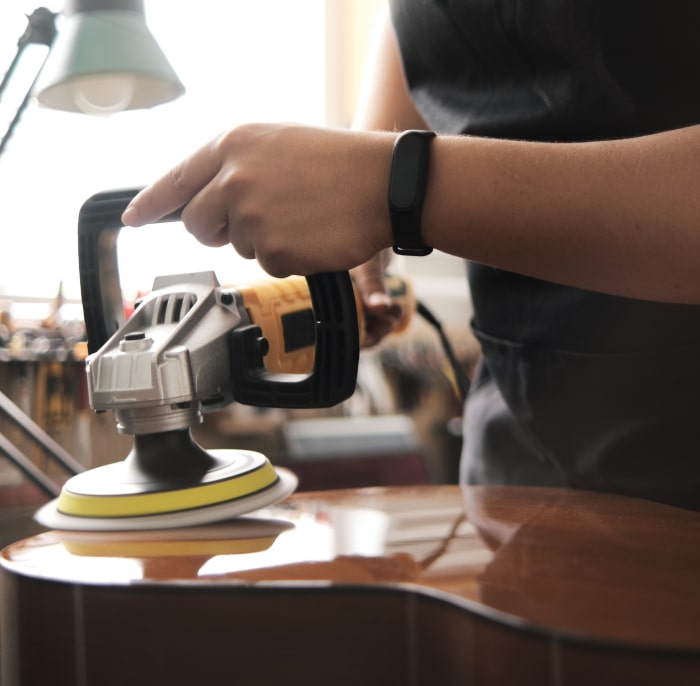
“Mirror polish” polishing is an optional step and can be carried out from 24 hours after the application of a 2-component polyurethane varnish.

It helps perfect the shine and remove certain micro defects, such as orange peel or a grain of dust.

I wrote a complete article on polishing techniques in automobile bodywork. In truth, these are exactly the same tools, the same products and the same techniques that we will use on a guitar.

Polishing is carried out with a polisher, there are even mini pneumatic polishers (link) with 75mm discs)

Defects are removed with P1500 or P2000 water abrasive discs. The shine of the varnish disappears momentarily during the first stages. Then, we must carry out the polishing with 2000 and 4000 discs and a polishing compound. The speed of rotation allows a rise in temperature which will modify the surface condition of the varnish and give it a very high shine.

VARNISH AND SOUND
If you ask guitarists and audiophiles, the choice of varnish is very important. Among the latter, some claim that it is a secret that influences the quality of the guitar’s sound.
It is true that in terms of acoustics, the type and thickness of the varnish is important. However, have the Stradivarius benefited from cutting-edge varnish for hundreds of years? The choice wasn’t as important back then as it is today!
According to Stardust, it is important that the varnish is thin, that is to say that in its “dry” state, its thickness should not exceed 50µm, or 5 times the diameter of a hair. The flexibility and hardness of the varnish (the latter will increase over time) are two important parameters.

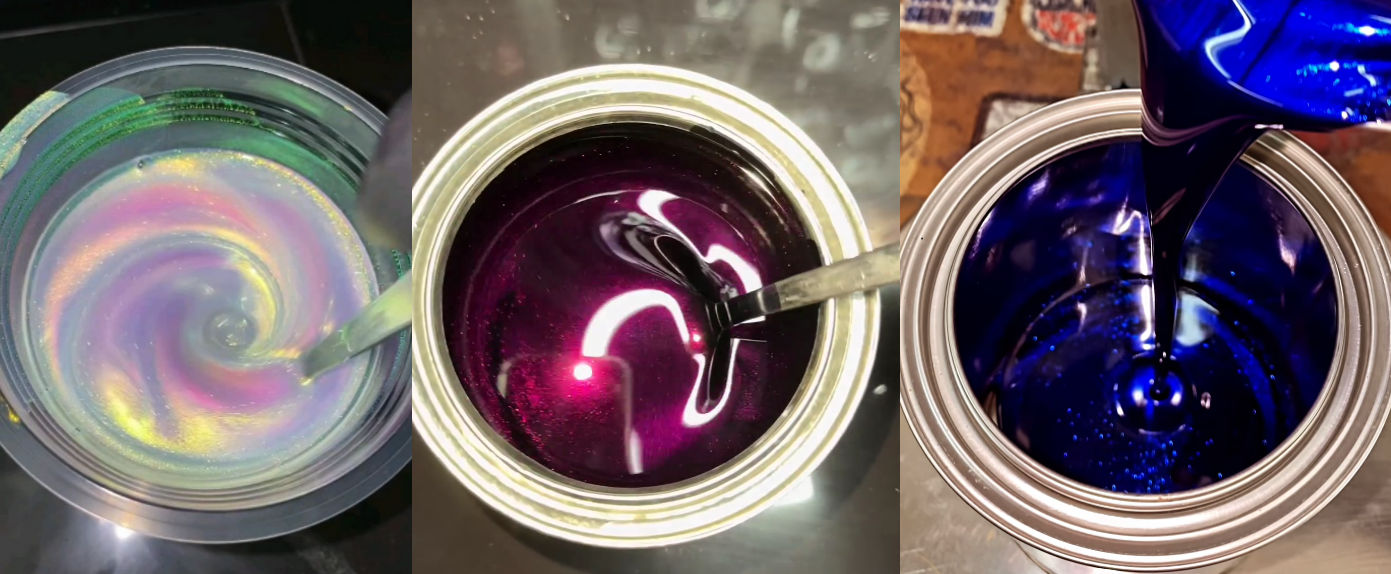
Add coloring to the guitar varnish
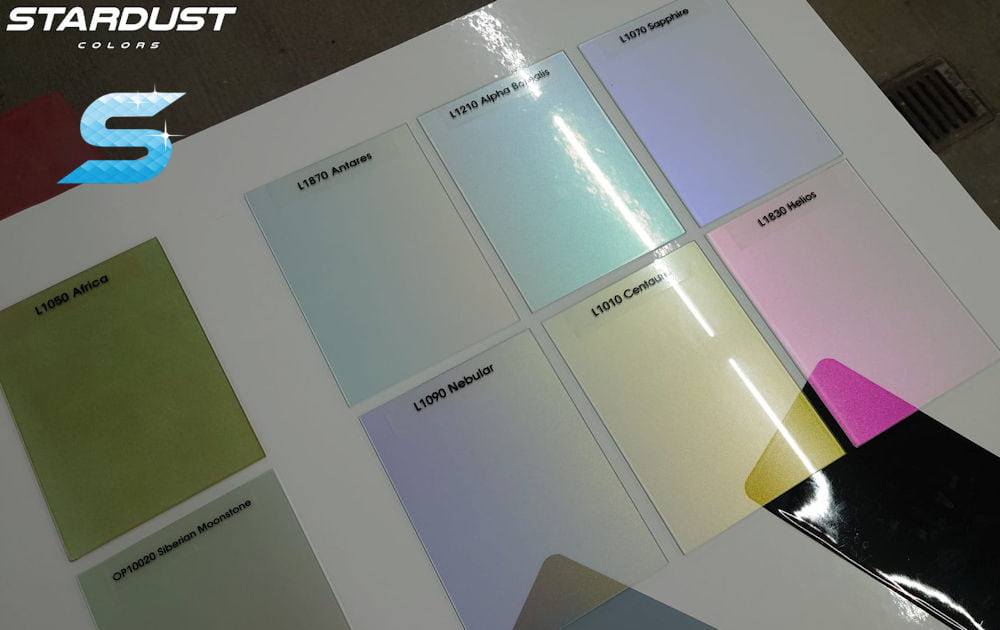
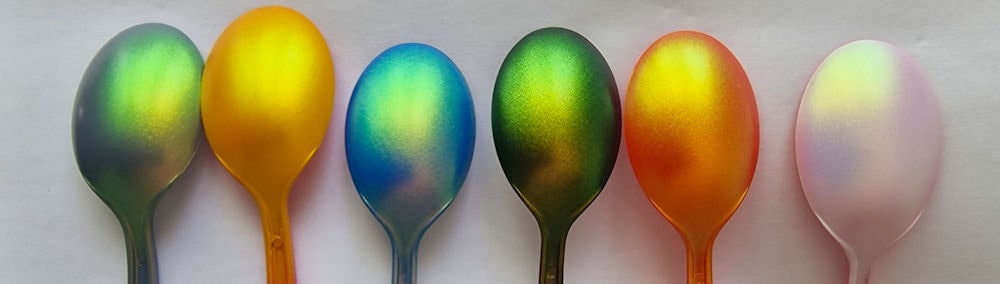
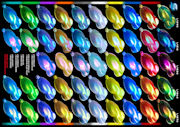
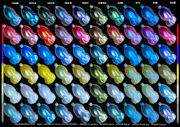
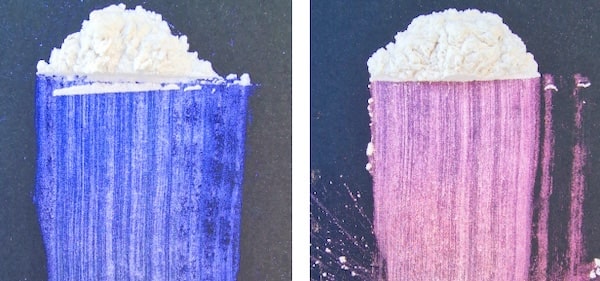
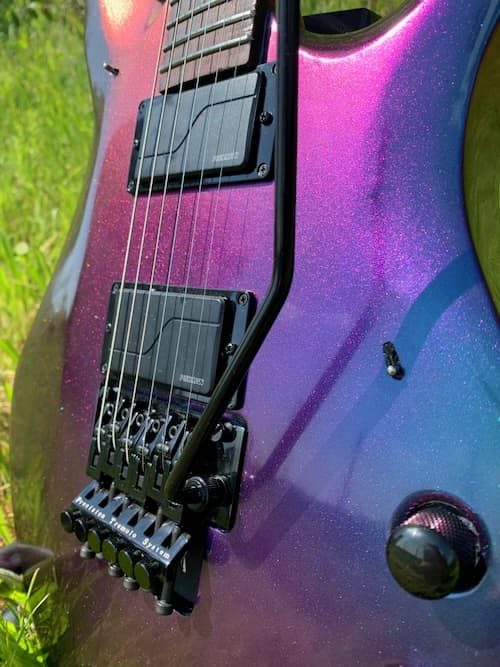
To give color, there are pigments and dyes. To create transparent coloring in a varnish, and allow tinting without masking the texture of the background, then only transparent dyes must be used.
These are concentrated soluble tints which are added to the varnish at around 5 to 7% of the total weight. These concentrated inks are called “Candy”
There are Candy inks concentrated in solvent phases
there are Candy inks concentrated in aqueous phase
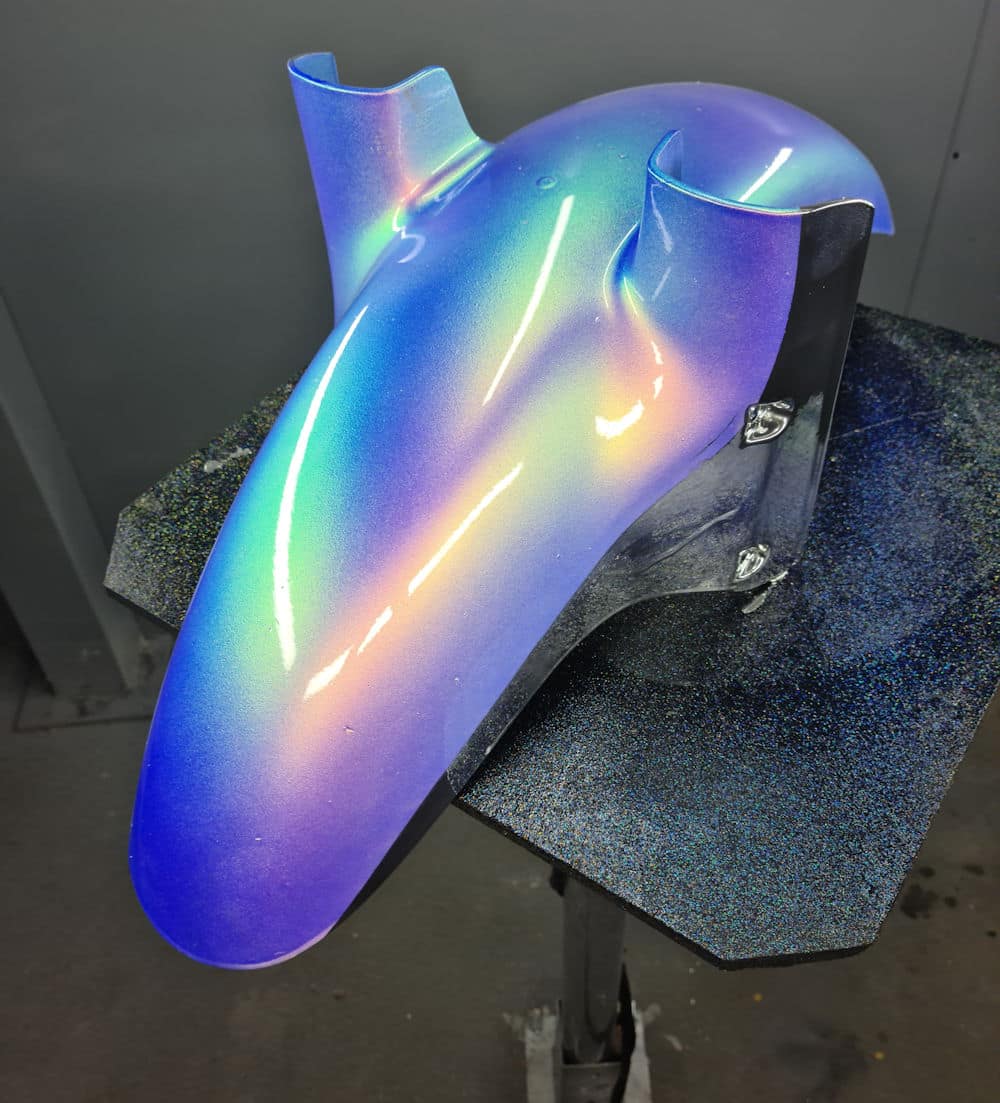
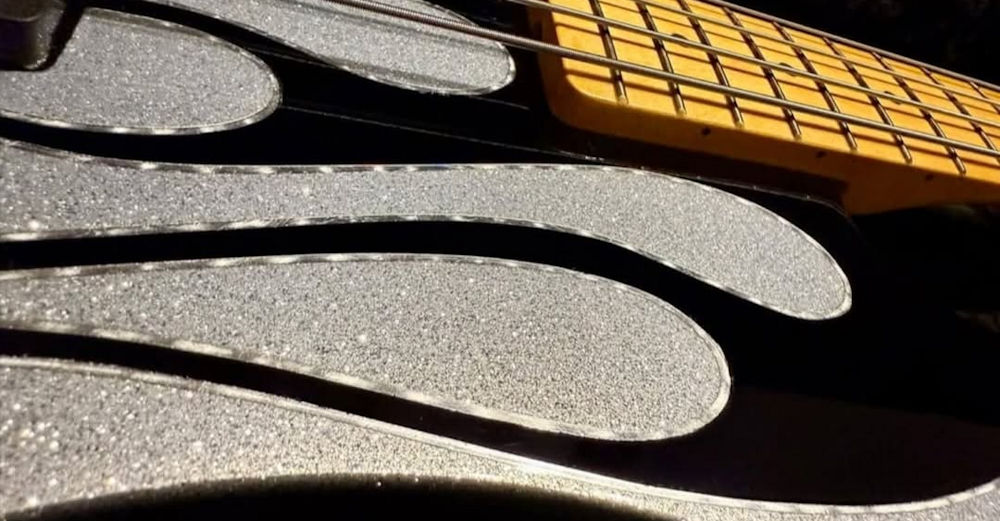
There are also ultra-fine dry pearl pigments, which can be added to varnishes to add a slight pearly reflection to the finish.

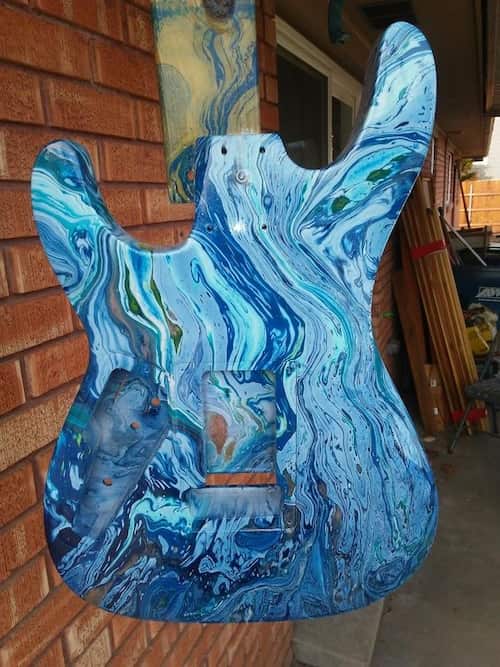
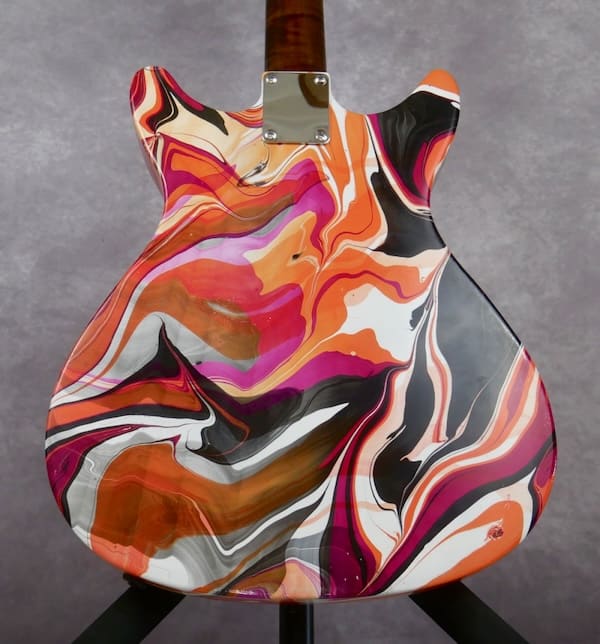
How to apply paint to a guitar?

Guitar painting: how to personalize your guitar?

Guitar painting: how to personalize your guitar?

3 ideas for tuning your guitar with special effect paint!
It is possible to personalize the painting of a car, a motorcycle, a helmet… But then, why not the painting of a guitar? What could be better than the surface of a guitar to apply a special and unusual paint?

This can be a phosphorescent paint, a fluorescent paint that becomes luminous under UV lamps, a chrome paint, or even a prismatic paint giving rainbow reflections.

Today we will present to you 3 customization ideas with effect paints for a guitar:

Guitar Tuning: how to paint a guitar?

The preparation :
Whether it is bare, raw wood, or even an old painted background, I advise you to apply a thick, covering primer, which can fill in all the micro-defects and create a perfect, smooth background. , ready to receive any effect paint.
For this, there is the filling primer in a pot or in a two-component aerosol.
These primers are available in several colors, including black which you will use to create guitar tuning ideas 2 and 3.
Sanding with P500 hydro abrasive paper.

DIPPING: guitar paint

It is in a way a Hydro printing or Hydro transfer technique, but carried out not with transfer films, but with transfer paints.
Start by making a hard base (2C primer) with the color of your choice.
Place the chosen colors on the surface of the water in a tray large enough to contain the body of the guitar. Use an interesting color combination, such as orange, purple and green with a few touches of black.

Dipping colors are specially made not to dissolve in water and to cling directly to the surface of the object being dipped.
It is possible to distort the position of colors on the water surface using a rod.

The guitar is therefore printed with your decor. All that will remain is to varnish with as many layers of varnish as is necessary to level and create a perfectly smooth and shiny surface.

artist : @burlsart

2/ Pearly and multicolored speckled effect

To achieve this beautiful effect, which produces bright, shimmering colors, you will need a hard (2C primer) and black base, perfectly black.
You can then take interfering pearls, which are available here in eight colors
And you can mix them in a little bit of transparent binder available here in small format.
Makes a liquid paste with the mother-of-pearl and the binder, which will allow you to dab with a piece of plastic or a sponge on the surface of the guitar. The pearls appear colorful on this black background. Of course, it is possible to use other background colors or even color gradients. The effects of the interfering pearls are very interesting on other background colors.

3/ The Chameleon Colorshift effect on a guitar

Here are some impressive colors that have the ability to capture attention and attract all eyes! These colors are particularly bright and intense in comparison to other metallic or pearl colors. And they have the particularity of changing appearance depending on the angle of view. So, you never really know what color they are!

It doesn’t matter if you don’t have a spray gun, you can apply them with an aerosol because they are available in the 38 colors of Stardustcolors, both in a pot or in an aerosol.
This is probably one of the most effective effects but also the easiest to achieve:
on the black background sanded with P500, you must apply thin layers, and repeat these thin layers until the black background disappears. Then we can varnish

There is a large choice of colors, with some shades changing up to two colors and even up to 8 colors depending on the viewing angle.

Phosphorescent paint in towns to save energy

Phosphorescent paint in towns to save energy

This article deals with the solution of phosphorescent road paint and photoluminescent markings, for exterior pedestrian zones and the marking of paths and obstacles, following the extinction of street lights in the city during the night.

With the increase in electricity prices in France, many municipalities have implemented switching off public lighting at night. This rather radical measure was necessary, it not only avoids high bills and it has a significant beneficial ecological impact. Not to mention the end of nighttime pollution.

Certainly some nocturnal pedestrians will naturally feel a little less safe in the dark streets, but in return they will be able to rediscover the magnificence of the starry sky, forgotten for too long!

The phosphorescent solution to light up French cities* at night

It is the company Arco Iris SAS, a small company based in Gard in 2009, specialist in Europe for all photoluminescent products, which made a name for itself by offering town halls an urban phosphorescent paint and a complete catalog of innovative solutions, durable and “luminous”! (their site: phosphorescentpaint.co.uk *)

Photoluminescent products are also called phosphorescent, and their main property is to shine or be visible in the dark, after having been charged with light, or light energy, during the day.

Used successfully indoors, in buildings, factories, or even boats, all these phosphorescent products are the ideal solution to improve the safety of people moving in the dark outdoors, in cities after dark .

5 reasons to use phosphorescent road paints for urban marking

1/ phosphorescence is an extremely durable phenomenon, which does not suffer a drop in performance over time. The old paintings present in the Second World War bunkers in Normandy are still functional after 80 years!

2/ These products are economical, and relatively easy to install, whether they are photoluminescent road paint, nails, strips, or stones or gravel. They can be adapted or created for each type of surface, floor, walls, corners, posts, etc.

3/ Photoluminescent products are ecological, because they are first of all manufactured without radioactive products and without toxic products. And they require no energy source other than that of the sun during the day. They also do not require maintenance, other than simple dusting.

4/ In a dark environment, they allow you to mark obstacles, indicate steps or corners, or even mark out a path.

5/ During the day, these photoluminescent markings are discreet. Very discreet, so much so that they are almost invisible, since their daytime appearance is colorless. Only in complete darkness do they become bright and visible.

A variety of photoluminescent equipment for town halls for marking paths in a nocturnal atmosphere

For floors, there are phosphorescent road paints. These are extremely durable paints that can be applied to almost any surface.
There are also phosphorescent arrows, but also stones, nails, or photoluminescent gravel.

Urban phosphorescent paints can be applied to vertical surfaces, such as walls, poles, or all types of obstacles: they thus reduce the risk of falls. They are also suitable for stairs, tunnels and sports areas. They are resistant to trampling, sun and rain

There are also many types of strips, based on PVC, plastic, aluminum.

If you want more information regarding photoluminescent road paints, specially designed for cycle paths or pedestrian paths, or if you wish to create equipment specially designed according to your requirements, contact our company service by email. (info@photoluminescent.fr)

Hikari Toys for Soft PVC – Interview StardustColors

Hikari Toys for Soft PVC – Interview StardustColors

For two years now StardustColors has been offering the HIKARI Toys for Soft PVC range of paints specially designed for soft vinyl toys.

Today we welcome Stéphane, a user of the range since the start of its marketing, to tell us about his hobby: sofubi painting.

> Hello Stéphane and welcome. Before getting to the heart of the matter, can you introduce yourself in a few words?

Hello to the whole Stardust team! So Stéphane, I have been a sofubi collector since 2009. In 2016 I decided to take the plunge and start painting this type of toy to give an extra dimension to my hobby. I also have an Instagram account (https://instagram.com/_thechogokinjawa_) where I present, among other things, my projects trying as much as possible to present their WIP (Work In Progress) to show the different stages of painting until the final result.

> But what exactly is sofubi?

Sofubi is the phonetic contraction of the Japanese “sofuto biniru” which refers to PVC toys. In the hobby we use this word interchangeably or sofvi, the English contraction of “soft vinyl”… it’s quicker than talking about soft vinyl toys… and a little more flattering too (laughs).

> How long have these types of toys been around and where do they come from?

Originally these were Japanese toys which began to be produced after the Second World War for the American market. But from the 1960s, sofubi took on real importance in Japan with the marketing of toys based on films and TV series around Godzilla or Ultraman. Very quickly sofubi developed, mainly on the themes of monsters (kaiju), robots or creatures of traditional Japanese folklore (Yokai). At the end of the 90s, sofubi took on a new dimension when street wear stores such as Bounty Hunter decided to start selling soft vinyl characters. Since then, this phenomenon has continued to grow, sparking vocations beyond the street culture community and has even spread to other Asian countries (China, Hong Kong, Taiwan, Thailand). ) or the United States. Today the themes in sofubi are almost endless because it is an environment where everyone can give free rein to their imagination when it comes to creating a figurine. From very gory to very kawaii (which means cute in Japanese) there is something for everyone!

Sofubi offers a very wide variety of themes, sizes and colors!

> But what ultimately differentiates the sofubi from other toys?

Compared to toys that can be found on the market, I would say that a sofubi can appear extremely simplistic and sometimes give the impression of being one of those cheap toys that you see at fairgrounds.
It’s true: a sofubi is made of hollow plastic, is made up of few parts (this can range from two to at most ten) and is not very articulated (it is often the bare minimum: head, arms and legs).
And this is for good reason: each sofubi is made by hand using artisanal techniques that have not changed since the very beginning. We are therefore very far from mass production and in the end the number of copies of a sofubi will not exceed a few hundred (or even thousands for the most fashionable models) over several years.
On a sofubi the effort is focused on two aspects. First of all, the design: some artists produce phenomenal work of sculpture with incredible attention to detail. And then the painting: each piece being painted by hand, the sofubi leaves the door open to all possible and imaginable shades.

Anatomy of a sofubi

> Thank you for all these details and this transition to the theme of painting! What do you think is the main difficulty in painting a sofubi?

The main difficulty in painting a sofubi? I would definitely say it’s finding the right paint! (laughs)
More seriously, I think that before starting to paint any object (a plastic model, a resin kit or a sofubi), you have to “get to know it” to determine which paint will be the one. more suitable.
The case of sofubi is quite particular in the sense that it is the way in which it is designed which will dictate the choice of paint to use.
In fact, to paint a sofubi you have to start by dismantling it. To do this, we will soften the vinyl by heating it. So far so good.
Once the different parts have been painted, everything must be reassembled.
And this is where things get complicated: the painted parts will have to be softened again by heating them to fit them into each other.
We therefore need a paint that is both flexible to withstand the pressure that we will exert on the parts during reassembly and resistant to the friction that can occur in certain places of the sofubi (which I remind you is not necessarily perfect because it is made in an artisanal way).
The optimal solution therefore lies in a vinyl paint which combines these two properties, because it has the particularity of creating a chemical bond with the vinyl substrate of the sofubi.
Before StardustColors launched its HIKARI Toys for Soft PVC range, there was none of this in France or even Europe. The arrival of your paint was a real game-changer!

Hikari Toys paint with matte varnish from the Graphic range

> But then what did you do before HIKARI Toys for Soft PVC paints?

In principle, you can paint the sofubi with almost any type of paint other than vinyl paint: acrylic (water or alcohol base), solvent-based or enameled (enamel).
But they are not really suitable because none has the capacity to create the chemical bond with the vinyl substrate that I spoke to you about previously.
As for me, I used solvent-based paints for their quick drying and relatively good resistance to friction. I could quickly handle the part which was very quickly dry to the touch and continue working on it.
On the other hand, at the time of reassembly, if the paint is not suitable it can quickly turn into a nightmare: the paint can crack (or even jump), poorly resist the heat (resulting in fingerprints on the part) …I can’t count the number of times I’ve ruined hours of work in just a few seconds. I won’t hide from you that this type of mishap, which happened quite regularly, was extremely frustrating and even discouraging.

> Very good, but StardustColors is not the only company producing vinyl paints for sofubi. So why not use other brands?

Because the other manufacturers are either in Asia or in North America and in the best case scenario I could have bought the paint in concentrated form but not the thinner, due to international air transport regulations.
And I’m not going to teach you this: each paint has its appropriate thinner. Painting is above all chemistry! (laughs).
In short, without the thinner specially designed for paint, it is impossible to extract its full potential, especially knowing the rather particular properties of vinyl paint…but here I am starting to get into the technical details.

> That’s perfect, so let’s talk technical now! First of all, what materials do you need to paint sofubi?

Basically, a sofubi is painted with an airbrush because vinyl paint is not particularly suitable for painting with a brush.
You will need an airbrush that is absolutely equipped with Teflon (PTFE) seals to resist solvents….otherwise I won’t give you much of your equipment after a few uses. And of course add a compressor to it.
I advise you to choose airbrush brands whose reputation is well established: Japanese (Iwata, Wave, GSI-Creos) or German (Harder & Steenbeck). They are all very good, although I must admit that I have a slight preference for Japanese airbrushes.
I suggest you first opt for a versatile airbrush with a 0.3 mm nozzle. It will allow you to do just about anything you want. And if you decide to go further in detail work, then I advise you to add a 0.15 mm or 0.18 mm airbrush to your painting equipment.
Of course, using an airbrush with vinyl paints requires taking precautions for your health. So cartridge mask and paint booth with extraction to the outside are mandatory!
Finally, when it comes to cleaning my equipment, I use acetone or cellulose thinner and it does the job very well.

At the top the Super Airbrush Advance (0.3 mm) from Wave and at the bottom the PS-771 (0.18 mm) from GSI-CREOS

> Before starting to paint a sofubi, should we take any special measures?

Firstly, I degrease the toy because there are often residues of mold release products. Getting rid of it will help the paint stick.
For a plastic model or a resin kit I generally use soap or dishwashing liquid, but for a sofubi it is the paint thinner that will be used for cleaning.
Not only will this degrease the part but it also prepares the vinyl to be painted. Cleaning with thinner creates a temporary reaction in the vinyl (it will feel sticky to the touch) and this will promote the famous chemical bond with the paint.
As for me, I clean the part by rubbing it with a cloth soaked in thinner then I immediately apply the first sprays of paint to retain all the benefits of this cleaning.

> Now let’s talk about using HIKARI Toys for Soft PVC paints. What advice could you give to someone who is going to use them for the first time?

I have advice that can be summed up in just one word: dilution.
I consider this to be the essential thing to have in mind, not only when painting with an airbrush but even more so with a vinyl paint like HIKARI.
When it is not diluted enough, a vinyl paint will quickly let you know because it has the particularity of producing a “cobweb” effect. You will end up with filaments on the object when spraying the paint and I can tell you, the first time it feels funny! Increase the dilution and the problem will disappear instantly.
Vinyl paint is also sensitive to ambient temperature. Be extremely vigilant about this, otherwise you risk exposing yourself to another phenomenon: overspray.
Concretely, when spraying the paint you will notice around the painted area the appearance of a white powdery layer, often in the corners of the room. This is because the paint is already almost dry when it comes into contact with the part. If you have not changed the pressure at which you are working then this means that your dilution is not sufficient in relation to the temperature.
In short: for the same paint application, the dilution may vary depending on the season.
And to be really calm, I advise you to add HIKARI “retard” to your diluted paint. As its name suggests, this product will delay the drying of the paint and will therefore further limit the risks of overspray.
If, despite all this, you still have a slight residual overspray, I’ll give you a little tip: a veil of pure HIKARI “retard” quickly sprayed on the bleached area will solve the problem.

> Thanks a lot for the clarifications ! In the end, what dilution would you recommend?

Personally I work with a dilution between 1:1.5 and 1:2 by volume (the first number being the volume of paint and the second that of the thinner) with a pressure of 20 psi at my compressor.
If I ever have to paint small details or want to work transparently then I increase the dilution. This can go up to 1:5 or even 1:7 and I adapt the pressure accordingly.
As I always prepare bottles of previously diluted paint, another little tip: by default I always add between 2% and 3% by volume of HIKARI “retarder”. This is the price of a certain tranquility! (laughs)

> Before ending this interview, do you have a few last little secrets to share with us regarding sofubi painting?

With pleasure! First of all, the first will concern painting with the HIKARI Candy range on transparent vinyl sofubi.
Even if the dilution is appropriate, it is possible that at the transitions between the different Candy colors you will have some sort of tarnishing.
To remove this effect, I spray a fine veil of pure Hikari “retarder”.

My second tip will concern the final appearance that you want to give to your sofubi. Basically, HIKARI Toys for Soft PVC paints have a satin finish. To give your sofubi a matte appearance, apply a layer of Medium HIKARI and that’s it!

Finally, two tips for the sofubi reassembly phase.
First of all: patience! Even if HIKARI Toys for Soft PVC paints dry very quickly to the touch (a few minutes), wait at least 24 hours for them to be completely dry before reassembling your sofubi.
And then: moderation! HIKARI Toys for Soft PVC paints are certainly flexible and resistant, but they are no less heat-sensitive. So heating the room to too high a temperature risks having the opposite effect to that sought: certainly you will very quickly soften the painted vinyl but you also risk starting to melt the paint and damage it when you go. re-fit the parts.

Sofubi made with HIKARI Toys for Soft PVC paints

> Thank you Stéphane for all this information! I think readers of the blog are now ready if they want to get started with sofubi painting!

Being a PLAMO builder: GUNDAM-GUNPLA plastic painting and modeling

Being a PLAMO builder: GUNDAM-GUNPLA plastic painting and modeling

Stardustcolors introduced you to modeling on PVC toys (SOFUBI), modeling on radio-controlled models (LEXAN), modeling of miniatures and figurines, and today here is another family of modeling: GUNPLA or GUNDAM modeling. Here too, paints are used to personalize the parts of miniature robots.

Several types of paints can be used for the world of GUNDAM:
► Solvent-based airbrush paints for PVC: HIKARI Toys range
► Water-based acrylic airbrush paints: Stardust Pro range
► water-based acrylic airbrush paints for plastics: HIKARI RC range


First of all, what is PLAMO? a Weapon of War? No no……The term PLAMO is a contractive term of Plastic Model. This refers to plastic models to be removed, for which you do not need glue or paint to have a finished result.

This hobby became popular with the “anime Mobil Suit Gundam” in 1979, which gave rise to a variant of GUNPLA. This notably designs the GUNDAM plamos. Then there is an abuse of language, because we say “gunpla” for all plamos…… “I fight regularly on that…. » explains André ( @aivon_lepgm ), specialist in PLAMO modeling
For the assembly of the different GUNDAM modeling figures, there is a notice with the number of the parts and each letter of each sprue.

For assembly, a pair of precision tweezers, a glass file, do the job from the start. You should avoid low-end equipment anyway!

In the photo above, we can see a Dspiae pliers (red), a Tamiya pliers (black) and a no name pliers. There is also a Shave Plus file from Gunprimer. (It’s high-end.)

Afterwards, when it comes to cutting and editing, just take a look at YT where there are already so many videos on this…
As for the final result, we have the choice, either leave it as the kit provides at the end, with the stickers and other decals, or paint them. And to do this, there are a whole bunch of paints, my choice is Stardustcolors, a French brand. (I made my two YT and Instagram videos on it under the nickname Aivon_Lepgm.)

Interview with André, PLAMO modeling specialist

► André, do you have an idea of how many enthusiasts of the practice of GUNPLA/PLAMO are identified in France and around the world? What is the country where this art is most widespread?
Wow, a difficult answer, I even think that there are no official figures in this hobby. In the sense that there is no federation (there are associations) or anything else for the census. But I know from sources that Bandai has sold more than 500 million copies worldwide.
It is no surprise that the Asian continent is the must have. They are the ones who have the greatest potential, a custom expert with us is the equivalent of a beginner with them (that’s another dimension there). Japan wins the prize in sales, limit, this country alone accounts for the sales of the rest of the globe!

►What is a Nakamas?
Ahahah, I always say in my videos “hello nakamas”, this comes from my manga universe, and in particular One piece: or a nakama, is a crew member who has become more than that, who is part of the “family “. Otherwise it comes from Japanese: means colleague, compatriot, companion, or comrade.
► What is the material that different plastic Gundam models are generally made of? What type of plastic exactly?
The middle of the plamo is made of plastic, and in particular ABS and polystyrene ,
►Are you making Plamo today using 3D printing?
I just make the supports for my plamos, but you can find a lot of parts on different sites for that. But maybe one day yes, if I’m missing a part or for a big custom why not.
► In the field of GUNPLA paint, do we use solvent paints or Hydro paints when we want to personalize parts?
It depends on the builder, because some will only look at solvent-based paints, because their quality is still superior to “hydro”, but much more harmful. And on the contrary, some prefer hydro, for the ease of use, cleaning, and the odorless side.
I’m a fan of both, I don’t have a preference on that. Because both offer equivalent choices.
►For finishing paintings on GUNPLA, is glossy varnish or matte varnish preferred?
It all depends on the finish, we tend to varnish in gloss before applying panel line (enamel juice to accentuate the lines), to facilitate application and protect the parts (because the bandai plastic can crack with the uses panel line. Basically, it all depends on what the Builder wants to do.
►What shades do you prefer to personalize your GUNPLA models?
I like the chameleon effects, but that’s my side: “I love fast and furious Tokyo drift” (ahahaha). I like all the shades, I’m not very picky about it, the advantage of our hobby is this enormous freedom to do what you want quite easily, without a lot of space, and with the paints that ‘we want. I really liked the paints I used from Stardustcolors, I find that the ease of use saves us time. And that is not negligible.