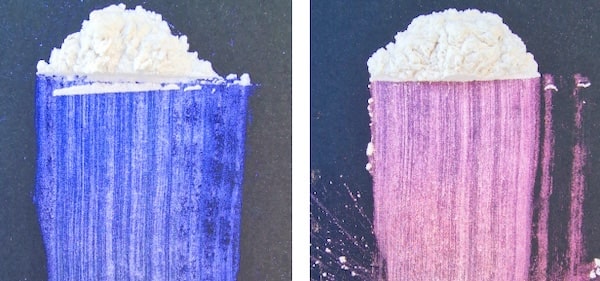
Techniques for modifying chameleon paints and mixing them with Candy inks

Techniques for modifying chameleon paints and mixing them with Candy inks

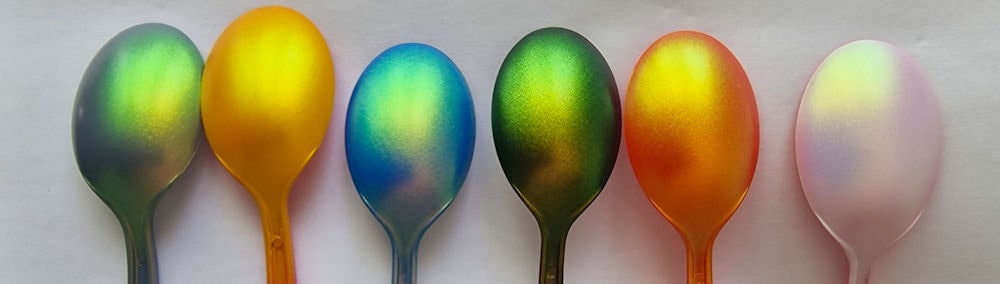
There are several ways to modify a chameleon to produce a colour variant, whilst retaining that fascinating iridescent colour-changing effect.
Before explaining the various options for using a chameleon to create new colours, we need to explain that there are essentially two main families of chameleon:

  • Classic-style chameleon paints, which are semi-opaque pearlescent particles. Like all pearlescent paints, they are not completely opaque; they consist of mother-of-pearl coated with iron oxide, which creates the appearance of a coloured powder that can be blue, red or copper-coloured.
  • Transparent-type chameleons: these are made from pearlescent particles that appear whitish but are, in fact, almost completely transparent. They consist of flat particles of synthetic mica coated with a thin layer of titanium oxide or silica. This allows light to pass through, revealing the underlying colour almost unchanged.

The first technique involves changing the background colour :
Usually, a chameleon paint must be applied over a black background to reveal the chameleon’s original colours. So try using different colours for the chameleon’s base coat and you’ll be able to see the variations compared to the standard application. The colours can be dark or light, and they must always be solid, opaque colours. Background shades can include bright red, navy blue, yellow, grey, or even a more complex colour.
The result will be much more varied with transparent-type paints, whilst opaque chameleon paints will reveal almost no change at all.

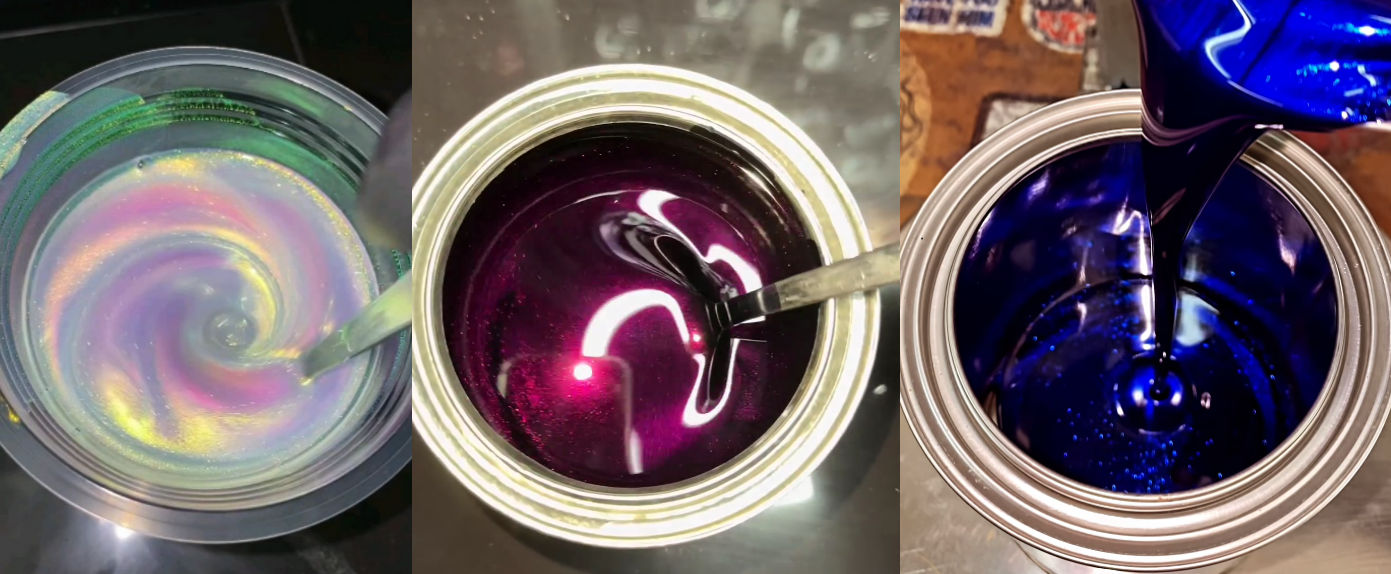
Mix Candy with a chameleon Stardust Colors

Second technique: add some Candy
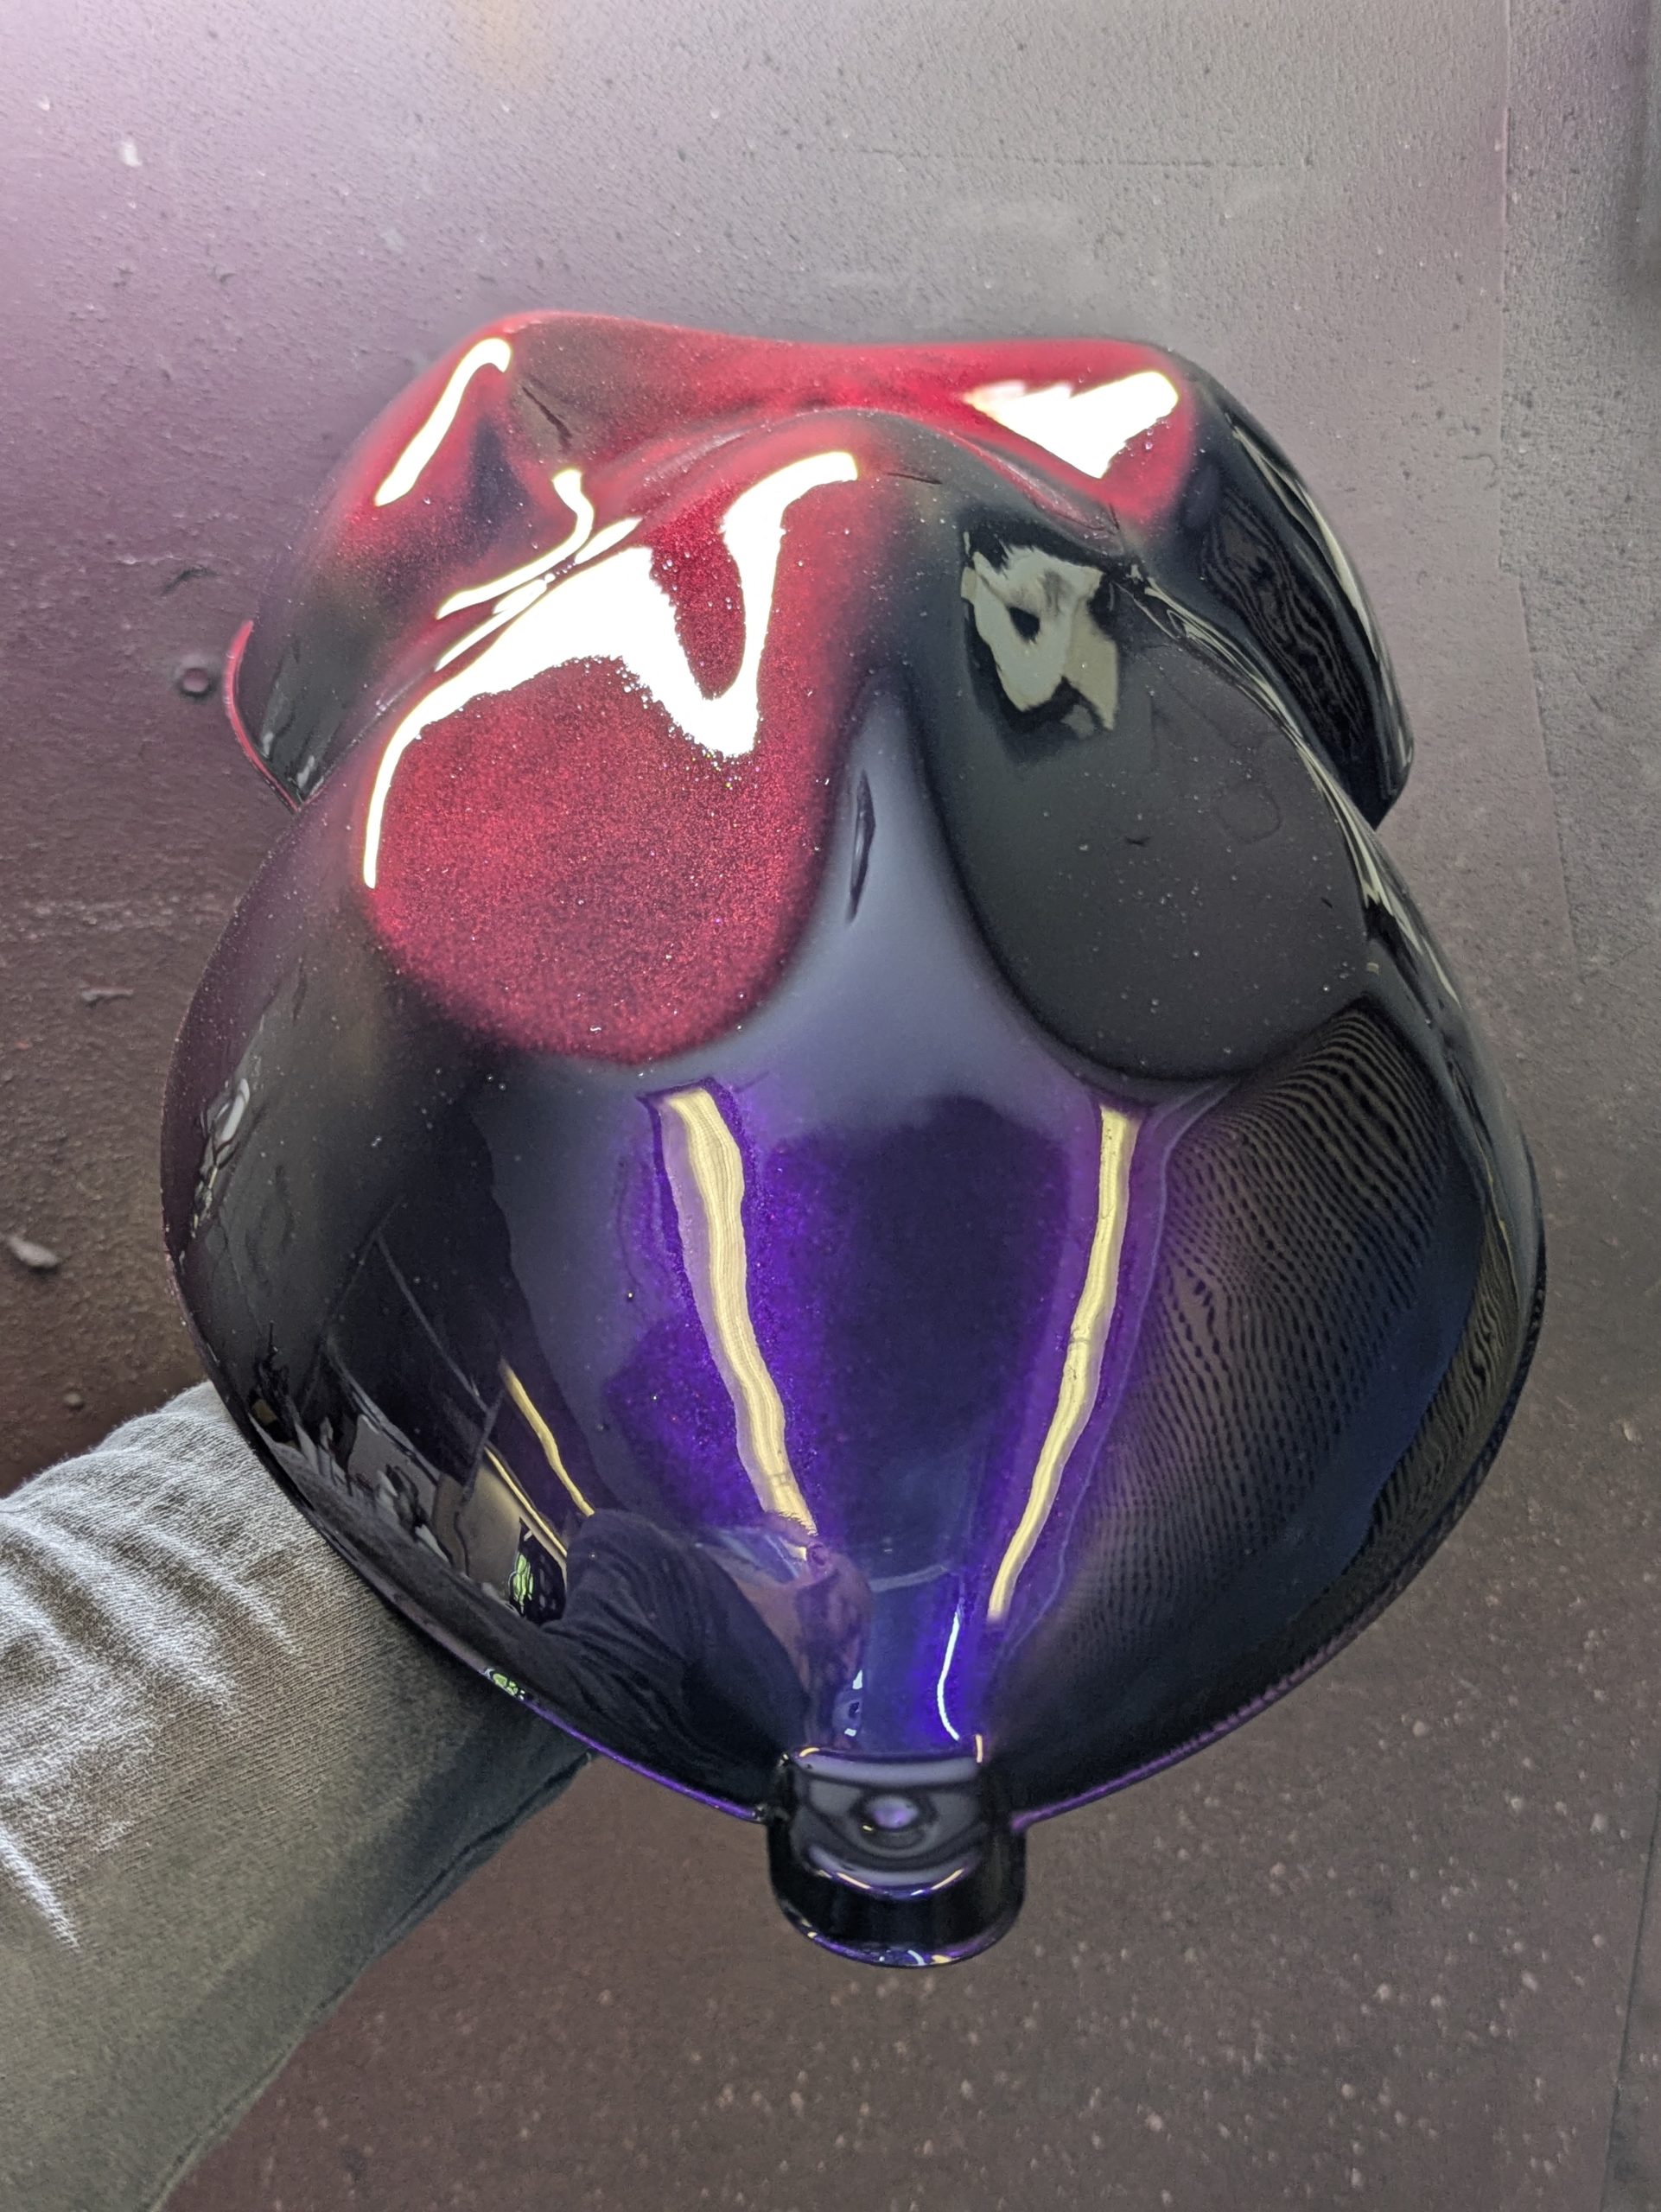
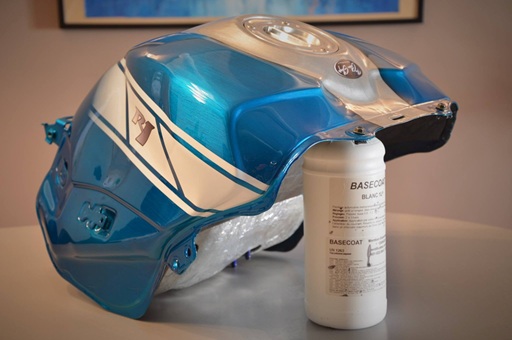
Candy dyes are light-transmitting colourants that allow light to pass through, in contrast to opaque pigment dyes which block light. Candy dyes can be added to chameleon dyes to filter incoming and outgoing light and bring about a subtle or even radical change to the chameleon’s iridescent colour.
It should be noted that the more Candy ink you add, the more the colour change will fade. Candy should therefore be used sparingly.
You can choose a Candy shade similar to that of the chameleon to enhance the colour and intensity, or a contrasting shade to create effects of depth and more complex, subtle colours.

The third technique: mixing with other types of paint:
It is possible to mix chameleon paint with other particle-based paints, such as pearlescent or holographic paints, and even aluminium paints.

How to achieve mirror-like gold colours using NeoChrome paint and gold pigments

How to achieve mirror-like gold colours using NeoChrome paint and gold pigments

Thanks to the new Neochrome paint and the Candy colourants from the Precious Metals range, it is possible to achieve high-quality decorative finishes with a look:

* Satin nickel * Bright nickel *Polished metal
* Mirrored chrome * Bright gold, pale gold, warm gold * Copper

* Rose gold

* Bronze

* all the vivid colors

For example, a company specialising in the manufacture of metal fittings and decorative components for furniture, which already has a painting/lacquering facility complete with a spray booth and spray guns, wishes to develop in-house finishing capabilities for its prototypes, commercial samples and small batches, as well as its mass-produced parts, in order to minimise the need to use subcontractors for electroplating.

Materials that can be painted include, for example, metals such as Zamak or brass, plastics such as PVC or ABS, 3D-printed objects, wood, etc.:
StardustColors paint systems offer an effective and relatively easy-to-apply solution.
To achieve this type of result, we offer:
► Primers or adhesion promoters suited to each material.
► The most suitable nickel, chrome and gold effect paints.
► Protective ceramic, gloss, satin and matt topcoats

Applicable to spray guns
Available as a complete kit
Both in small packs for testing purposes and at special rates for industrial production.

If you wish to reproduce or imitate a metallic finish resembling precious metals such as gold or bronze, or even other polished metals, then it is worth adding a mirror or polished effect. This requires a finish free of pearlescent agents and metallic pigments, with completely invisible pigmentation.

It is therefore possible to achieve a gold ingot finish, or even a gold mirror finish, by first applying a mirror-finish chrome coating. This finish must be particularly bright and pure. This can be achieved using just two products

► chemical silver plating, which produces a silver mirror finish. This is a complex process that we offer here, but which we will not cover in this article
► the new Neochrome paint
Since its launch in 2025, this new paint has been increasingly used by interior design professionals, thanks to its exceptional qualities and relative ease of application

The various transparent pigments used to obtain the gold metallic effects

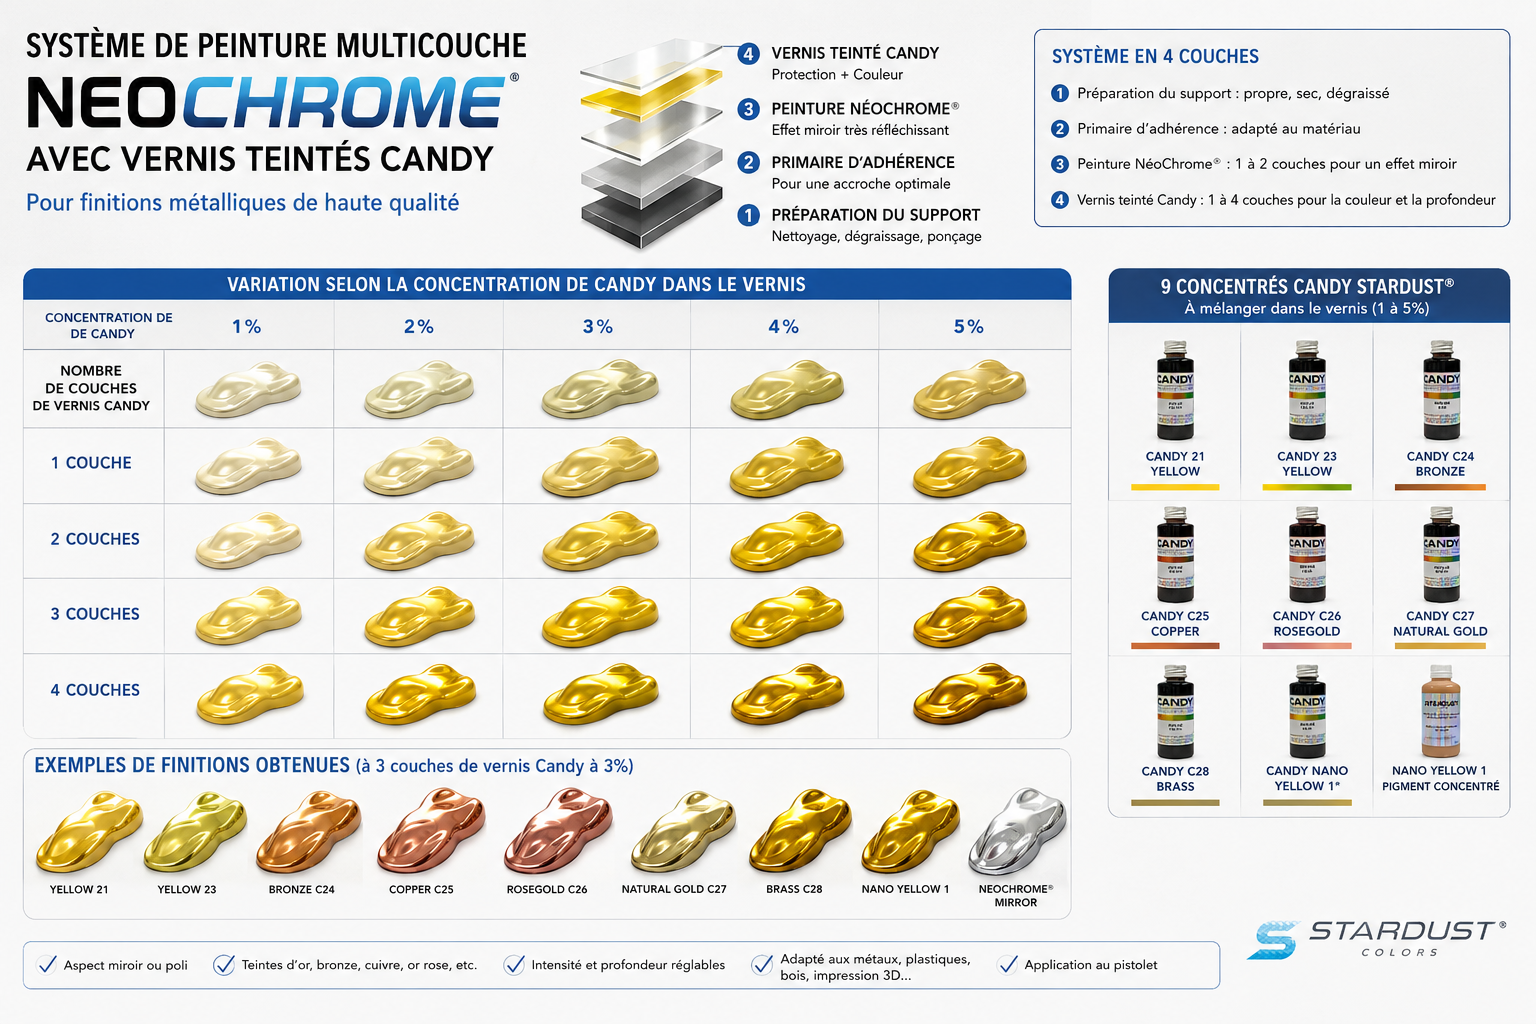
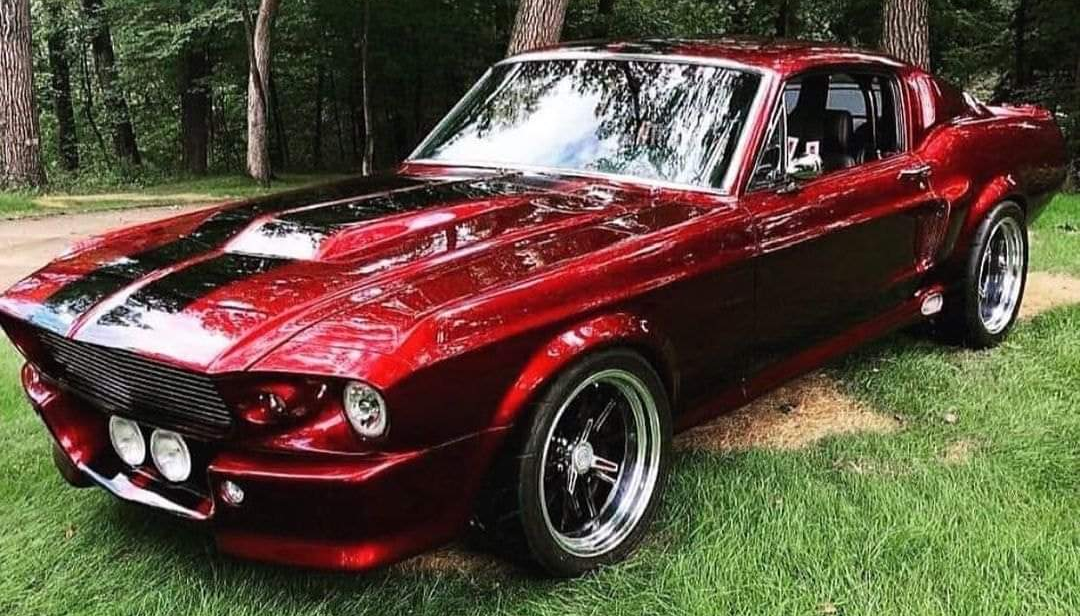
Neochrome paint produces a very light, highly reflective metallic finish, and it is easy to coat it with a varnish to which a transparent ‘Candy’-type colourant has been added
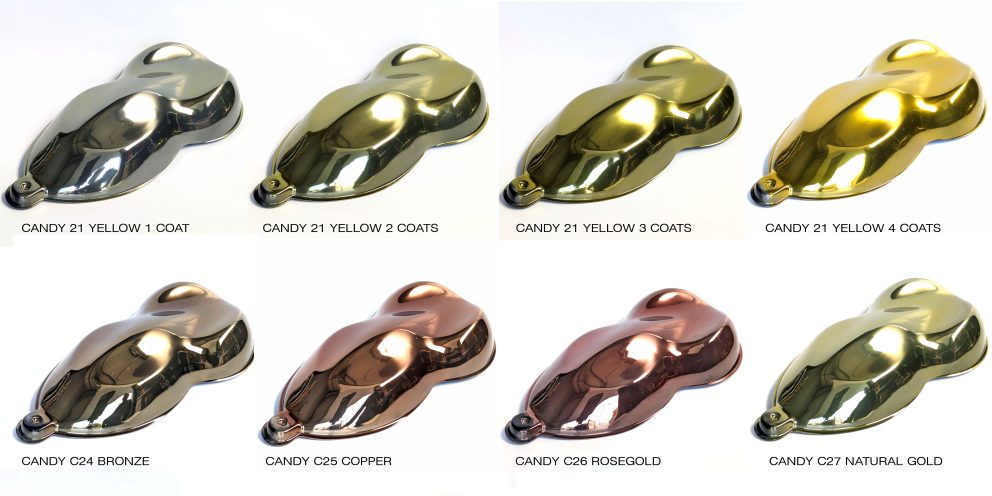
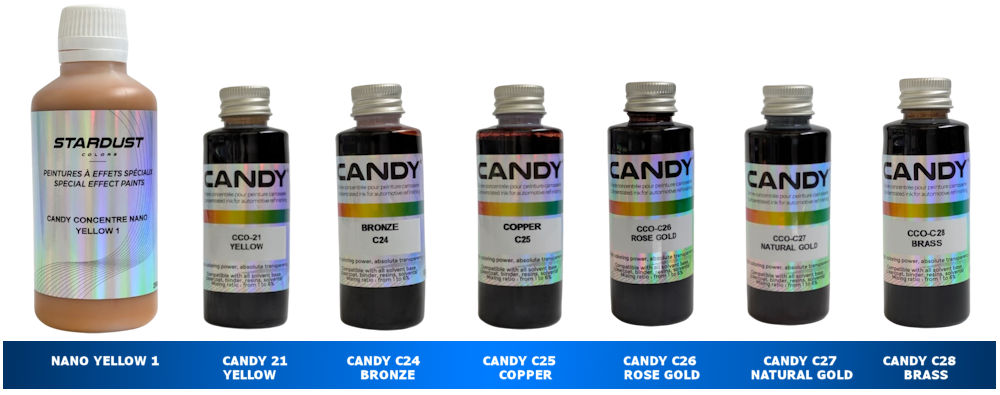
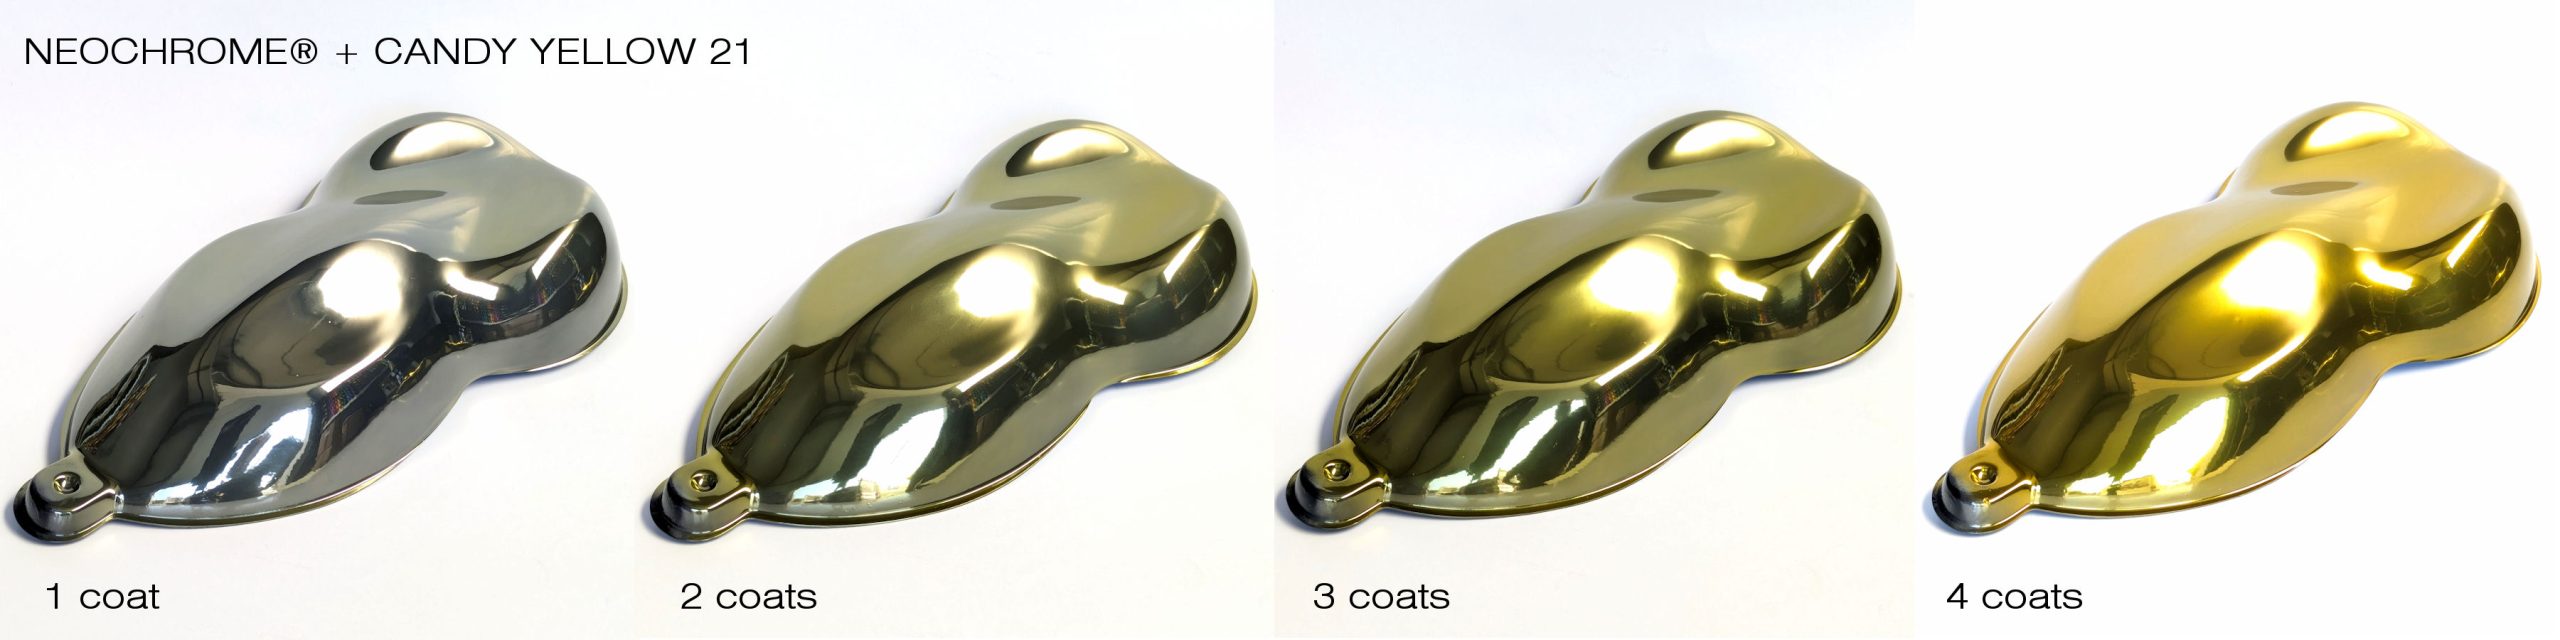
The simplest way to achieve a mirror-finish gold effect is to add a yellow colourant, such as Candy Yellow 21 (Oxide Yellow), which is the main colourant alongside Candy Lemon Yellow 20 (pure, light yellow).

To obtain aged or natural colours

► Add Magenta 162 pink and a little black 01
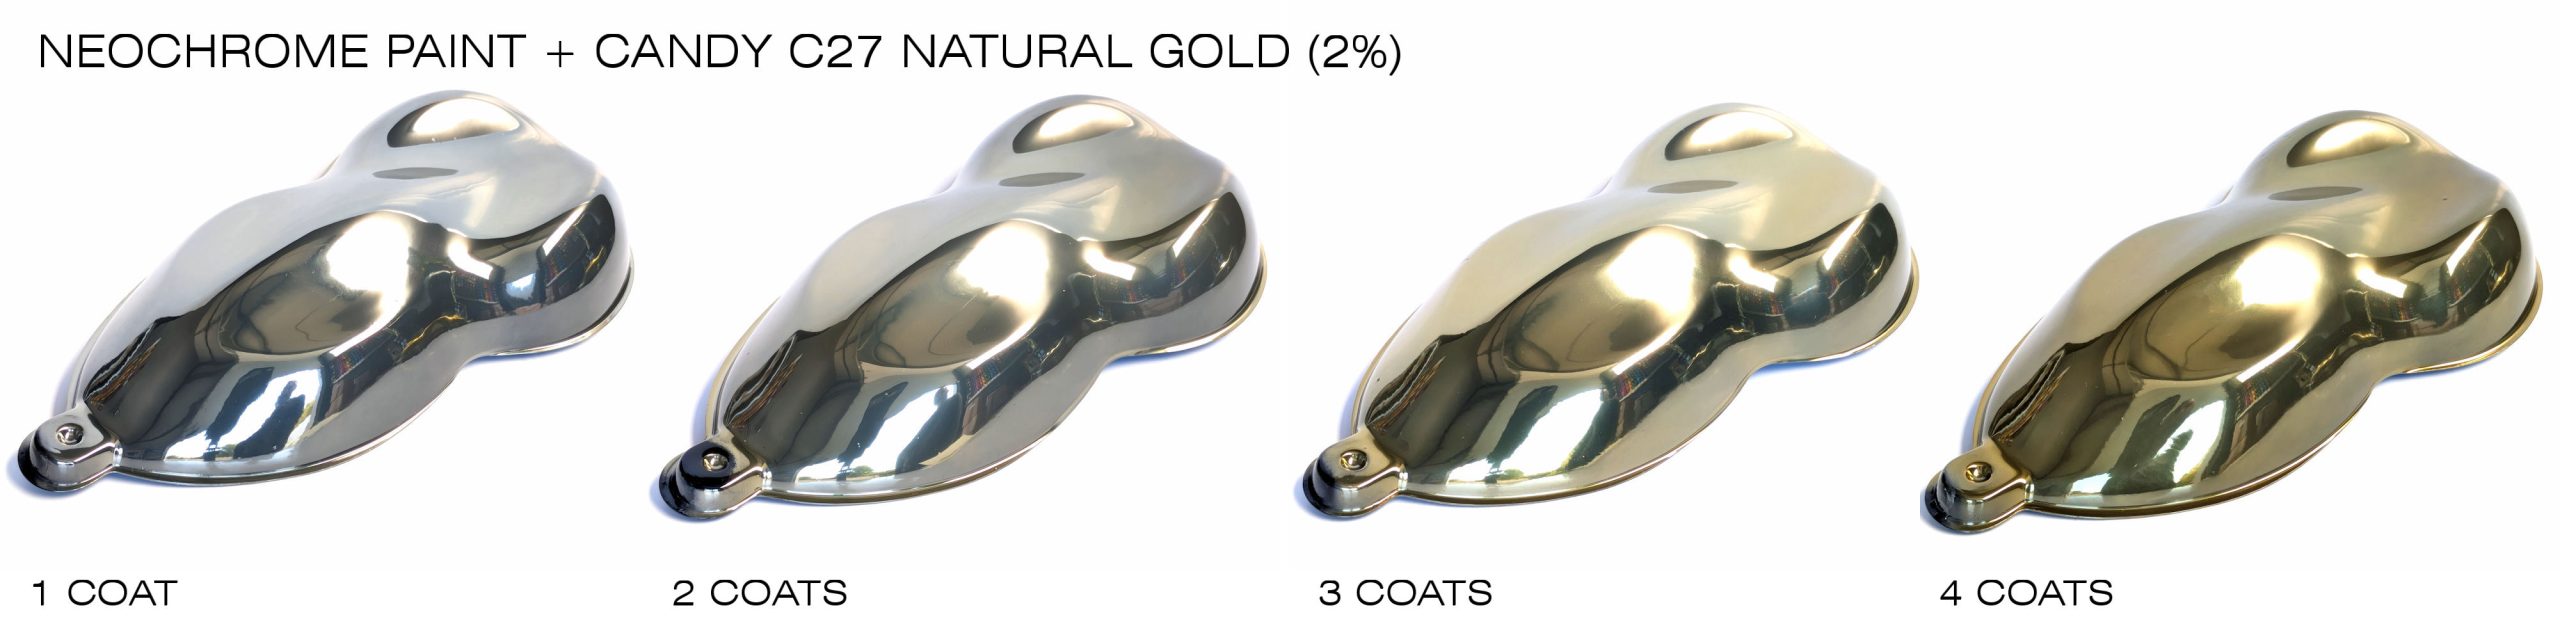
There are many shades of gold, or even bronze, as well as new, fashionable colours such as rose gold. It is possible to achieve more natural-looking gold shades by mixing Candy colourants into the varnish applied over the Neochrome paint.

In the video above, we carried out application tests mainly using Neochrome paint topped with a varnish that we tinted with just 2 per cent Stardust transparent colourant

The colour intensity increases with each layer; in other words, you can adjust both the ink concentration and, preferably, the number of layers. This allows you to control the depth and intensity of the colour by adding layers, for example to go from a pale gold to a very yellow gold.

Polished gold-coloured metal finish, satin-finish nickel

It is also possible to achieve some very interesting polished metal effects over Neochrome paint by using a satin-finish varnish rather than a gloss one. When combined with the addition of colourants for precious metal effects, it is possible to achieve a wide range of shades and subtle finishes.

How to achieve an ‘ice effect’ with the Stardustcolors crystalliser

How to achieve an ‘ice effect’ with the Stardustcolors crystalliser

StardustColors’ “Crystal Fx” crystalliser is well known for its effect on a metallic base.
However, as is always the case with custom paint, its application can be adapted to create a new effect.

Today, I’m going to show you how to create an ‘ice effect’.
As usual, I start by preparing my surface: sanding and degreasing.
Then I apply a primer.
The type of primer depends on the nature of the surface (plastic, metal, composite); there is a product suitable for each material.
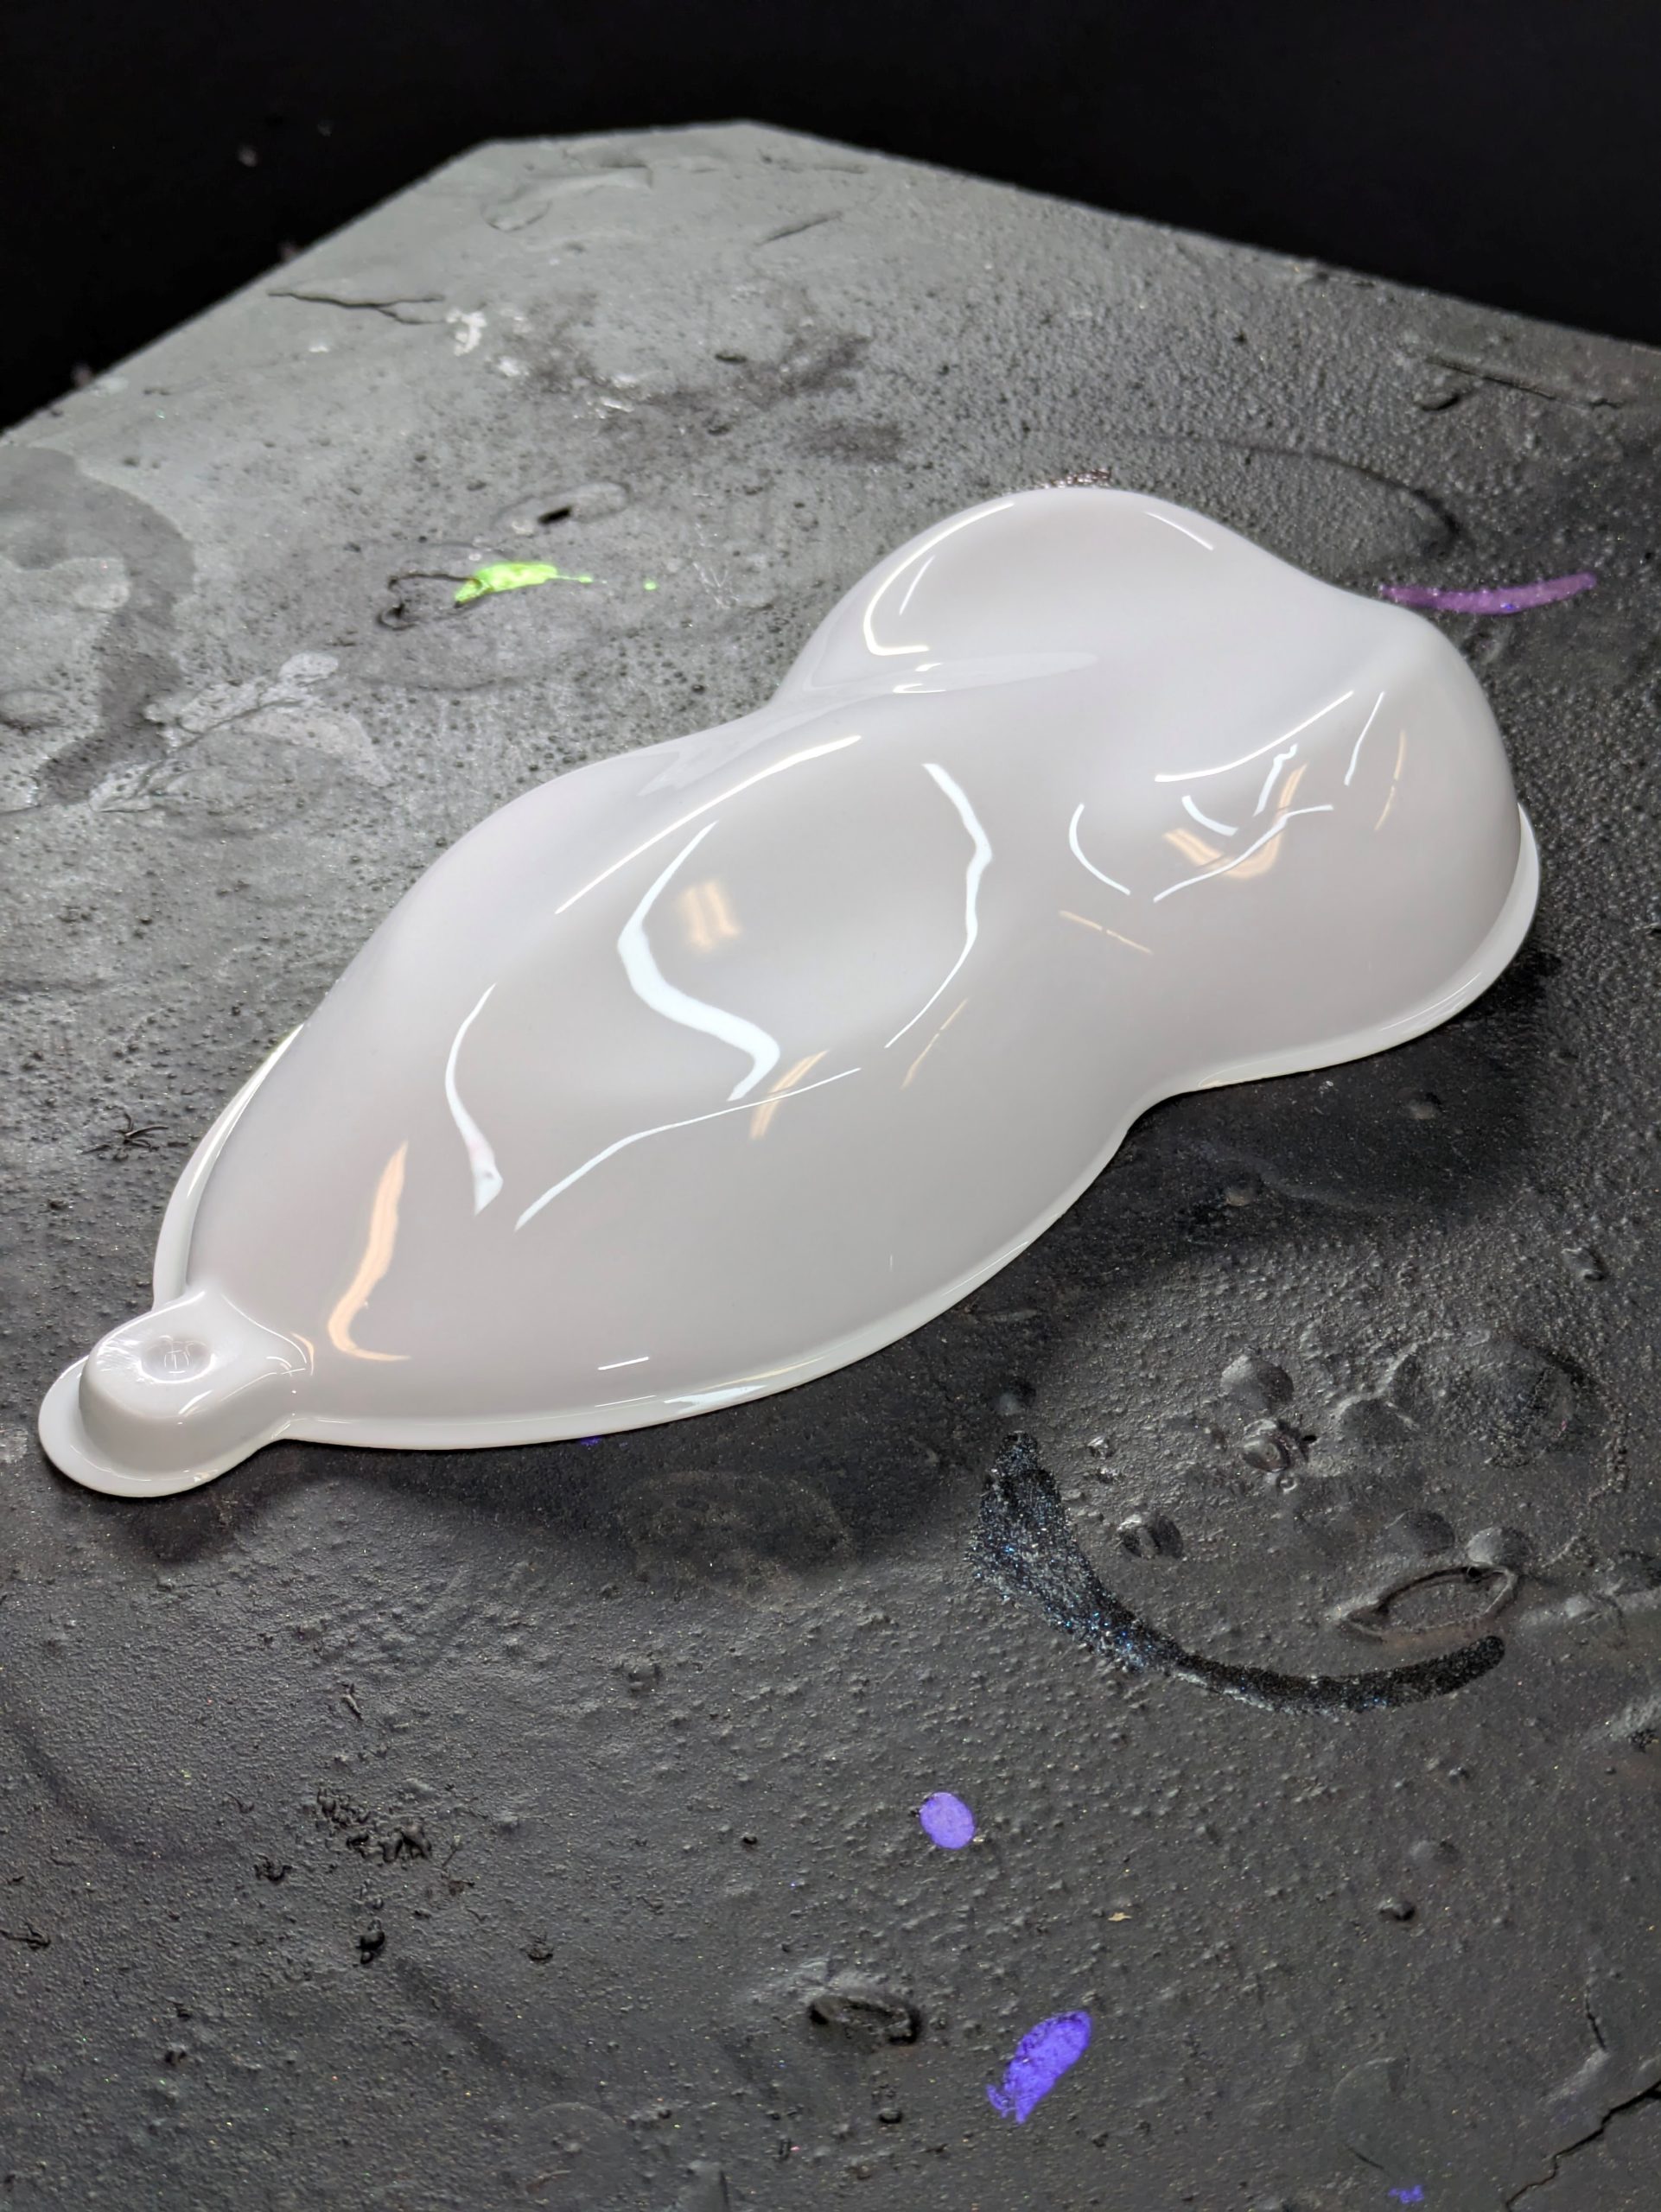
Once my primer is dry and re-sanded, I can apply my base colour. I chose pure white, which I varnished within 30 minutes with our UHS car body varnish.

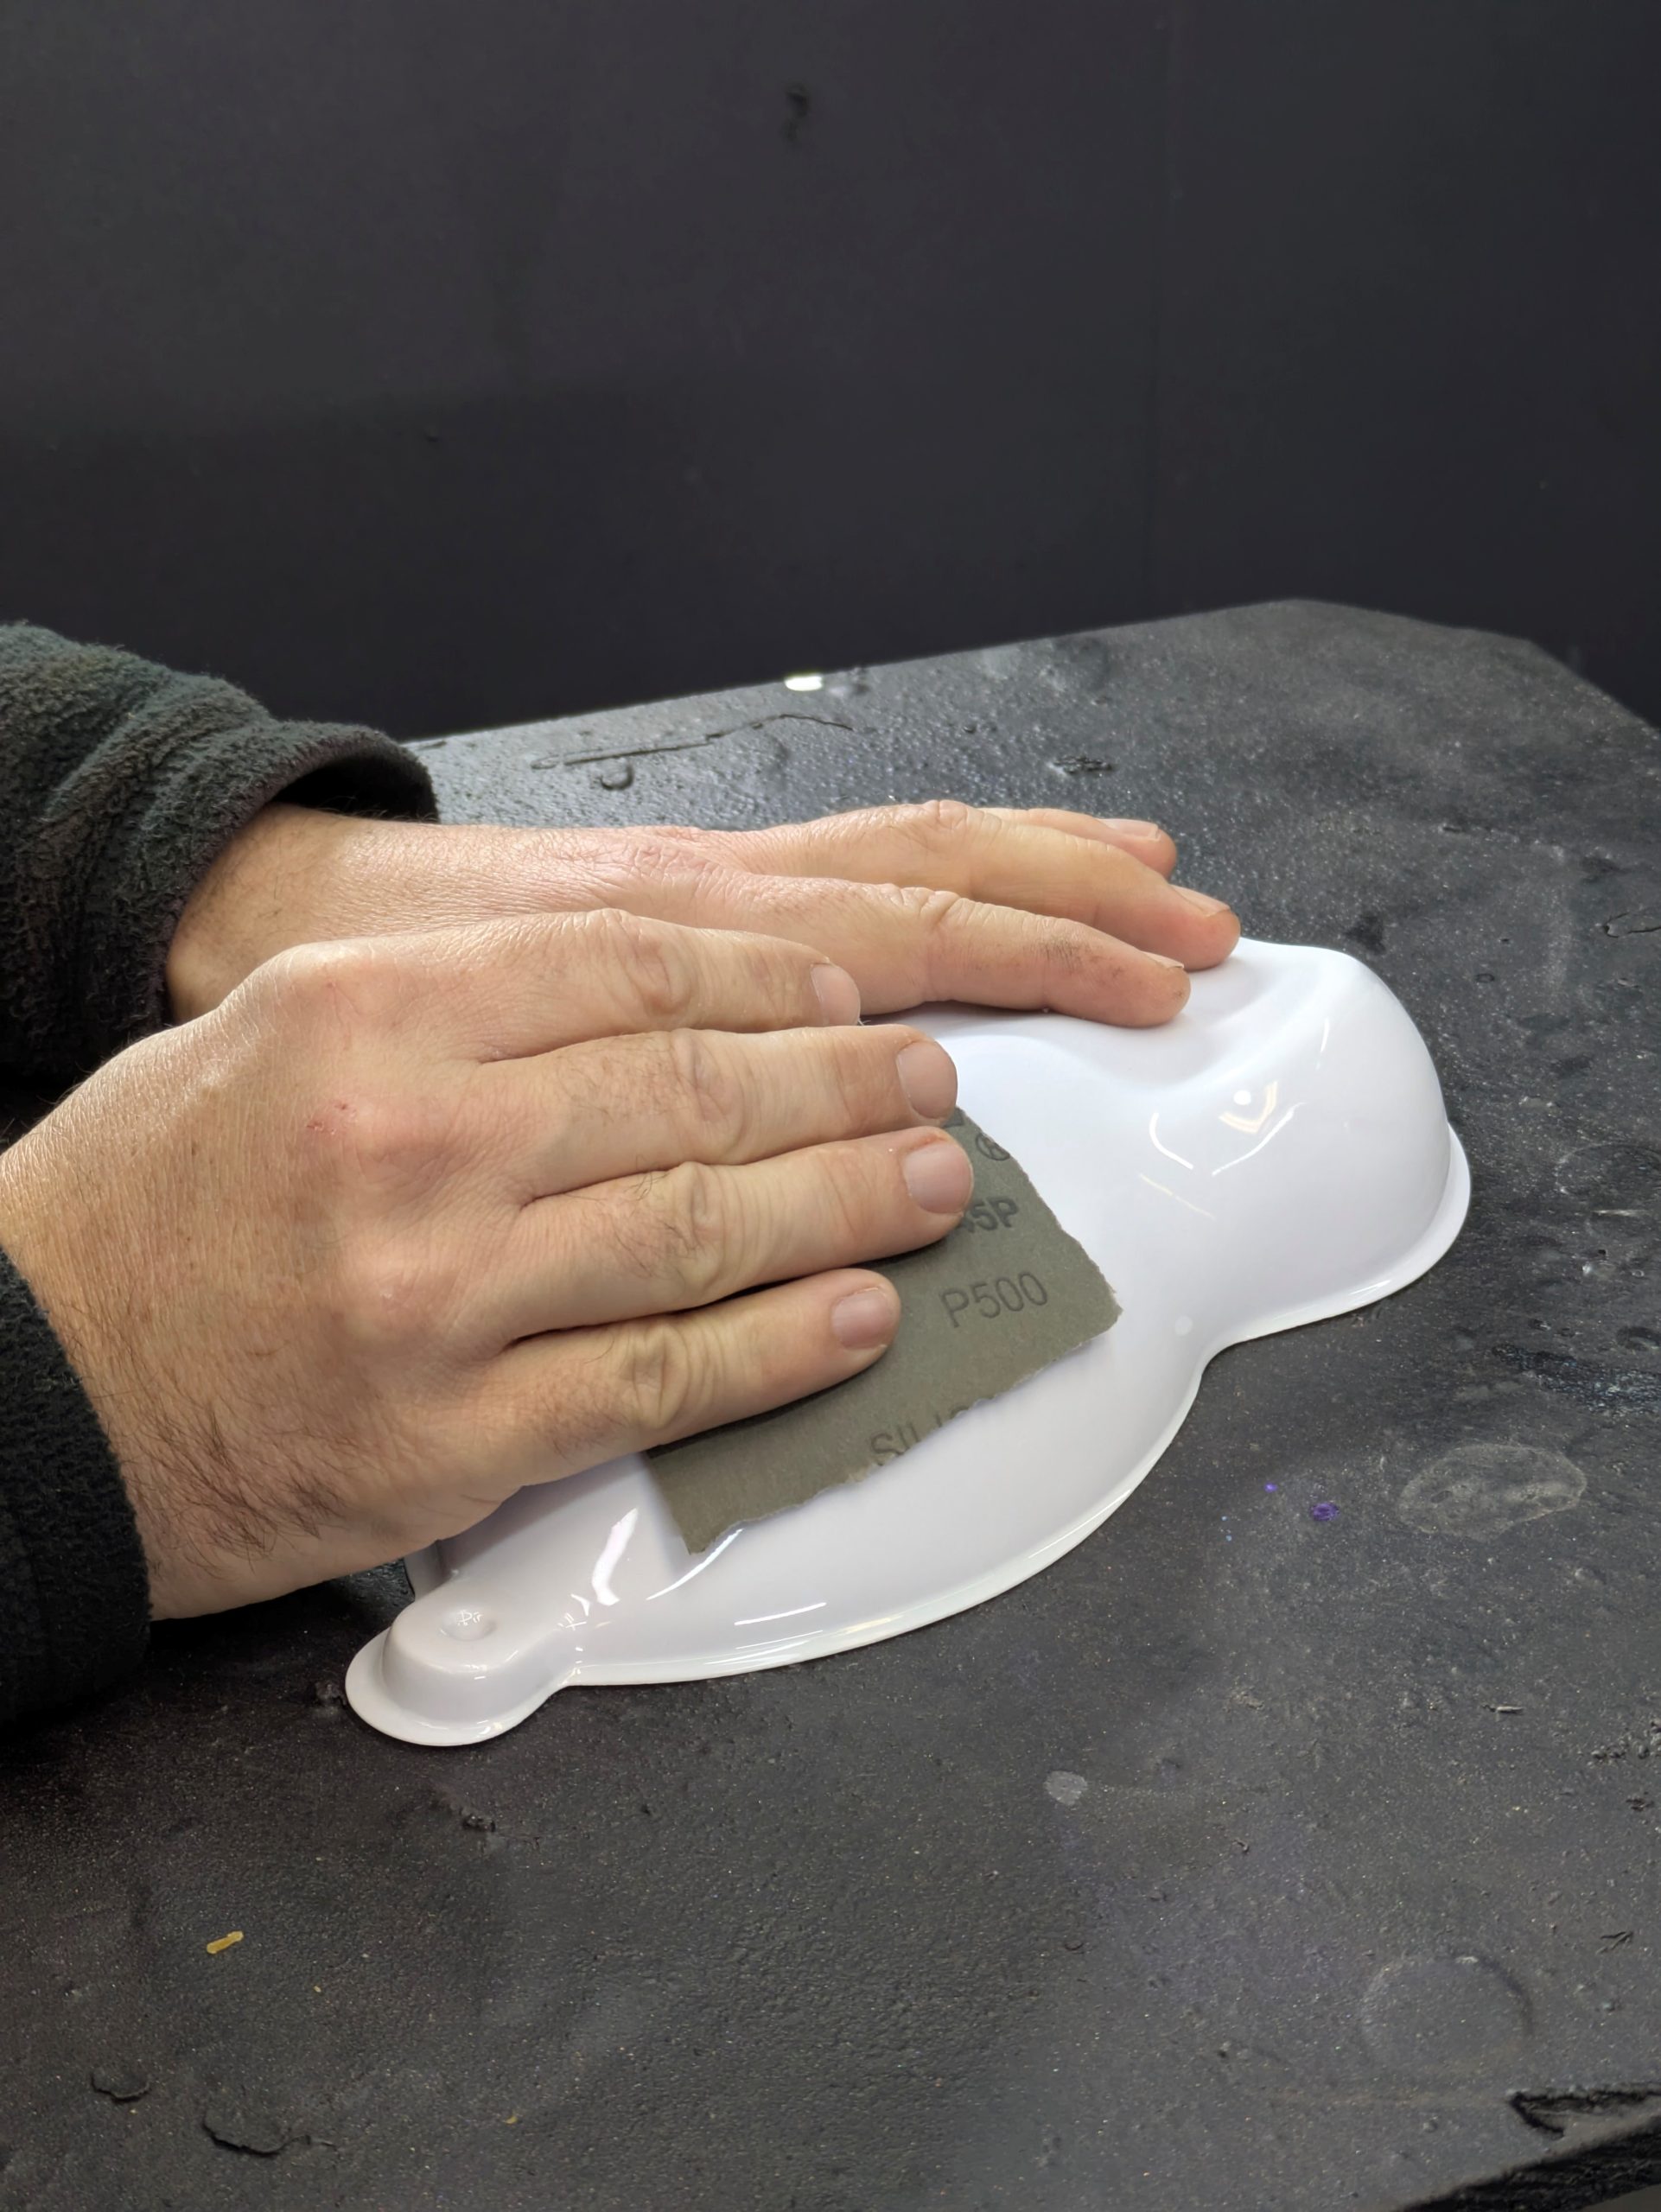
After 24 hours of drying, I sanded (energetically!) this varnish with P500 sandpaper to create a highly adhesive surface for the subsequent layers.
At this stage, it is important to take care not to miss any varnished areas, as the success of the effect depends on it.

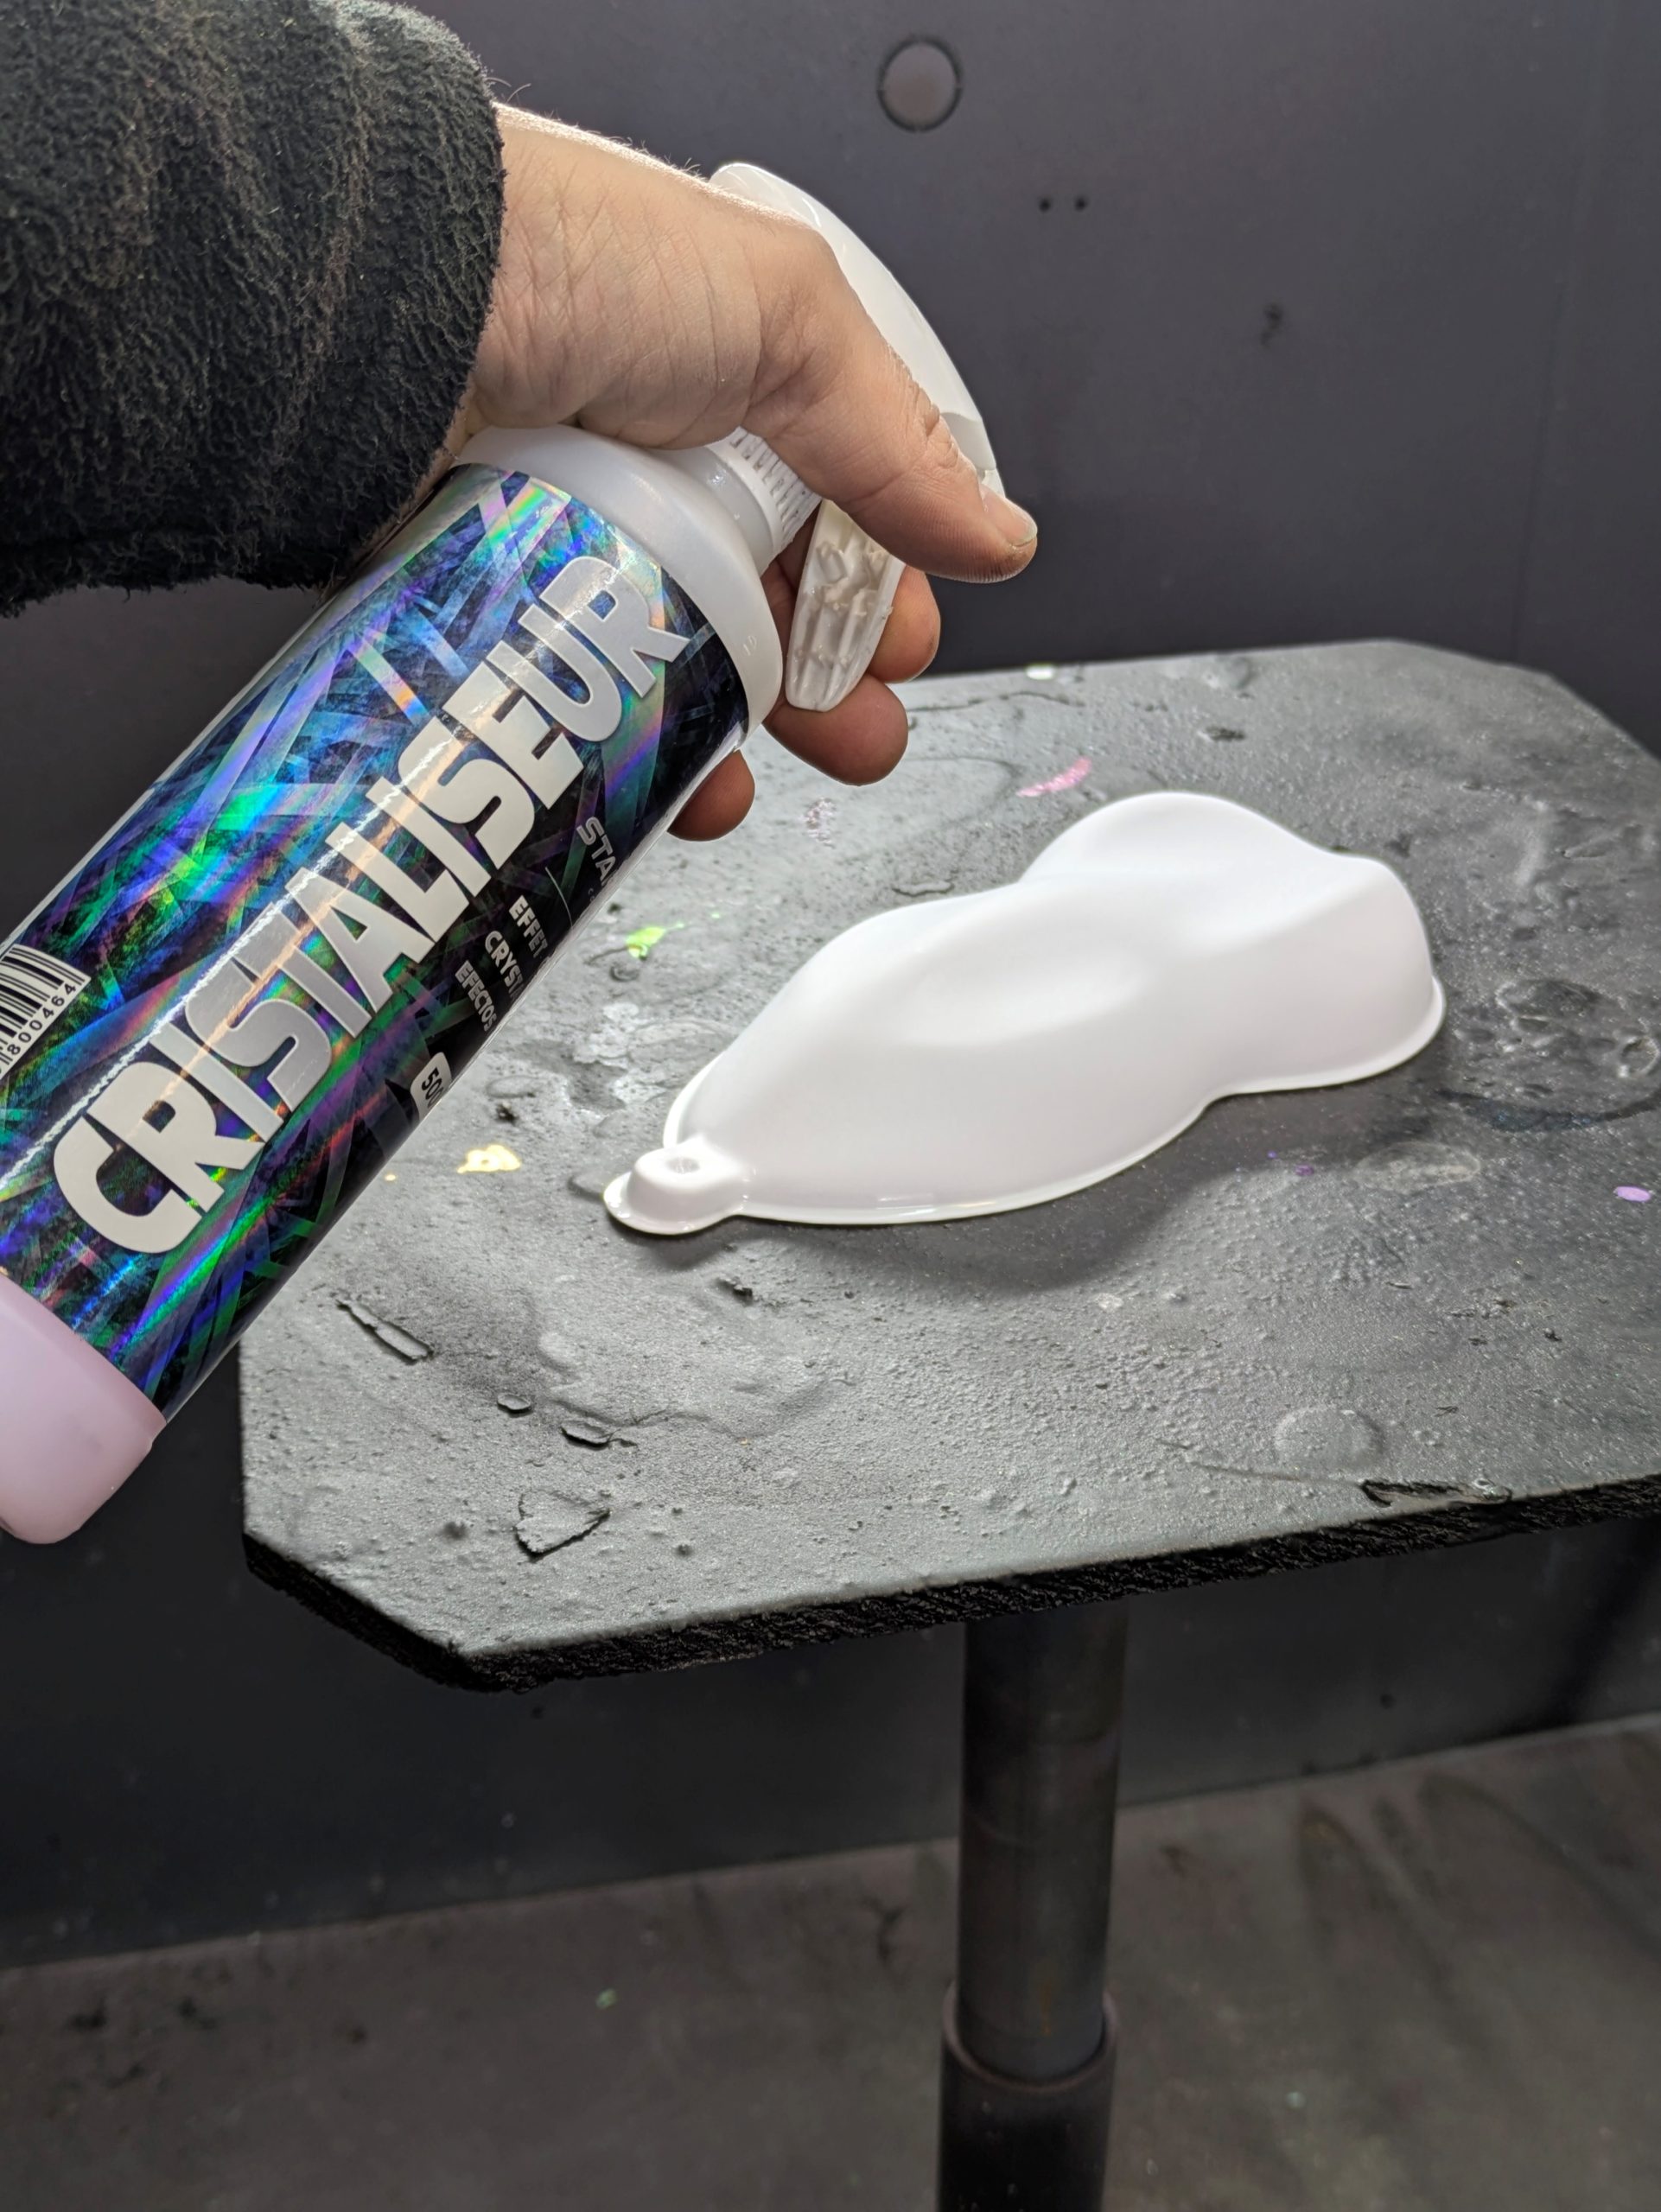
Once my surface was perfectly sanded, I applied the crystalliser.
The piece is thoroughly wet, then shaken to remove any excess product, creating a uniform layer over the entire piece.

It is essential that this step be carried out at a moderate/warm temperature.
The crystalliser does not work below 20 degrees (it needs to be warm to achieve a good icing effect!).
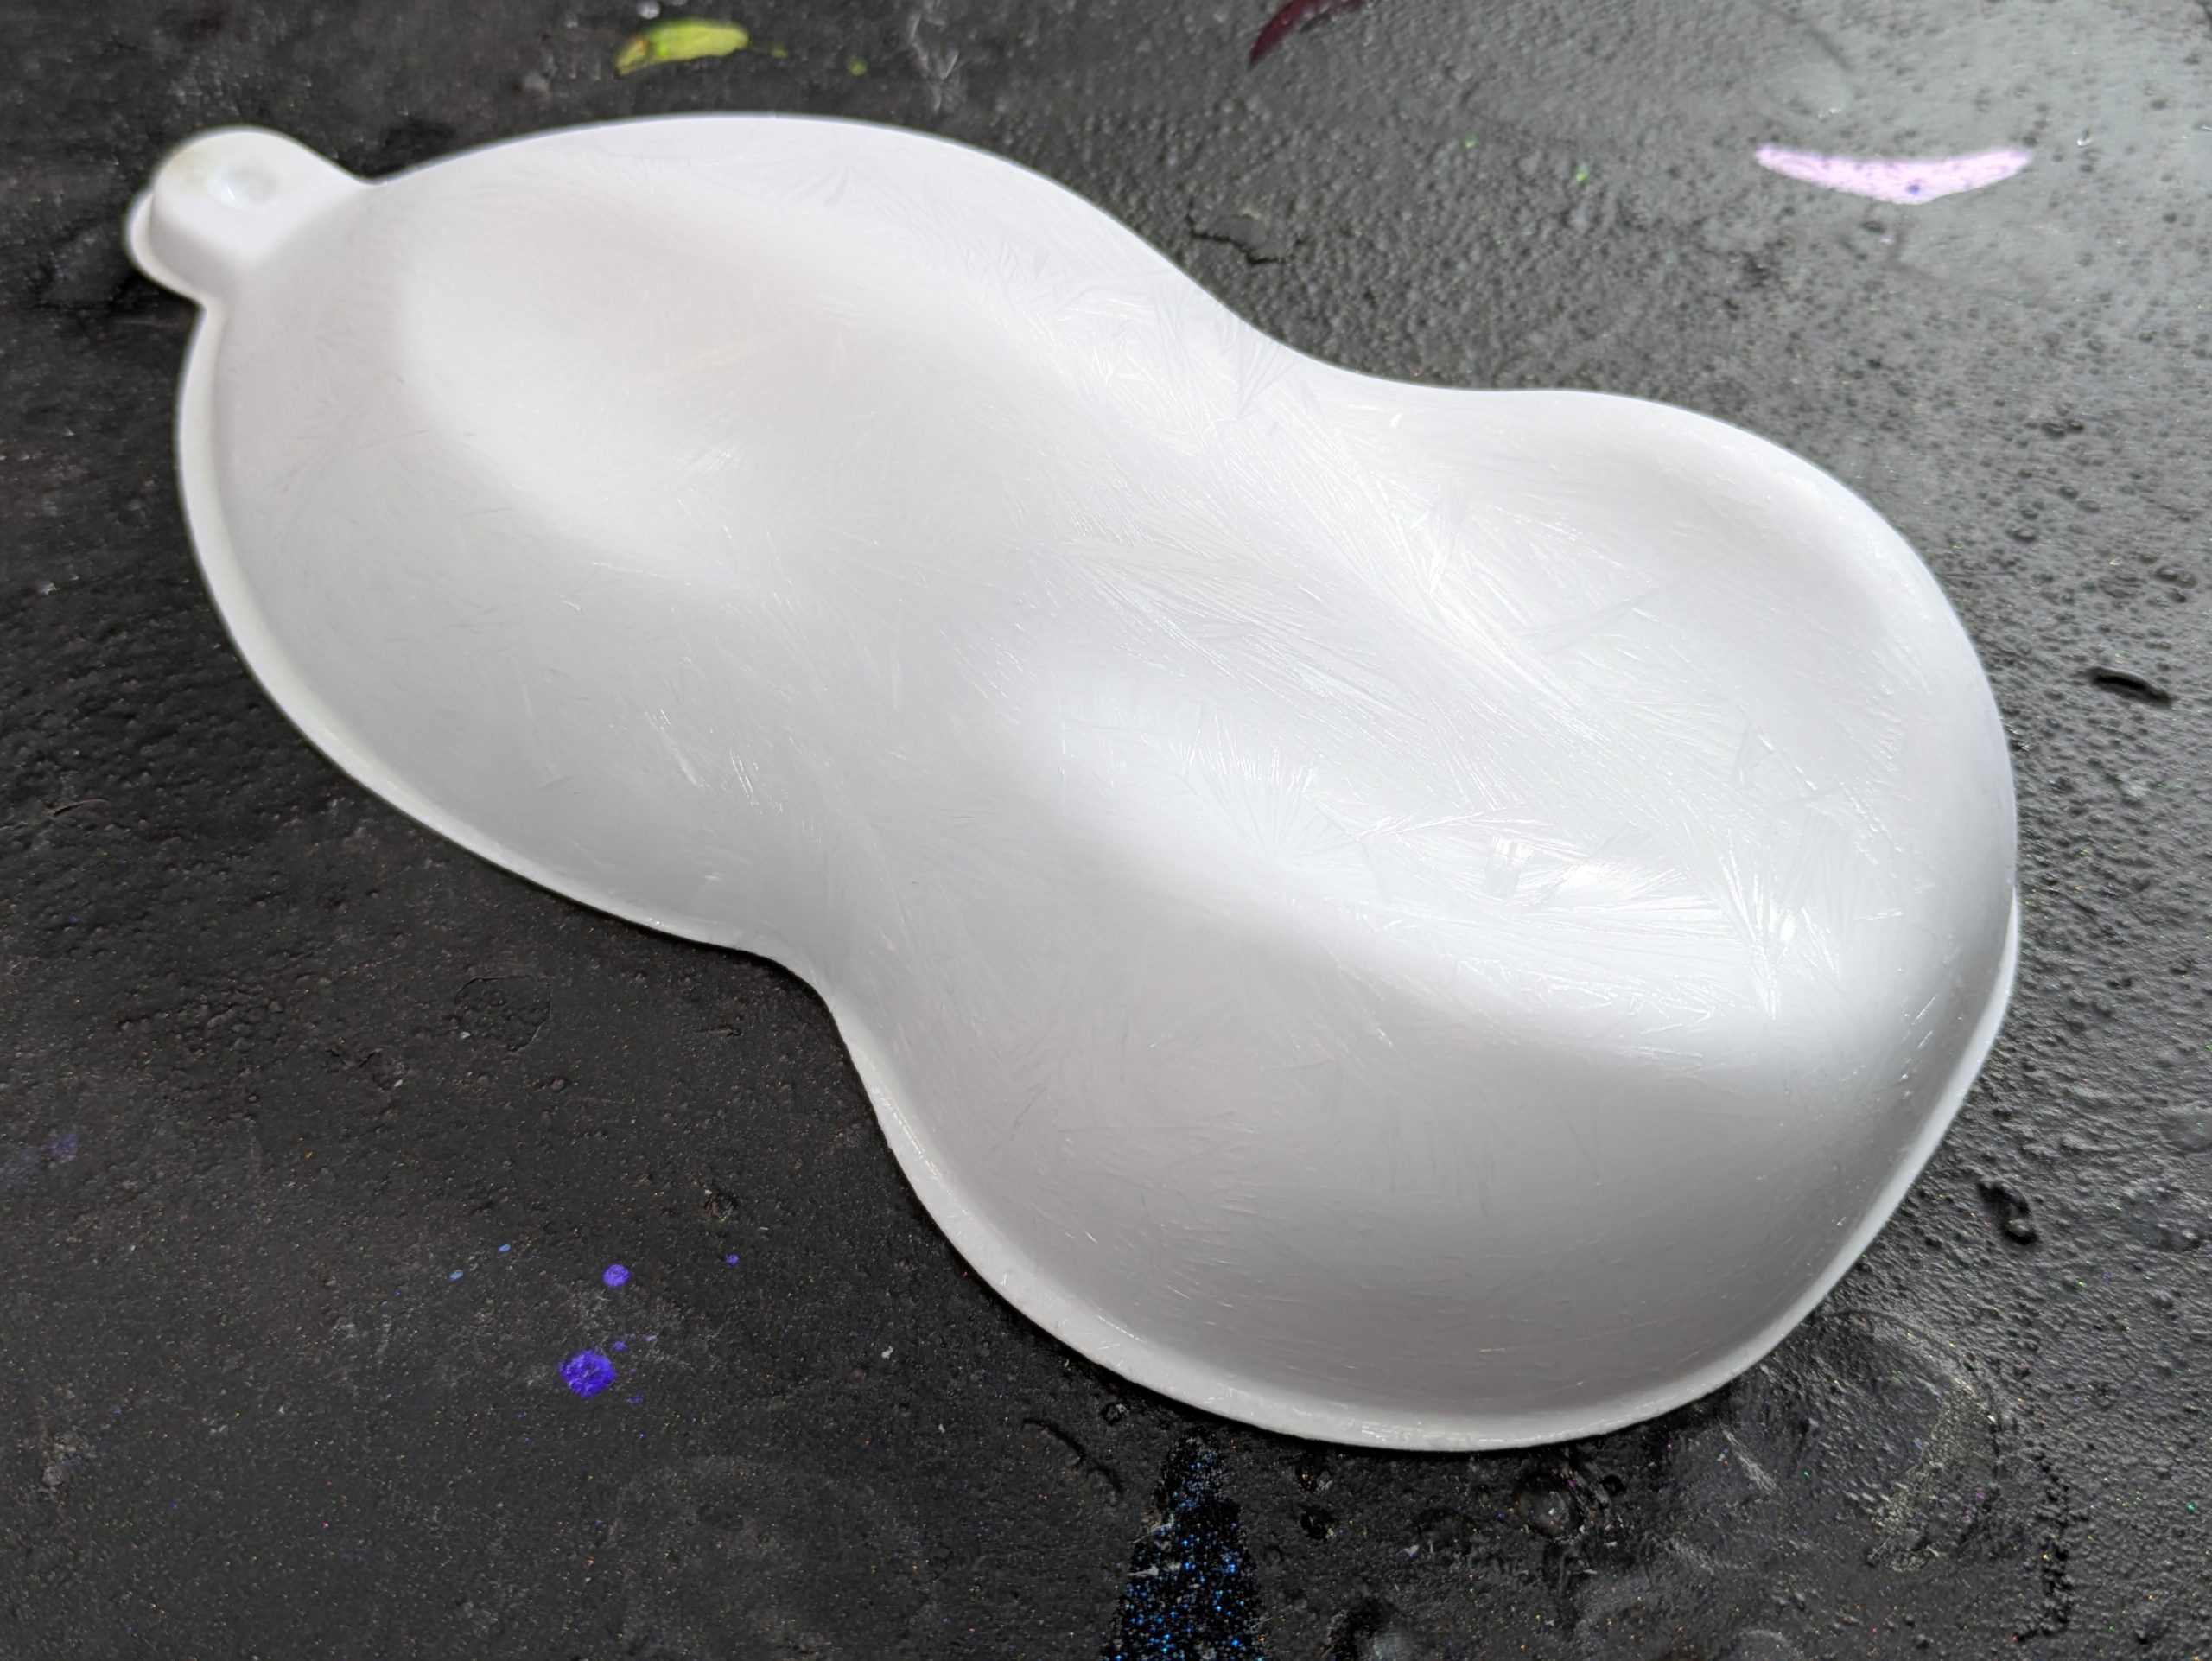
The crystals form quickly, so leave the product to dry completely.

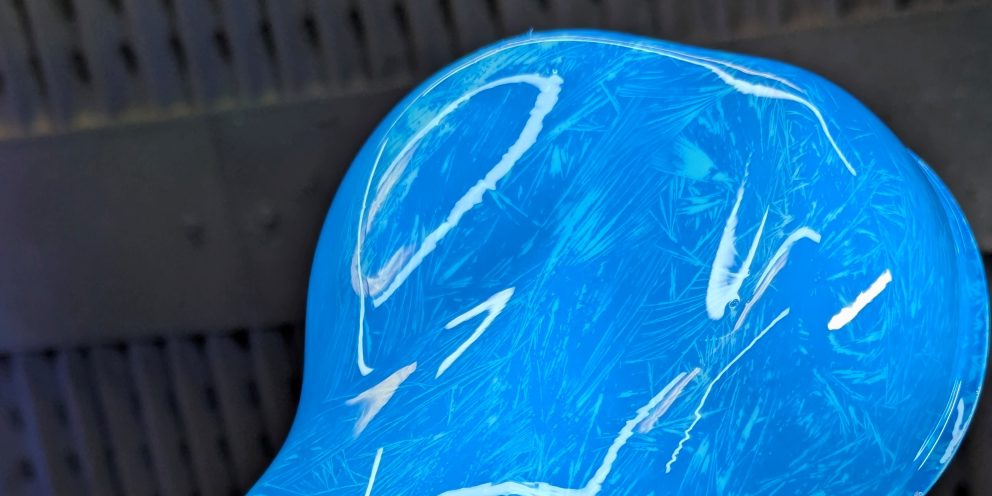
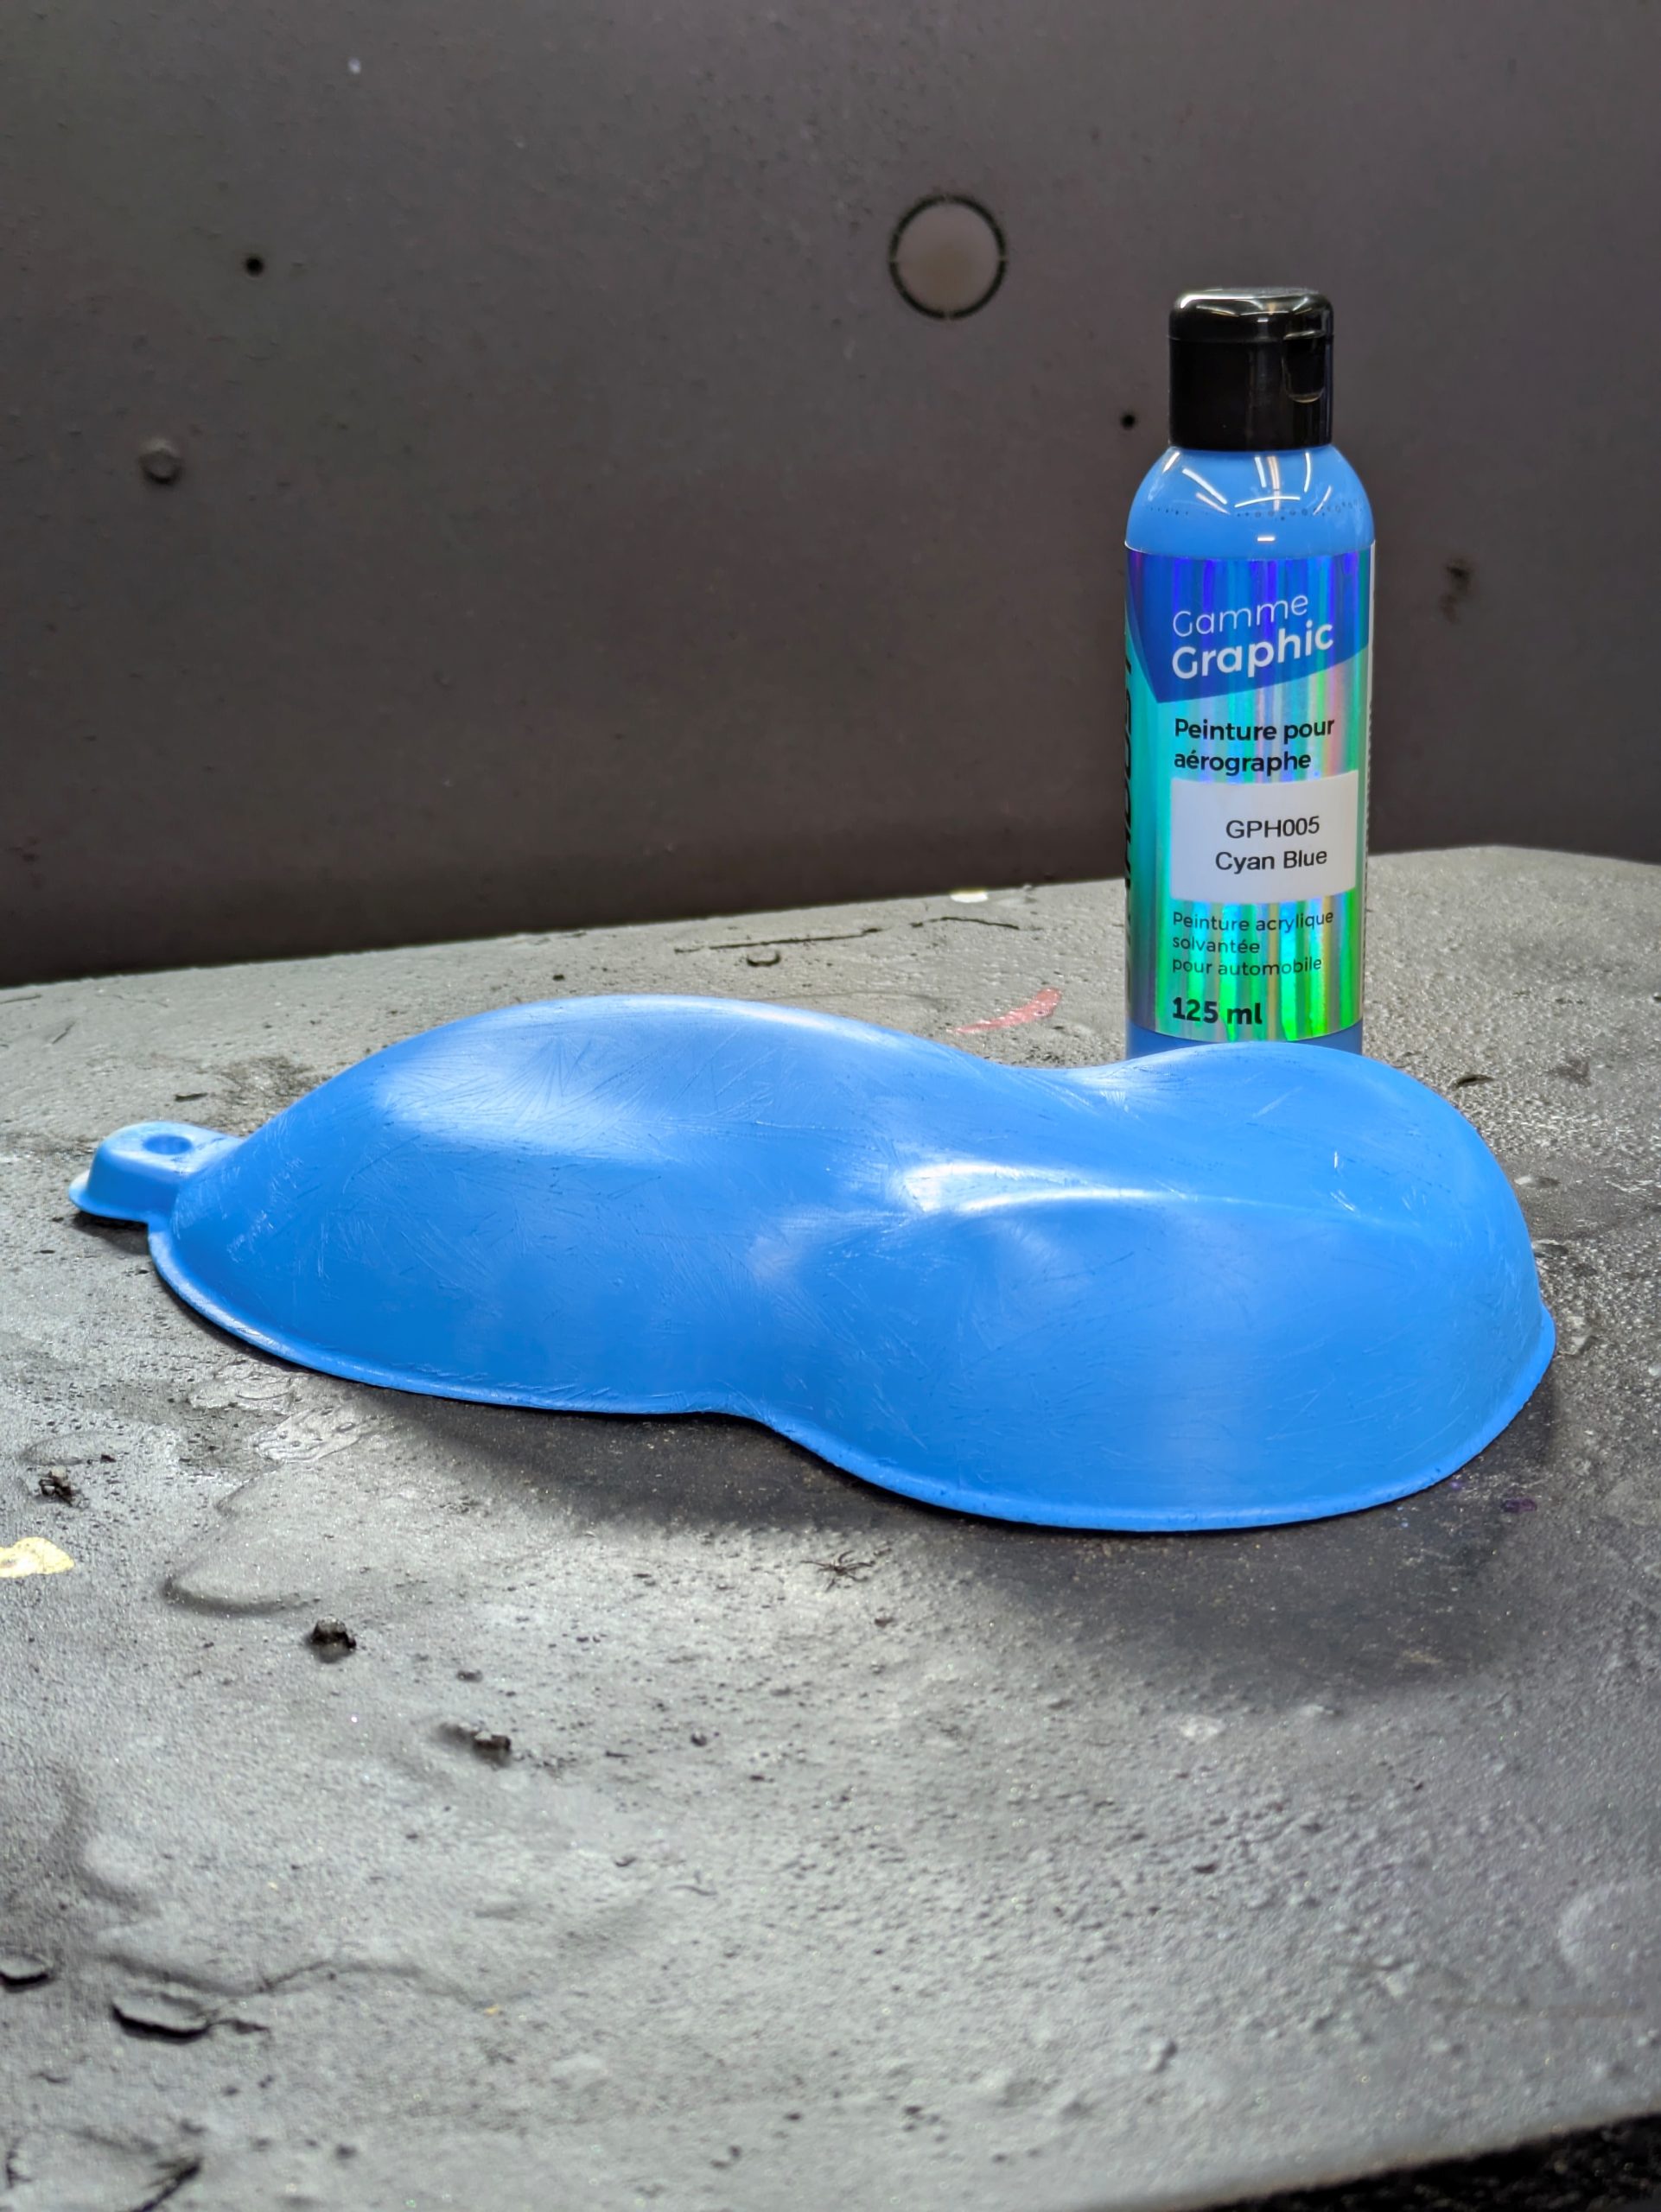
Once dry, I applied a coat of cyan blue (solvent-based paint required), trying not to overdo it.

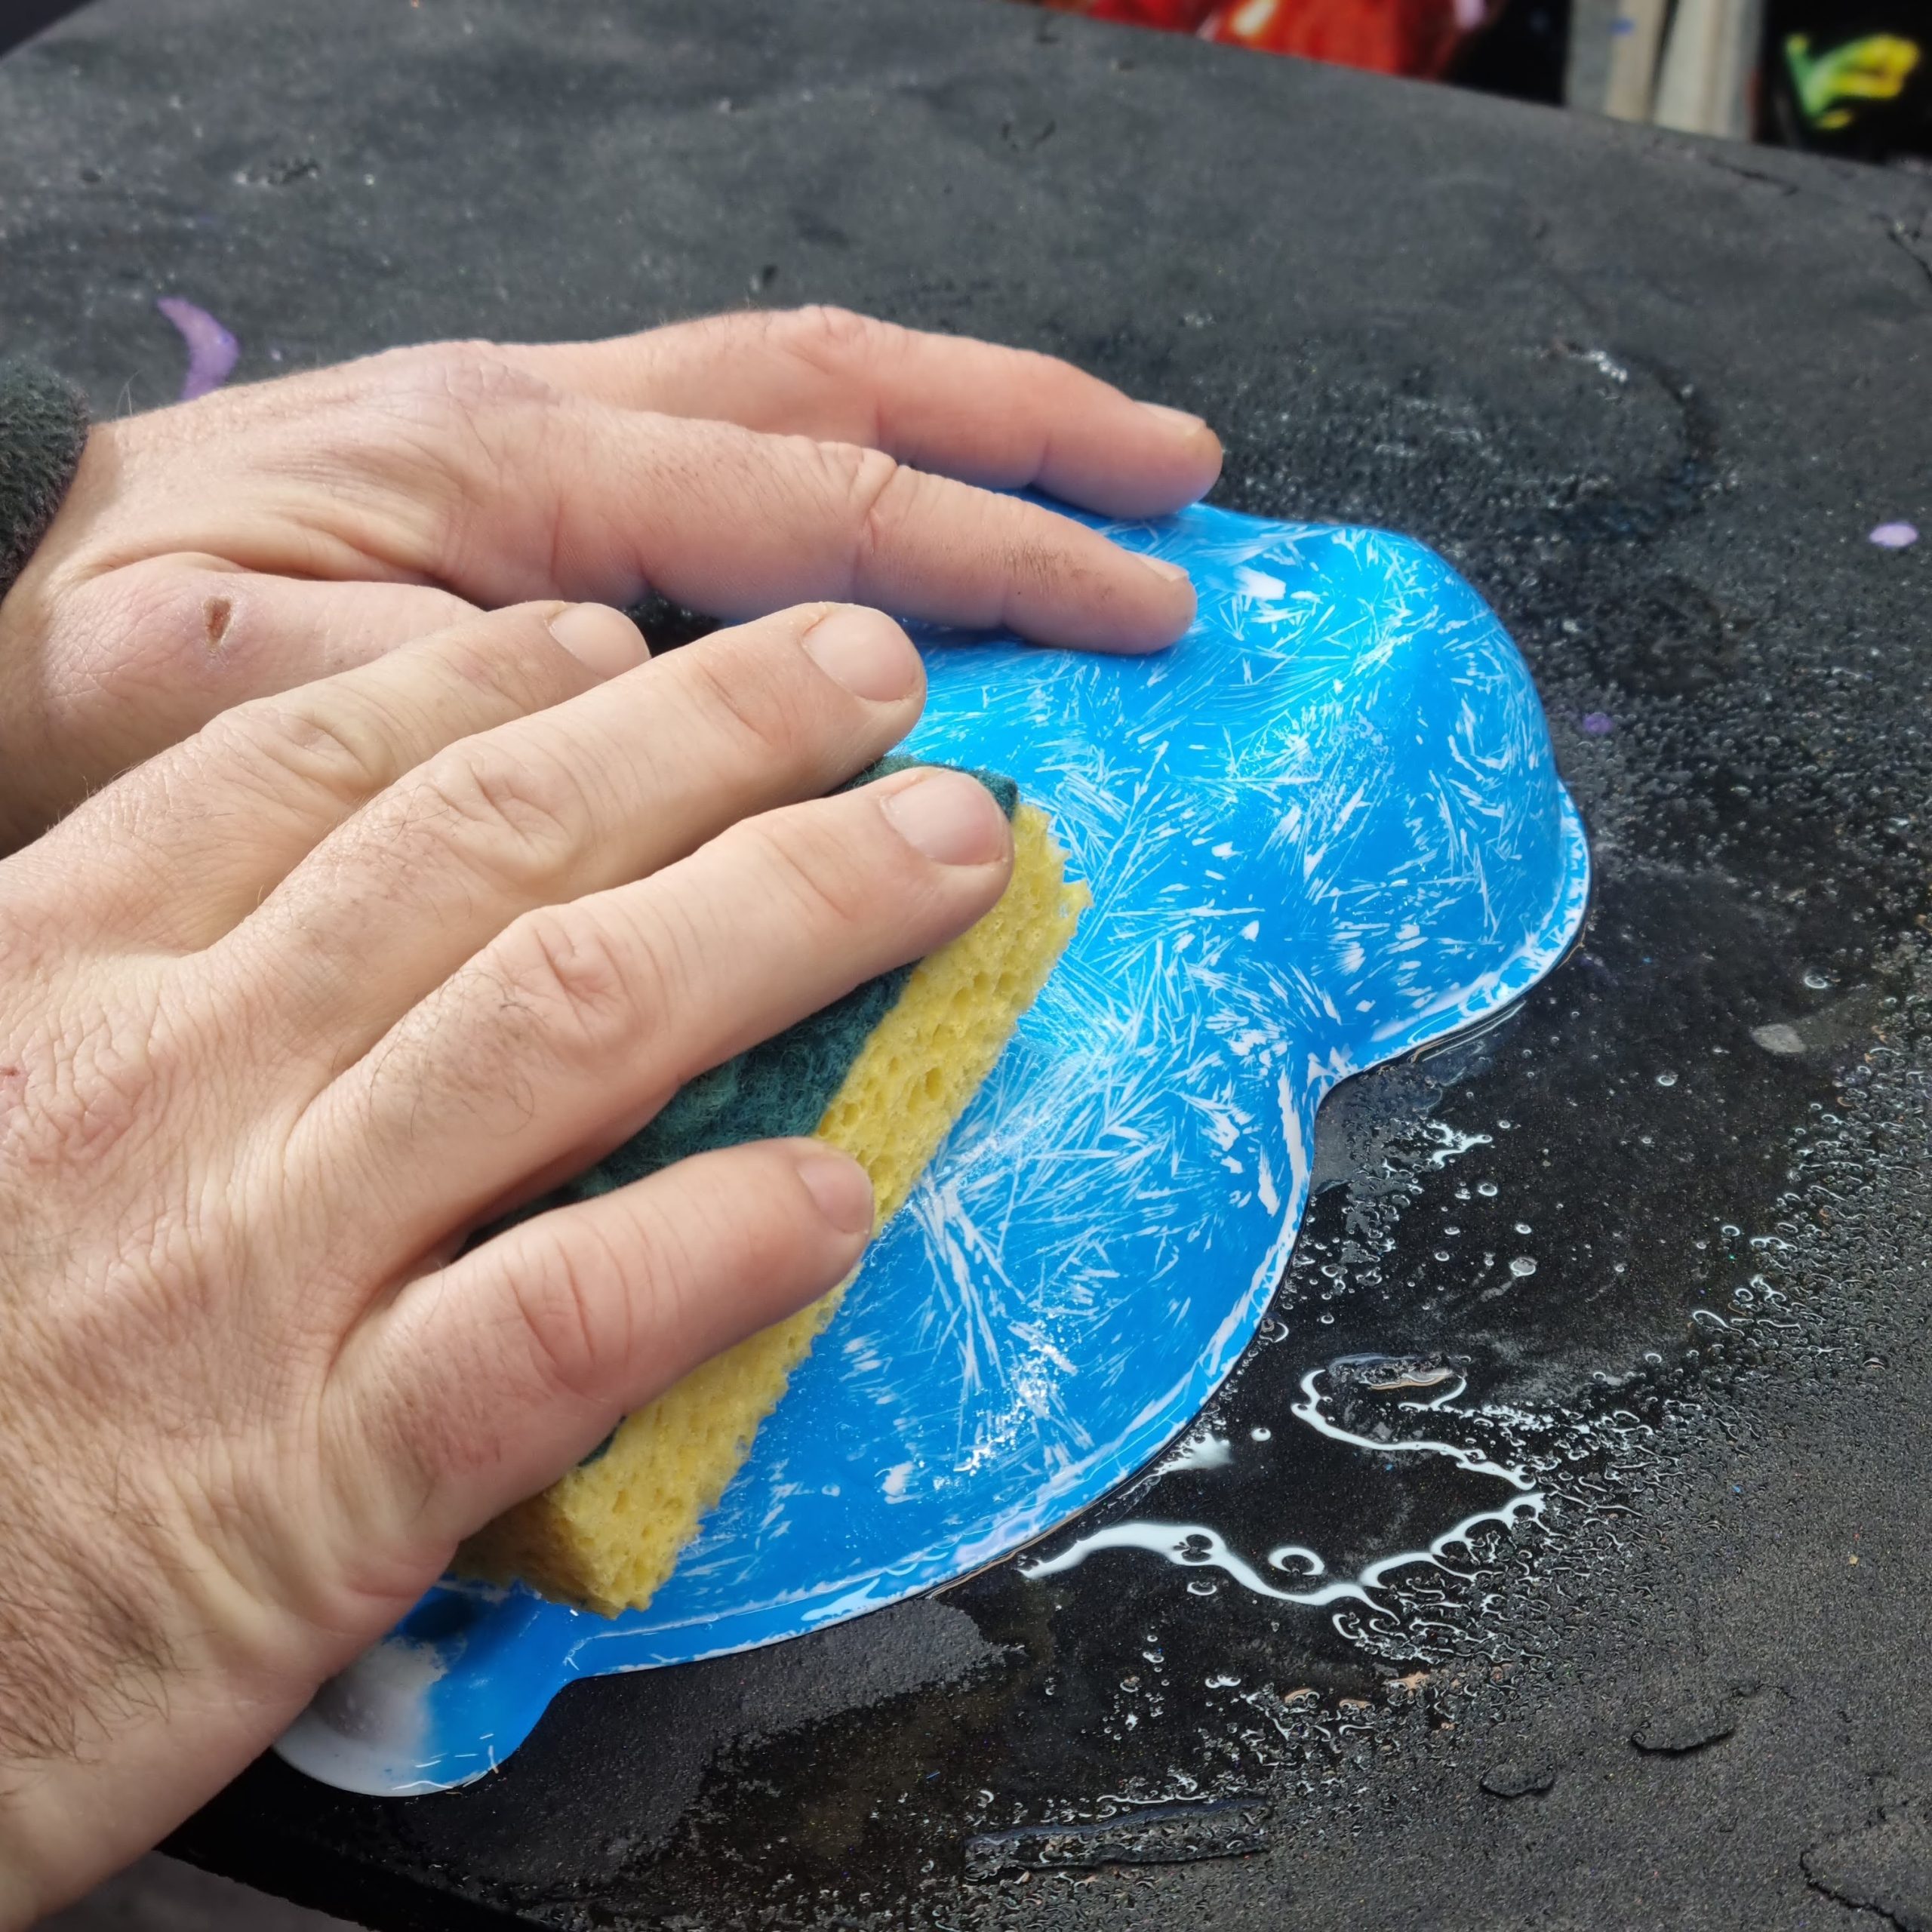
Once my blue layer was completely solvent-free, I revealed the crystals using a non-abrasive sponge and a little clean water.
The white crystals stand out against the blue background.

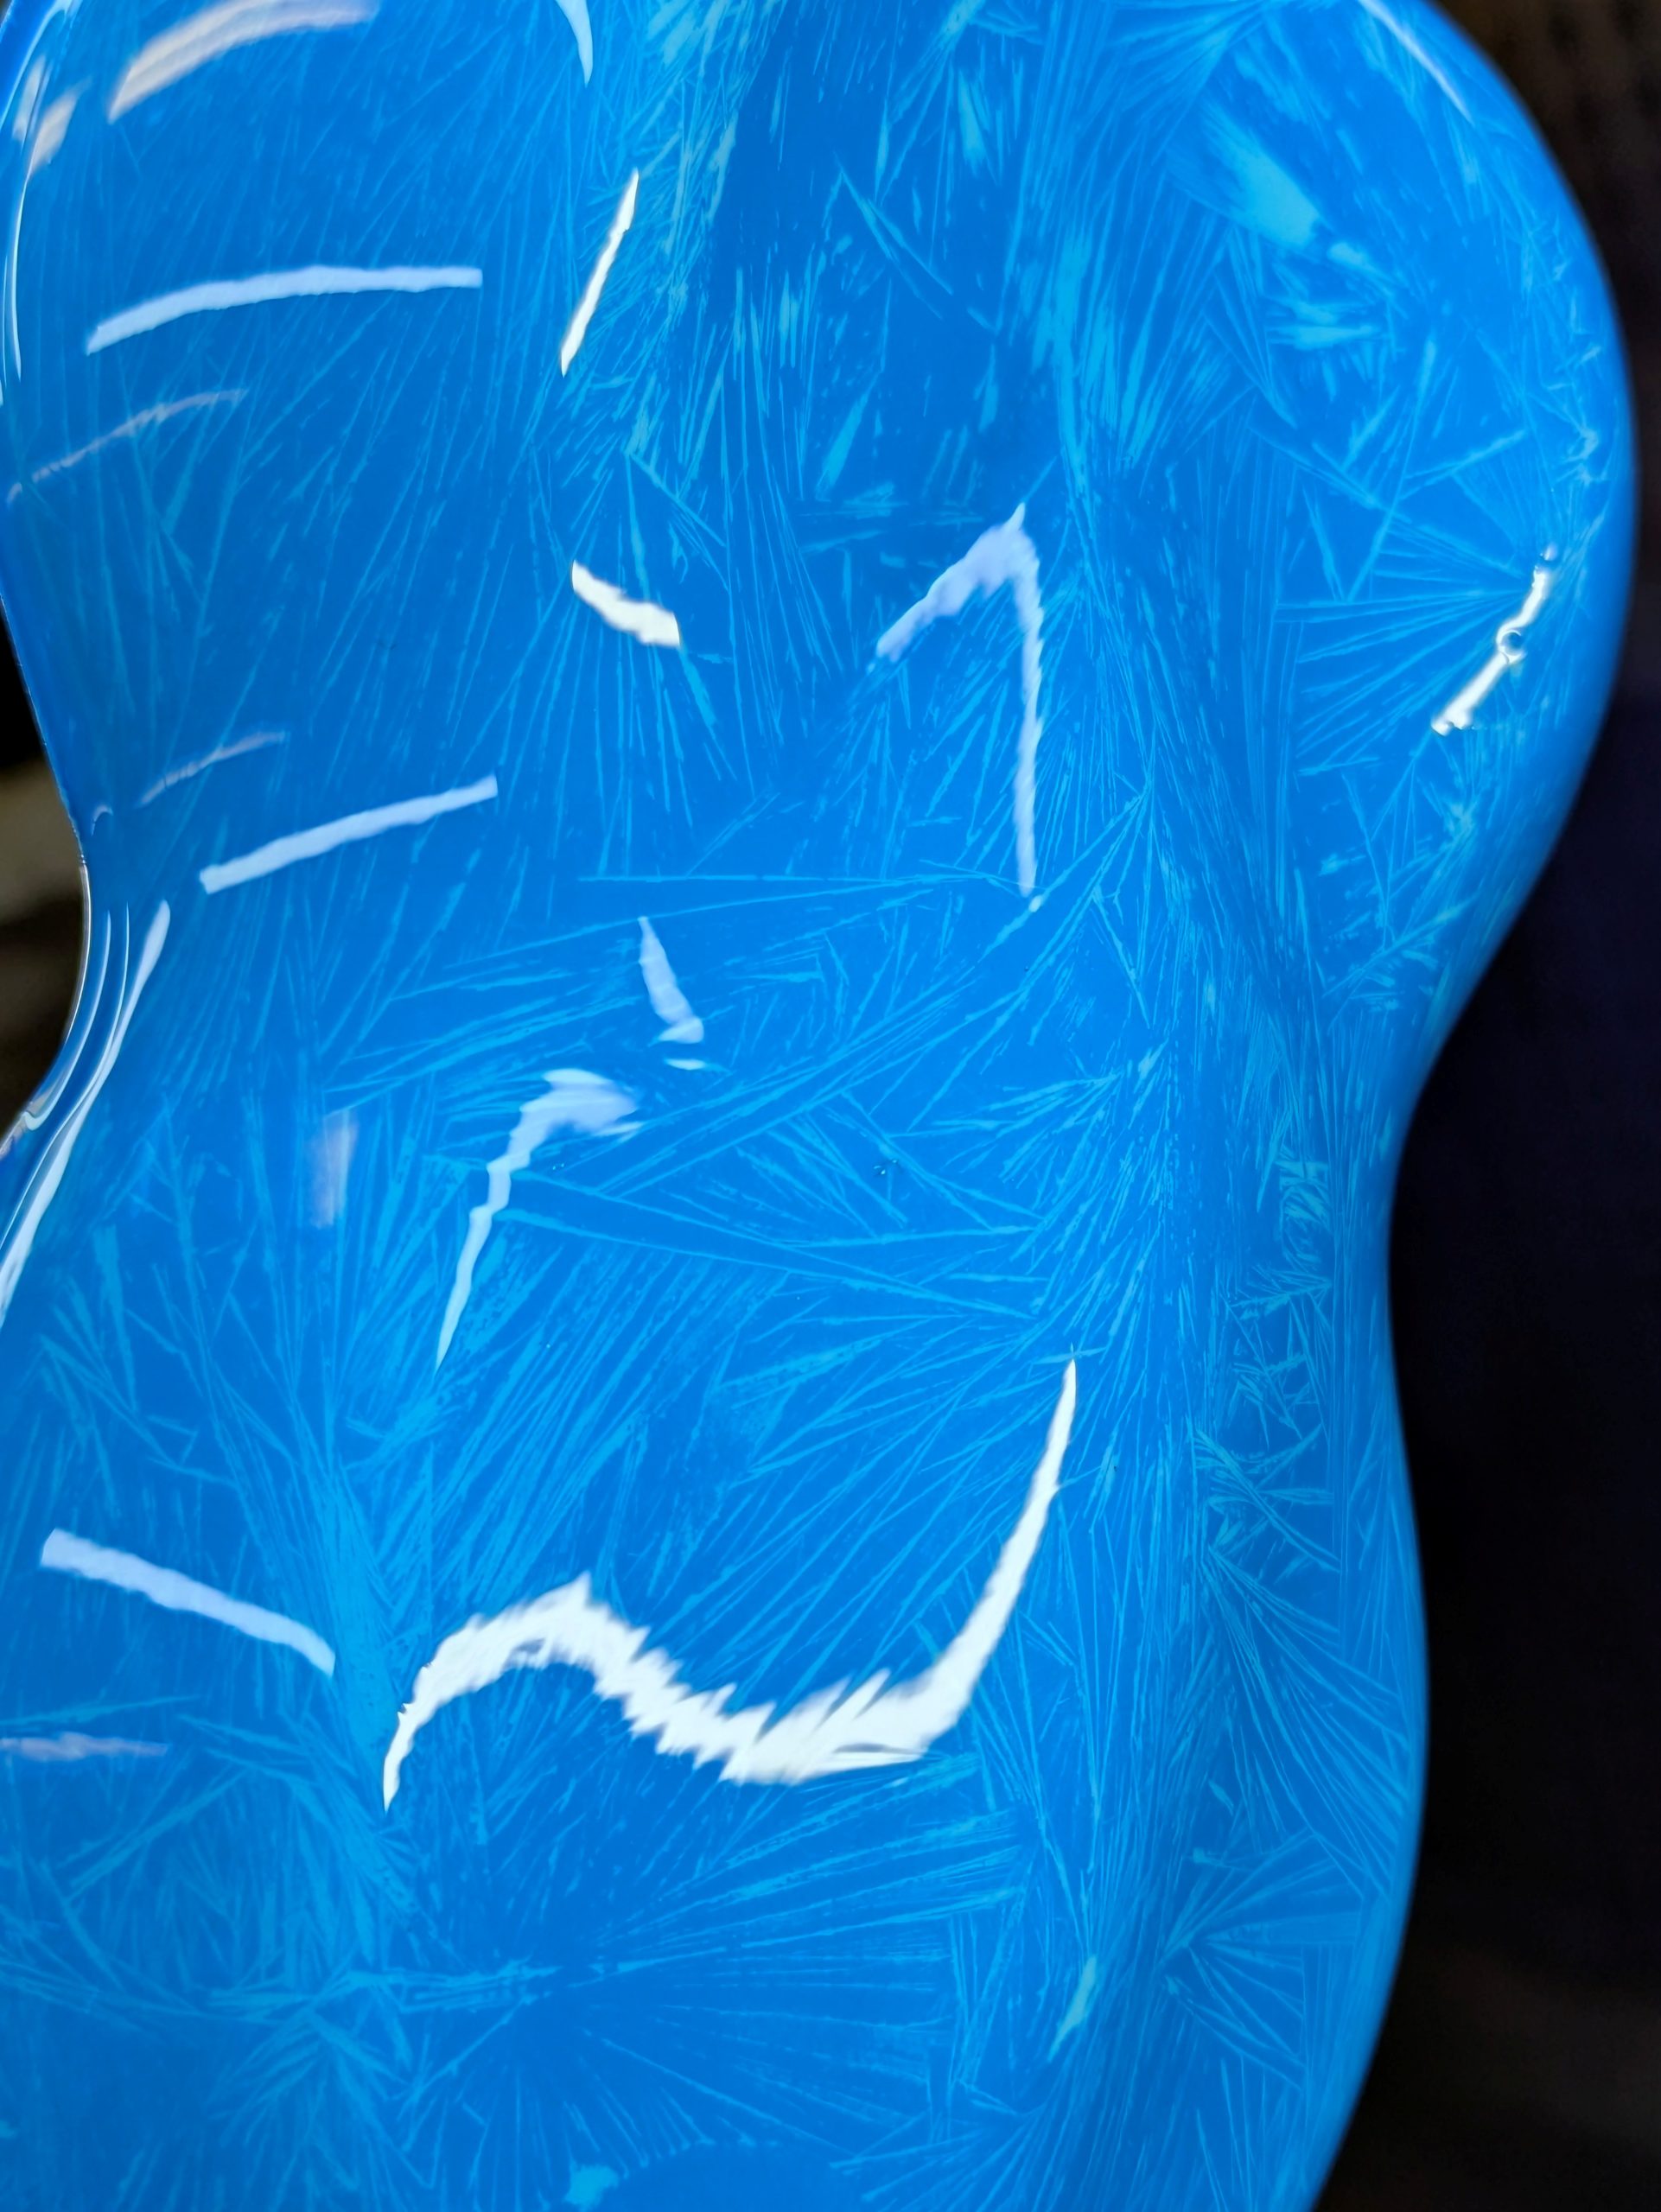
Finally, to “bind” everything together, I chose to varnish with a varnish slightly loaded with Candy cyan ink.
And here is our finished ice effect!

Ps: multiple variations are possible, blue crystals on a white background, pearly white rather than opaque, no Candy ink in the top coat, etc. It’s up to you to create!

How to create a polished metal effect

How to create a polished metal effect

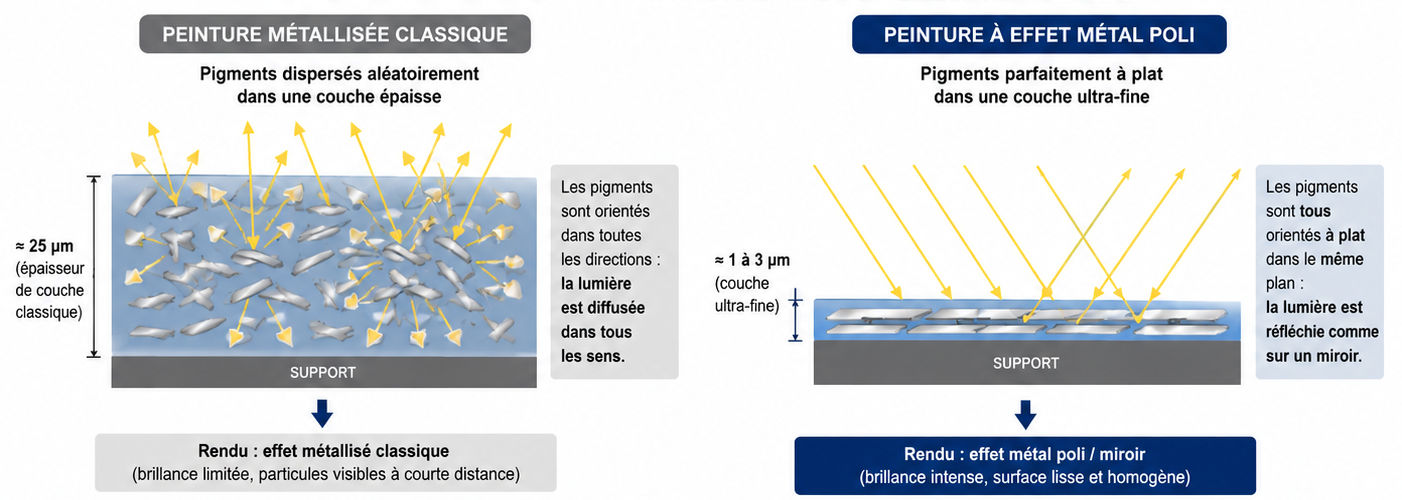
With a polished metal-effect paint, the aim is to replicate the appearance of genuine raw metal such as steel, stainless steel or aluminium. Unlike conventional metallic car paints, where each aluminium particle remains visible at close range, the aim here is to achieve a uniform, smooth and continuous surface, creating the illusion of a genuine metallic material.

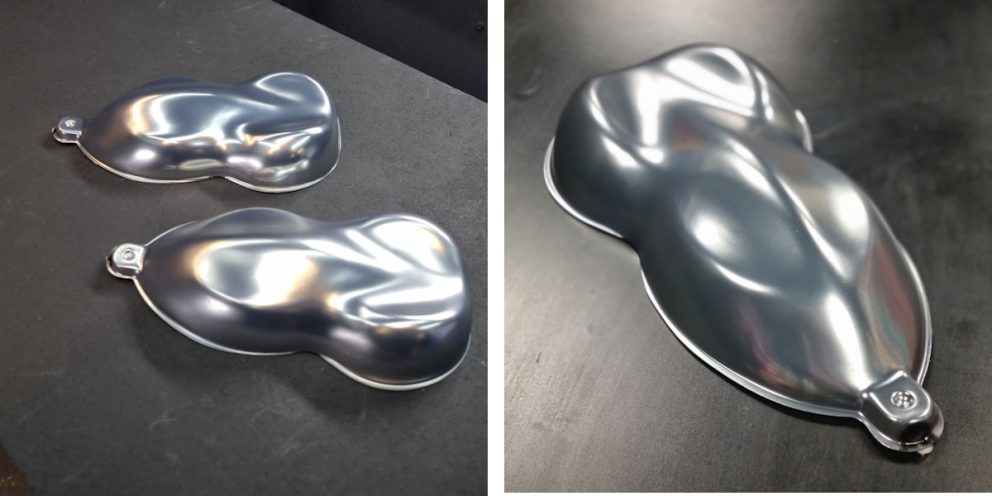
The polished metal finish is available in a range of colours: natural aluminium, mirror-finish chrome or polished gold.

To achieve this effect, three elements are essential:

  • very high-quality, perfectly uniform metallic pigments;
  • an extremely flat arrangement of these pigments;
  • a satin or semi-matt topcoat that preserves the raw metal finish.

With certain specialised aluminium paints, it is possible to achieve this polished metal finish. However, there is now a new alternative in the form of NeoChrome paint, which is not formulated using conventional aluminium, but rather a semi-precious metal.

Create a satin chrome finish with NeoChrome paint

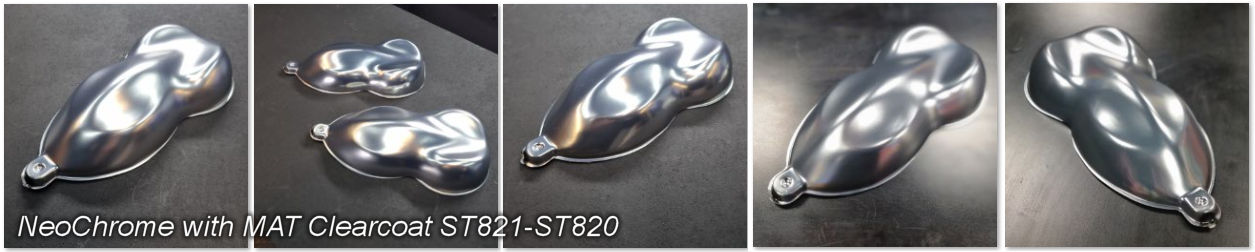
When applied in the conventional manner, NeoChrome paint produces a particularly intense mirror effect, with excellent opacity, very good resistance to UV light and corrosion, and is easier to apply than traditional aluminium-based chrome paints. It also takes to clear coating much more readily, which is a significant advantage for applicators.

We tested different types of clear coats — satin, semi-gloss and matt — on the NeoChrome paint to see how they affected the final appearance of the polished metal.

High-quality metallic pigments and VMP pigments

To understand how to achieve a genuine polished metal effect, you first need to understand how metallic pigments work.

In the field of paint, metallic pigments are mainly composed of aluminium. This metal is light, abundant and inexpensive, which explains its widespread use in metallic paints. These pigments take the form of micro-flakes which, when viewed under a microscope, resemble tiny flakes similar to Corn Flakes.

The higher the quality of the pigment, the finer, flatter and more uniform the particles are. Aluminium pigments are generally less than 70 µm in size, with a thickness of less than 5 microns.

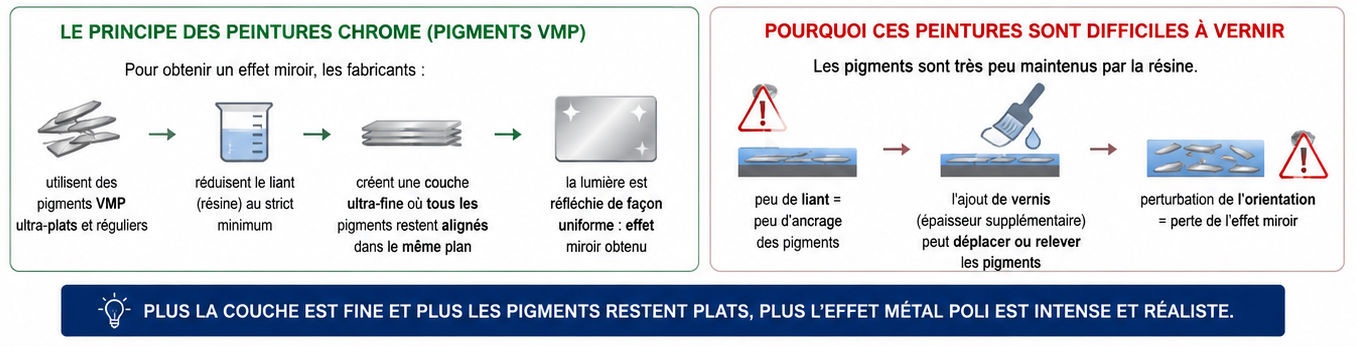
VMP (Vacuum Metallised Pigments) aluminium pigments represent a much more advanced technology. They are manufactured by vacuum metallisation, whereby an extremely thin layer of pure aluminium is deposited onto a carrier film. This metallic layer is then detached and fragmented into ultra-flat, perfectly uniform micro-flakes. Thanks to this technology, VMP pigments offer far superior light reflection compared to conventional ground aluminium pigments. They therefore enable the creation of chrome, mirror or metallic effects with exceptional visual depth.

Pigment placement: the key to the polished metal effect

When metallic pigments are dispersed randomly in a paint, they settle in all directions. The result is a conventional metallic paint.

To create a genuine polished metal effect, all the pigments must, on the contrary, be perfectly aligned in an extremely thin layer. It is precisely this uniform alignment that allows the light to be reflected in the same way as a real metal surface.

With conventional paint, this remains impossible, as the thickness of a single coat is generally around 25 microns – which is much greater than the thickness of the pigment itself. Take, for example, chrome paints formulated with VMP pigments: to achieve a mirror effect, manufacturers reduce the amount of binder to the absolute minimum. The aim is to create an ultra-thin layer in which all the pigments remain aligned in the same plane.

This is also why chrome paints are often difficult to clear-coat: the pigments are held in place by the resin only very loosely, and even the slightest addition of extra material can disrupt their alignment and impair the mirror-like effect.

The same principle applies to aluminium paints with a polished metal effect: the thinner the coat and the flatter the pigments lie, the more realistic the metallic effect will be.

Choosing the right clear coat to preserve the raw metal finish

The choice of clear coat plays a key role in the final appearance.

A glossy clear coat quickly gives a ‘car paint’ look, which is a far cry from the natural appearance of raw metal. In fact, most unpolished metals naturally have a satin finish rather than a mirror-like shine.

To maintain a realistic metallic finish, it is advisable to use a clear coat with a gloss level of between 20 and 60°. A clear coat such as ST820, with a gloss level of around 40°, offers, for example, an excellent balance between protection and visual realism.

It is important to bear in mind, however, that applying a matt or satin finish to a genuine mirror effect will automatically reduce the intensity of the chrome reflection.

The same phenomenon occurs with gold paints featuring a raw metal effect, such as the GOLD PREMIUM BC70, BC71, BC75 or BC76 paints. These formulations also use very high-quality metallic pigments and optimised particle positioning. If a topcoat that is too glossy is applied, the natural appearance of the gold metal is lost, giving way to an artificial, glossy paint finish.

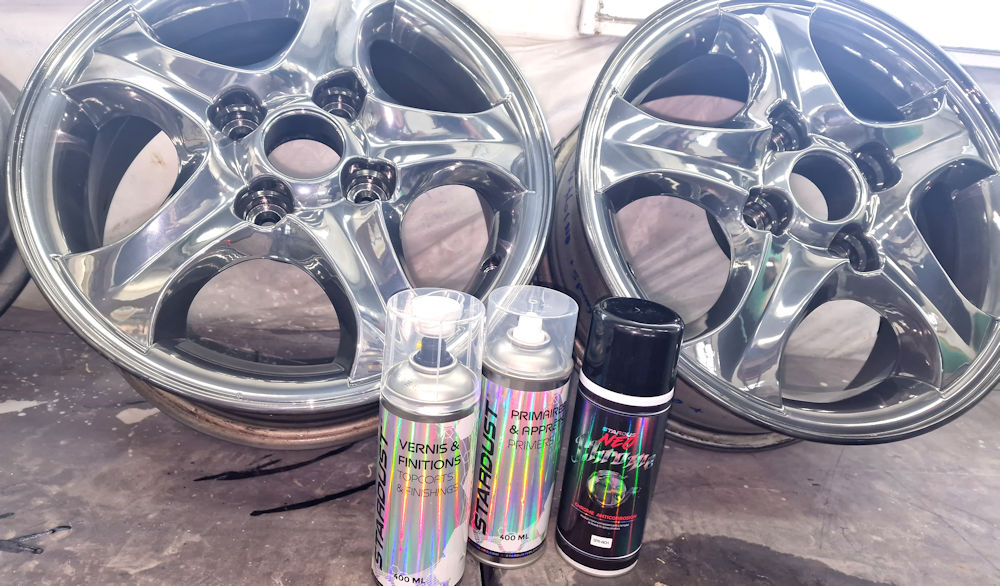
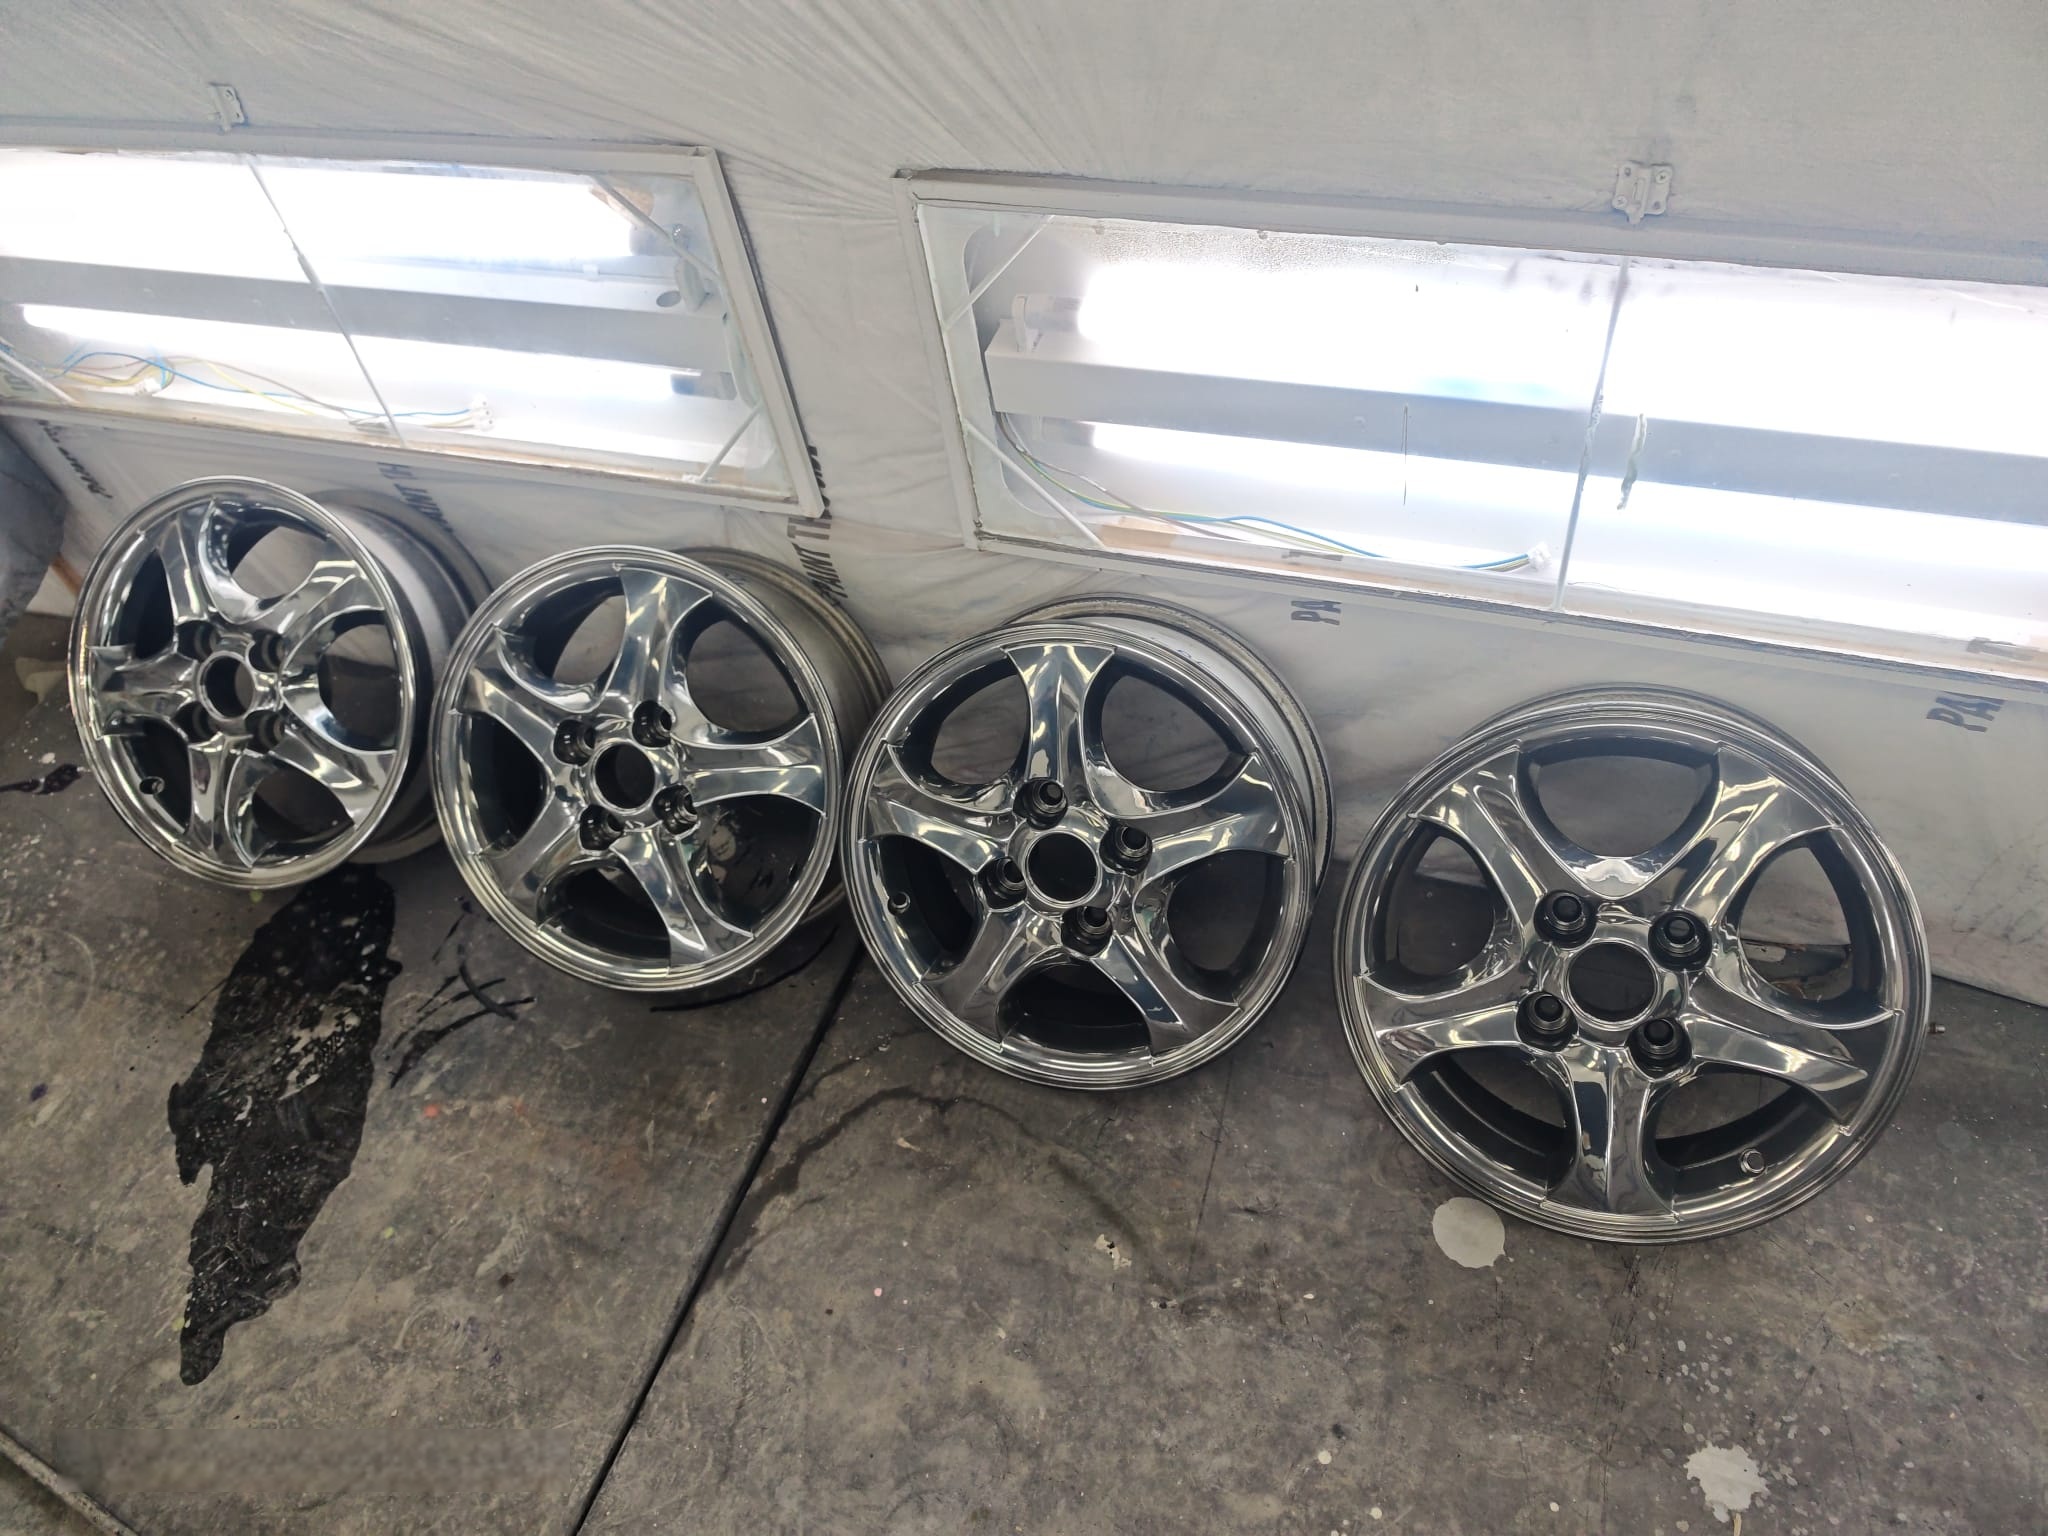
Paint the rims chrome using NeoChrome paint

Paint the rims chrome using NeoChrome paint

It is not often that we see truly significant and radical innovations in the field of paints and coatings, and this is precisely the case with the new chrome paint.

This new technology naturally prompts me to share this article with you about an innovative paint called NeoChrome, which is made from a rare metal with reflective and anti-corrosion properties.

We can put aside our preconceptions and limitations regarding chrome paint effects, which were often difficult to apply and disappointing once varnished. Gone are the days of complicated techniques, or the chrome effect disappearing when the varnish is applied.

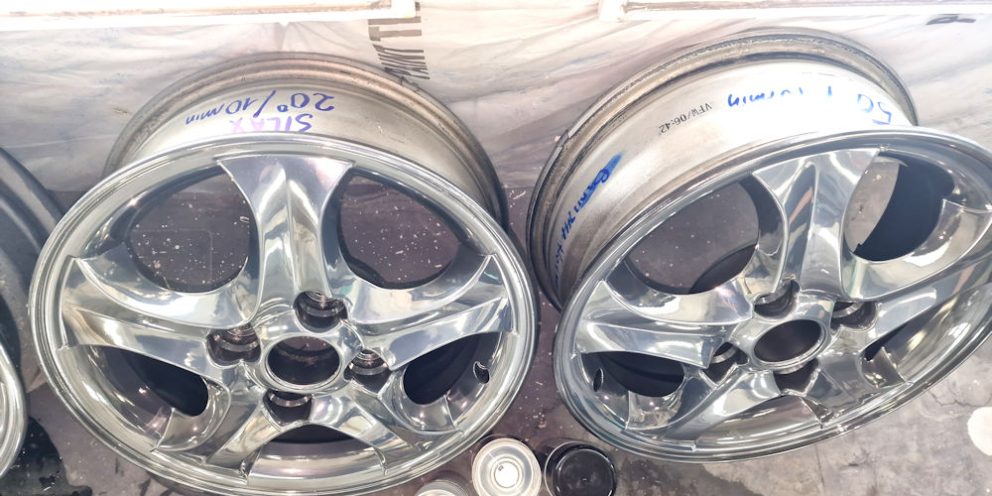
It is now genuinely possible to achieve a chrome finish on items such as wheel rims – which are relatively easy to paint – with a high-quality, mirror-like silver metallic effect.

That’s not all, as NeoChrome paint comes with a guarantee against corrosion and UV damage. On top of that, there is more than adequate adhesion between the different layers of the paint system.

So we have all the ingredients for a beautiful, durable chrome finish that can be applied to car wheels, or of course to any other exterior or interior car part.


Client project by @tintedrims using NeoChrome

Chrome-finishing wheel rims is now available to everyone, even in spray can form
Until now, there weren’t many options if you wanted to achieve a chrome effect on wheel rims: expensive and highly regulated electroplating, difficult, costly silver plating that isn’t UV-resistant, or older-generation chrome paints.

It is now possible to paint using a spray gun, or even with the aerosol version of NeoChrome paint.
With a bit of care and by strictly following the instructions on the product page, anyone can paint chrome wheel rims without needing any formal training or professional equipment.

In summary, here is a brief guide to chrome-plating wheel rims using NeoChrome paint:

  • Step 1: Prepare the surface (sand with P500 grit on painted rims) or apply an anti-corrosion metal primer to bare rims
  • Step 2: Apply the black base coat followed by the two-component ceramic varnish, and allow it to dry for at least 48 hours
  • Step 3: Apply the NeoChrome paint by spraying on very thin layers until you achieve the chrome effect.
  • Step 4: Apply the ceramic sealant to finish.


Aerosol application instructions: There is no reduction in the chrome mirror effect on the wheel rims.

Furthermore, there is no special technique for applying the varnish, and any car varnish can be used.

There are simply a few rules regarding drying and the possibility of applying a top coat after 10 minutes using a fixative.

The benefits of chrome-plated rims with a painted finish

1 – Quick and easy to apply (the process takes around seven days for all stages, which can be reduced to 48 hours if firing is included).

2 – The chrome finish remains durable thanks to its anti-corrosion properties. It does not yellow in the sun.

3 – Cost: around €200 to chrome-plate four wheel rims using the complete NeoChrome kit.

A few important tips:

– Avoid applying thick coats and allow each coat of chrome to dry completely before applying the next one.

– Extend the drying times as much as possible to ensure optimal curing right through to the core.

– Use the varnish mixture quickly, without exceeding the pot life*

How to create a brushed metal effect in paint?

How to create a brushed metal effect in paint?

This technique is simple and accessible to everyone.
The following steps should be followed:

When I want to achieve a brushed metallic look, I like to start by working on the background:
On any surface that has been sanded and degreased, I apply a black primer.

This first step will ensure that subsequent coats adhere properly and is ideal for metallic paints.
Once your primer is dry (24 hours), I sand it with P500 dry sandpaper.

At this point, you are free to choose any metallic colour you like, depending on your taste and the colours available!
Anything is possible. For example, you can simulate brushed aluminium using the BC60 Micro Aluminium base, or brushed brass using the BC53 base.
I recommend choosing metallic colours with a fine grain, which will give a realistic metallic appearance.

Then I apply the dye and leave it to dry for at least 30 minutes.

It’s time to create your brushed metal paint effect.
Arm yourself with a medium-grit abrasive fibre.
Personally, I apply this fibre using only the weight of my hand, and by choosing the direction of my brushing, I create the brushing pattern.
Be sure to stick to your chosen brushing direction, with each pass going from edge to edge without stopping ‘in the middle of the piece’.
Do not press too hard, otherwise you risk removing too much metallic colour.
The idea is not to reveal the primer.

You have created ‘streaks’ in your metallic colour. Well done, you have achieved a brushed metal effect.

Still to be varnished with 2 options:

The midcoat in Custom paint

The midcoat in Custom paint

Transparent base, binder, resin, interlayer, midcoat, medium… these are just some of the many terms used to describe this product, which has as many names as it has uses.

In this article, we will clarify everything related to transparent midcoat base and present all the possible uses that this transparent binder can offer painters.

What is a transparent interlayer base?

It is a product specific to the field of custom painting.

In the field of car bodywork, it is used solely for mixing paints: car body painters call it the ‘binder’ or “resin” or sometimes, according to the Anglicism, ‘Binder’.

The binder is simply the base of the paint. It is a mixture of acrylic (or polyester or nitro) polymers in a solvent or water phase, which binds the pigments, allows adhesion, and provides strength, flexibility and texture.

All major automotive paint brands offer a midcoat binder in their colour system. The car body painter adds all the concentrated opaque or transparent, pearlescent or metallic pigment pastes to mix their colour codes.

The appearance and characteristics of a binder

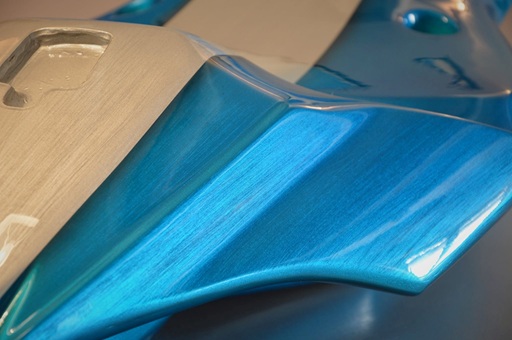
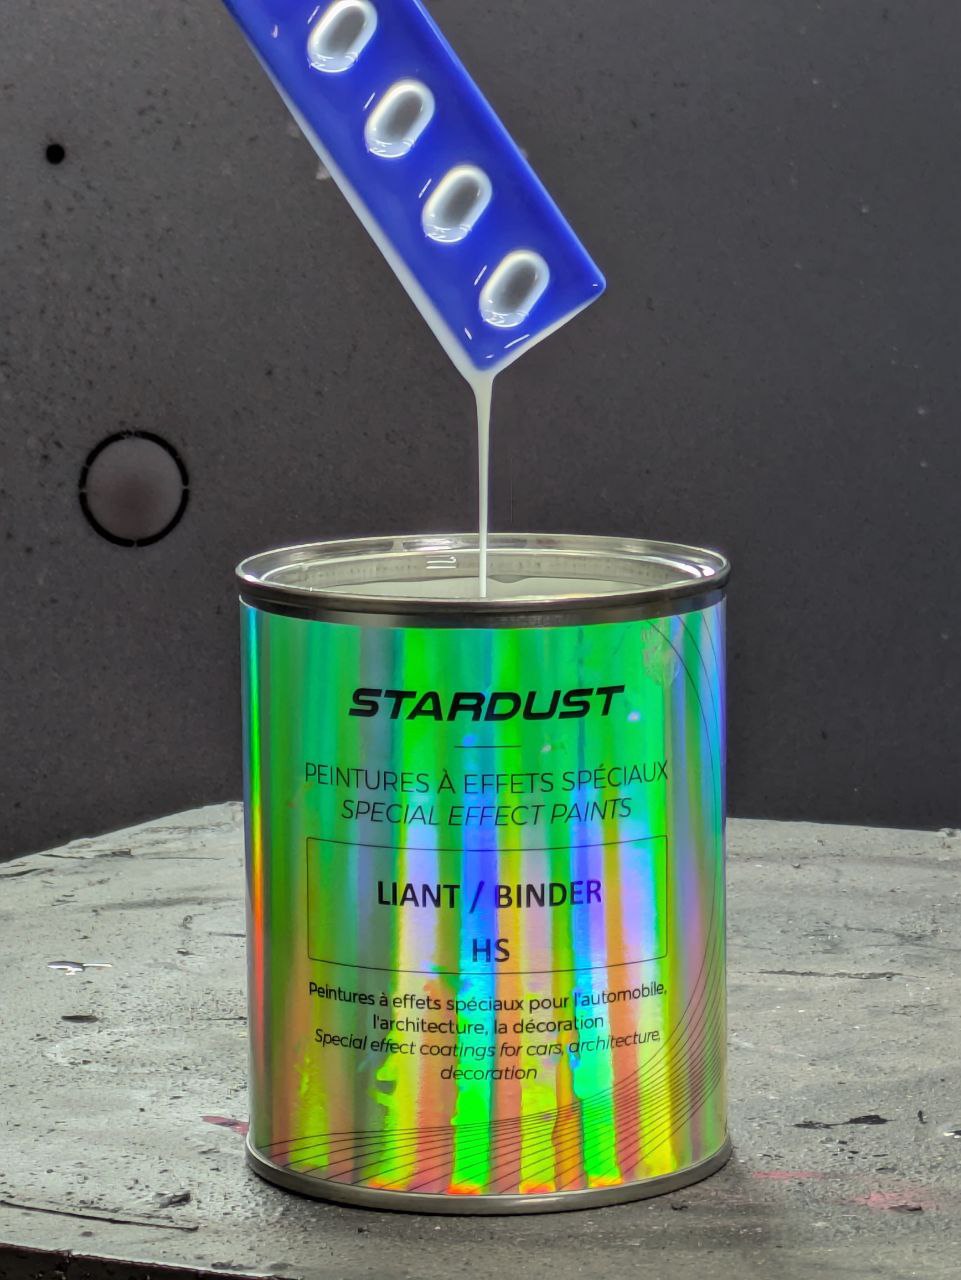
The midcoat or binder is a liquid that varies in thickness and has a cloudy or whitish appearance. The binder is matt and transparent once it has been applied and dried.

The binder is rarely as transparent as a varnish, but it is sufficiently transparent to be completely colourless and invisible. Once applied and dried, the thickness of a transparent midcoat binder is only about 15 microns per coat.

Midcoat binder is always single-component (1C), as it is a base coat for varnish.

It can be supplied pure, to be diluted (50 to 100%), or supplied already diluted, ready for use with an airbrush.

There are different types of midcoat

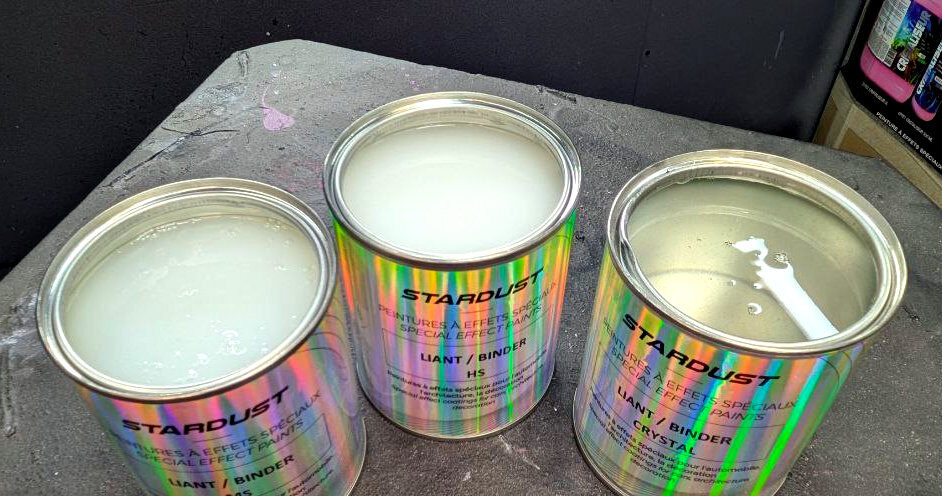
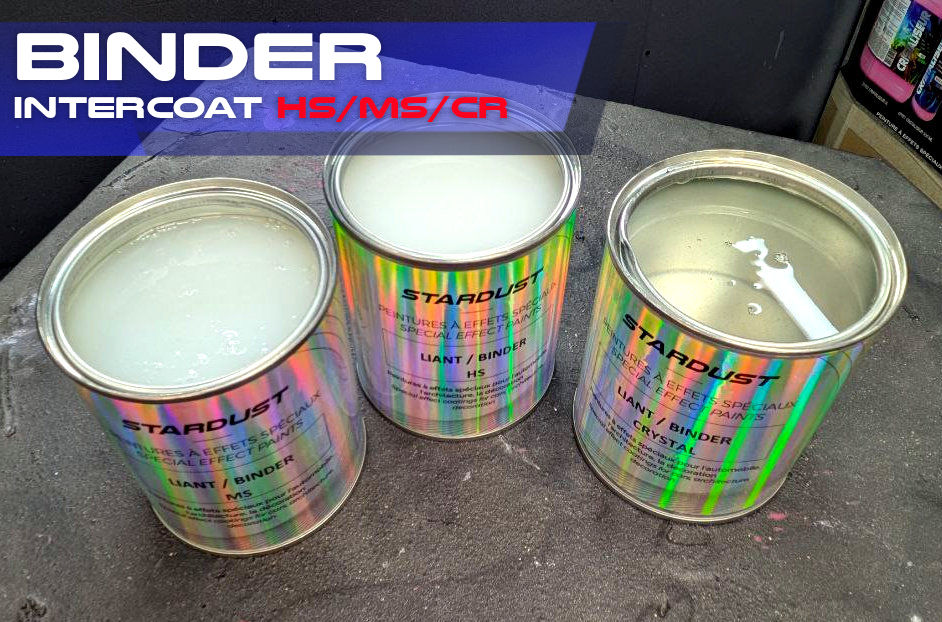
-HS: high solid content, HS binder is thicker, strong and resistant to pigment load, ideal for colour formulations, protection, mixing glitter, candy and iridescent effects
-MS: Medium Solid, the MS binder is thin and ideal for pearlescent and metallic effects
-Crystal: the Crystal binder is translucent like varnish and is a special type
-Hydro: the water-based Hydro binder is used to comply with the European standard on VOC limitations.

Fields of application

In the field of creative leisure and plastic arts, it is used as a medium. These are often water-based acrylic binders.

In the world of custom painting, midcoat is used for several different purposes, with a paint spray gun or an airbrush. Here are the different possible uses and advantages:

1/ Mixing pearlescent pigments and Candy

Rather than adding dry pearlescent pigments to the varnish, it is preferable to add them to a transparent matt base coat.

(See video)

► Advantages: thin application, quick drying, and optimal placement of pearlescent pigments, which lie flatter than in a thick varnish.

This also prevents the pearlescent particles from moving during drying and avoids dripping when applying multiple coats.

With a midcoat binder, you can apply as many coats as you want at once without the risk of dripping.

2/ Fixing and protecting decorations

When creating a painted decoration with overlapping layers and different colour areas, the masking and painting work can take several days.

► Advantages: The transparent intermediate coat allows you to lightly sand the surface at the start of the day to ensure the new layers adhere properly without damaging the decoration.

This is particularly useful when creating freehand designs with an airbrush. The transparent intermediate coat creates a very thin but effective protection against stains and scratches until the next design session.

For those who use water-based airbrush paints, there are transparent airbrush binders available in small bottles, ready to use.

3/ Isolate adhesive masking

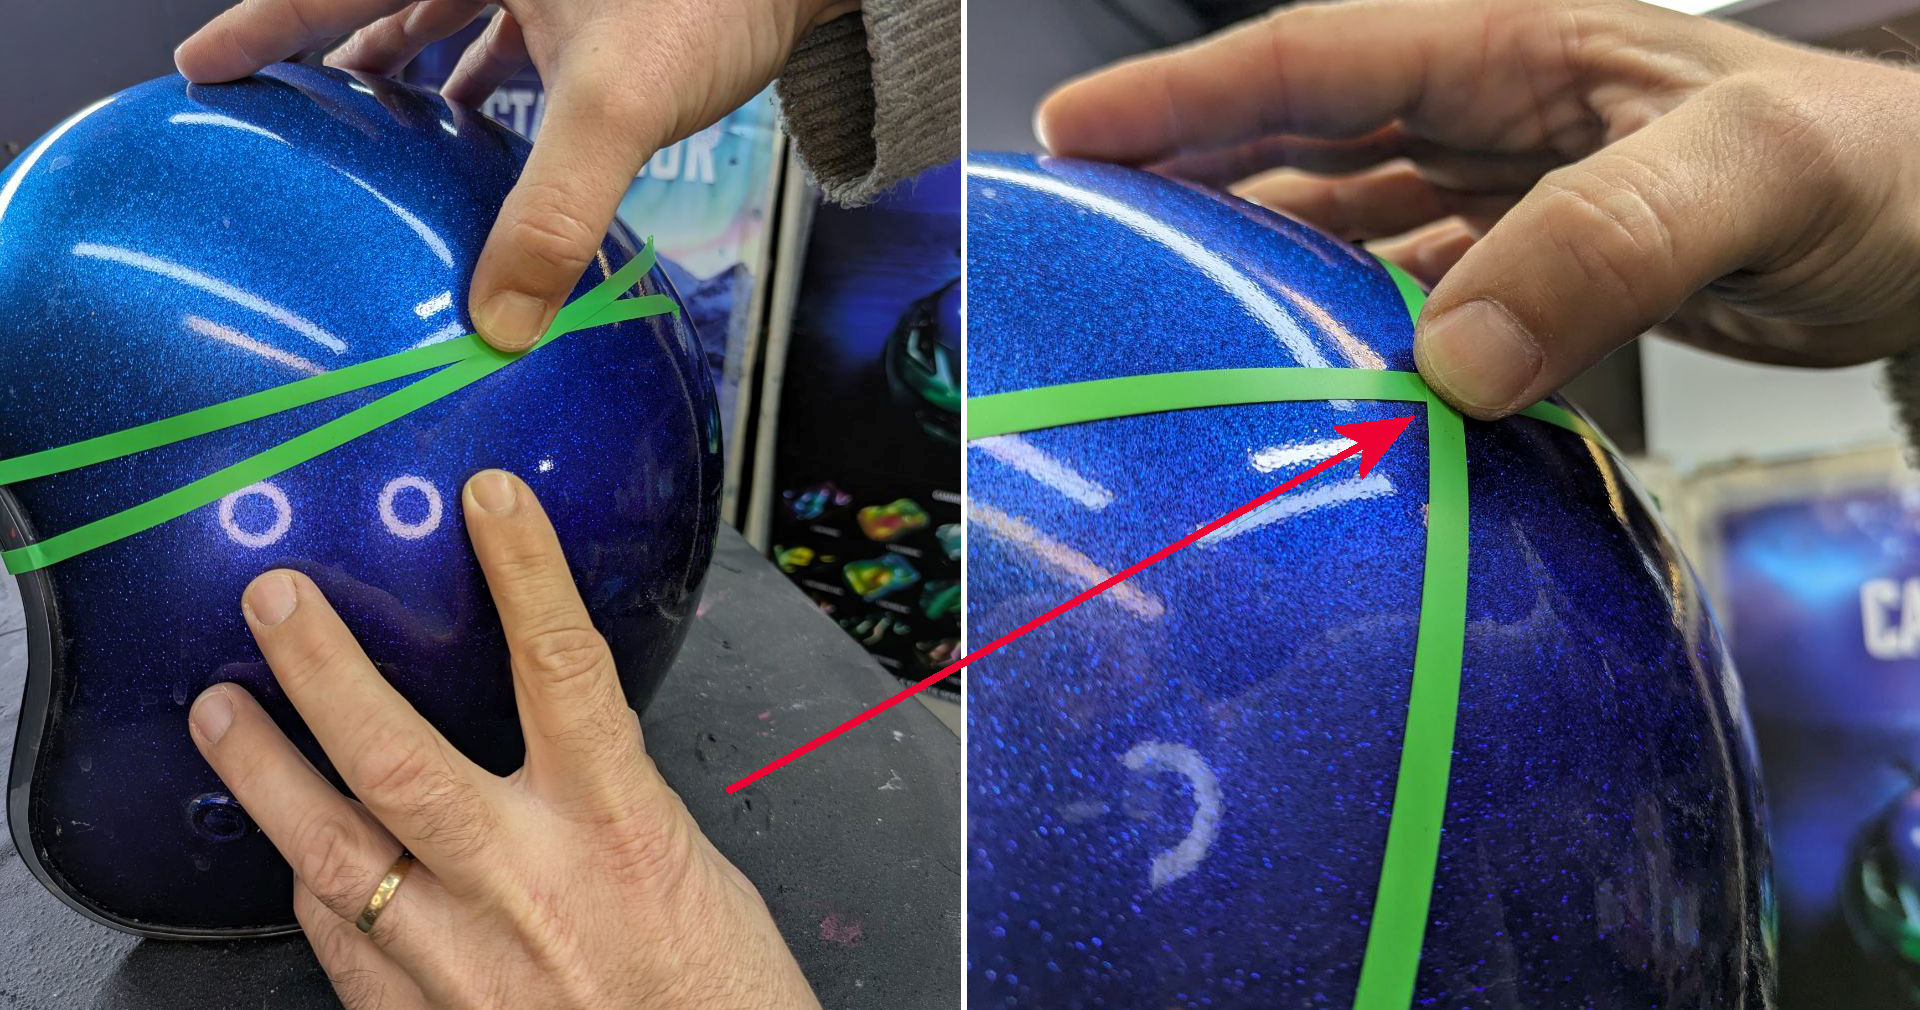
When two adhesive PVC lines cross, a small tunnel can form at the intersection of these lines or colours can seep through. When there are many lines and adhesive masking, it becomes difficult to control everything, and this is where the transparent midcoat binder can be used to create an ultra-thin, invisible insulating layer to prevent any risk of leakage.

4/ Mixing and creating colours

If you want to create your own colours by mixing concentrated shades, pearlescent or aluminium pigments, or even fluorescent pigments or phosphorescent, you will need HS binder.

The binder can be loaded with 3 or 4% pearlescent pigments and 5 to 25% colourants.

Using midcoat binder to create candy paint

Custom painters do not all agree that a single-component transparent intermediate coat is as transparent as a clear coat when painting with candy paint.

While it is possible to apply several coats of Candy clear coat to motorcycle parts, it is often difficult or impossible to apply repeated coats of clear coat to vertical surfaces such as those on a car without causing runs or even marbling defects.

In such cases, a midcoat binder is mainly used, which allows multiple coats to be applied to achieve a very deep and dark Candy colour. Thanks to its immediate drying time, the pearlescent or Candy coats set immediately and form a perfect film.

Some claim that the transparency is the same, while others say they perceive a slight difference in the level of transparency.

What interlayer binder cannot do!

This versatile product, essential for custom painters, has many advantages, but there are some things it cannot do:

Levelling: Transparent interlayer binder cannot be used for levelling, as it is far too thin for this purpose. It is half the thickness of a conventional automotive varnish.

When you want to fill with a transparent material to level a surface, for example after applying polyester flakes, you need to use a very thick varnish such as Super UHS 6000 varnish.

Blocking migration:

When covering soluble colours such as Candy colours with light colours, the solvents reactivate the Candy colours, which then bleed into the topcoat.

In such cases, a transparent midcoat base coat will not create a barrier against Candy migration. Candy can only be blocked by a sufficiently thick layer of two-component varnish.

SCO Color System Chameleon/Opal

SCO Color System Chameleon/Opal

Paint combinations with color-changing effects

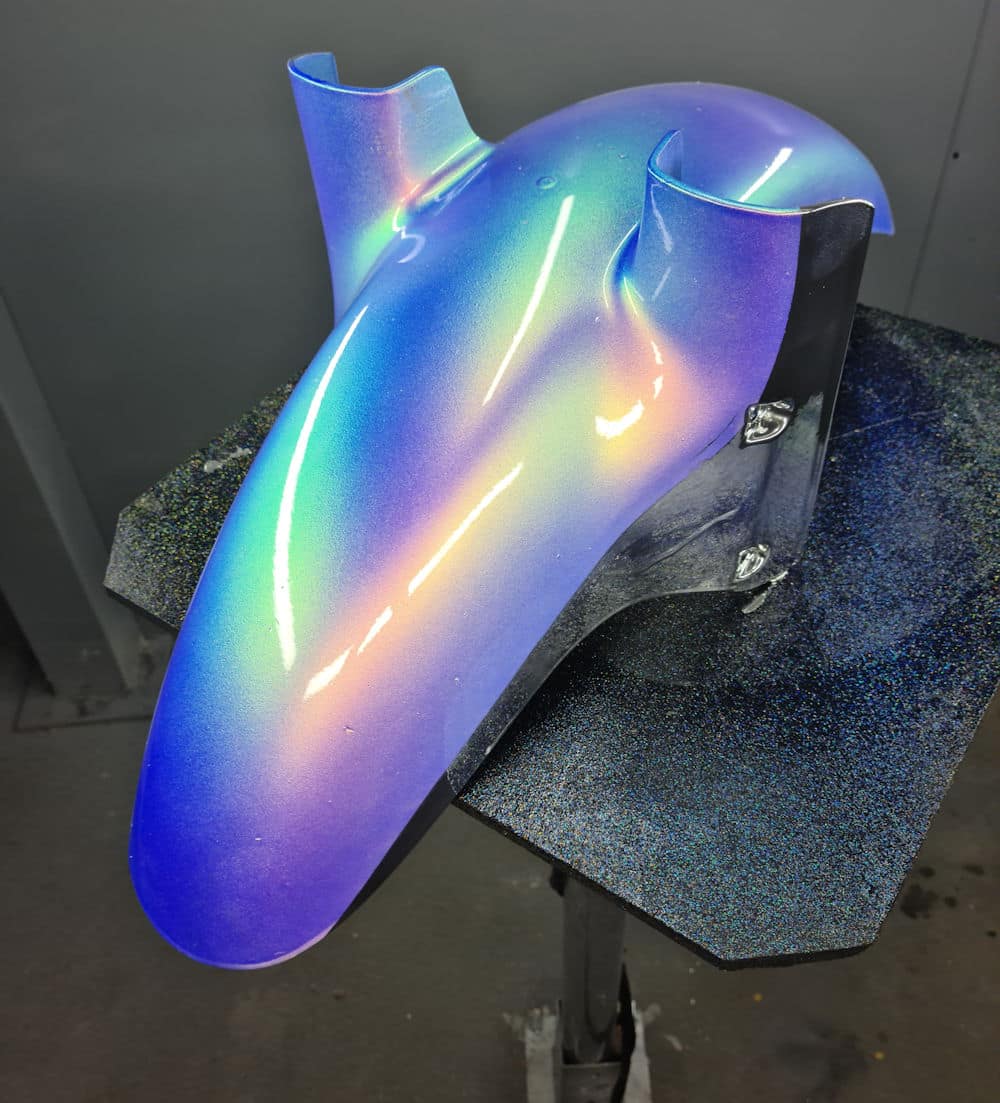
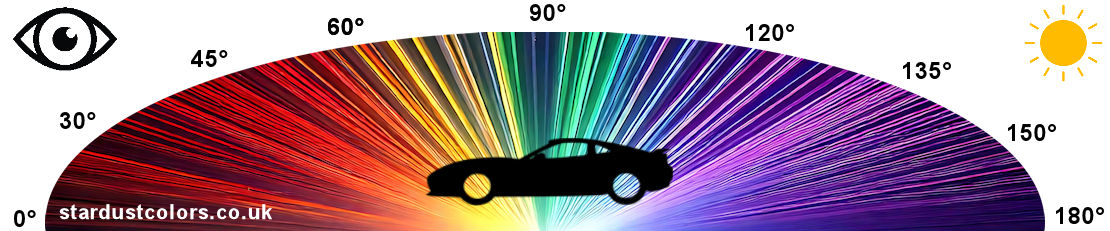
Some paints and special effects create a luminous color that changes depending on the viewing angle.

These chameleon paints create color by reflecting light. This phenomenon is made possible by the optical properties of certain chameleon paints made from synthetic mica. This reflection of luminous colors places itself in the background color.

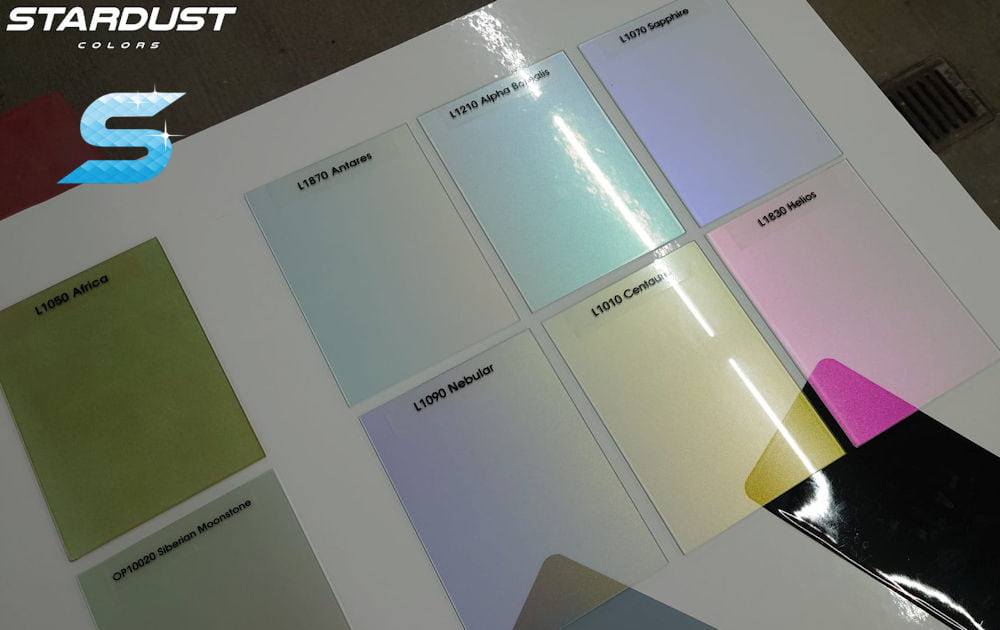
The range of chameleon colors developed by StardustColors is certainly one of the largest in the world, with more than 44 color references (STANDARD range (20) and around twenty EXTREME colors (24)).

► There is a SEMI-OPAQUE type of chameleon paint and a TRANSPARENT type, as shown in the table below.

Stardust Chameleon Standard Series
Videos


Stardust Chameleon Extrem series
Videos

205 gold pink violetTRANS
L1009 ORIONIS Green Turquoise Blue Violet Red Orange
215 blue redTRANS
L1010 CENTAURI Tourmaline Orange Gold GreenTRANS
217 turquoise blue violetTRANS
L1020 DRACONIS Grey Green
225 gold green blueTRANS
L1022 POLARIS Red BlueTRANS


L1030 MAJORIS Aquamarine Silver
1001 green violetTRANS
L1040 RIGEL Green Violet Pink SilverTRANS
1002 turquoise pinklTRANS
L1050 AFRICA RED GREEN YELLOW
1003 orange greenTRANS
L1060 ANDROMEDA Violet Blue green gold
1004 blue greenTRANS
L1070 SAPPHIRE Blue VioletTRANS
1005 green violet orange

L1080 GAMMA LEONIS Gold GreenTRANS
1006 green silver violet

L1090 ​​NEBULAR Blue Gold GreenTRANS
1008 green brown

L1100 SIRIUS Blue Green
1345 turquoise violet pinkTRANS
L1210 ALPHA BOREALIS Green Blue VioletTRANS


L1230 EPSILON Turquoise Blue Violet Red Gold
82061 outremer blue violet red

L1280 SAGITTARII Blue Violet Red Gold
82062 turquoise blue violet red

L1830 HELIOS Red OrangeTRANS
82063 blue violet red gold

L1864 SCORPIUS Brown Gold Green BlueTRANS
82064 violet orange

L1866 ALDEBARAN Green Gold Pink
82065 red gold

L1868 ARCTURUS Green Gold Orange
82066 pink green

L1870 ANTARES Fire Orange GreenTRANS
OS32 green copper

L1890X PEGASUS Green Turquoise Blue Violet Red Orange G-Gold
CS32 green blue

HS1 HYPERSHIFT Black/orange Red/Gold


HS03 HYPERSHIFT Black/Violet Red/Gold


HS05 HYPERSHIFT Black/Blue

You can order the complete kit, which includes the base coat*, chameleon effect* and clear coat, here:
► Motorcycle kits Motorcycle tuning paint kit
► Bicycle kits Special effects bicycle paint – complete kit including base coat, paint and clear coat
► Scooter spray paint kit Special effects scooter paint: Chameleon, Candy, Holographic
*Choice of base colours and chameleon effects

Chameleons should usually be applied on a black background.

Transparent chameleons, however, can create very interesting color effects when applied to white or even brightly colored or pastel backgrounds.

Basic colors (among 63 colors in the GRAPHIC range)

GPH001 Turquoise GPH011 Vivid red GPH022 Orange GPH061 Violet
GPH003 Vivid green GPH012 Pink GPH055 Grey GPH065 Orange
GPH005 Cyan Blue GPH013 Yellow GPH056 Amaranth  
GPH007 white GPH018 magenta GPH057 LILA  
GPH010 Black GPH020 Sienna GPH060 Ultramarine  

White Backgrounds
Chameleon colors are identified as “OPAL” when the background color is white or very light, making them resemble the color effects of certain seashells.
Find OPAL colors

Intermediate colors
When used as an undercoat, transparent chameleons create very interesting effects. The background color is little or not at all altered by the chameleon. The color-shifting reflection may only be visible under a direct light source; it remains invisible in the shade or under diffused light.

Black backgrounds and dark colors
They allow the chameleon to fully display its colors.
Find EXTREME colors

COLOR POSTERS
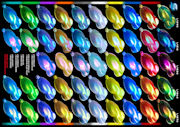
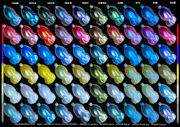
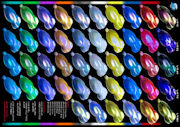
Three large-sized (A1 or A2) color chart posters showing all the transparent chameleon paints applied to different background colors of the SCO system
You can download the high-resolution images of these charts below, or order them in the Stardust poster category

It’s possible to create unique combinations on

  • bright colors such as orange, red, green, and yellow
  • light “pastel” colors
  • complex and subtle colors such as ochre, brown, and purple…
    ♣ Never use metallic or pearly bases; this will cancel out the pearlescent optical effect.
    Examples

L1210 ALPHA BOREALIS / OP121Q offers three cool-toned reflections: TURQUOISE BLUE VIOLET.
This is a highly transparent shade, among the strongest. It’s a great shade for creating contrasting effects (e.g., warm background/cool reflection).

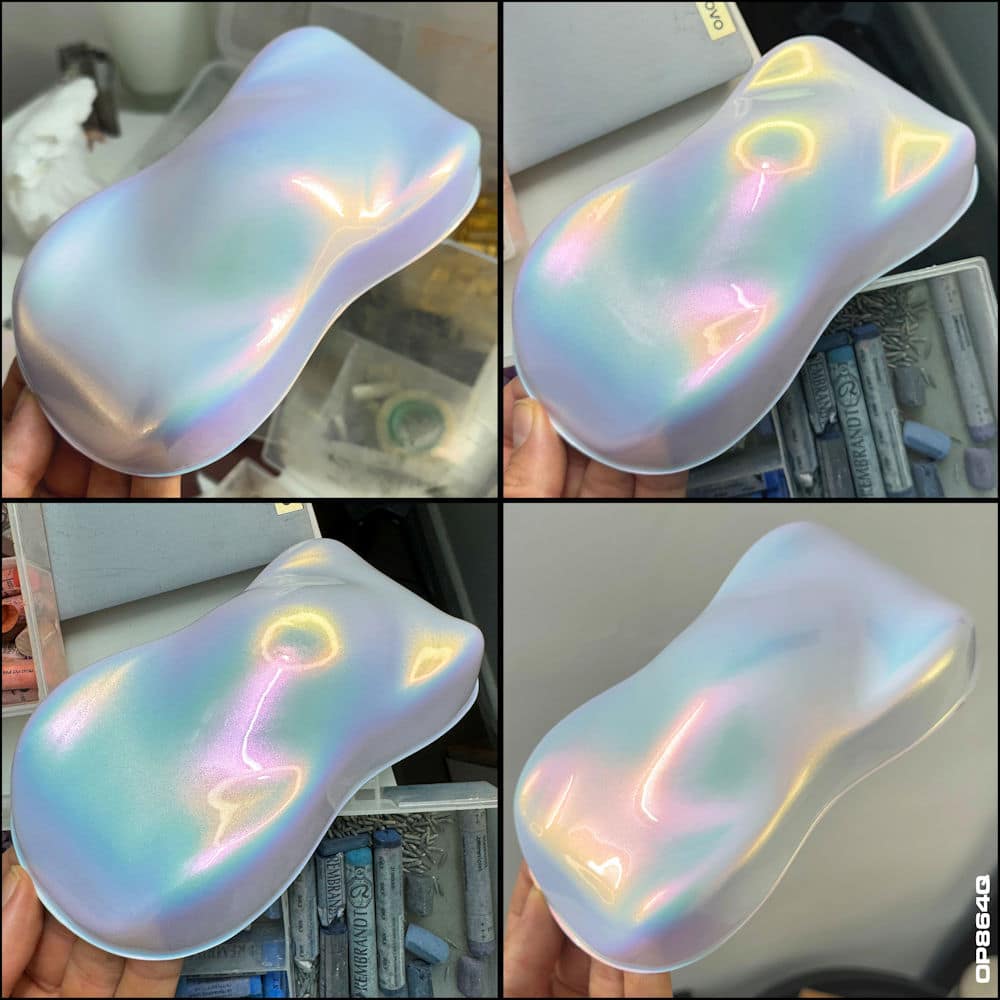
L1864 SCORPIUS / OP864Q
This is a very powerful semi-transparent shade that creates colorful reflections ranging from PINK, ORANGE, GOLD to GREEN.

Economical Colors
There is a range of chameleon colors that are much more affordable than the EXTREM colors.
With highly effective colors such as:
♦ 215 BLUE RED
♦ 217 TURQUOISE VIOLET
♦ 225 BLUE GREEN GOLD
and finer, more subtle colors such as
♦ 1001 VIOLET GREEN and all the other references in the 1000 range.

The most remarkable SCO color combinations, coupled with Candy, have been grouped together in the LUNAR range, available very quickly.

System SCO L1870 ANTARES

System SCO L1830 HELIOS

System SCO L1022 POLARIS

System SCO L1864 SCORPIUS

LUNAAR SC0 L1090 NEBULAR

LUNAAR SCO L1070 SAPPHIRE

LUNAAR SCO L1080 GAMA LEONIS

LUNAAR SCO 1345

System SCO L1210 ALPHA BOREALIS

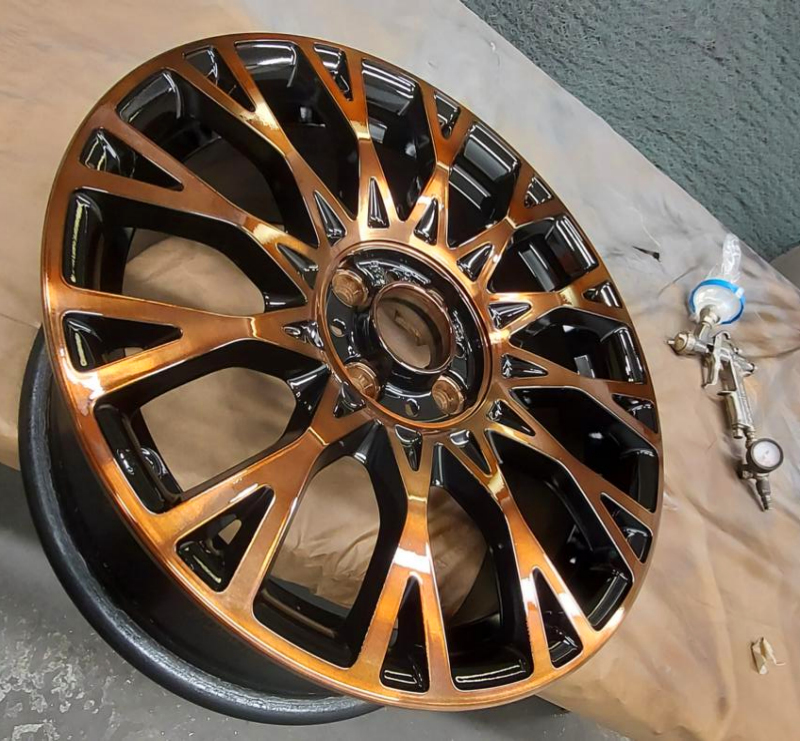
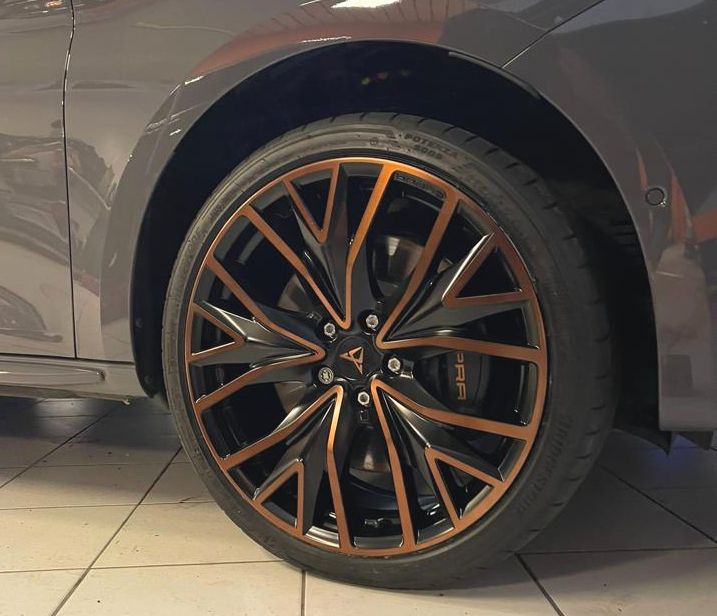
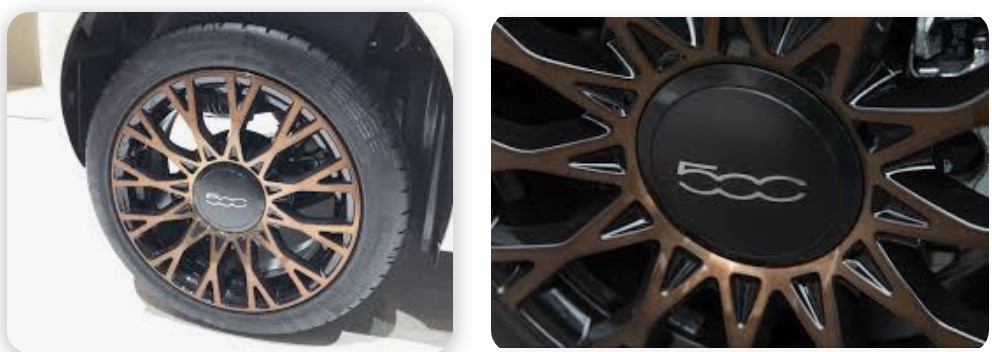
Special recipe to achieve the color of the copper metallic rims SEAT CUPRA and FIAT 500

Special recipe to achieve the color of the copper metallic rims SEAT CUPRA and FIAT 500

Cupra is a manufacturer that belongs to the German Volkswagen group. Previously it was the sports division of the Spanish car manufacturer SEAT until 2018, when it became the successful brand we know today.

The ingredients of this success are high performance, affordable prices, but also innovation, style and talent. CUPRA models redefine racing, and today, in just a few years, it has become a recognized brand of sports cars .

How to reproduce the colours of CUPRA copper rims?

Design and colours are essential elements integrated into the CUPRA brand.
In this blog post, we present some special paint formulas developed by one of our customers to reproduce the effect colour of CUPRA rims..

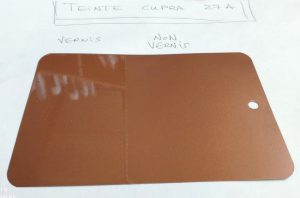
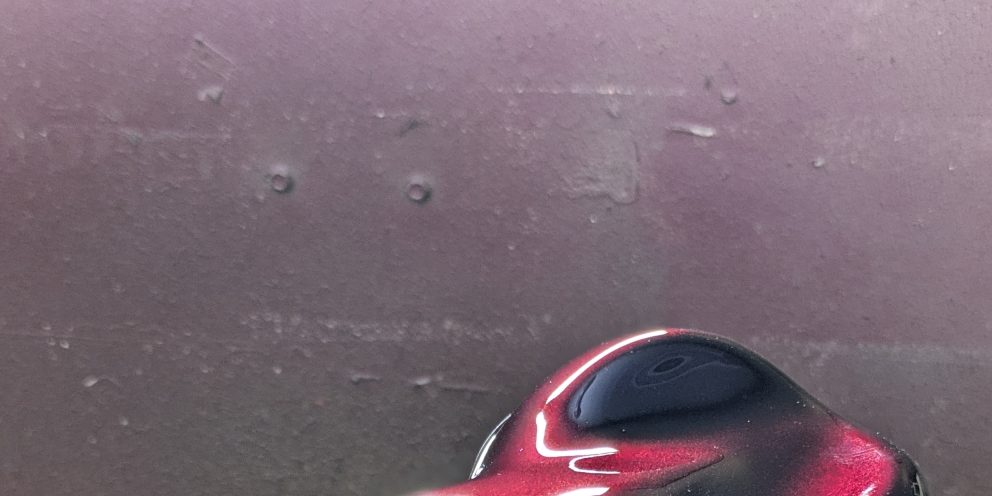
There is a CUPRA metallic shade with the color code L27A named “CUP COPPER”

It is a solvent-based 1K basecoat, available in both can and aerosol format, it should be applied over a RAL 7040 grey primer.

There is also a similar color, copper-coloured shade, created using transparent tints

Below is a recipe developped by one of our professional automotive paint applicators.

This is a matte Candy finish, which can be applied directly to the metal rim (our matte clearcoat adhere to bare metal) or applied over an ultra-fine metallic base such as BC60

Special recipe: Seat Cupra Red Copper clearcoat

100g of extra matte varnish St822
20g hardener
25g thinner

4g of Candy “RootBeer 18”
2g of Candy “Gold C27”
2g of concentrated black tint*

Any concentrated opaque black tint can be used. This addition helps “break” excessive transparency.
Apply several coats until you reach the desired shade..

Special recipe: Fiat 500 Copper clearcoat

100 g of varnish (matte or glossy)
Hardener (20g or 33g depending on type)
Thinner

+
3.5g of pure Black tint (opaque tint)
6g of « Candy Root beer 18 »

Mix thoroughlyl!
Apply on aluminum base or raw rims
using several cross-coats , until the desired result is achieved.

Guitar painting: how to personalize your guitar?

Guitar painting: how to personalize your guitar?

3 ideas for tuning your guitar with special effect paint!
It is possible to personalize the painting of a car, a motorcycle, a helmet… But then, why not the painting of a guitar? What could be better than the surface of a guitar to apply a special and unusual paint?

This can be a phosphorescent paint, a fluorescent paint that becomes luminous under UV lamps, a chrome paint, or even a prismatic paint giving rainbow reflections.

Today we will present to you 3 customization ideas with effect paints for a guitar:

Guitar Tuning: how to paint a guitar?

The preparation :
Whether it is bare, raw wood, or even an old painted background, I advise you to apply a thick, covering primer, which can fill in all the micro-defects and create a perfect, smooth background. , ready to receive any effect paint.
For this, there is the filling primer in a pot or in a two-component aerosol.
These primers are available in several colors, including black which you will use to create guitar tuning ideas 2 and 3.
Sanding with P500 hydro abrasive paper.

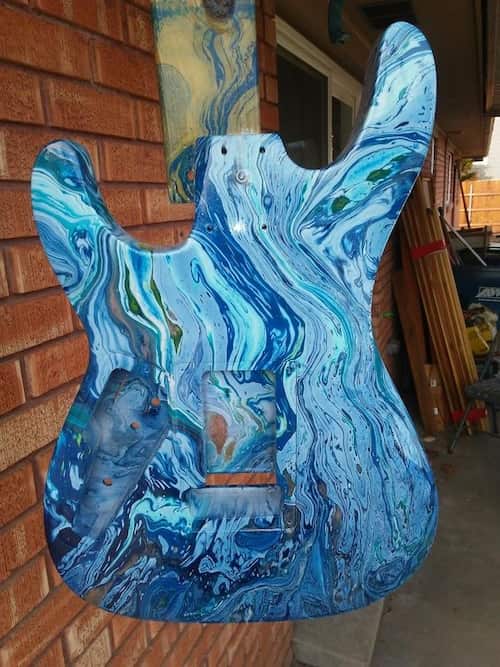
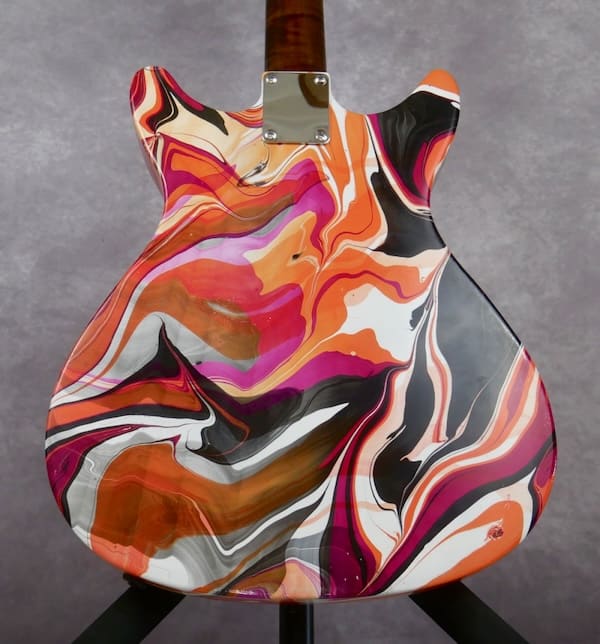
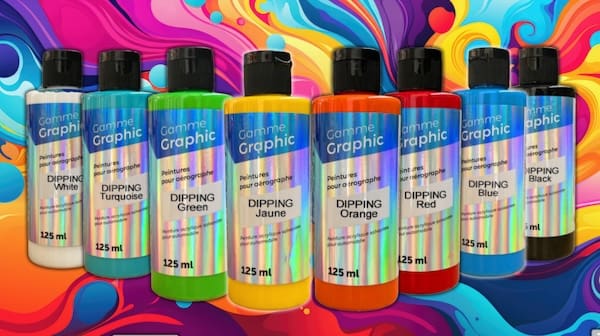
DIPPING: guitar paint

It is in a way a Hydro printing or Hydro transfer technique, but carried out not with transfer films, but with transfer paints.
Start by making a hard base (2C primer) with the color of your choice.
Place the chosen colors on the surface of the water in a tray large enough to contain the body of the guitar. Use an interesting color combination, such as orange, purple and green with a few touches of black.

Dipping colors are specially made not to dissolve in water and to cling directly to the surface of the object being dipped.
It is possible to distort the position of colors on the water surface using a rod.

The guitar is therefore printed with your decor. All that will remain is to varnish with as many layers of varnish as is necessary to level and create a perfectly smooth and shiny surface.

artist : @burlsart

2/ Pearly and multicolored speckled effect

To achieve this beautiful effect, which produces bright, shimmering colors, you will need a hard (2C primer) and black base, perfectly black.
You can then take interfering pearls, which are available here in eight colors
And you can mix them in a little bit of transparent binder available here in small format.
Makes a liquid paste with the mother-of-pearl and the binder, which will allow you to dab with a piece of plastic or a sponge on the surface of the guitar. The pearls appear colorful on this black background. Of course, it is possible to use other background colors or even color gradients. The effects of the interfering pearls are very interesting on other background colors.

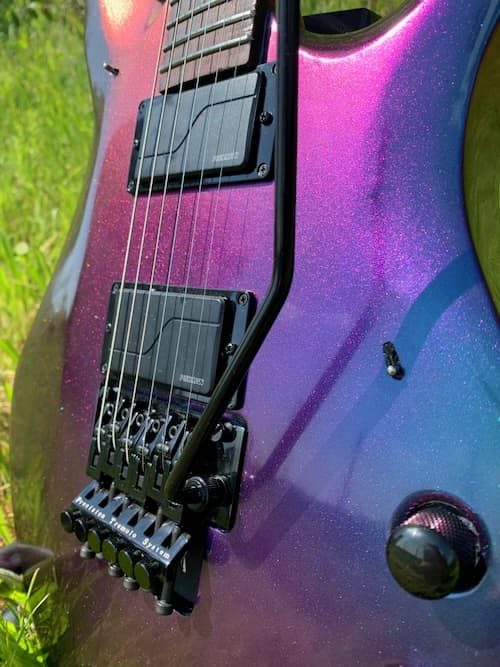
3/ The Chameleon Colorshift effect on a guitar

Here are some impressive colors that have the ability to capture attention and attract all eyes! These colors are particularly bright and intense in comparison to other metallic or pearl colors. And they have the particularity of changing appearance depending on the angle of view. So, you never really know what color they are!

It doesn’t matter if you don’t have a spray gun, you can apply them with an aerosol because they are available in the 38 colors of Stardustcolors, both in a pot or in an aerosol.
This is probably one of the most effective effects but also the easiest to achieve:
on the black background sanded with P500, you must apply thin layers, and repeat these thin layers until the black background disappears. Then we can varnish

There is a large choice of colors, with some shades changing up to two colors and even up to 8 colors depending on the viewing angle.