Steps and tips for successful crystallized paint

Steps and tips for successful crystallized paint
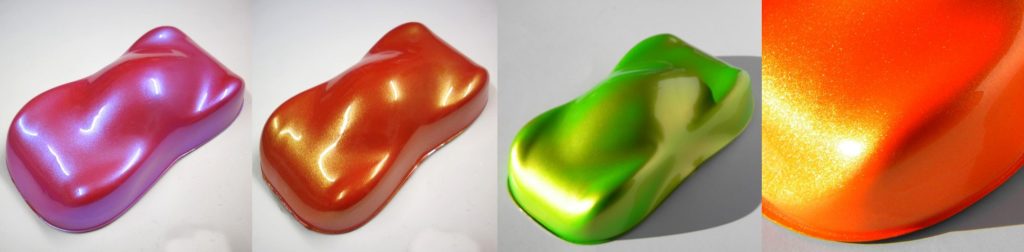
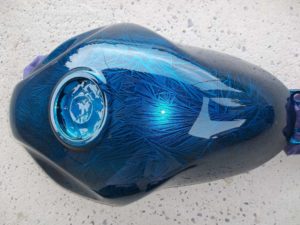
The Crystalizer is a completely exotic product among all existing products in the world of decorative paint or bodywork. It allows you to create a surface with patterns of crystals, and when combined with the Candy technique (transparent colored clearcoat), the Crystalizer produces a real illusion of depth, a sort of crystallized optical illusion effect.

It is possible to use the Crystalizer technique on any surface, any primed material, and on objects or devices of any size : motorcycles, helmets, countertops or tables, joysticks, video console, sculptures…

What exactly is the Crystalizer ?

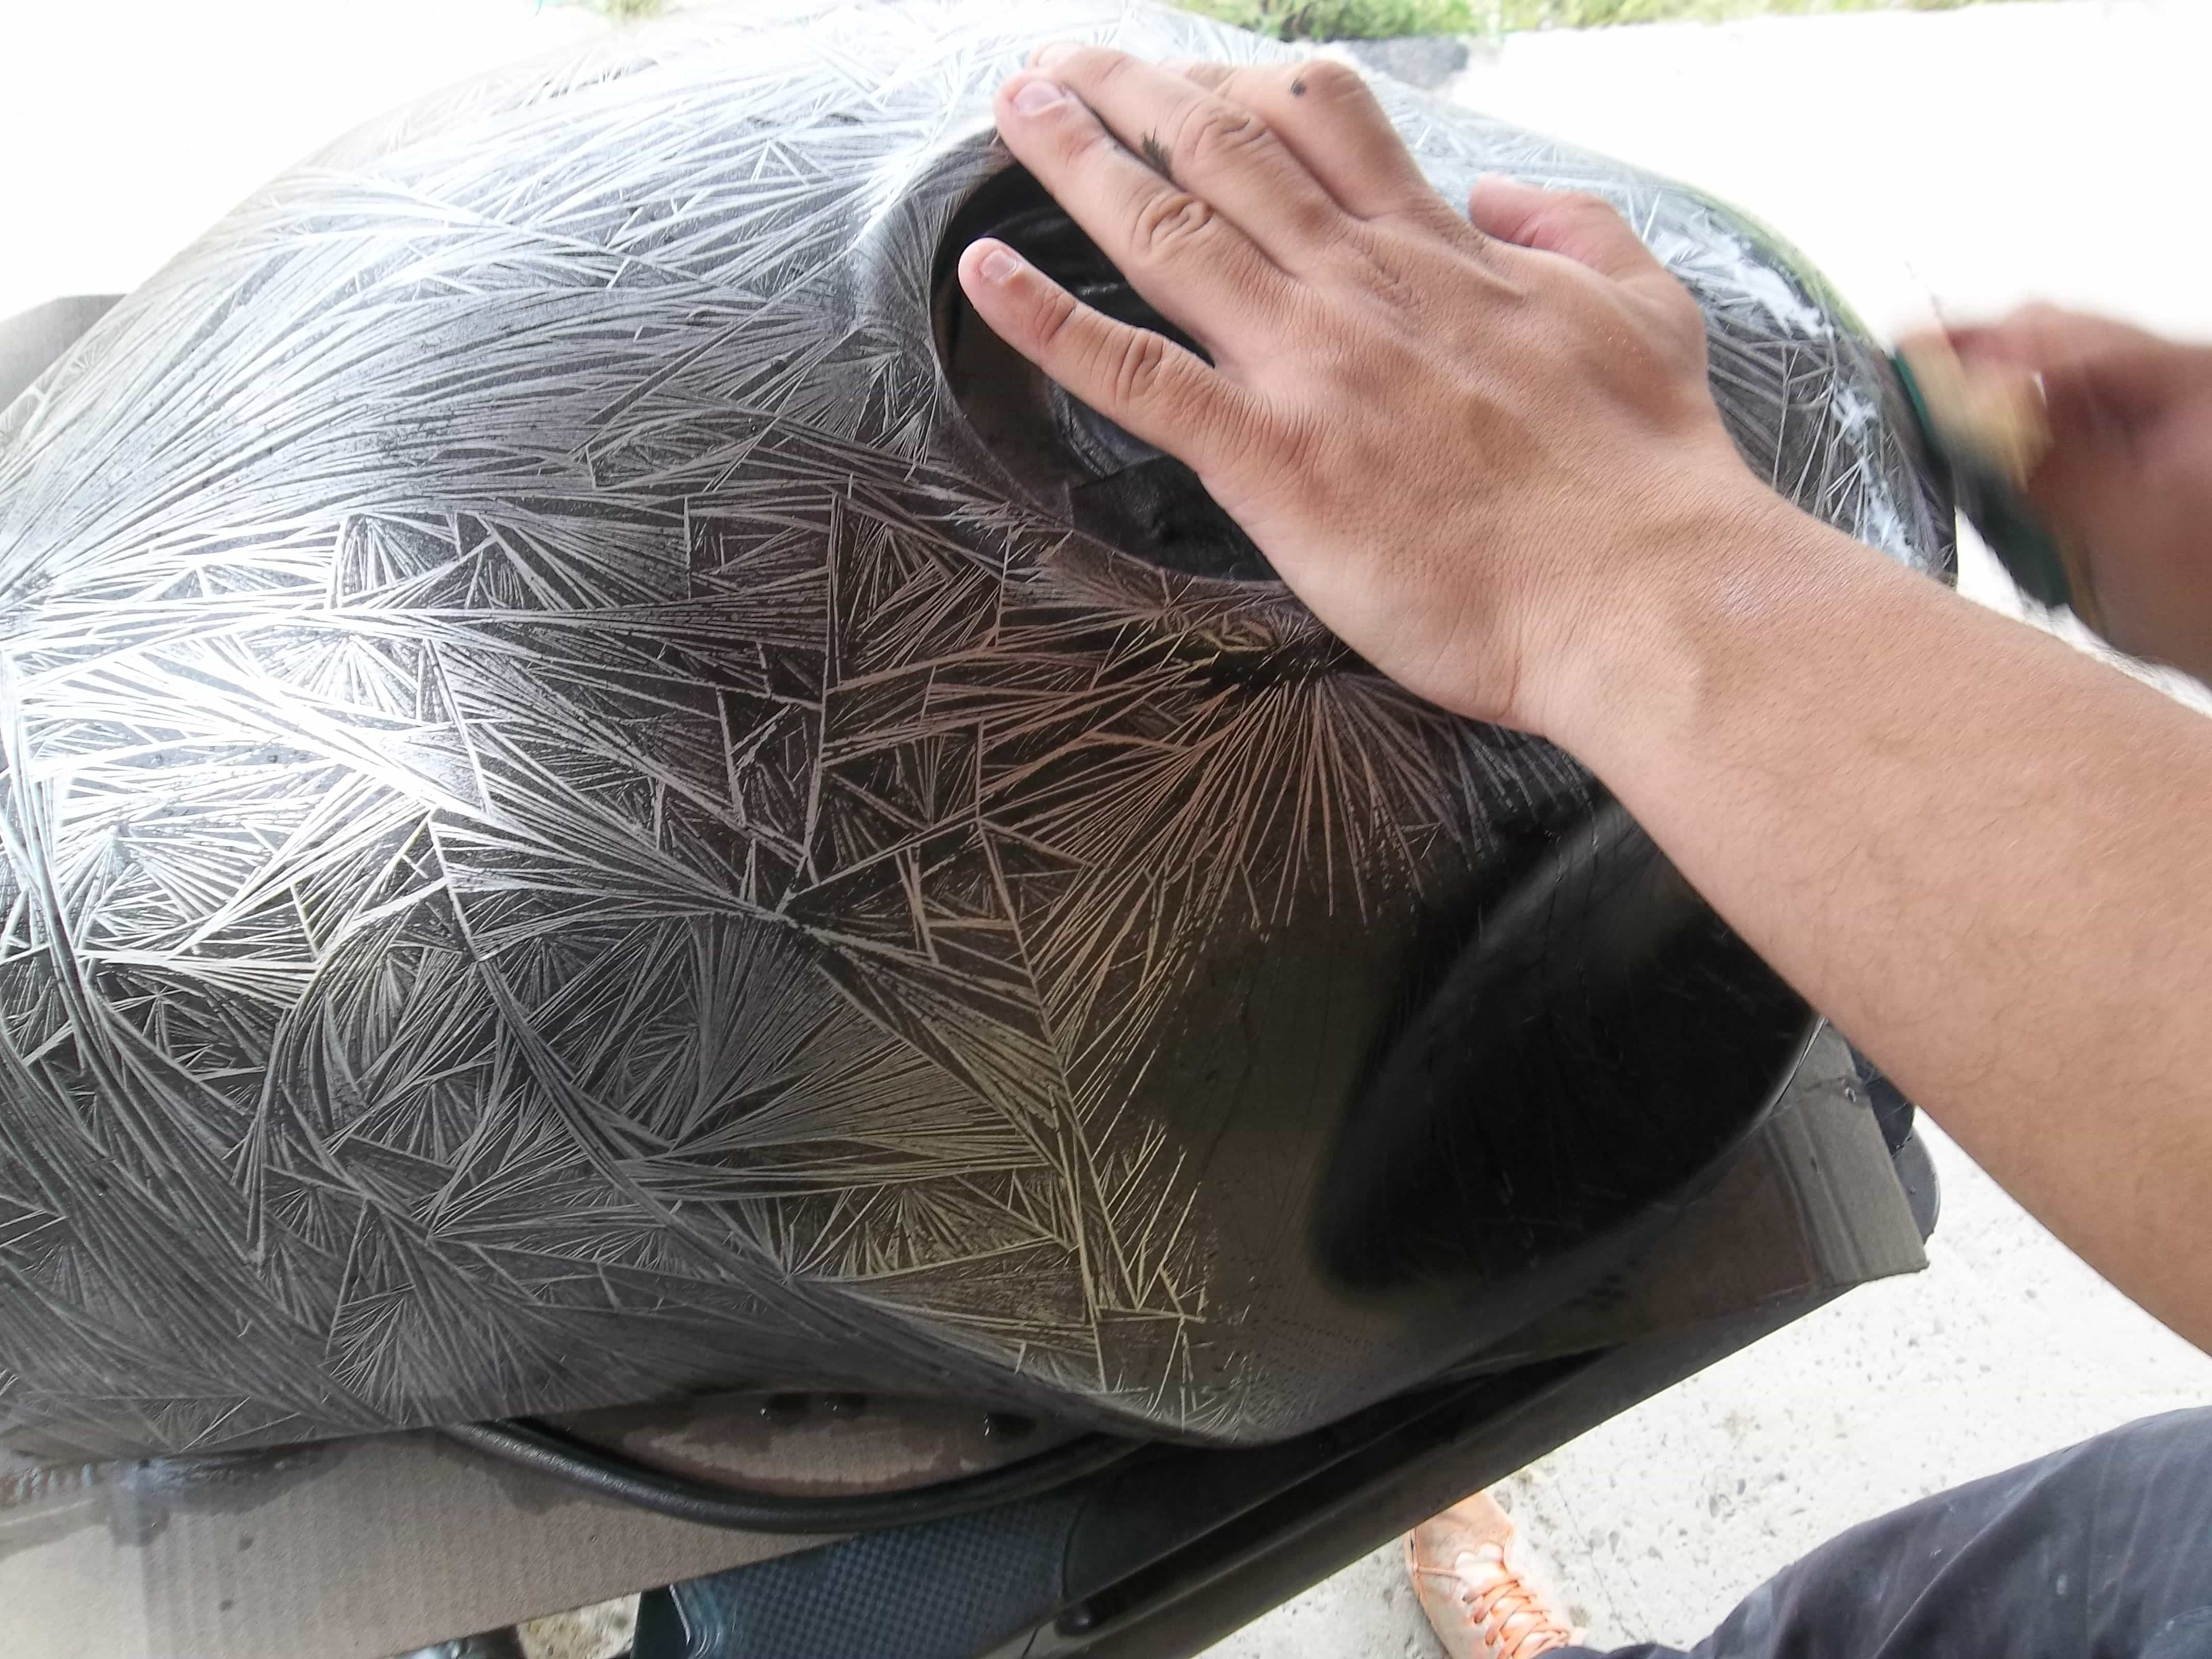
It is a liquid product, based on alcohol and also containing a salt ; during its evaporation, the product creates a crystallized surface, with slight reliefs formed by crystals.

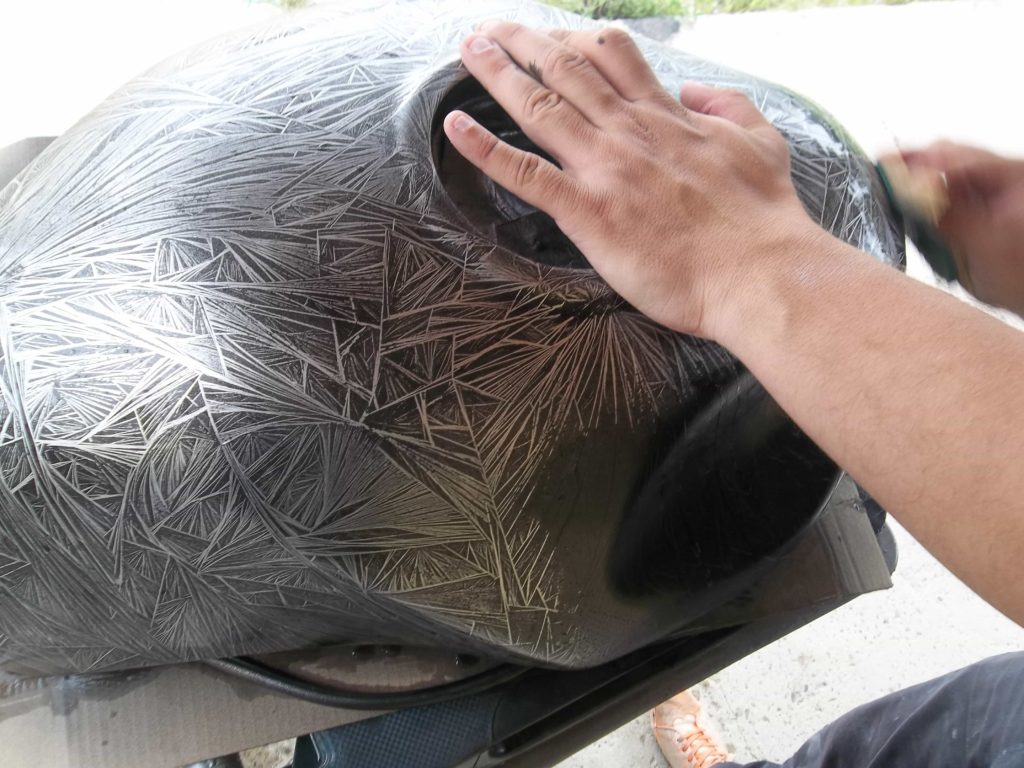
The product once dry is very delicate, and can be removed with a simple rinse. This decoration can only be fixed with a light coat of black paint*, before the rinsing phase. During cleaning, we just “decapitate the edges of the crystals” and only the deep areas retain the black paint.
 

Setup for a Crystalizer effect succeeds

It is possible to use any colored background, as long as this background color will contrast with the shading color.

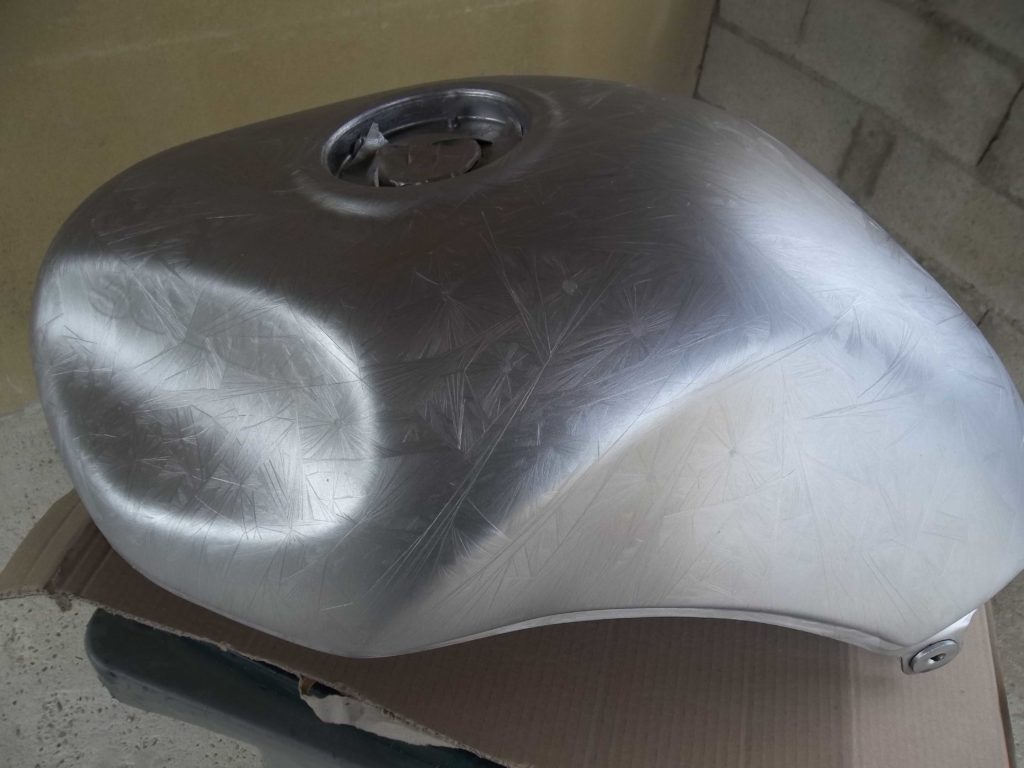
It is much more interesting to use a reflective paint under the Crystalizer and a colored varnish, in order to reflect the light well and create a luminous and powerful color.

  • Usually aluminum paint is used.

However, you can use mother-of-pearl, Chameleon, chrome, glitter…

Attention ! It is not recommended to apply the Cristalizer directly on the aluminum paint. The latter produces a surface composed of metallic micro flakes which overlap in all directions and it does not form a favorable and ideal surface for the propagation of crystals. It is therefore important to have a varnished bottom, to obtain a smooth and perfect surface.

Of course it is necessary to sand the dry clearcoat with 400 grit paper. This will allow the crystals to adhere well. With a finer sanding, the crystals come off the surface too easily when rinsing.
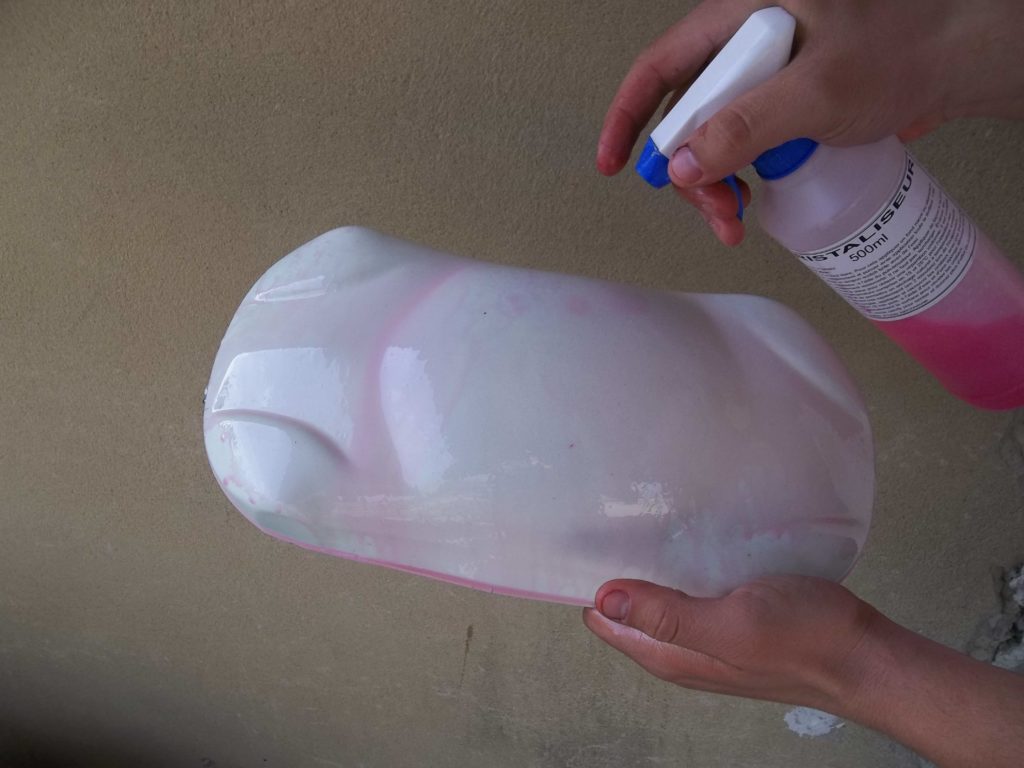
Application and drying

It is not a paint, so it is unnecessary and not recommended to apply this product with a spray gun, making multiple coats and expertly applied !

No, you just have to wet the surface copiously, all at once and as quickly as possible. Especially if the temperature is over 20°, in which case crystallization can develop rapidly.

It should not be disturbed or covered with a second layer.

So once the part has been well covered with the product, the excess can possibly be evacuated, by leaning or shaking the part (if this is possible of course).

On very large surfaces, such as a boat, for example, we will try to apply the right dose, and we will move all around the boat as quickly as possible.

Successful crystallization is done with a dry and warm atmosphere. On the contrary, it is impossible to succeed in the application in a humid and cold atmosphere.

  • You can keep the Crystalizer dry as long as you want without covering it, provided you store the piece in a dry environment.
Shading

It is convenient to use a solvent-based paint.

As for the color, it is necessary to use a solid color, not transparent, not pearly, and sufficiently different from the background color.

It is important to apply the right amount :

If you apply too little paint, the decor will be too light.

If too much paint is applied, rinsing and cleaning will require too much pressure and insistence, and this will always risk washing away the fragile crystals.

  • The Crystalizer does not form any thickness after rinsing because it simply disappears.

It is important not to delay after applying the paint, to clean it with water and an old abrasive sponge. A well-worn dish sponge is ideal !

Beyond 2 or 3 minutes, it will no longer be possible to clean the crystals without applying too much force.

When practicing the technique on large surfaces, it is necessary to act with 2 applicators, one to apply the paint, and another applicator which follows immediately behind to carry out the cleaning without delay.

Once the black crystallized decoration has been cleaned and sanded with an abrasive sponge, it can be varnished or left as it is, for as long as needed.


Coloring and clearcoat

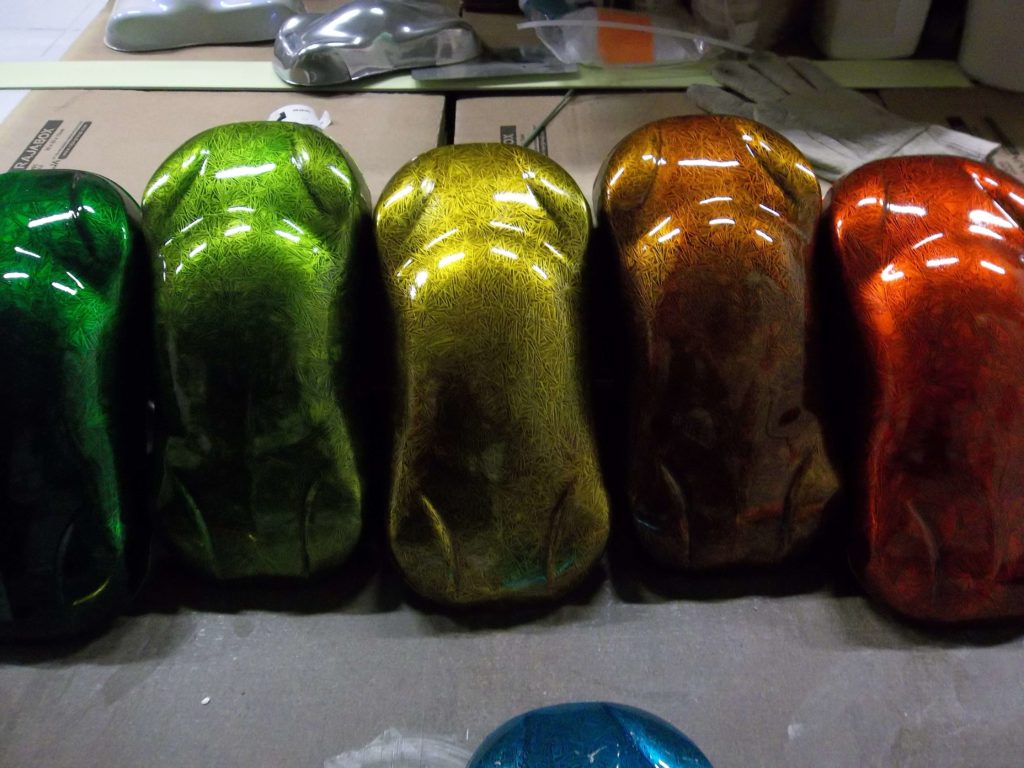
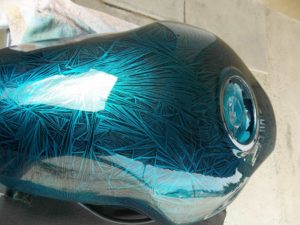
A Candy varnish is used, to choose from among the 24 Candy colours, and depending on the number of coats, the final color will be more or less dark.

2 types of effects are possible : discreet, dark and deep finishes, and finishes with bright and intense colors that will make the crystal decoration very visible.

On a classic crystallized decor in aluminum and black colors, the most vivid colors are Green, Yellow, Orange.

Dark and deep colors are Reds, Violets, Blacks, Browns, Blues.

With the latter, the effect is particularly discreet and is revealed when the sun hits the paint.



Chameleon Interference effects in painting

Chameleon Interference effects in painting

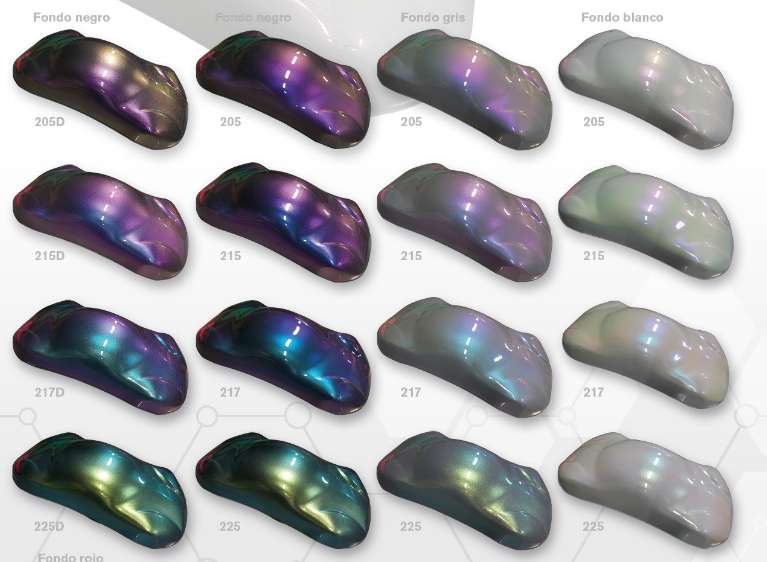
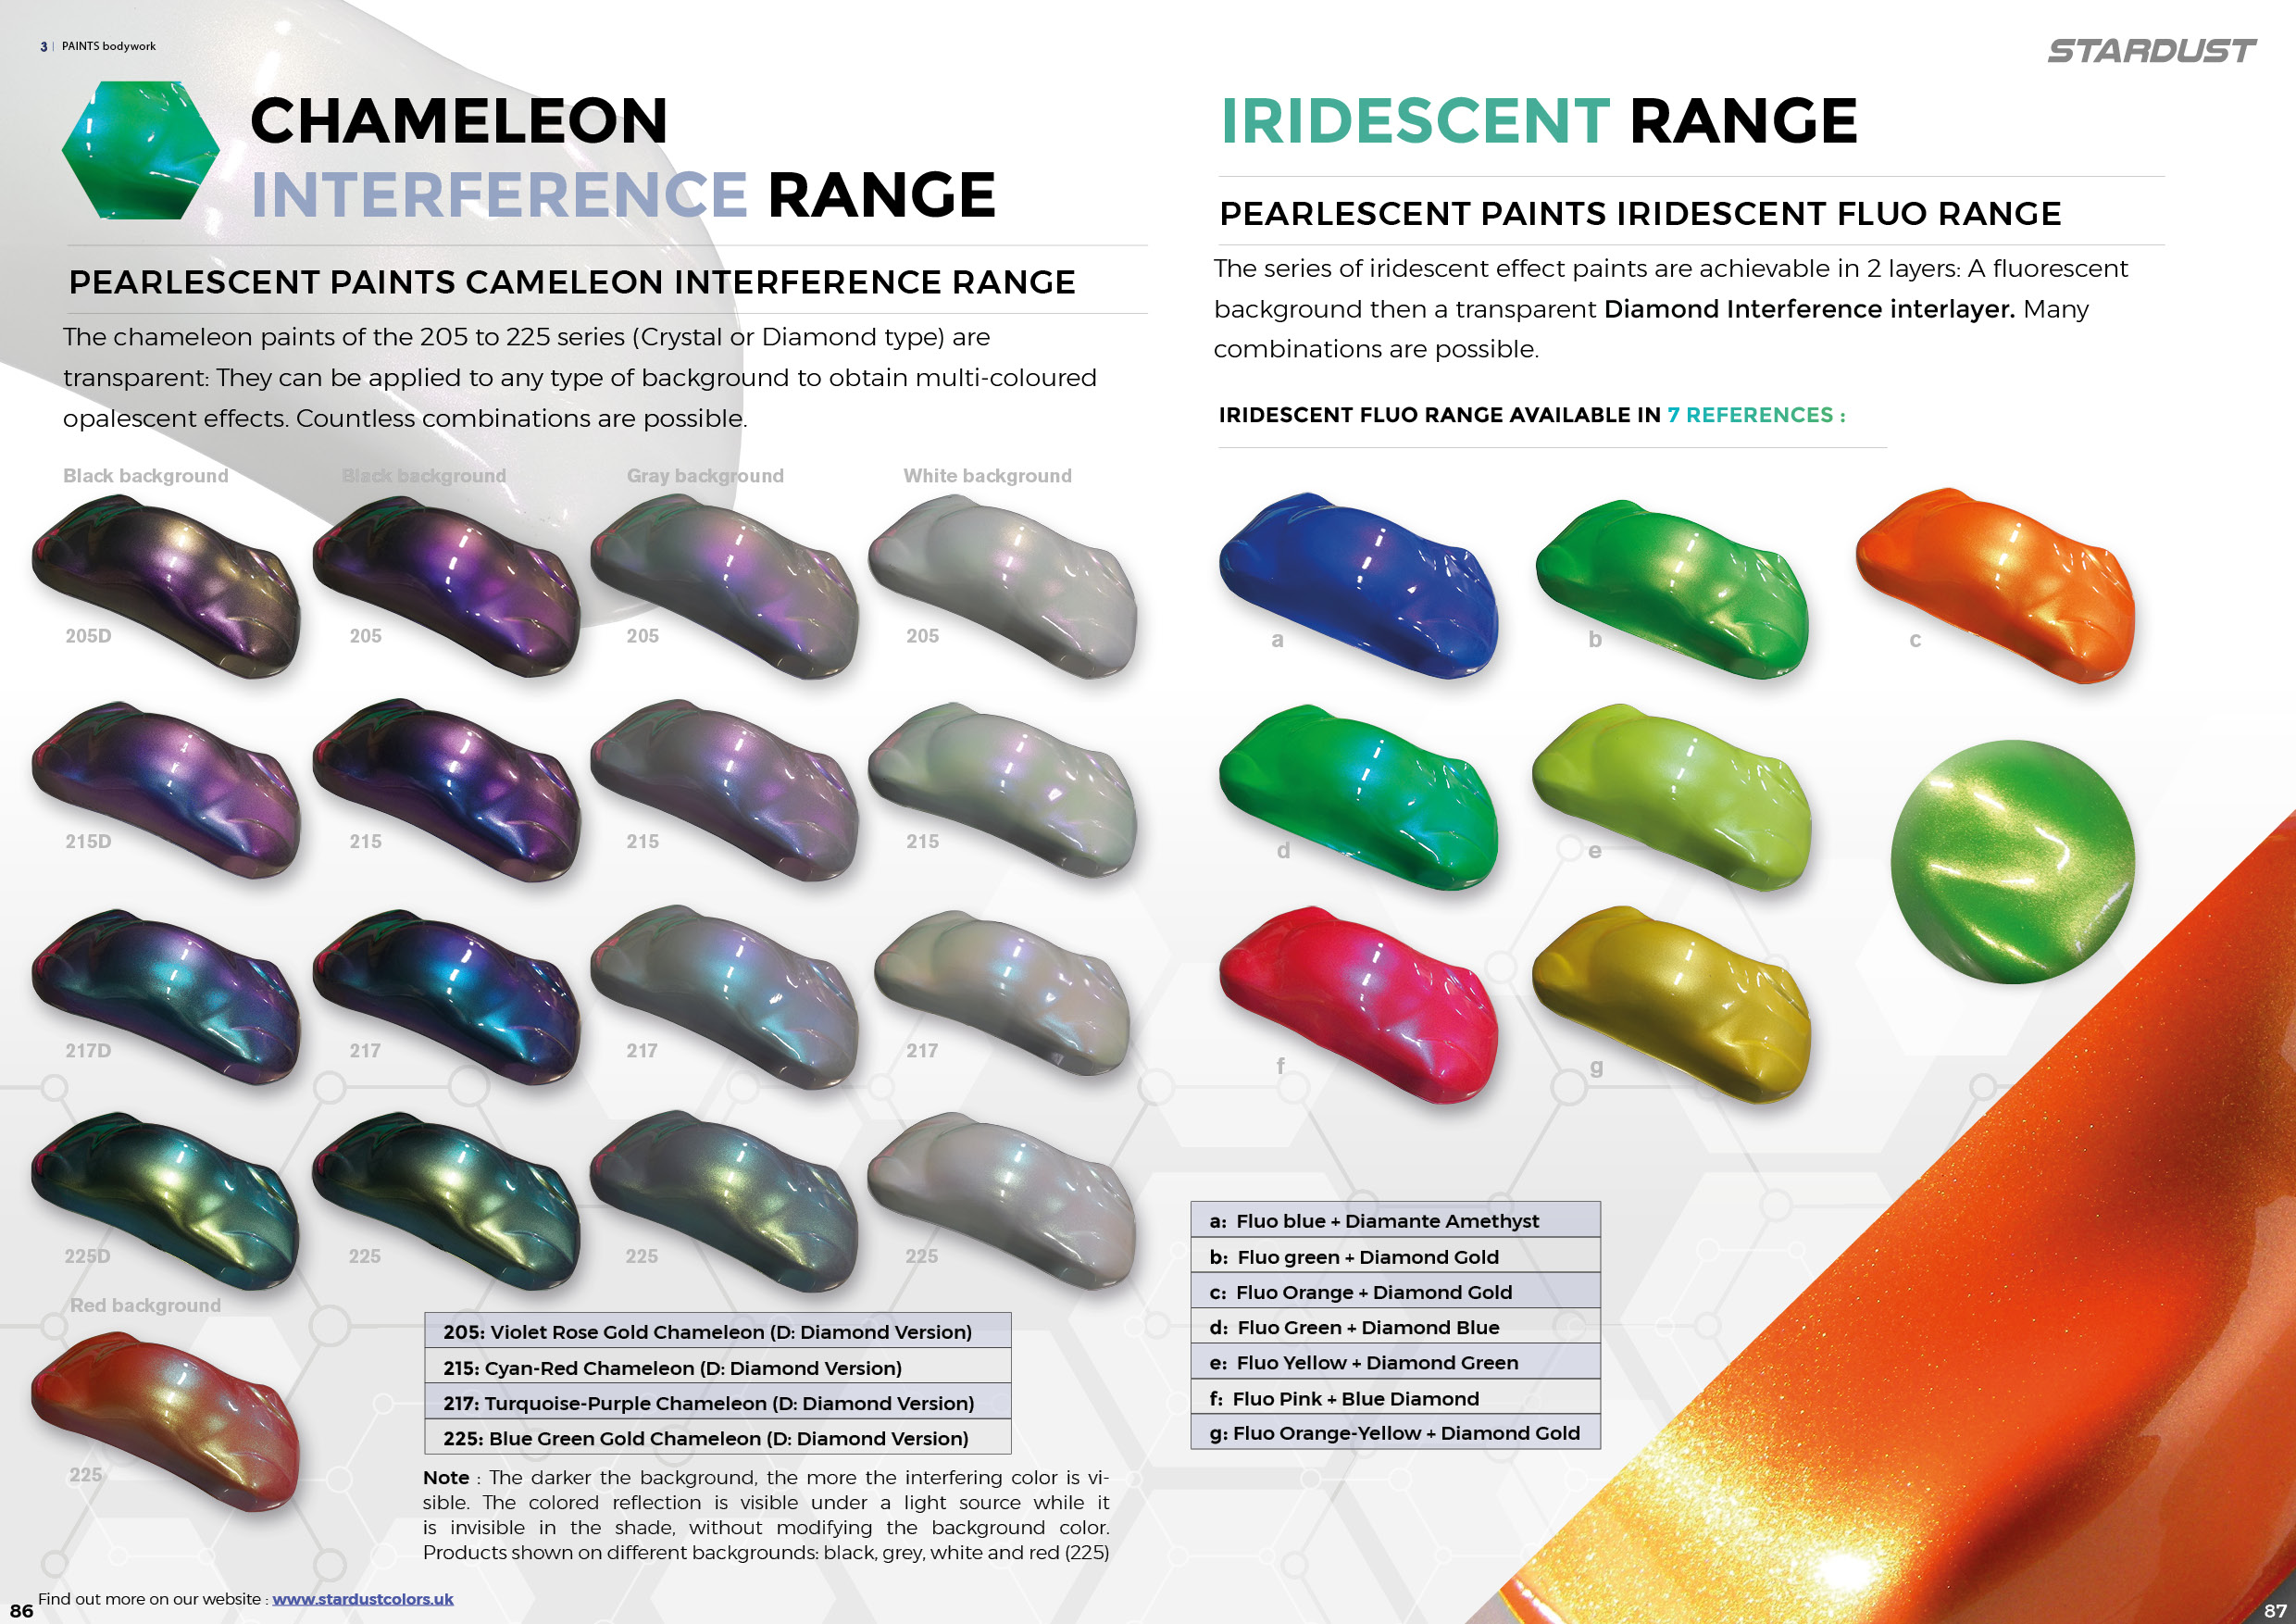
There is a unique collection of 38 references in the Stardust® range, leader and pioneer in Europe in the field of Chameleon colours.

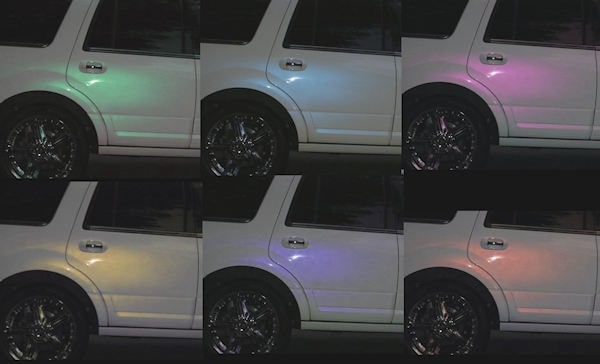
“Chameleon” paints, formerly known as “Beetle” paints, “Flip Flop” paints, or even “Colorshift” paints are pearlescent colors that offer changing color reflections depending on the angle from which they are observed.

Among the chameleon colours, there are a certain number which consist of transparent pearls*.

These chameleon paints then take on the appearance of a whitish liquid, which is in truth almost transparent when applied with an airbrush / spray gun.

*The transparent mother-of-pearl is made of a modern synthetic material imitating natural mica. It is more transparent, more reflective, and less yellowing.

Try changing the background color

Usually applied on a black background, in order to reflect only the light of the mother-of-pearl that composes them*, transparent type chameleon paints can be applied on other background colors.

*the black color reflects little or no light.

We are not talking about a pearly or metallic background color here, because due to certain optical phenomena, a mother-of-pearl on another mother-of-pearl, or a mother-of-pearl on a metal pigment, see their effects cancel out.

We can therefore apply a transparent chameleon color on an opaque colored background, red, yellow, blue, gray… In truth, any color, white included.

The effects are quite interesting and surprising. These are innovative finishes in the field of bodywork or decoration, which are perfectly suitable for indoors or outdoors, thanks to the high resistance of chameleons to UV.

Multicolored interference mother-of-pearl

Interference is an optical phenomenon. In the field of painting, it designates the return of a single color, different from that of the background.

Example : a GREEN background + a RED interfering layer

Stardustcolors classic interference colors include red, green, blue, gold, and purple ; these effect products can be found either in powder form with Crystal interference pearlescent pearls, or in the form of clearcoats.

Transparent chameleons created richer effects in terms of reflections, with double, triple or quadruple colored reflections.

Depending on their purity and composition, they will modify the background color very slightly or not at all.

In truth, the darker the background color, the more the interfering chameleon reflection will dominate the visible appearance returned to the viewer of the painted piece.

Diamond-like interfering chameleons

Classic chameleons are composed of fairly fine particles, the size of which is in the average of the pigments used in the world of automotive paint. These transparent chameleon effects have been transposed onto the large diamond mother-of-pearl, which is made of glass, and which has much more iridescent and glittery properties.

Interference chameleon sequins from the COSMIC range

Here are flakes from the Metal Flakes family, made of polyester, which reproduce the same multicolored effects as chameleons. These COSMIC flakes are perfectly transparent and have an advantage over the large classic opaque Metal Flakes flakes : they are thinner and much easier to varnish.

There is yet another spangle, still polyester-based, and still 200µm in size, which is the transparent holographic spangle.

All these effects mentioned above belong to the family of “Interference effects”.

Print a photoluminescent fire safety plan

Print a photoluminescent fire safety plan

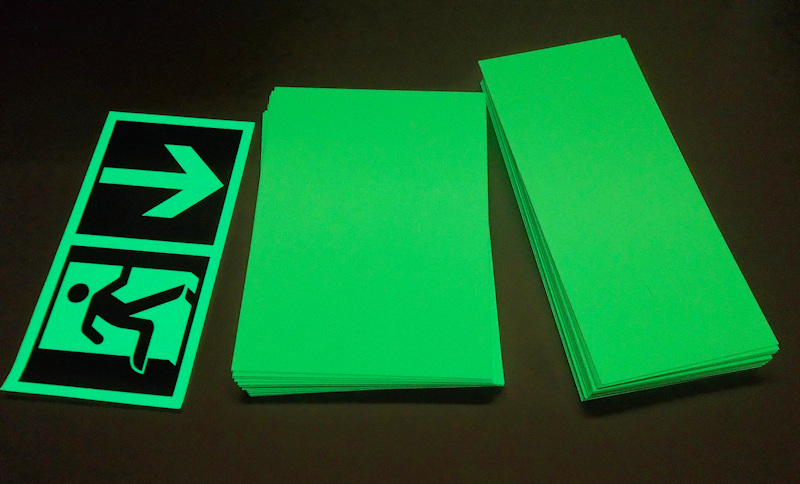
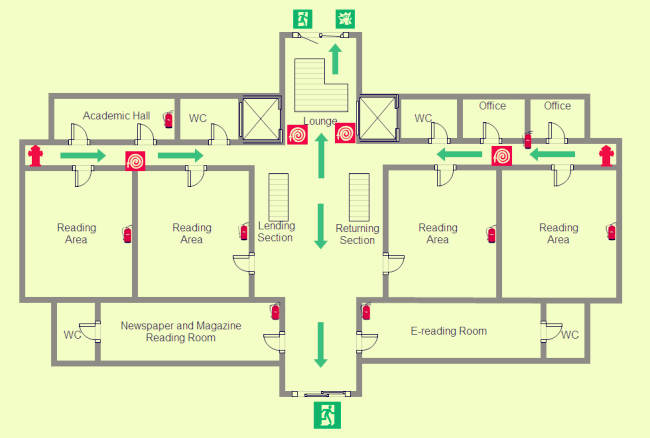
In establishments open to the public, such as gymnasiums, museums, hotels, ships but also in certain factories, it is required to install a Photoluminescent PVC evacuation plan in order to guide the occupants towards the exits in case of emergency and especially in the event of lighting cuts.
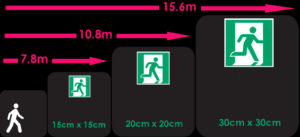
It can also be safety instructions for the use of fire-fighting equipment, the use of a machine or emergency contact.

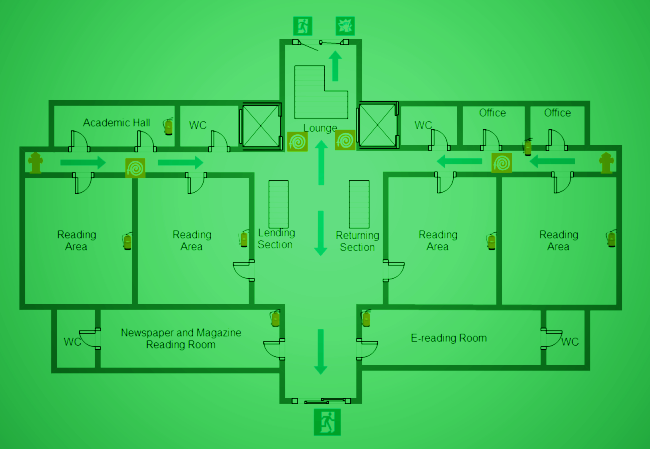
A photoluminescent security plan stores ambient light energy, whether natural or electrical, and permanently releases it in the form of photoluminescence : that is to say, it glows in the dark.

European standards govern phosphorescence levels : luminance (intensity of phosphorescence) and remanence (duration of phosphorescence) must be of a class C level. These performance indications must appear on the photoluminescent safety plan.

General sizes

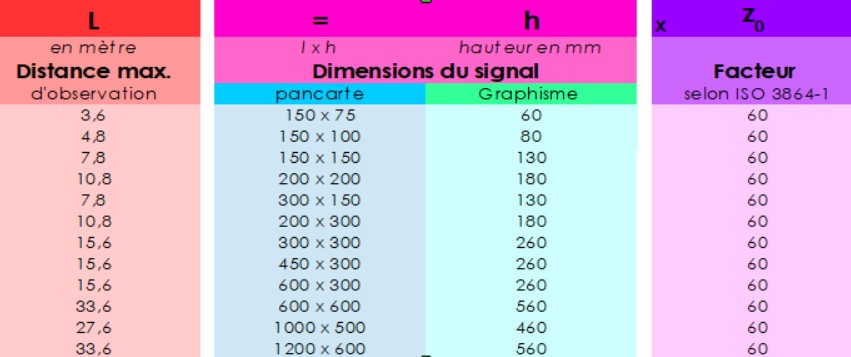
The most frequently printed size is A4. It is possible to print larger plans, depending on the observation distance, and also depending on the complexity and importance of the evacuation plan.

It is possible to order free sizes and formats.

Contact ARCO IRIS SAS at info@phosphorescent.fr for prices and to obtain the printing of a photoluminescent safety and evacuation plan.

The different mediums

In general, evacuation plans are always made on PVC panels. It is a light and economical material, easy to print, and suitable for all interior areas. It is rare to place a security plan in an outdoor area, however, when it is necessary to have an evacuation plan resistant to heat or weather, then more materials such as aluminum are used. or stainless steel as a support.

Printing modes

Screen printing is the method that has been used the most since photoluminescent planes have existed. It is particularly economical and practical when printing a large number of identical plans. It turns out to be less interesting when it comes to printing one, or even 2 or 3 plans, because you have to make a “screen” for each drawing, and each colour.

Today we use more the laser printing method, which allows four-color prints to be made which is quite economical.

The fixing method

The safety boards measure approximately 1-1.5mm thick and are easy to attach to walls or doors, with double-sided adhesive tape. It is also possible to screw them, or even to install them with frames.

The costs

For a photoluminescent PVC evacuation plan, the price varies according to the size, quantity and type of materials.

Initially, as for all printing works, If a single photoluminescent plan is printed, the work of setting up and adjustments will be equivalent to that necessary for the printing of 50 photoluminescent plans.

There is therefore a sliding scale of tariffs.

In addition to the price, which logically varies according to the size of the plan, there are also different costs for the material of the support :

Rigid PVC plans are by far the most economical.

The price range then goes up with the aluminum tops, and goes up again with the stainless steel plates.

Make a phosphorescent outdoor floor with phosphorescent stones, pebbles and gravel

Make a phosphorescent outdoor floor with phosphorescent stones, pebbles and gravel

It’s very easy and the achievement is within everyone’s reach.
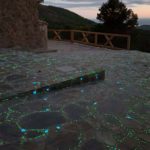
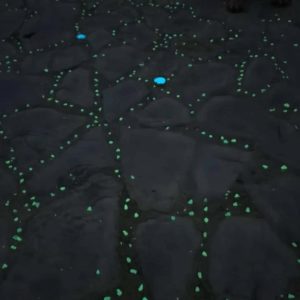
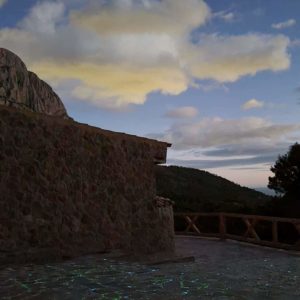
Above all, make sure that the area where you plan to embed these small phosphorescent stones is sufficiently dark during the night. If you live in a residential or urban area, with night lighting, then you can forget about this project, because the phosphorescence requires sufficient darkness to be clearly visible.

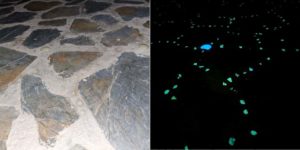
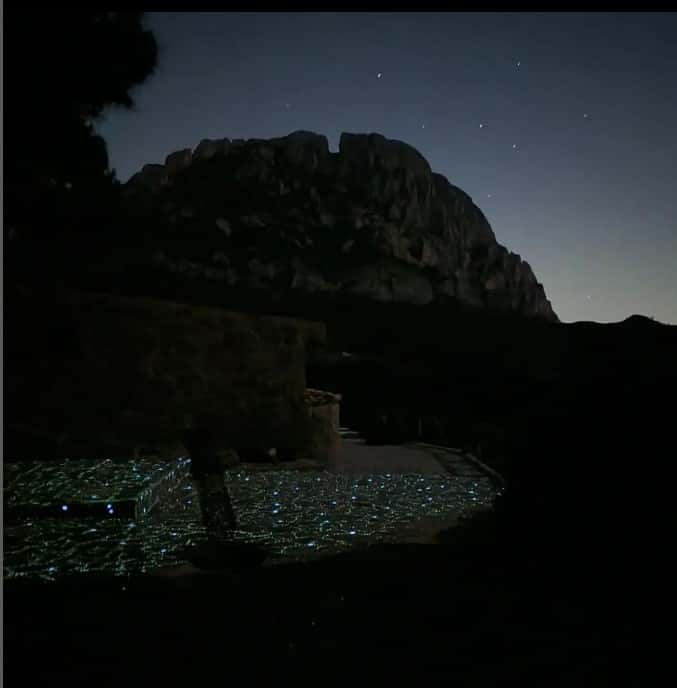
If, on the contrary, you have a house in the mountains or in the forest, then at night you will be able to see all these small luminous pebbles shining, until dawn.

It is only on a full night, when the luminosity is too high, that you will not be able to observe the phosphorescence.

On the contrary, on a dark night, you will have the impression of walking in the starry sky, when you walk on this floor encrusted with luminescent stones.

Glow-in-the-dark pebbles, how do they work ?

These small stones, gravel, fragments, pebbles contain synthetic and non-hazardous pigments, which are able to react and store ambient light. This energy is immediately converted into phosphorescence, which glows slowly and for a long time :

The release of the energy thus accumulated is done “drop by drop”, and can last up to more than 10 hours of time.

How to set up these phosphorescent stones
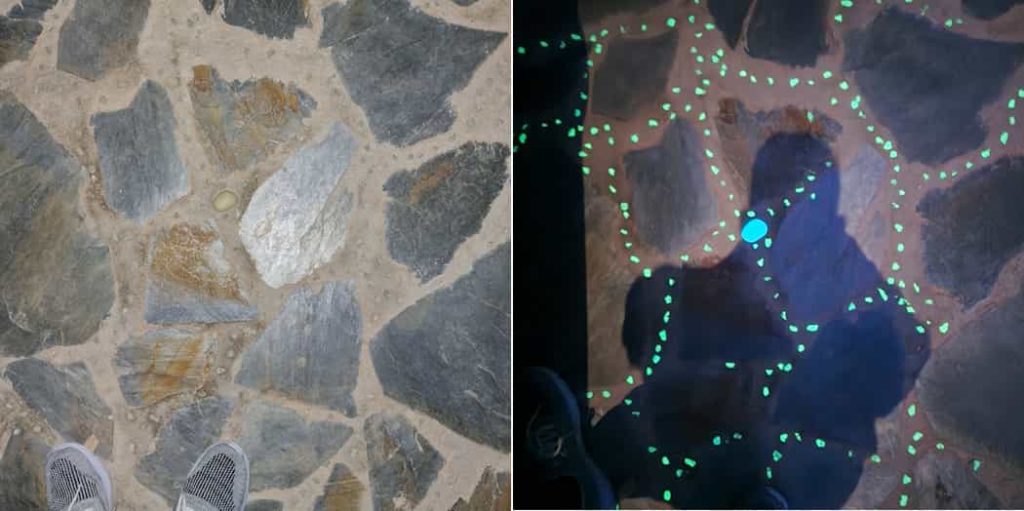
We advise you to embed them in concrete, mortar, plaster or cement when it is still fresh. The stone or gravel must be encrusted at least 2/3 of its thickness, in order to remain well fixed over time, and to resist trampling, or even bad weather, such as rain or frost.

When you want to incorporate these small phosphorescent gravels in an already existing construction, then there remains the solution of transparent or colored silicone glue.

It takes about 1 kg of these stones or its fragments to cover up to 3 m². Finally, it all depends on the concentration you want for your decor on the phosphorescent floor.

The different performance levels of luminescent gravels and pebbles
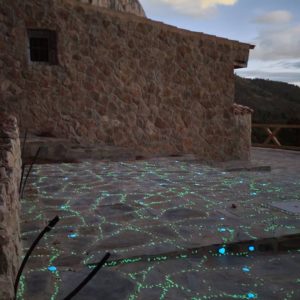
Stones and pebbles are often brighter and their phosphorescence lasts longer at night, compared to gravels.

You also have to take into account the color: by far, the green phosphorescent color is the most efficient, both in its luminous intensity and in the duration of its effect.

Often these materials are offered in 3 main emission colors: Green, Turquoise and Blue.

The company ARCO IRIS SAS, (site phosphorescentpaint.co.uk) offers up to 4 colors, with even purple phosphorescent stones.

The diurnal or nocturnal aspect

The materials have a slightly colorless, whitish, sometimes greenish appearance during the day.

We speak of “emitted color” to refer to the color of the light produced by the stone in the dark. It is indeed a luminous color which then emerges from this colorless stone during the day.

Resistance and composition

These stones and pebbles are relatively resistant, especially the gravels which are composed of glass (silica).

As for the stones, which are produced from plastics of the PS type, they can yellow slightly with the years, however the phosphorescence as for it, is almost eternal: that is to say that it does not drop in intensity with years.

Where to buy these stones here in England ?

The specialist in this field is ARCO IRIS, producer since 2010 : site phosphorescentpaint.co.uk


How to repair a scratch on your car or motorcycle ?

How to repair a scratch on your car or motorcycle ?

Here is a summary tutorial to guide you in repairing small tears on the metal or plastic bodies of cars and motorcycles.

We describe here the actions to be carried out for each step, from the repair of the dents to the finishing clearcoat.

1. Shocks and bumps

This type of defect is mainly found on the metal bodies of cars or even motorcycles (tanks). We only deal with slight defects here, that is to say from 0.5 mm and up to 1 cm in depth.

A/ Sand the area with an abrasive grain between P240 and P320. It does not involve stripping and removing existing paint. You simply have to create the right bonding conditions for the primer and the mastic.

Even if the sealants can hang on the metals directly, we always recommend applying a thin layer of primer to promote adhesion to metals and anti-corrosion in a pot or in a spray beforehand.

B/ Apply the putty, previously mixed with its hardener. The mixed putty must be applied quickly because it hardens very quickly. It is important to smooth the surface well and to avoid large overthicknesses, which will give more sanding work.

C/ Sand with a P320 abrasive grain and a sanding block. Wet sanding is recommended. It is imperative to sand with a flat wedge, in order to obtain a flat and regular surface. After sanding, wash the surface with water to remove sanding residue.

2/ How to repair a scratch on your car

Here is the phase following the application of the mastic.

When treating only scratches with a depth of less than 0.5 mm, it is not mandatory to use a filler beforehand.

Apply a filling primer (primer) in a pot or spray, with as much thickness as necessary to cover the defects. Allow complete drying of the primer (2 hours at 20°C). Sanding with a sanding block is an abrasive grain of P500.

For all applications of matt or direct glossy base paints, abrasive grains greater than P500 should never be used, in order to guarantee good adhesion. Again wet sanding allows you to sand longer with the same paper and avoid overheating.

3/ Substrate preparation

In order to receive the paint, the surface must be perfectly smooth and free of micro holes or micro scratches. In the rules of the art of painting, it is important to have a perfectly healthy surface. A sound support means a sanded support, free of moisture, grime, dust, grease or silicone.

Some invisible contaminants can cause blemishes to appear after paint is applied. For this reason it is advisable to use a degreaser.

The degreaser is applied with a clean cloth and must be quickly removed with another clean cloth, before it evaporates.

The last step just before painting, is the passage of a sticky pad, specially designed to catch dust. This sticky cloth must be passed with the weight of the hand, delicately and without forcing.

4/ The painting

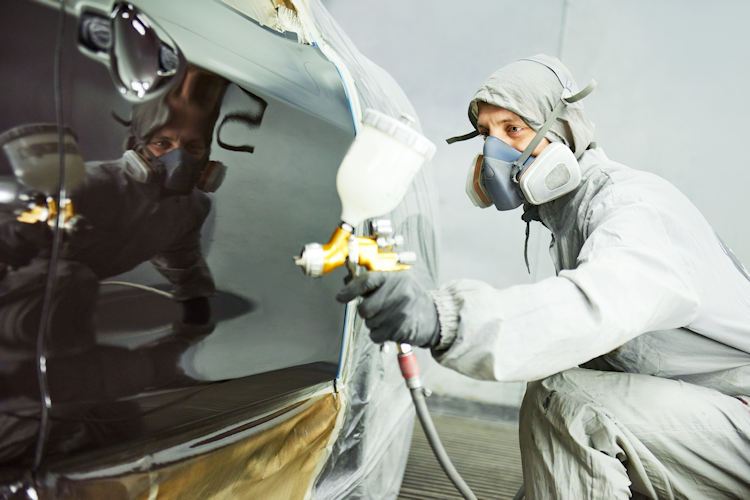
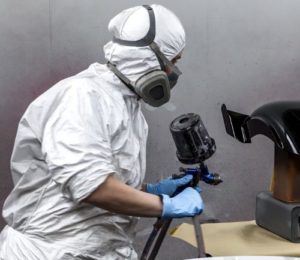
The painting is done with an aerosol or with a gun, with passages from left to right, and from right to left, at a fixed distance from the support (10-15cm), and always with an angle of 90° facing the support.

It is important to work in a clean environment, with sufficient air extraction, low ambient humidity, and with a moderate temperature, between 15 and 25°C.

There are 2 paint systems : two-coat paint (Matt base to varnish) and polyurethane finish paint (direct gloss).

A/ Bi-Coat 1C paint

Bicoat means 2 steps : paint + clearcoat.

This type of paint represents +95% of automotive and motorcycle paints today.

This paint can be a solvent-based Hydro formula. It is applied in 2 to 3 coats spaced 5 minutes apart (20°C). For metallic or pearl type paints, it is customary to spray ½ coat in the end. This type of paint is single-component, and dries very quickly thanks to evaporation in the air, in 30 minutes.

It is important to varnish them before they are superficially dry, to benefit from the so-called “wet on wet” grip.

B/ 2C Direct Gloss Lacquer

This type of paint is two-component. It is mixed with a hardener and must be used for a limited time (pot Life). It dries and hardens by polymerization.

It forms a shiny and resistant finishing layer, and does not need to be varnished.

Two-component glossy paints should be applied in 2 glossy coats, each separated by a time interval of 10 minutes.

5/ Varnishing

This last finishing phase concerns only two-coat systems.

Clearcoat is a shiny and transparent lacquer which gives an aesthetic appearance to the paint, and above all which makes it possible to confer resistance to abrasion, bad weather and hydrocarbons: it protects the paint as well as the sheet metal bodywork.

The varnish is always a 2-component product (Clearcoat and hardener).

It is always applied in 2 glossy coats spaced 10 minutes apart.

The varnish is surely the most delicate step to succeed. The secret of a beautiful, shiny and flawless clearcoat is the deposition of the right dose on the surface. Applying layers that are too thin results in an “orange peel” defect or lack of shine. On the contrary, when too thick layers are applied, drips can occur. When the defects are too important, it is necessary to carry out a sanding after 24 hours with water and paper 500 or 800, then to apply a new coat of clearcoat.

The drying of the core clearcoat is between a few hours and 24 hours, before commissioning.

6/ Plastic bodies and fairings

It may be necessary to add 1 to 2% of flexibilizing in the finishing clearcoat on flexible plastic parts. Adding this additive to the varnish of the bumpers makes it more resistant to the impact of stones.

Adding this additive to matt base paints under the clearcoat is optional, as the latter are naturally flexible.

The preparation of bare plastic substrates is special, because adhesion to plastics is often very difficult to obtain. There are special techniques and specific primers to prepare plastics. In general, all plastic-based motorcycle or car bodies are already painted and do not need any special preparation.

7/ Further information

Mixtures

It is very important to shake aerosol paints vigorously before use, and to stir paints in pots thoroughly, with a ruler, before using them.

The mixtures with the thinner, are free and approximate. Thinning allows the paint to be refined and can be made according to the painter’s preferences, the size of the nozzle, but also according to the ambient temperature. There are different speeds of diluent which correspond to the speeds of evaporation adapted according to the seasons.

The diluent mixture is done by volume. Mixing with hardeners should be more precise. It is important to scrupulously respect the indications of the technical data sheet.

In general, hardeners can be mixed both by volume and by weight.

Pot life

it is about the life and possible use of the mixed paint.

For single-component type paints, the addition of the thinner does not induce a mandatory period of use. On the contrary, the diluted paint can be kept for several months or several years.

For bi-component type paints, it is important to respect the working time, which varies between 15 minutes and 2 hours depending on the product. It is therefore important to add the hardener to the paint 5 minutes before application, and to mix only the quantity of products you need.

Drying

Drying and hardening depends on the products, the thickness, and the ambient temperature. For single-component type paints, it is important to monitor the drying time, because they must be covered with a varnish before surface drying, which is 30 minutes at 20°C. For two-component type paints, or varnishes, drying is often slower, and it can vary between 1 hour and 24 hours.

The interval time between each layer is an important point to respect. This waiting time between each layer allows the solvent to evaporate, and also to avoid runs.

“Dust-free” drying is when the paint is dry on the surface.

“Through” drying is the paint’s ready-to-use time, with 90% complete drying and curing

All paints can be sanded after complete drying, to be covered.

How to customize your bike frame with the cromovelato style ?

How to customize your bike frame with the cromovelato style ?

We also recommend that you consult our detailed tutorial: “How to paint a bike ?

This is possible using 2 different techniques, which we will explain to you below in this article dedicated to the technique of cromovelato bicycle painting.

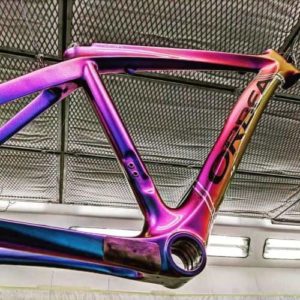
Chromvelato is a gorgeous finish that combines the effect of chrome with a transparent candy-like color.

In the jargon of painters, these translucent colors are called “Candy”.

The principle of cromovelato is simple with a first metallic coat of chrome paint or mirror polished metal, then a second coat of transparent Candy color.

The result of the cromovelato technique is a color from the light that bounces off the chrome paint and is colored with the Candy clearcoat.

Here are the 2 techniques to perform the cromovelato technique on your bike frame.

1. Cromovelato technique with Chrome paint + Candy clearcoat
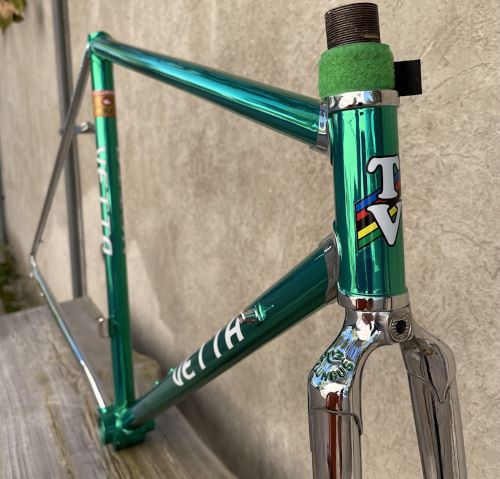
For this first technique, you will absolutely need to have a paint gun to be able to carry out the colored varnishing.

This technique has the advantage of being able to be carried out on any type of bottom, even carbon, that is to say that you will be able to use your frame of bike stripped or painted with its old paint.

It’s a multi-layered system, here’s the detail :
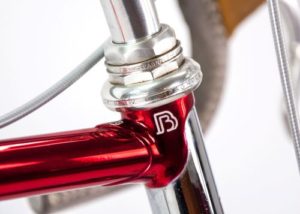
With the colored chrome bicycle paint kit, you will have all the products to achieve the cromovelato effect.

For this first technique, you will absolutely need to have a paint gun to be able to carry out the colored varnishing.

This technique has the advantage of being able to be carried out on any type of bottom, even carbon, that is to say that you will be able to use your frame of bike stripped or painted with its old paint.

It’s a multi-layered system, here’s the detail :

With the colored chrome bicycle paint kit, you will have all the products to achieve the cromovelato effect.

  • create the grip with a 500 sanding and clean the surface well before painting
  • apply the black base provided in the kit
  • follow in stride with the ceramic clear undercoat necessary for the chrome effect. Allow at least 48 hours of drying. The harder this clearcoat, the better your chrome effect will be
  • apply the chrome paint. It is a liquid paint made up of mirror aluminum particles. It takes a very small amount to cover an entire frame. At least 48 hours of drying.
  • Apply the Candy clearcoat : this is a completely transparent colored clearcoat which allows the passage of light thanks to its dyes. Different from pigments, dyes allow light to pass through and color it. The varnishing technique is the most delicate step and it requires a specific way of applying the varnish in order to maintain the chrome mirror effect. This is explained in the paint kit page.

2. Cromovelato technique On the raw and polished metal frame
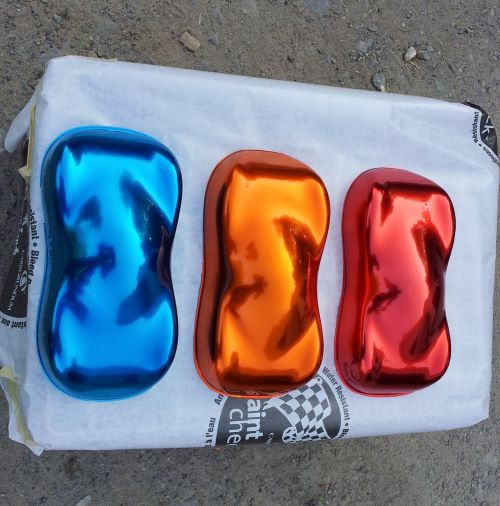
Here is a method accessible to anyone and which does not require a spray gun. This paint can be applied, in a single step, with the two-component varnish aerosols offered by the Stardust Bike range.

This technique is only possible with steel or aluminum metal frames.

The first step will be stripping the frame to get to bare metal.
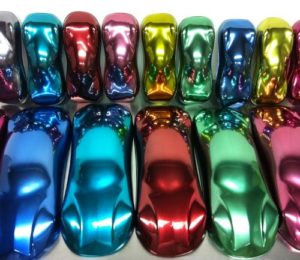

It will then be necessary to polish the metal to obtain a chrome effect. The glossy frame will perfectly reflect the light and your image like a mirror.

All polished metals are particularly difficult to snag. If any paint or varnish is applied to their surface, then detachment is assured. Most metal adhesion primers are not effective on chrome or polished metals.

You have to use what is called a primer for chrome, transparent in nature and very thin, which is called silax. This very specific product can be found in aerosol or jar format.

Here are the 2 steps :

  • apply the silax, in one or two thin coats. Do not wait to cover this primer which dries particularly quickly, i.e. apply the next coat within 2 or 3 minutes.
  • Apply the Candy clearcoat, in 2 or 3 coats.

The multicolored cromovelato effects

Candy transparent colors make it very easy to make fades and gradients.

This is particularly interesting with neighboring colors in the color spectrum :

For example, it is possible to follow a blue with a green, a red with a yellow.

There are also black Candy transparent colors that can be blended with all other colors, of which there are about fifteen available.

Get a paint splatter on a body, fairing, or bike frame

Get a paint splatter on a body, fairing, or bike frame

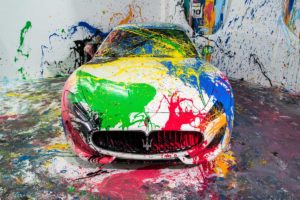
The technique of splash painting is all the rage right now in all areas of decorative objects, and especially on bicycle frames.

We can of course decorate any object, piece of furniture, wall, or vehicle with splash paint style, on the condition of respecting 3 main steps, and using the right products that can be used to make your painting project a success. splashed style


So here is a tutorial for splashing paint on a bike, in 3 main steps. of course you could transpose these techniques to the vehicle or medium of choice.
In the case of a mural, we can do without the 3rd step, varnishing.


There are black primers for all types of materials (plastic, wood, bodywork, iron, aluminum, PVC, etc.)


Splash Effect Paint / Step 1 :


Start by preparing your support well and create the black background*

to create perfect grip conditions, sand the surface with 500 grit sandpaper then apply a black primer.

Mask with masking adhesive for bodywork, all areas to protect

Most of the time, we will work on an old background, that is to say an old paint, so in this case, no primer is necessary, we can therefore apply a black base paint here available in spray
Let dry for an hour, then sand with 500 grit

>>> Colors other than black can of course be used to create the background.

>>> Flying stencils can be used, to mask areas when splashing. It is also possible to use adhesive masking, in the form of a strip, which will not be removed after the splashes.

It may seem restrictive and useless to sand each time you do a step, however this is really necessary, and will prevent you from seeing your layers of paint peel off, dissociate after a few months or years, or simply continue. to a shock.


Splash Effect Paint / Step 2 :


The choice of colors is free, however it is not advisable to exceed 3 or 4 colors.

You can choose colors in the same range of tones, or opposite and complementary colors.

When painting a bodywork or a bicycle frame, it is necessary to use certain quality paints, and absolutely avoid using commercial acrylic paints, but on the contrary choose a professional product, which will allow us to varnish without fear of reactions.

There are 2 types of paint that can be used :

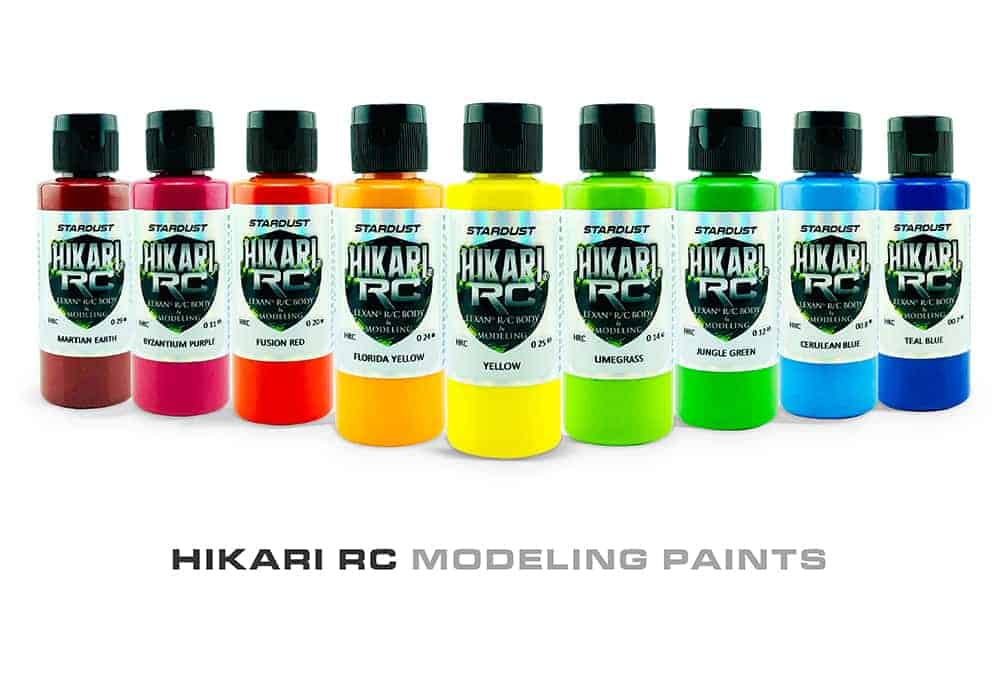
1/ high quality polyurethane acrylic paints, such as that of the Hikari RC 60ml range, which offers a 40 Bright Colors : These colorful paints have enough pigment load to cover the black background when splattering thin or thick

These paints have 2 advantages, in addition to their exceptional pigment strength :

They have no odor and are not harmful, so they can be used indoors, anywhere.

In addition, it perfectly supports all types of bodywork varnishes, which is not generally the case with water-based paints.

2/ Body paints in small 125ml format

They are more liquid, and particularly fine. They offer quick drying, and of course are compatible with all bodywork products.

If you use them on your black background, make sure that it is completely dry, to prevent them from melting under the effect of a thick layer of paint splashed on its surface.


Applying Splatter Paint :


dip small bits of paper into the color. You can use brushes, or anything else. Make sure to lightly remove excess paint, while keeping a good amount of material on your wick. Then splash the support with forceful movements

Take care to vary the directions, making random gestures, freely and without repeating the same Patterns. In order to have a natural result, do not attempt to regularly cover the surface, on the contrary, you will have better results by splattering the paint freely, or even with your eyes closed !

Drying :

if you have used water-based paints, then allow complete drying, that is to say at least 24 hours in a dry and temperate environment.

If you used solvent-based paints, you can varnish directly.


Splash Effect Paint / Step 3 :


The paintings of a bicycle frame or any other vehicle can be protected by a varnish.

This gives a nice even glossy look, and it will also level the surface by smoothing out the slight differences in thickness of the splattered paint, to give a “wet” finish as if the frame of the bike had just come from the factory.

Here is a professional varnish aerosol used for all body work

If you have applied fairly thick splashes of paint, and you want a perfect result, it will probably be necessary to varnish a second time the next day, after a light sanding. With 4 coats of varnish, i.e. coats applied every day, you will have a perfect finish !

I wish to create a white and red pearl paint with glitter on my Supra Comp TS6 Ski Boat

I wish to create a white and red pearl paint with glitter on my Supra Comp TS6 Ski Boat

car paint on a boat

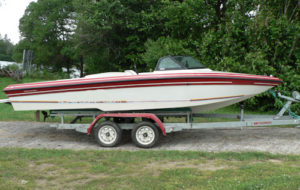
I wish to create a white and red pearl paint with glitter on my Supra Comp TS6 Ski Boat. The boat measures 6m by 2m with a hull whose height is of 0.70m. The red band measures 0.30m. Can you give some tips on how to proceed and which painting to choose ?

Sincerely, Michel.
Stardust Customer


Can we use “car paint” on a boat and will it stick ?

Solvent-based and polyurethane car paints are suitable for structures in marine environments. Our primers, including the filler primer surfacer, can be applied over a gel coat (after sanding with 400 grit abrasive paper). The bottom will be blocked, smoothed and improved.
If you follow the substrate preparation and sanding procedures, all the layers (primer/paint/topcoat) that form the “multiple layers” of the paint will be bound and perfectly protected from water and peeling.
You can use any effect paint on a boat without worrying about resistance to salt and water. It is actually the final topcoat (polyurethane or epoxy) that will serve as a barrier against the water. Automotive clear coats are perfectly waterproof and UV resistant.


How to paint a boat with pearl or metallic paint?

There are mainly 2 ways to paint a boat with a metallic effect, pearlescent or not:

Metallic effect paints or diamond pearl effect paints
Pearlescent glitter to be mixed in varnish or in a transparent GelCoat


car paint boatWhat can I use as a primer ?

In all cases, it is necessary to apply all over the boat a filler primer surfacer, in thick passes, to be sanded once dry.
This primer will serve as a white background and also help to block and perfect the bottom.
This product includes a very resistant hardener, that can be found in the PRIMERS section. A 1.5L Kit covers 4 to 5sqm in two passes. A 6L Lit covers 20 to 46sqm in two passes. This primer is applied using a spray gun with a nozzle of 1.4 or 1.7mm minimum

I wish to apply a paint with glitter, something unique that stands out?

We advise then to apply all over the boat a DIAMOND paint, White or Cosmic White.
It’s a very iridescent paint with glitter effect.
If you want us to customize this Diamond paint with flakes larger than 500µm (0.5mm) instead of 100µm, it is possible.
This paint is applied using a spray gun with a standard nozzle of 1.2 to 1.5mm. When diamond flakes of 500µm (1.7mm) minimum are used, then it will be necessary to use a bigger nozzle.
Diamond paint coverage rate: 4sqm/kit. The kit consists of 1 liter of pure paint + 1 liter of thinner.


How to paint a strip of red glitter paint ?
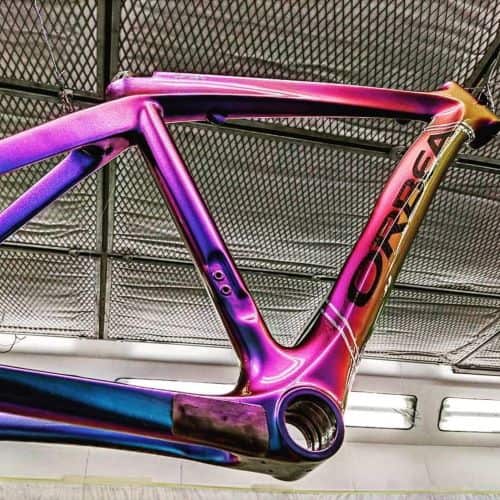
Once the white Diamond paint is dry, apply
adhesive stripes, or other masking adhesives to paint the red stripes.

There are two options available to you:
– A ready-to-use paint, the Bright Red Diamond, which requires an already existing white background.
or
– Red Metal flakes, to produce a very strong glitter effect.
To apply these flakes, mix them into our “Transparent matte base binder”
You will need 50g of glitter/sqm

Once the red strip is painted, remove the adhesives
Then apply the clear coat. A beautiful glossy and thick topcoat is used, like our 83 Ultra High Solid clear coat or our anti-scratch HS clear coat.

It is important to topcoat within 30 minutes to ensure cohesion between the layers.
If such time frame has been exceeded, you will need to recreate adherence with a grey abrasive sponge on the whole.

Download the https://www.stardustcolors.co.uk/documents/en/catalogue.pdf

The new Stardust Spray Bike paint in the bike world

The new Stardust Spray Bike paint in the bike world

Stardust bike is the new range of bike paints in spray format.

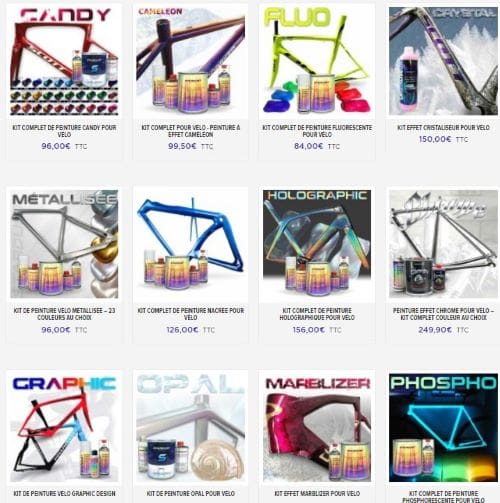
Long awaited by many bike customization enthusiasts, the bike paints Stardust Bike line includes all the basic bike paints (primer, basecoat, color, and clearcoat), as well as the fabulous special effect colors.

bike paint stardust spray bike

Previously available in can format, for professional spray painters, specialists in the decoration and customization of bike frames, the amazing Stardust Spray Bike paints from StardustColors, are now available for the most part, in 400 ml spray version, with as target market, individuals and cycling enthusiasts wishing to give a new look to their bike.

stardust spray bike paint

Ral & Pantone colors free colors to choose from, and custom made
Candy effect transparent, very bright, and sparkling colors (collection of 25 shades)
Chameleon effect multi-color paints, changing according to the point of view (36 shades)
Fluorescent effect Ultra vivid colors (12 shades)
Crystallized effect Crystallization decoration and depth effect, with choice of color
Metallic effect Pure metallic and body colors
Pearl effect Iridescent colors with intense colors
Holographic effect Rainbow prismatic paint effects
Chrome effect Imitation of chrome metals with mirror effect
Crackle Effect Produces cracks with a contrast color + black
Phosphorescent effect Luminescent paint in the dark
Marble effect Illusion of texture, with colored iridescence effect
Opalescent effect imitation of multicolored and natural white pearls
Graphic colors color spray paint kits to make custom decorations


Make your own bike paint, with STARDUST® BIKE spray cans


stardust bike paint


At a professional bike paint shop, you can expect to pay anywhere from €300 to €600 for a complete frame painting, depending on the complexity of the design and the type of paint.

Some chameleon or holographic paints reach several hundred euros per liter.

With a STARDUST Spray Bike kit, the average cost is 120 to 200 €. The cost corresponds to professional quality products, not available in “consumer” stores.

Now, with Stardust Bike spray paint kits, anyone can repaint their bike, with a professional look. The spray paints make it possible to achieve the same level of finish as that achieved with a spray gun.

A range of primers for the specific surfaces of carbon and aluminum frames is available.
A range of varnishes with hardener is also available in STARDUST Spray Bike.

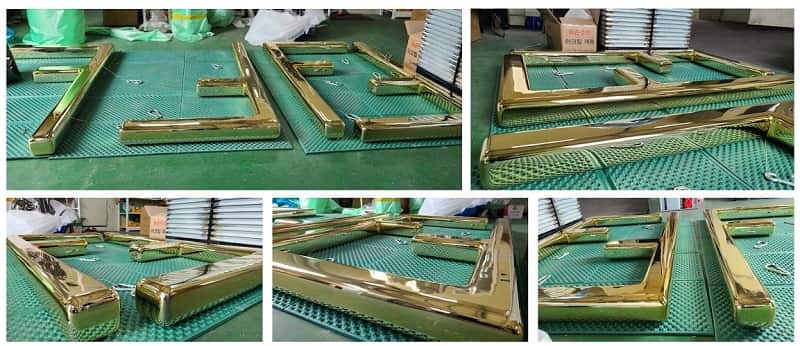
Paint a sign with shiny gold letters with colored chrome

Paint a sign with shiny gold letters with colored chrome

Chrome paint Gold is the most precious and beautiful metal, when polished it forms a reflective mirror.
This stainless metal born in the heart of the stars is synonymous with luxury and rarity.
In the field of decoration, gilding, chrome paint or gold chrome plating is regularly used for shop windows and signs.
Firstly, the galvanizing technique, which is a complex and expensive technique, is now highly regulated. There is also the technique of polished aluminum with a colored varnish.
The innovative technique that we are going to present to you here and probably the easiest, the most suitable for all types of surfaces and materials:

This technique is called silvering, it is an old and well-known technique which consists in metallizing a surface with a microscopic layer of pure silver. This forms a silver mirror that resembles chrome and even surpasses it in the purity of the mirror effect.
Once this chrome effect has been achieved, the piece becomes colorable as desired, with a very simple technique which consists of adding a concentrated colored ink (this is called a concentrated candy) in the varnish which will protect the silver piece.
We thus obtain mirror gold or any color of colored chrome, red, blue, green, and even black…

All-terrain gold chrome plating for letters and signs

Whether your letters or pieces are made of wood, metal, plastic, or any other material, it is easy to prepare them to receive the silvering process.
There are indeed primers suitable for all surfaces and once these surfaces are prepared to receive the paint, the technique is then imperceptibly the same.
It is a complex technique, but achievable by any painting professional.
Step 1 consists of the application of a glossy varnish which serves as a base for the silver.
Once it is dry, we will come and apply a succession of chemicals and rinsing based on distilled water and in a few minutes, the silver will create a chrome mirror on the surface.
The last step consists of varnishing, and in the case of the creation of a golden lettering for a sign, we apply a varnish colored in yellow.

It is possible to make any type of gold tones, from old gold, to pale gold, or even ingot yellow gold.

Chrome paintThe possibility of its golden signs to resist outdoors

It is true that the adventure has an unfortunate tendency to oxidize, it then sports a slight yellowing which will increase over time. It is inevitable, but however, it is completely negligible when one makes a silvering with a golden varnish: this slight defect then becomes unnoticed.
It is the same for any other color that one can choose.
We can therefore conclude that the adventure is a suitable process for the production of golden signs subject to external conditions, in particular variable sunshine conditions.

Is this gilding process for signs toxic or regulated?

Without advertising this innovative technique, because we are there to convey objective and critical information on each process and solution, we can clearly say that the technique does not use any carcinogenic or toxic product, as is the case for galvanizing processes, which involve chromium, real chromium, which is toxic and carcinogenic. The adventure is certainly a process reserved for professionals equipped with cabins and respiratory masks, but it only involves ammonia and silver nitrate, products which are harmful but far from being toxic.