Bodywork Topcoat, Polishing and Buffing Techniques

Bodywork Topcoat, Polishing and Buffing Techniques

Polishing and buffing are techniques that can perfect, increase, or restore the gloss from car or motorcycle topcoats.
These same techniques are applicable on topcoated surfaces in the furniture and interior design sectors.
It’s a gradual process that uses polishing from coarse polish to ultrafine polish, which corresponds to the terms of “sanding/polishing/buffing”

Usefulness:
– For fresh coats of clear coats, but perfectly through-dry, if you want to remove the defects.
– To eliminate defects such as “orange peel” or lack of shine.
– For old clear coats with micro-scratches on the superficial layer of the topcoat.

1 – Sanding/polishing

1500

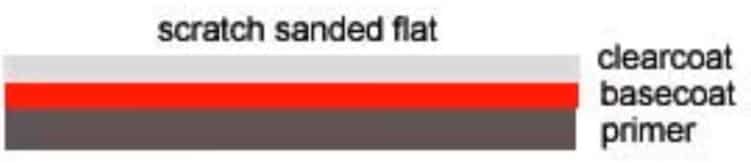
When the clear coat is very damaged, or has orange peel, remove the clear coat top layer.
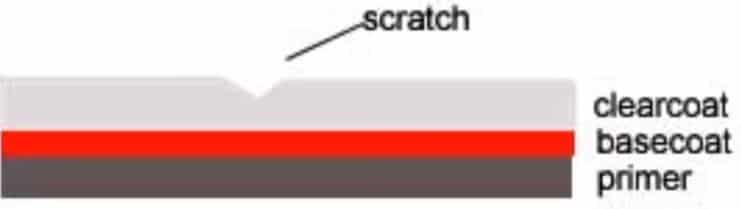
rayure sur vernis autobefore
Apres polissage. after

This is performed with sanding, manually or using a sanding machine, with a 1500 grit (we do not recommend going below 1200)
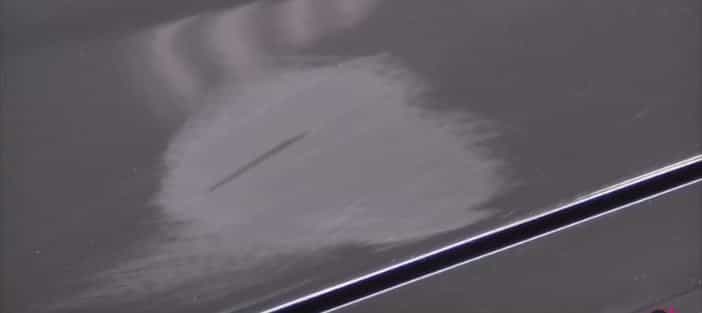
vernis après ponçage au 1500

Topcoat application after 1500-grit sanding

You can use for this:
– our 1500-grit abrasive papers
– our 1500-grit abrasive discs with a flexible tray
dry, or wet

Never cross the topcoat layer, especially on the edges.

Between each stage, clean the sanding and polishing residues with a clean microfibre cloth!

3000

To remove the micro scratches from sanding with 1500-grit, sand then with 3000-grit, dry or wet.
several products for this:
– our 3000-grit abrasive papers
– our 3000-grit abrasive discs
– our Mirka 3000 and 4000-grit disks
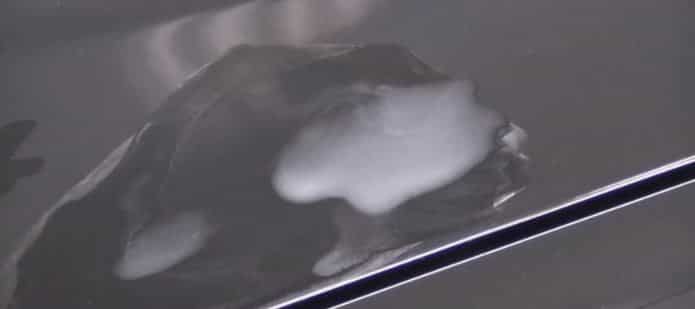
ponçage à l'eau

Wet sanding

2 – Polishing

Then move to the polishing phase, which allows to further refine the surface condition at an extra level.
The polishing is performed in at least 2 steps.
Polishing can be done directly without going through step 1 if the clear coat is in good condition.
In this case, you should never polish without thorough cleaning and decontamination of the surface first!
> For this we use
Degreasing Isopropyl Alcohol Solution
Clay bar

Polisseuse

Polishing machine

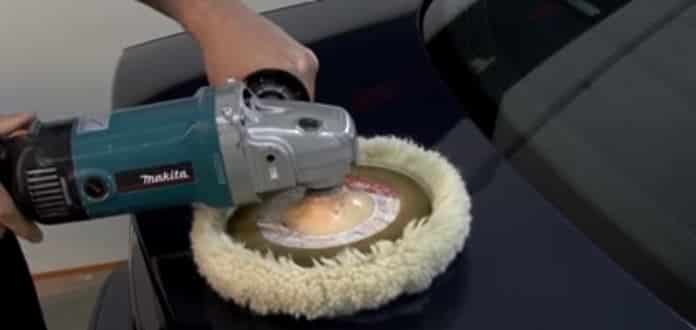
An electric polisher is usually used, by exerting a little pressure with the fingers on the rotary axis, and continuing until the polishing paste is dried.
Do not use too much polishing compound!

Hard foam pad and wool

Here are the equipment that will be installed on the polisher and used to rough the polishing
– all types of hard foam pads (white or orange)
natural wool trays
These materials will “cut” the polishing scratches

A “compound” or a polishing paste must be used: apply 5 drops of product on the disc. Then pass over the disc for different uses of the bodywork to spread evenly the product

Apply the polishing compound, spread and polish
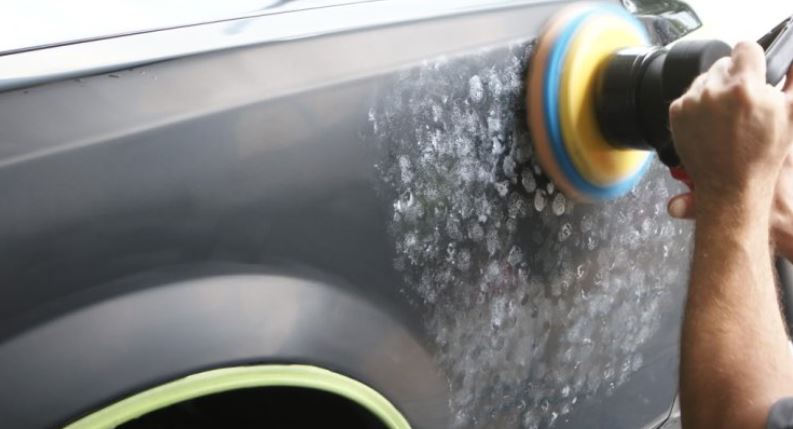
appliquer le compound de lustrage repartir et polir

Work in 0.5m to 1m² section maximum, to allow the product to work properly.
You can wet slightly to lubricate with a sprayer, although it is not mandatory to do so.
Polish first slowly then increase the speed to 1000 – 1500 rpm
Work from left to right by drawing a grid, then from top to bottom.

Our Mirka® Polarshine 10 is a versatile high efficiency product ideal for all stages of polishing.

Final polishing with black soft foam pad

For the final gloss, choose a soft foam pad, especially for black bodywork paints.
The softest foams are usually blue and black.
Still with Polarshine 10, apply 5 drops of products on the foam, spread on the surface and polish at 1500-2000rpm.
Clean with a microfiber cloth: your topcoat is great!
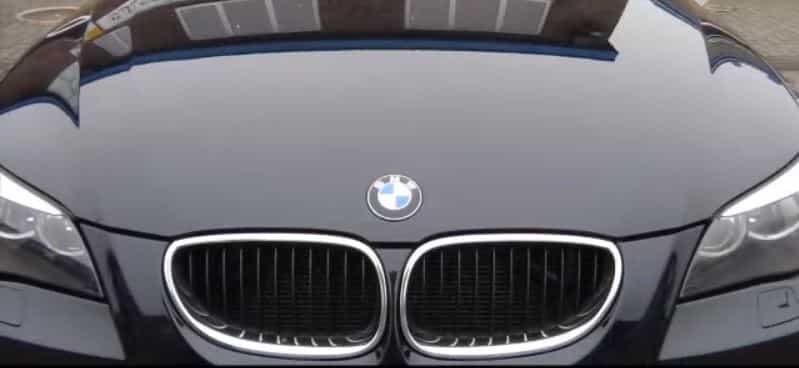
vernis brillant polilustré

Polished-buffered gloss topcoat

Polishing wax

Wax application is not mandatory. A professional wax such as Mirka’s NanoWax can be used to create a protective layer.
This layer of wax will be removed after the first wash.

How to choose a buffing and polishing foam
What is the difference between hard and soft foam pads?
The hard foam pad will penetrate deeper into the topcoat and abrade the surface.
Manufacturers usually use the same colour codes: Yellow, white, orange, for hard foams and black for soft polishing foams.

What is the difference between a lambswool tray and a foam pad?
Only use lambswool for rough buffing and polishing. Wool has more abrasive properties than soft foams It is the equivalent of a hard foam.
Contrary to common perception, the heating power of a wool is much lower than that of a foam: the heat produced by a foam makes your topcoat shine.

What is the difference between a soft foam or waffle foam pad?
The waffle foam pad produces less heating. It’s designed for final polishing. Its use is rather special and it’s recommended only to experienced applicators.
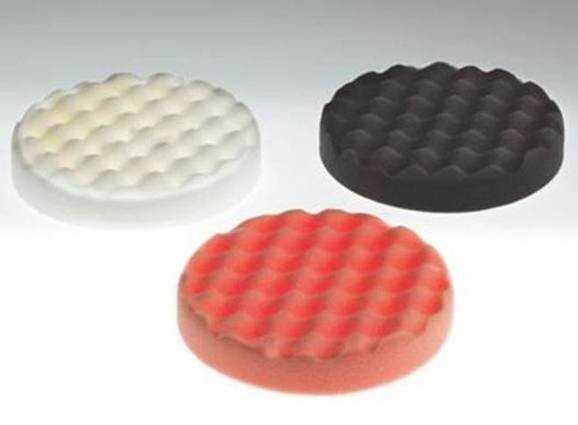
Mousses Gauffrées - Waffles

How to make a river table with epoxy resin?

How to make a river table with epoxy resin?

How to make a river table with epoxy resin?

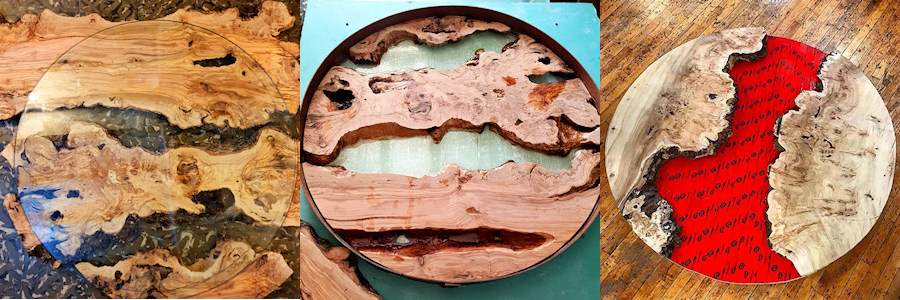
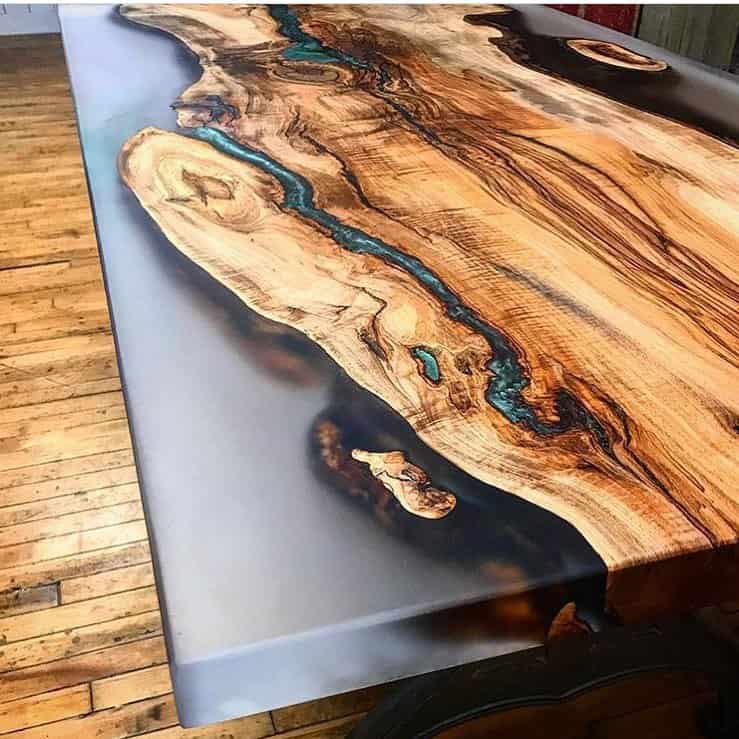
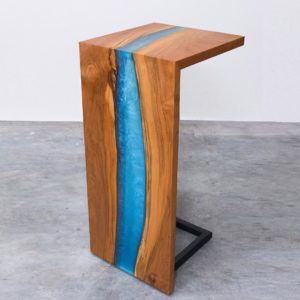
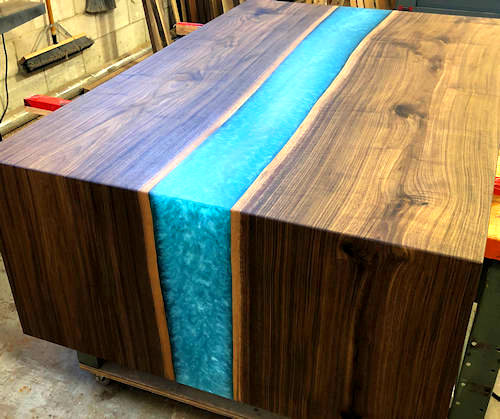
River tables are truly unique artistic creations, which resemble a river flowing between two sides of a canyon. These masterpieces were created by combining wood, a natural and raw material, and resin, an amazing technical material which transforms whenever you want.


“credit : photo courtesy of JeffMackDesign Canada”


We can find on the site stardustcolors.co.uk all the products necessary for the realization of its own personalized “river table”.

How to choose the right type of wood for your epoxy table project?

All wood species (oak, poplar, chestnut, pine, Douglas fir, etc.) do not show the same characteristics, and some are more recommended than others:
Indeed, some woods are more porous than others, and will tend to “absorb” the resin during casting and to release air bubbles.
Wood species such as maple, hazel and olive tree are preferably used
More porous woods, such as pine, are not recommended.

The wood is also selected according to its thickness, price, shape, patterns and colour, more or less light. You can of course tint the wood with a lasure to colour or darken it, and offer a better contrast with the coloured epoxy resin casting.
Most often wood coming from the base of the trunk and the roots is used on the transverse section.

Wood preparation:

Cutting and drying:

It is very important to have a completely dry wood. Wood drying can sometimes take 1 year after felling the tree.
The wooden boards must be perfectly flat. Therefore, it is necessary to contact a carpenter or a cabinetmaker to obtain good quality cuttings.

Once you have chosen the board, cut it lengthwise, in the middle: flip each half and place the flat edges on each side of the casting frame, to form the future table’s edges.

Cleaning:

prepare meticulously the wood, by removing the bark, and sanding the surface and the edges. To remove sanding residue and dust, blown out with compressed air.

Stabilize:

Wood is a porous material, which has cavities and cracks: when covered with an epoxy resin, it frequently releases air in the form of bubbles.
To prevent any bubble formation and trapping in the epoxy casting during curing, a primer is applied over the full surface of the wood. For this, we use either:
– our water-based clear coat (very fast drying)
Resoltech 1010 waterborne multi-purpose epoxy resin

Soak the brush, and generously dab each crevice. This will also prevent leaks through cracks and crevices in the wood.
It is also at this stage that a tinted lasure can be applied, if one finds that the tone of the wood is too light.


Prepare your casting frame:

A structure is made to contain the epoxy resin casting. It’s the mold (or frame).
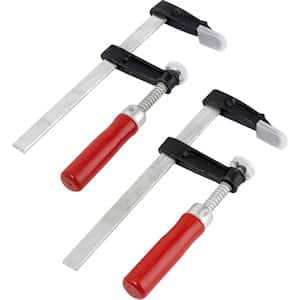
The frame must be perfectly sealed and tight using seal clamps, because of the fluidity of the resin which has a tendency to flow easily if the frame is not sealed. The walls of the melamine frames as well as the bottom board are covered with a gloss and resistant PVC adhesive, to facilitate subsequent removal.

Logs must be secured to prevent them from moving or “floating” after casting.

It is possible to apply a bit of silicone to help contain the potential pouring overflows, and remove the silicone later

Epoxy resin casting:

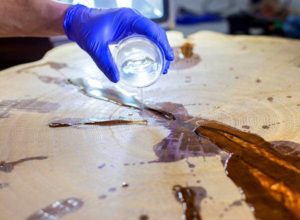
It is recommended to pour first a thin 5mm layer of resin into the frame before placing the wood in it and immobilizing it. This avoids the formation of air pockets, and also potential leaks during casting.
For this fine casting, use Resoltech 4000 epoxy resin, which allows quick drying and a thickness of 1 or 2cm.
Once it has partially hardened and you can run your fingernail over it, then you can pour the resin.

To make a river table with a layer of casting several centimeters thick, WWA resin is recommended as it is a “slow” resin for its drying time. It permits a thickness of 16cm in one single casting, with a perfectly transparent result, and without shrinkage after hardening.

Successful epoxy casting:

The technique is easy, however two critical points should be respected:

1 – The mixture:
The resin-hardener mixing accuracy and quality will depend on the good curing of the resin:
Make a precise mixture, “in weight”, not “in volume”, using a precision balance.
In order for the polymerization chemical reaction to take place, each hardener particle must mix with each resin particle.
To do this, use a rounded pot and a ruler and stir vigorously scraping well the edges and corners of the pot.
The mixture can be re-poured into a second pot, to keep only the “mixed product” and remove the unmixed product remaining on the walls.

2 – Thickness and temperature:
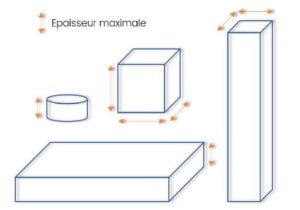
The epoxy resin produces exothermicity during its hardening: the reaction releases an energy amount in the form of heat. The greater the thickness, the higher the heat emitted (above 250°C!). Beyond a thickness of 16cm, the heat is trapped.
The shape affects how heat is released:

A low ambient temperature slows the hardening, while a higher temperature accelerates the hardening and increases exothermicity.

Similarly, the greater the thickness, the faster the resin hardens. On the contrary, the more the casting is fine, the more the curing time is slowed down.

Avoid, at all costs, a too high temperature increase: pay close attention to the ambient temperature, the temperature of the product stored (the resin), the shape and depth of the casting, and even the material that constitutes the mold. For example, an ambient temperature that is just a few degrees high can result in defects in the cured resin: yellowing, shrinkage, cracks.

River table casting:

With the WWA epoxy resin and a 5cm thick casting of resin, it will be necessary to work in an air-conditioned room and an ambient temperature between 20 and 24°C
For a perfect very thick casting, choose a lower temperature, which will lengthen the curing time.
If the ambient temperature is too high, it will require several castings, in smaller thicknesses, and a sanding with an abrasive sponge between each layer, to create the grip.


Drying:

The WWA epoxy resin drying (polymerization) is achieved in 24h/48h. Optimum curing is achieved after 14 days.
To accelerate the curing, it is possible to steam the casting once dry, overnight at 40°C.

Customize your epoxy resin with dyes and pearls:

Inks:

Tinting the resin in the mass is possible thanks to Candy epoxy inks: They are extra translucent and ultra-concentrated dyes, which are added to the epoxy mixture in small quantities. There are about twenty colours, from turquoise to red, black, purple, lime green, or even cobalt blue. Other opaque colours are available.

Pearl powders:

These are ultra fine mica powders, used as a “load” to provide an iridescent effect.


About 25g of pearls per liter of mixture can be added to create a richly-coloured sparkling resin.
There are many different types of pearls, transparent, opaque and tinted
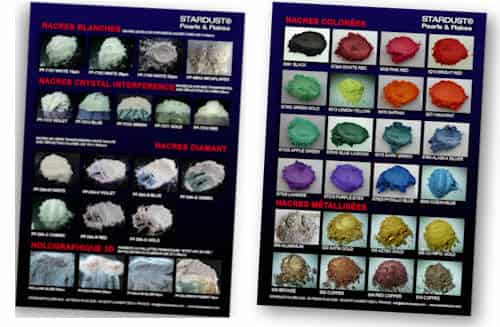
(see the colour chart detailing the 48 colours for Stardust® pearls)


Pearls and dyes can be combined to create extraordinary visual effects.

.

Finish:

The WWA resin provides an extra hard and gloss surface. One can apply topcoat of course, or polish using a polisher and a polishing paste, to increase the gloss and remove any defects.

Make a light table with a phosphorescent casting:

Phosphorescent (or photoluminescent) pigments store the light and release it gradually in the form of phosphorescence.
They are naturally whitish by day, or coloured and glow in the dark.
There is also a range of day-coloured phosphorescent pigments.
Find the complete range here, in many colours and sizes.

Successful implementation with an epoxy resin:

These pigments are compatible with epoxy resin and easy to mix.
About 50 to 100g per liter of resin are added.

These pigments are quite heavy, and we must absolutely prevent them from falling before the resin curing.
There are two ways to keep them in suspension in the resin:
– use the finest pigments (1-5µm or 5-15µm) as they are lighter
– choose a quick-setting resin, such as Resoltech 4000 resin, which allows a 2cm layer to cure in 30min.


How to effectively protect your epoxy resin against UVs?

Although having been considerably improved in their sensitivity to the sun,
epoxy resins must protect from the sun, to prevent yellowing.
Resin 4000 and very resistant to UVs, but the resin WWA and more sensitive.

There are relatively effective methods to protect these works with resins:

1 – Apply a UV varnish. Depending on the number of layers, this will block much of the ultraviolet light.
(application after sanding with 500 paper)

2 – Apply nano ceramic protection: this will not only protect against scratches, but also UV rays very effectively
(application directly on dry and glossy resin)

Chrome paint system – Industrial version

Chrome paint system – Industrial version

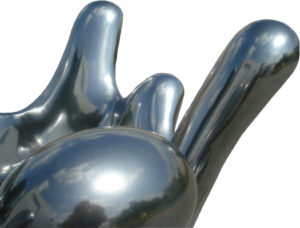
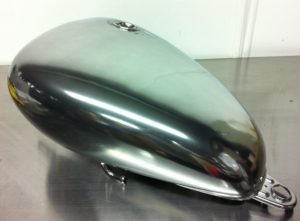
The StardustColors chrome effect paint is the best on the market : it produces a true mirror chrome effect.
The chrome paint effect is easy to apply using a spray gun over a gloss hard background.

The mirror layer is composed of aluminum flakes and is only a few micron in size once dry.
Yield: 4 to 5m²/L

For a quote and data sheet, contact us by email.

Different from the system on sale to the general public, the industrial chrome paint system provides an excellent level of adhesion between the coats (base/chrome/topcoat) and a shorter implementation time, for automatic paint lines The industrial system requires baking.

More details : Chrome paint


Chrome paint : what is it ?


This system consists of two products
CB7: For the undercoat and the topcoat
CHR : Chrome effect paint

The CB7 Base exists in 3 different kinds of packaging
1.65L Kit (1L CB7 + 150ml Hardener CCB7 + 500ml Thinner)
8.5L Kit (5L CB7 + 1L Hardener CCB7 + 2.5L Thinner)
33L Kit (20L CB7 + 3L Hardener CCB7 + 10L Thinner)

The chrome effect paint exists in 3 different kinds of packaging
– 1L
– 5L
– 21L


CB7 Topcoat

The CB7 Base will have a dual use: it will serve as a gloss and hard base to receive the chrome paint, and will also be used for the clear coat application.
This is a clear polyurethane topcoat that ensures adhesion with chrome paint without sanding. CB7 adheres directly to many plastics and metals.
Mixture: by weight, 100 parts of CB7 + 15 parts of Hardener CCB7 + 20-50 parts of Thinner
It is recommended to apply the CB7 Base over a black background for best results.
The CB7 Base is applied in 1 or 2 thin passes.
After 10 minutes of desolvation, proceed with baking
Recommended thickness: 25µm dry
Baking* of the CB7 Base:
1h at 100°C / 2-3h at 80°C / 3-5h at 60°C and minimum 3-7 days at room temperature > 20°C
*Ventilated baking
These recommendations are valid to get the best results.
Baking time can be shortened. Incomplete drying will produce a less perfect mirror effect.


Single-component ready-to-use product – Alcohol-based

The CB7 Base should be covered with the Chrome paint immediately after its temperature has dropped below 40°C
The chrome paint is applied in very thin repeated passes, until the surface is covered.


Allow a 20 seconds interval between each coat at 20°C
The chrome paint is immediately dry to the touch.
In order to facilitate the topcoat application without losing the mirror effect, it is recommended to bake the paint or use a flame treatment
5min at 100°C / 10min at 80°C / 20min at 60°C and minimum 48h at 20°C

Clear coat application is carried out with CB7, with prior very thin passes in order to fix the surface of the chrome paint without wetting it.
Then apply 1 or 2 passes

Phosphorescent Helipad

Phosphorescent Helipad

Photoluminescent Helipad:

Building a phosphorescent helicopter landing pad implies that it has to be visible at night, in complete darkness, without the use of electrical runway lights on the ground or other retro-reflective equipments.

An helipad with phosphorescent marking brings considerable benefits to both the civil and military fields:
No matter where it is located, even in the middle of a desert, the helipad markings will be luminous even without power supply:
It’s a limitless green renewable energy source: The phosphorescence, which primarily charges itself using sunlight.

The photoluminescence, according to its intensity and the size of the marking on the ground, will be visible at night up to 100m

Photoluminescent ground marking for helipad

The EPOXY 90000 High Resistance Photoluminescent Floor Paint emits a green fluorescence during the night for more than 8hours.
It creates a coating that provides high resistance to rain, chemical aggressions, UVs and mechanical abrasion from heavy traffic.
The system is composed of multi-layer painting easy to apply:

Ground preparation:
Washing, degreasing, dedusting, moss removal

Masking:
Laying masking adhesives, reserving and hiding parts to be painted for the design of the photoluminescent helipad.

Undercoat:
The photoluminescent paint used to make luminous the helicopter landing pad is a semi-transparent and colourless paint. It requires a white background for effective light reflection.
The EPOXY White Primer is applied in 2 coats at intervals of one hour. It effectively impregnates all concrete, asphalt and stone substrates.

Phosphorescent coating:
3 to 4 passes can be applied with a drying time interval of 1h to 24h max between the coats.
You can obtain a good phosphorescence with 3 passes. With 4 coats or more, it will increase in intensity.
Care will be taken to ensure that good adhesion exists between each of the layers, never exceeding 24h.

Hydro dipping equipment – Water transfer tank for sale

Hydro dipping equipment – Water transfer tank for sale

How to start and specialize in hydro dipping?

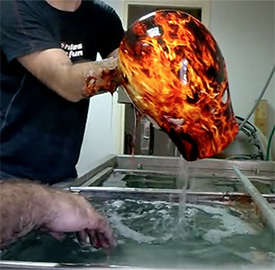
The hydrographics printing process involves immersing any item through an inked film placed on the surface of the water and dissolved with a solvent.

Dipping comes from the English word “to dip“.

In this process, the parts to be printed are treated with a special preparation before their immersion into the hydro dipping tank.
The object to be customized must be perfectly clean, cleansed with specific products to eliminate all the residues, greases, silicones, etc. which could affect water transfer printing.

Useful advice for preparation:

Use a specific adhesion primer.
Apply an undercoat and sand thoroughly with an abrasive sponge and some dishwashing liquid (to remove the surface tension).

Once the substrate is clean, apply a base colour (this base colour depends on the hydro dipping pattern you are working with).

This innovative process known as hydro dipping, water transfer or even hydrographics is a printing technique by immersing an object into floating inks,
which allow the application of tridimensional images and effects by dipping in water (into a water transfer tank).

How does it work?

Hydro dipping is a 3D printing method in which an object is dipped into water, through a hydrographic film deposited on the water surface.

Water transfer applies to any type of hard-surface object, once this surface has been prepared and primed.
The first stage of the hydrographic transfer process is the application of the background colour (a paint, usually a matt basecoat for auto body works, is used). Carefully sand the surface so that the transfer film adheres to it securely.

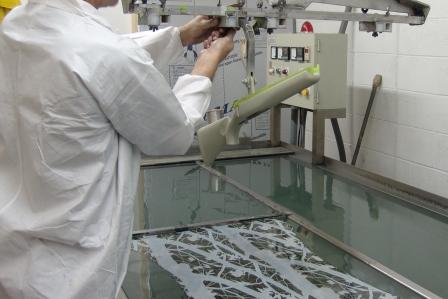
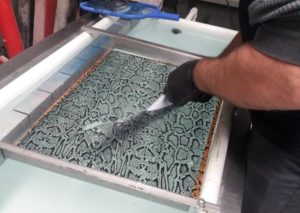
The hydrographics film is made of inks printed on a very fine and light polyvinyl alcohol-coated sheet which, when deposited in the water transfer tank, floats on the surface of the water.

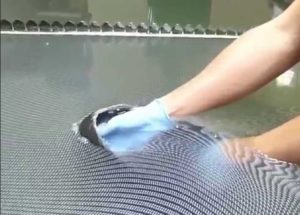
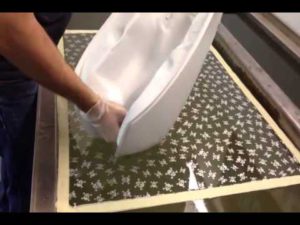
The film will be dissolved using a solvent-based activator sprayed over. The piece is then delicately immersed into water, through the floating ink layer, which wraps around and adheres to the item.

Once the part is removed from the water, it’s rinsed with warm water to get rid of any film residue. The piece is completely dried then topcoated with a car body clearcoat to protect the hydrographic pattern.

Is it necessary to sand before applying the topcoat?

No; besides, the film would not withstand the sanding due to its frailty and finesse.
The topcoat directly adheres to the ink.
*********

***************
How to install a hydro dipping workshop?

100 to 200m² premises are necessary, with a separate room for preparation and sanding, another room for painting, a room for dipping and a room for storage at controlled temperature.
The undercoat painting stages and especially the topcoating stages require a paint booth, to extract fumes and to avoid dust.
The hydro dipping can be achieved out of the paint booth. However, during the spraying of the activator (100% solvent based), the room must have sufficient air circulation.
Equipment needed:
A sanding station, a spray gun and a compressor, a suitable dipping tank, and supports to hold the parts during dipping.

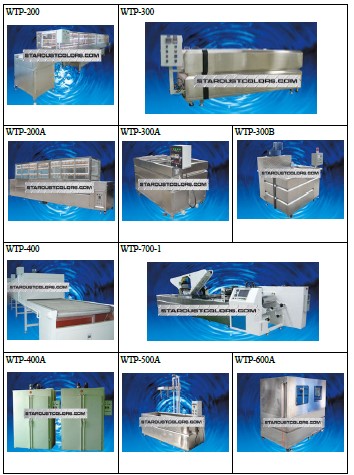
Which model of dipping tank to choose?

The Wtp300 is the smallest model; it allows an efficient and professional manual dipping. The tank is economical and affordable compared to the automated water transfer equipment limited to industrial installations.

***********************************************

The WTP300 manual dipping tank for hydrographics transfer measures 2.20m by 1.20 m wide by 1m high (300kg)
It allows to dip pieces up to 200cm by 100cm.
It’s manufactured from stainless steel and uses 220V (6kW).
It’s equipped with a heating system and a water recirculation system
The tank also relies on an automatic floating valve for filling and a water pump.
Price: 4800€ (excluding taxes)

***************************

Hydrographics – also referred to as transfer printing or dipping – involves applying an ink film to a surface

StardustColors is operating since 2006 in the field of custom paints. StardustColors plays a pioneering role in the field of hydrographics transfer and distributes a range of professional manual and automatic hydro dipping machines.
The website offers different patterns for hydrographic films, sold per square meter or per roll of 100m² or 250m².
StardustColors is not only a distributor but also a manufacturer of a range of activators with, since 2016, new high-performance formulas that ensure a perfect film dissolution and excellent adherence.


How to participate to a hydrographic transfer training?

Contact us by email to get our trainers contact details.

How to get the catalogue for the 800 hydrographic patterns available?
Contact us by email to get the complete catalogue

All hydro dipping machines for water transfer are supplied with a CE certificate of conformity (LVD and EMC)
StardustColors keeps a permanent stock of WTP300 manual hydro dipping machines

Delivery within 48hrs in France.

Are there blank films to print?

Yes. These blank polyvinyl films are available to order but with 100m² minimum size required. Note: they are sold at a significantly higher price than the printed film price, however they allow easy printing with most of printers.

Contact us

Frequently Asked Questions:

What are the possible applications for hydro dipping?
> Electric and electronic
> Furnitures and kitchens
> Automotive Parts
> Indoor and outdoor decoration materials

Are hydrographic prints UV resistant? Are they durable?
Yes, the inks used are resistant against UV-rays, and their resistance is increased with the topcoats applied over the surface.
We like to let our products speak for themselves: Some of our biggest customers are boat manufacturers, with very high level requirements in terms of resistance: many parts spend most of their time exposed to direct sunlight (e.g. instruments, dashboards).

What products do I need? Do you provide complete kits?
– 1K Basecoat or primers
– Transfer film
– Activator
– Automotive clear coat
You can find all these products here

What are the costs?
Hydro transfer is very economical. The film price is from 5 to 15€ per square meter.
In addition, the technique eliminates the most common problems associated with conventional methods such as hot printing process, screen printing, etc.

Is it difficult to learn the process?
Approximately 30 hours of training with an experienced applicator provides an overview of the essentials of hydrographic transfer.
A period of 2 to 3 weeks afterwards helps you gain complete control of the production.

Can badly printed objects be reprinted?
Yes, prints that are not satisfactory can be dipped again, as many times as you want.

In what form is the transfer film sold?
Per roll of 50, 92 or 100cm. The film can be stored for a period of 1 year by respecting temperature and hydrometric conditions.

How to paint the Kawasaki H2R?

How to paint the Kawasaki H2R?

Motorcycle paint

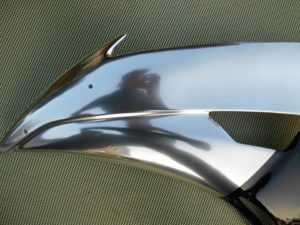
A true phenomenon! In the motorcycle industry, one had rarely seen such a beautiful painting effect, until the release of the famous Kawasaki H2R.
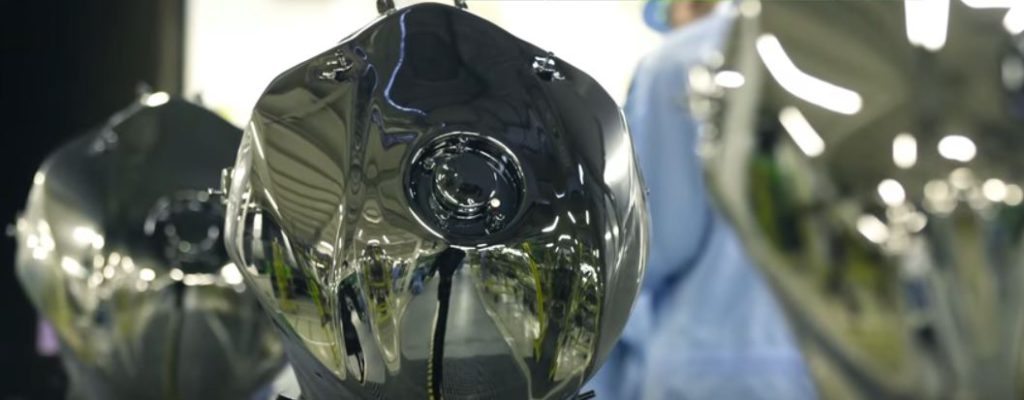
With its beautiful ultra-glossy black appearance, it does not go unnoticed. At first glance, one can see that its not just a simple black topcoat;
it is much more effective in reflecting light, and one can perceive, by looking more closely, a very impressive effect, like a metallized coat, a kind of black chrome.
In bodywork painting industry, this is quite unprecedented and most innovative!

The Kawasaki H2R paint:

But then what is it? What is the colour code and how to obtain the paint?

In response to many recent requests from motorcycle paint specialists, Stardust Colors shares the secret behind the technique to achieve this effect.

Indeed, for some years now, StardustColors painters have fun testing and combining the special effects with their spray guns.
And they know well this black chrome effect.
“This is not achieved with chrome paint, as some people think.
Here, we have been doing it for years and we call it black chrome”

Theres a metallizing (silver film) chemical effect which is used to produce such exceptional finish.
This can be achieved through a double nozzle spray gun that projects a pure silver film over the shiny black undercoat.
But it is not that simple:
To start the silver reaction, it is necessary to activate this surface with a third product.
It will bring an outstanding chrome effect.

Black Candy over Chrome

“We had found this black chrome effect by amusing ourselves to cover the chrome with candy inks, thus the black candy.
By applying a lot of transparent black, we have obtained a lacquer with a unique effect of glossiness.”

Each motorbike is “handmade” by the Kawasaki painters. (This may partly explain the price of 50,000 euros for each bike!) This process is done manually, with a chroming machine.
Only the topcoat part with a UV-cure clearcoat is done mechanically.

So what do you do if you dont have this chrome plating machine?
It would be difficult to use spray guns to undertake this technique.
It is necessary to have a chroming machine to spray and rinse all these products simultaneously.

However, StardustColors proposes a chrome kit without machine, but the process is limited to the treatment of small parts such as a helmet to the maximum.

Do it yourself – Auto-moto painting!

Do it yourself – Auto-moto painting!

Do it yourself – Auto-moto painting!

Do you want to give a new look to your old motorcycle paint ?
Do you want to create yourself a custom paint on your scooter?
Or repaint yourself a wing on your car?

It is of course possible! And this without using the services of a professional (car body painter), effective in most cases, but not everyone could afford it!

peinture-moto-do-it-yourself

There are two options:
Use a spray gun, like a pro, or
An aerosol. It is more difficult, imprecise and less economical, but you can achieve a good job if you do it carefully. Of course, the aerosol version should be considered only for small surfaces, never for a car

Products:

Stardust Colors offers complete kits for many of its effects paints, greatly simplifying the selection of products. The instructions are provided and various “How to make it” tips and videos are available on the product pages.

For example, the Do It youself series include
for scooters: the Scooter Candy paint kit and the Crystalizer effect kit
For motorcycles: The Chameleon, Candy, Chrome paint, Pearl, Metallic, Fluorescent paint kits…
For cars: The same kits, but bigger.
For manufacturer’s colour tone, there are paint kits + clear coat and accessories (degreaser, abrasive sponge and degreaser)

For Phosphorescent and fluorescent effects, by mixing epoxy resins and pigments, you will find complete kits at our site.

The “Chrome at home” chroming kits are quite exceptional since they give the opportunity to anyone to create real chrome effect on any substrate, in any colour.

Key tools for a painter!

Whether you apply car paint on a car body or a piece of furniture, it is pretty much the same…

For the preparation phase:
You need sandpapers
primer
duster buffer

For the painting and topcoating phases
a small compressor
a spray gun (a large choice of economic spray guns is available on Stardust Colors Webshop)

What to do when you have dust in your clear coat, since you are working without a paint booth?
>> Discover the polished-gloss technique (article on our blog)

Do it yourself!!

Do it yourself, for fun, but also to be successful and proud of yourself!
For this, all you need is to train a bit and follow carefully the instructions.
Choose a clean, dry, dust-free and properly ventilated area that you will use as a workshop.
Do not hesitate to ask for advice from our Stardust technical service
(replies seven days a week: info@stardustcolors.com )

Paint a table that changes colour with temperature

Paint a table that changes colour with temperature

1601188_10151812455725588_1176306382_n

Its possible and rather easy to create a surface that changes its appearance to the touch, or to the contact of an object.

Imagine a perfectly normal table, black and shiny, which turns pink, or green, or which reveals patterns, when you lay your hands, a dish, or a glass onto it.
This can be achieved of course with any object or surface: for example, a tray.

It is simply by changing the surface temperature that the colour change is observed.

526095_10150615530565588_1193193939_ndf-copie

To make this table that changes colour when touched, you need the following:

Two-coloured change:

– A table
– Some primer or background paint
– Some thermochromic paint
– Some clear coat

1 – Prepare the surface, in this case wood: fine sand, then dust. A filling primer for wood should ideally be applied to create a waterproof and perfectly smooth surface.
https://www.stardustcolors.co.uk/98-primer-adhesion-promoter

2 – Apply the first pass of colour: choose a light tint, such as white, beige, grey, apple green or yellow… You can draw patterns if you wish.
This first coat will be the hidden coat, that is the coat that will appear.

3 – Apply the thermochromic paint: This paint is available in black, blue or red and in different temperature values.

Two tips about how this paint is working: It becomes transparent when its heated beyond a certain temperature, for example 260C: The change in the appearance of the paint is not introduced abruptly, but in a gradual manner.
If a bright yellow background is applied, and green leaves have been designed on top, all this becomes visible when the thermochromic paint disappears.

4 – The topcoating process provides a beautiful gloss, or a satin effect, and protects the paints.

Multicoloured change:

The steps remain the same, but it is necessary to use a special thermochromic paint, that will show several colours. This paint called PULSAR is unique. It cannot be rendered opaque or transparent, but it changes colour when between 29 and 40C.
https://www.stardustcolors.co.uk/thermochromic-paint/249-thermochromic-dyes.html

Marbled effect with oakum

Marbled effect with oakum

13920689_10154301923935256_44922301891914704_n

We will show you how to get a very impressive yet easy to achieve marbled effect.

To obtain the marble effect with oakum, you need:
– An aluminum type metallic base
– A black base*
– Concentrated candy
– Clear coat
– Some oakum*

Base*: this means a matt base for topcoating
Oakum**: often made of horsehair. Material used in masonry, at a low cost, in the form of fiber pack.

The marble effect with oakum can be performed on small or large surfaces.
It consists of a monochrome effect producing a maximum contrast between two colours: aluminum grey and black. The whole is tinted in the final phase, producing a bright, deep colour with an illusion of relief due to the oakum.

Steps:
1 – Apply the Bright or Coarse (large grain size) aluminum base over the car body.
It is recommended to add 2 to 5% of hardener to solidify that base.
Allow to dry completely and sand with a green or grey abrasive sponge

2 – Untangle the oakum, unpack it and put it over the grey base: The oakum is used as a stencil; spray some black coats over the oakum, and when everything is removed, the negative image of the yarns is obtained. Continue being sure to vary the patterns to achieve a natural look. This requires to unravel the oakum and stretch it to obtain new shapes and patterns.

3 – Apply the candy (by mixing the concentrated candy in the transparent base binder to topcoat or in the clear coat).

And there you have it!

13938505_1024485627667538_8420875192513976280_n

Shielding home from radio waves

Shielding home from radio waves

peinture-anti-ondes-stardustcolors

How to protect your home against WiFi and mobile phone waves?

Do you live near a relay antenna?
In this case, the consequences on the health of people living nearby are real. The inhabitants concerned are living and sleeping in environments exposed to recorded high waves levels (above 2V/m).

Unfortunately, the danger is real: The WHO has classified mobile phone and WiFi waves as “possibly carcinogenic” (Group “2B”),
considered to be hazardous products like Bisphenol A, gasoline fumes…

The symptoms of damaging effects of radio waves on people are:
– Headache
– Insomnia and sleep disorders
– During the day, difficulty concentrating
– Fatigue
– Ringing in the ears

> You may ask, via a Cerfa form, the intervention of a government agency for monitoring health, to measure the levels of microwaves in the house. This intervention is free and takes about 1 hour.

There is no doubt that the graphite paint can help reduce significantly the problem of pollution from electromagnetic waves in your house.
The paint contains almost 10% of micrometric pure graphite; this product is one of the most effective material against radio waves. The graphite and the water-based paint do not contain harmful components, they do not have any risk for health and are completely neutral.

Can the waves-blocking paint be also used as WiFi anti-spy screen*? In these cases it will take practice

There are other solutions than painting, such as adhesives and metal curtains, which are also highly effective.

https://www.stardustcolors.co.uk/rust-effect/1098-anti-wavelength-hz-screen-paint.html