Guitar painting: how to personalize your guitar?

Guitar painting: how to personalize your guitar?

3 ideas for tuning your guitar with special effect paint!
It is possible to personalize the painting of a car, a motorcycle, a helmet… But then, why not the painting of a guitar? What could be better than the surface of a guitar to apply a special and unusual paint?

This can be a phosphorescent paint, a fluorescent paint that becomes luminous under UV lamps, a chrome paint, or even a prismatic paint giving rainbow reflections.

Today we will present to you 3 customization ideas with effect paints for a guitar:

Guitar Tuning: how to paint a guitar?

The preparation :
Whether it is bare, raw wood, or even an old painted background, I advise you to apply a thick, covering primer, which can fill in all the micro-defects and create a perfect, smooth background. , ready to receive any effect paint.
For this, there is the filling primer in a pot or in a two-component aerosol.
These primers are available in several colors, including black which you will use to create guitar tuning ideas 2 and 3.
Sanding with P500 hydro abrasive paper.

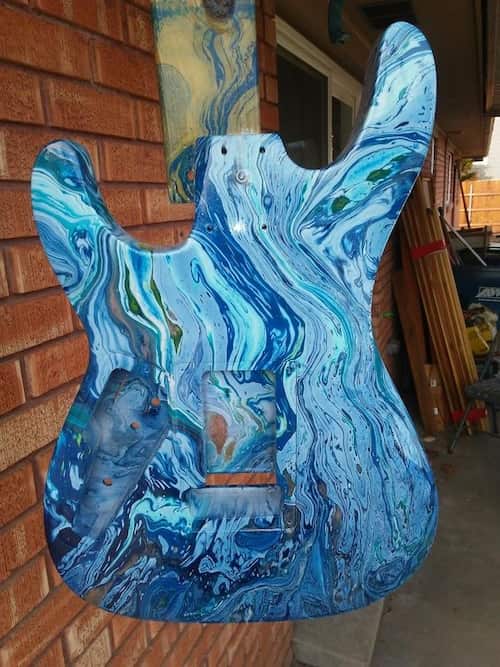
DIPPING: guitar paint

It is in a way a Hydro printing or Hydro transfer technique, but carried out not with transfer films, but with transfer paints.
Start by making a hard base (2C primer) with the color of your choice.
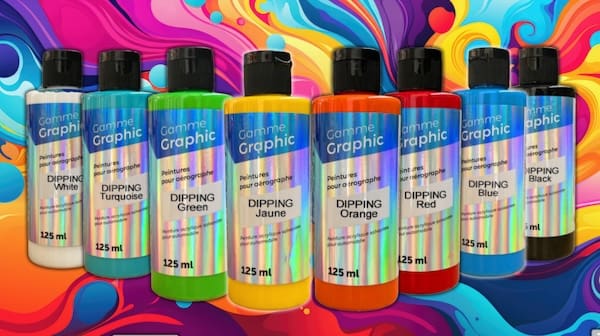
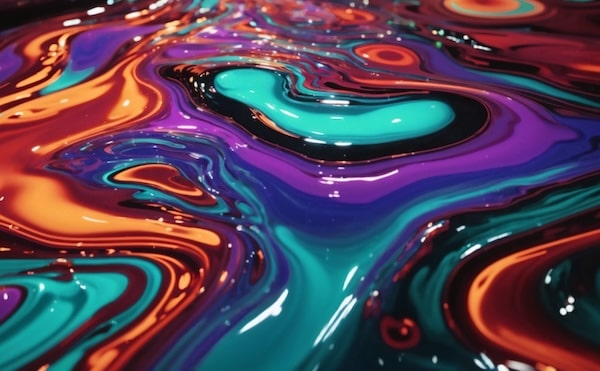
Place the chosen colors on the surface of the water in a tray large enough to contain the body of the guitar. Use an interesting color combination, such as orange, purple and green with a few touches of black.

Dipping colors are specially made not to dissolve in water and to cling directly to the surface of the object being dipped.
It is possible to distort the position of colors on the water surface using a rod.

The guitar is therefore printed with your decor. All that will remain is to varnish with as many layers of varnish as is necessary to level and create a perfectly smooth and shiny surface.

artist : @burlsart

2/ Pearly and multicolored speckled effect

To achieve this beautiful effect, which produces bright, shimmering colors, you will need a hard (2C primer) and black base, perfectly black.
You can then take interfering pearls, which are available here in eight colors
And you can mix them in a little bit of transparent binder available here in small format.
Makes a liquid paste with the mother-of-pearl and the binder, which will allow you to dab with a piece of plastic or a sponge on the surface of the guitar. The pearls appear colorful on this black background. Of course, it is possible to use other background colors or even color gradients. The effects of the interfering pearls are very interesting on other background colors.

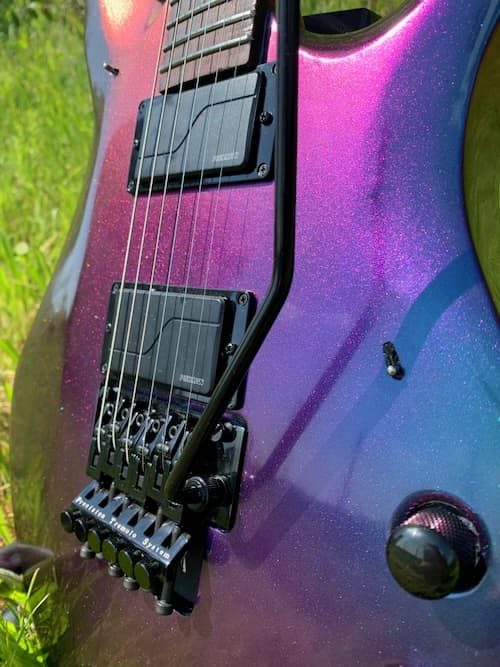
3/ The Chameleon Colorshift effect on a guitar

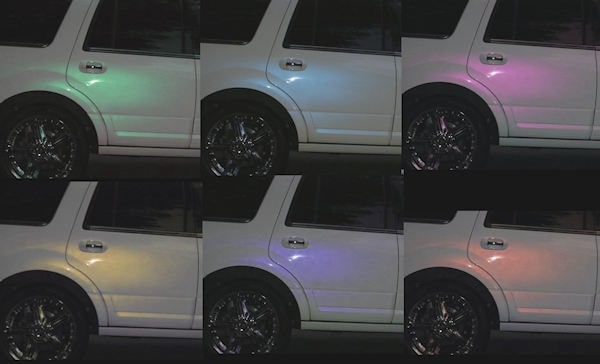
Here are some impressive colors that have the ability to capture attention and attract all eyes! These colors are particularly bright and intense in comparison to other metallic or pearl colors. And they have the particularity of changing appearance depending on the angle of view. So, you never really know what color they are!

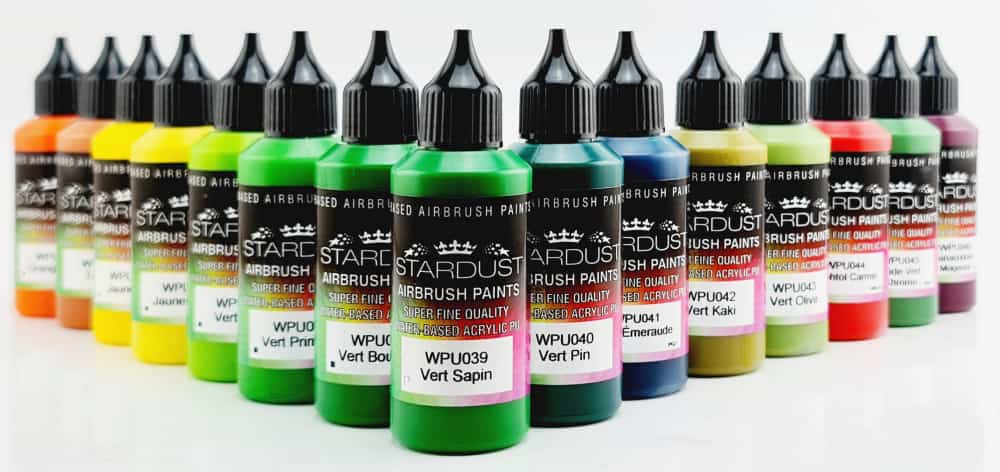
It doesn’t matter if you don’t have a spray gun, you can apply them with an aerosol because they are available in the 38 colors of Stardustcolors, both in a pot or in an aerosol.
This is probably one of the most effective effects but also the easiest to achieve:
on the black background sanded with P500, you must apply thin layers, and repeat these thin layers until the black background disappears. Then we can varnish

There is a large choice of colors, with some shades changing up to two colors and even up to 8 colors depending on the viewing angle.

Phosphorescent paint in towns to save energy

Phosphorescent paint in towns to save energy

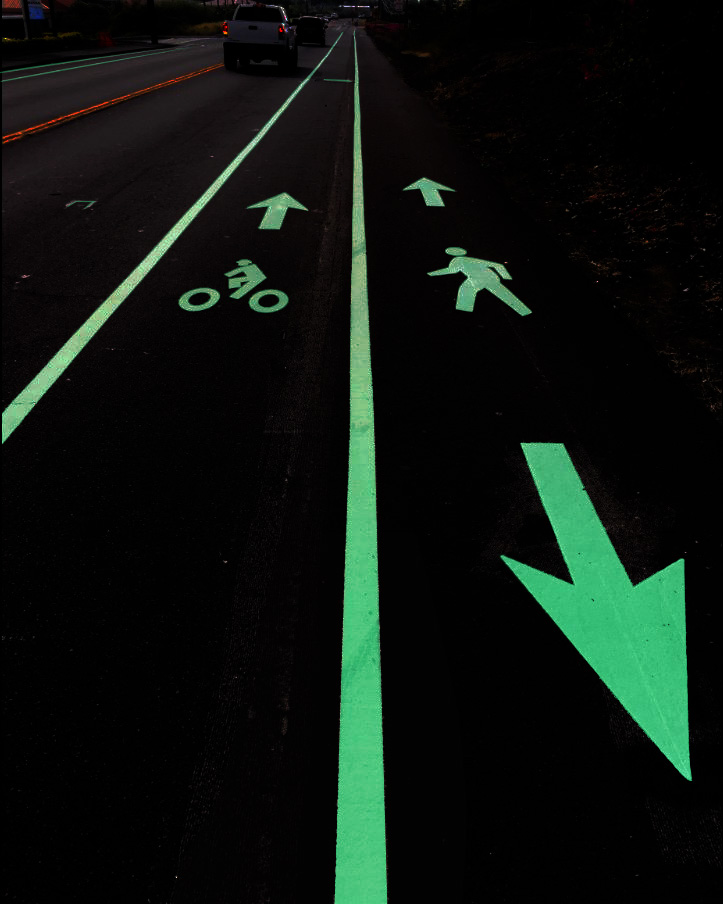
This article deals with the solution of phosphorescent road paint and photoluminescent markings, for exterior pedestrian zones and the marking of paths and obstacles, following the extinction of street lights in the city during the night.

With the increase in electricity prices in France, many municipalities have implemented switching off public lighting at night. This rather radical measure was necessary, it not only avoids high bills and it has a significant beneficial ecological impact. Not to mention the end of nighttime pollution.

Certainly some nocturnal pedestrians will naturally feel a little less safe in the dark streets, but in return they will be able to rediscover the magnificence of the starry sky, forgotten for too long!

The phosphorescent solution to light up French cities* at night

It is the company Arco Iris SAS, a small company based in Gard in 2009, specialist in Europe for all photoluminescent products, which made a name for itself by offering town halls an urban phosphorescent paint and a complete catalog of innovative solutions, durable and “luminous”! (their site: phosphorescentpaint.co.uk *)

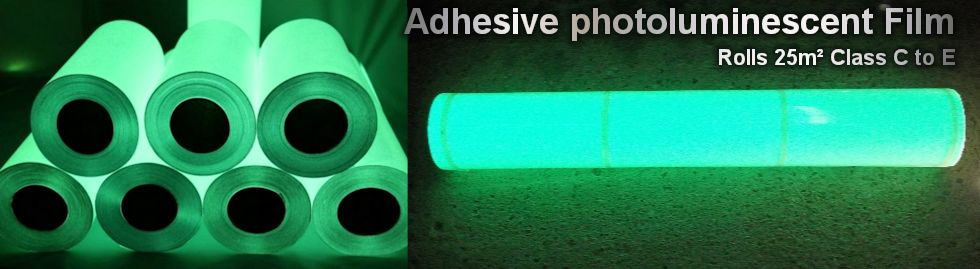
Photoluminescent products are also called phosphorescent, and their main property is to shine or be visible in the dark, after having been charged with light, or light energy, during the day.

Used successfully indoors, in buildings, factories, or even boats, all these phosphorescent products are the ideal solution to improve the safety of people moving in the dark outdoors, in cities after dark .

5 reasons to use phosphorescent road paints for urban marking

1/ phosphorescence is an extremely durable phenomenon, which does not suffer a drop in performance over time. The old paintings present in the Second World War bunkers in Normandy are still functional after 80 years!

2/ These products are economical, and relatively easy to install, whether they are photoluminescent road paint, nails, strips, or stones or gravel. They can be adapted or created for each type of surface, floor, walls, corners, posts, etc.

3/ Photoluminescent products are ecological, because they are first of all manufactured without radioactive products and without toxic products. And they require no energy source other than that of the sun during the day. They also do not require maintenance, other than simple dusting.

4/ In a dark environment, they allow you to mark obstacles, indicate steps or corners, or even mark out a path.

5/ During the day, these photoluminescent markings are discreet. Very discreet, so much so that they are almost invisible, since their daytime appearance is colorless. Only in complete darkness do they become bright and visible.

A variety of photoluminescent equipment for town halls for marking paths in a nocturnal atmosphere

For floors, there are phosphorescent road paints. These are extremely durable paints that can be applied to almost any surface.
There are also phosphorescent arrows, but also stones, nails, or photoluminescent gravel.

Urban phosphorescent paints can be applied to vertical surfaces, such as walls, poles, or all types of obstacles: they thus reduce the risk of falls. They are also suitable for stairs, tunnels and sports areas. They are resistant to trampling, sun and rain

There are also many types of strips, based on PVC, plastic, aluminum.

If you want more information regarding photoluminescent road paints, specially designed for cycle paths or pedestrian paths, or if you wish to create equipment specially designed according to your requirements, contact our company service by email. (info@photoluminescent.fr)

Hikari Toys for Soft PVC – Interview StardustColors

Hikari Toys for Soft PVC – Interview StardustColors

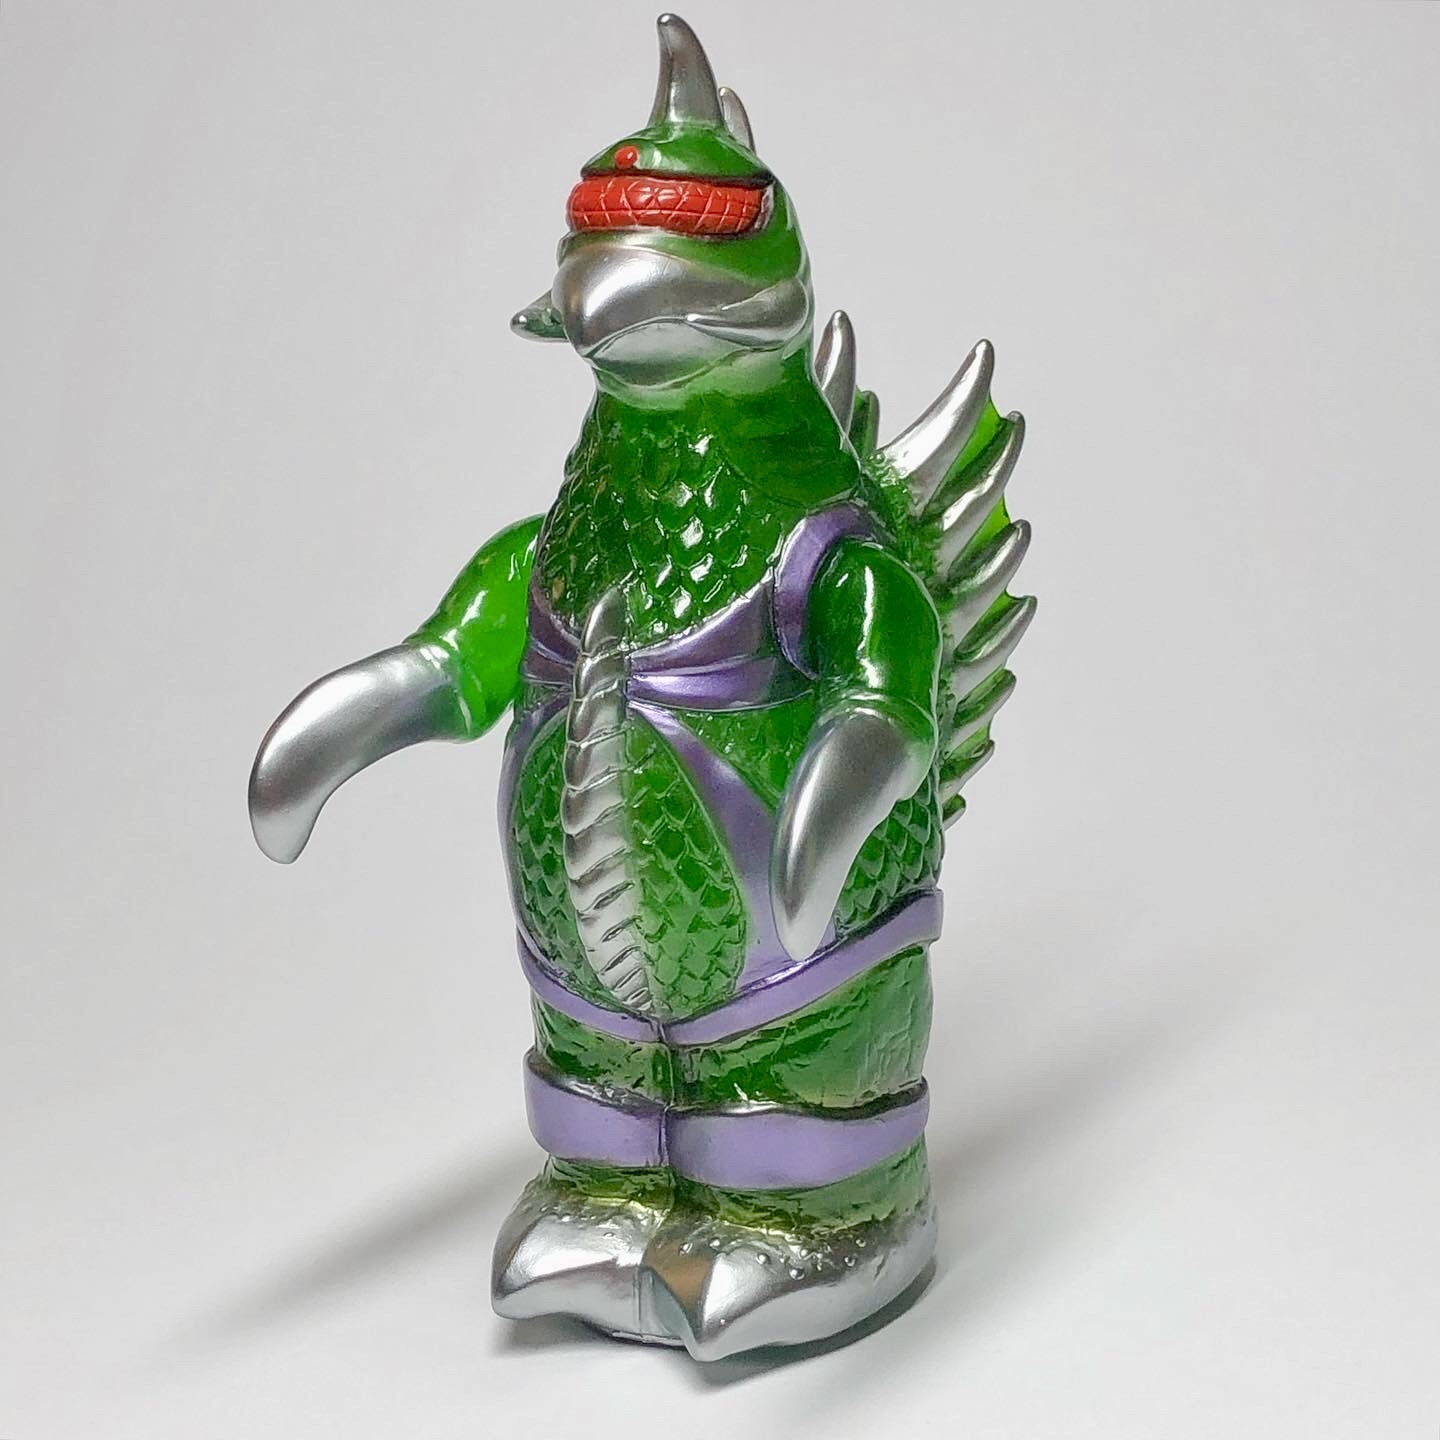
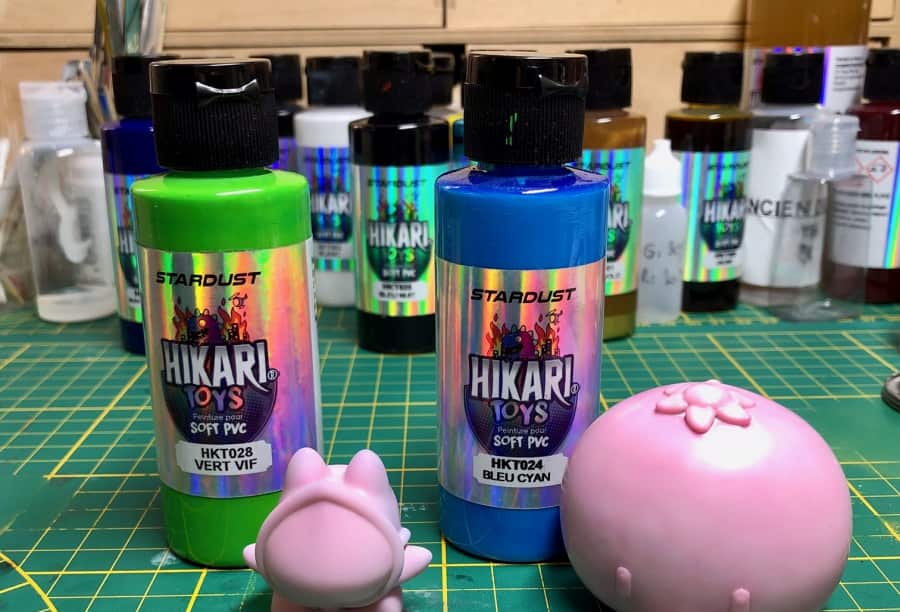
For two years now StardustColors has been offering the HIKARI Toys for Soft PVC range of paints specially designed for soft vinyl toys.

Today we welcome Stéphane, a user of the range since the start of its marketing, to tell us about his hobby: sofubi painting.
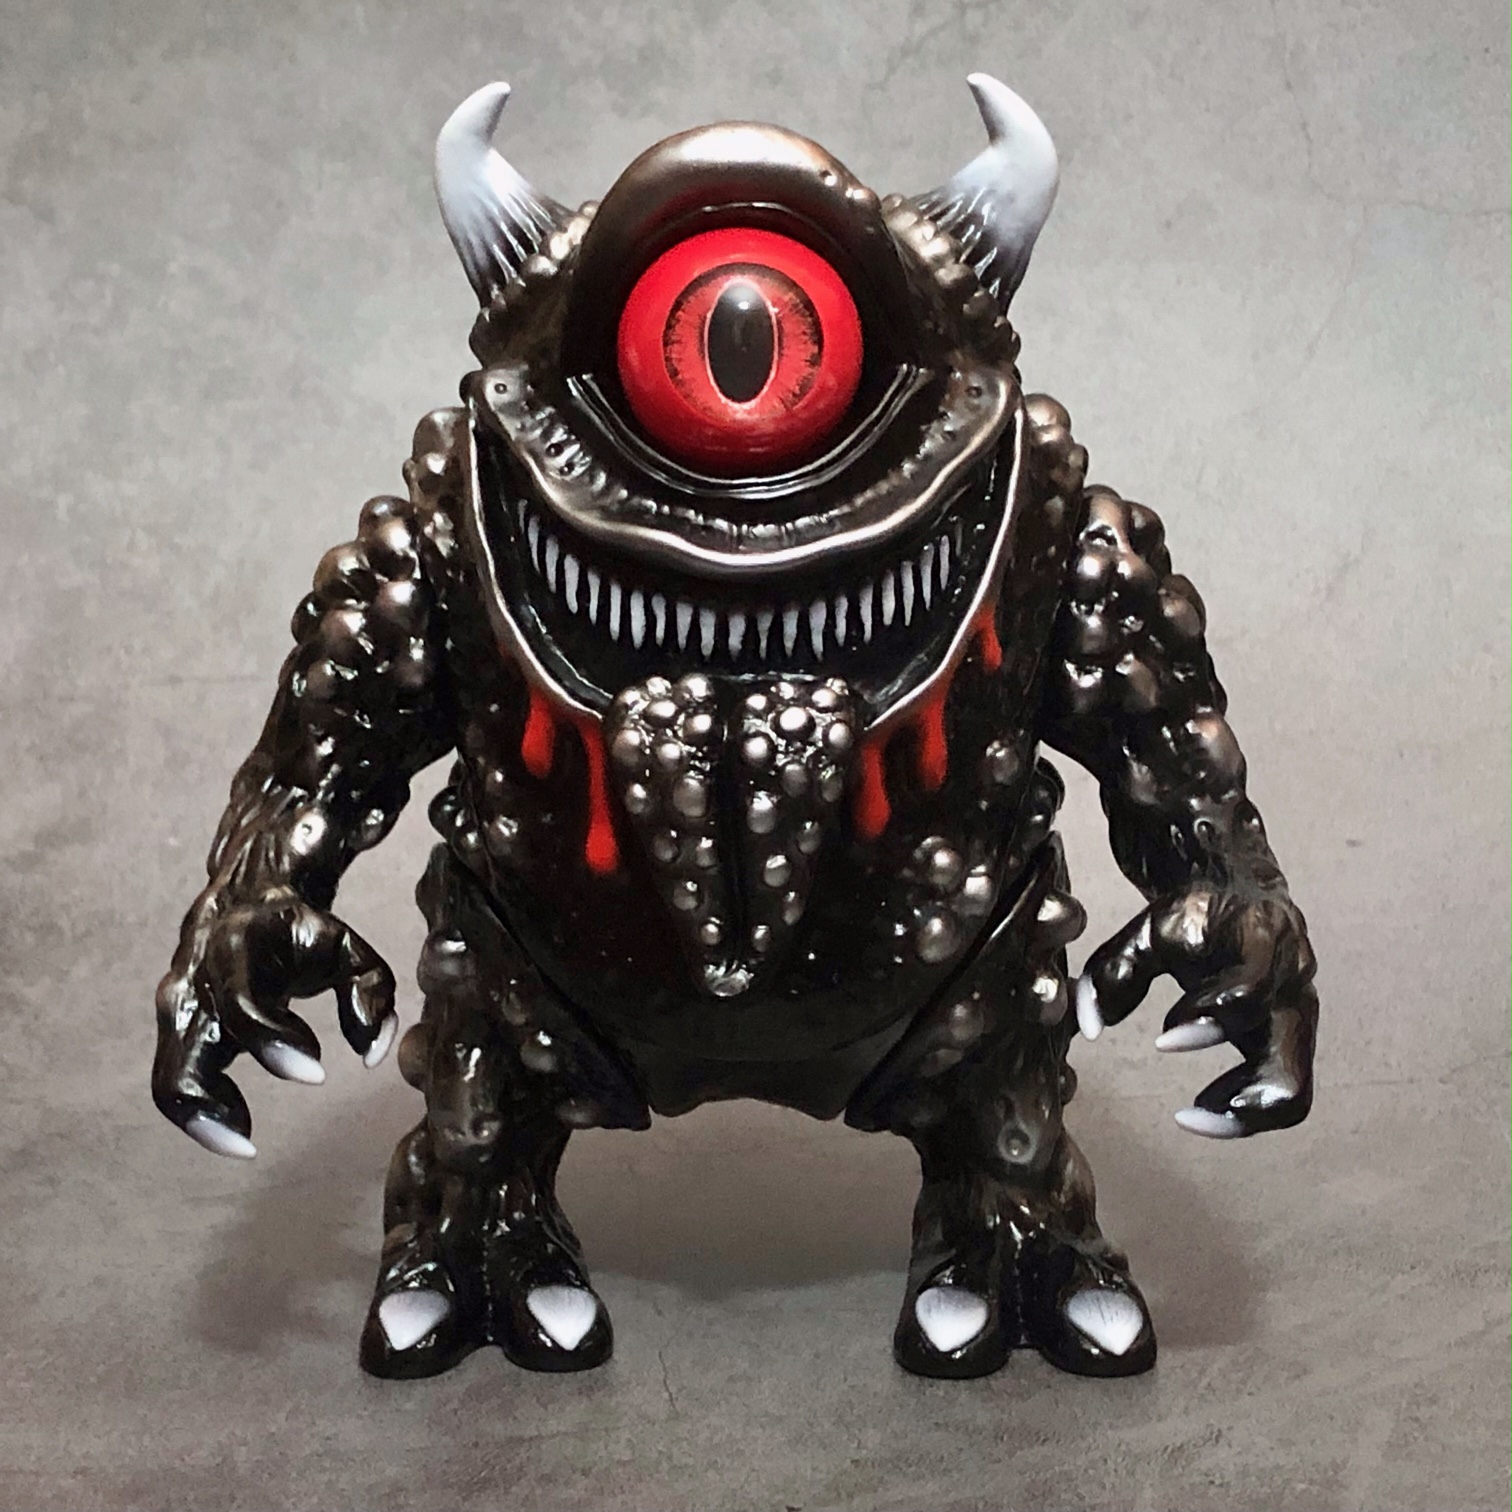
> Hello Stéphane and welcome. Before getting to the heart of the matter, can you introduce yourself in a few words?

Hello to the whole Stardust team! So Stéphane, I have been a sofubi collector since 2009. In 2016 I decided to take the plunge and start painting this type of toy to give an extra dimension to my hobby. I also have an Instagram account (https://instagram.com/_thechogokinjawa_) where I present, among other things, my projects trying as much as possible to present their WIP (Work In Progress) to show the different stages of painting until the final result.

> But what exactly is sofubi?

Sofubi is the phonetic contraction of the Japanese “sofuto biniru” which refers to PVC toys. In the hobby we use this word interchangeably or sofvi, the English contraction of “soft vinyl”… it’s quicker than talking about soft vinyl toys… and a little more flattering too (laughs).

> How long have these types of toys been around and where do they come from?

Originally these were Japanese toys which began to be produced after the Second World War for the American market. But from the 1960s, sofubi took on real importance in Japan with the marketing of toys based on films and TV series around Godzilla or Ultraman. Very quickly sofubi developed, mainly on the themes of monsters (kaiju), robots or creatures of traditional Japanese folklore (Yokai). At the end of the 90s, sofubi took on a new dimension when street wear stores such as Bounty Hunter decided to start selling soft vinyl characters. Since then, this phenomenon has continued to grow, sparking vocations beyond the street culture community and has even spread to other Asian countries (China, Hong Kong, Taiwan, Thailand). ) or the United States. Today the themes in sofubi are almost endless because it is an environment where everyone can give free rein to their imagination when it comes to creating a figurine. From very gory to very kawaii (which means cute in Japanese) there is something for everyone!
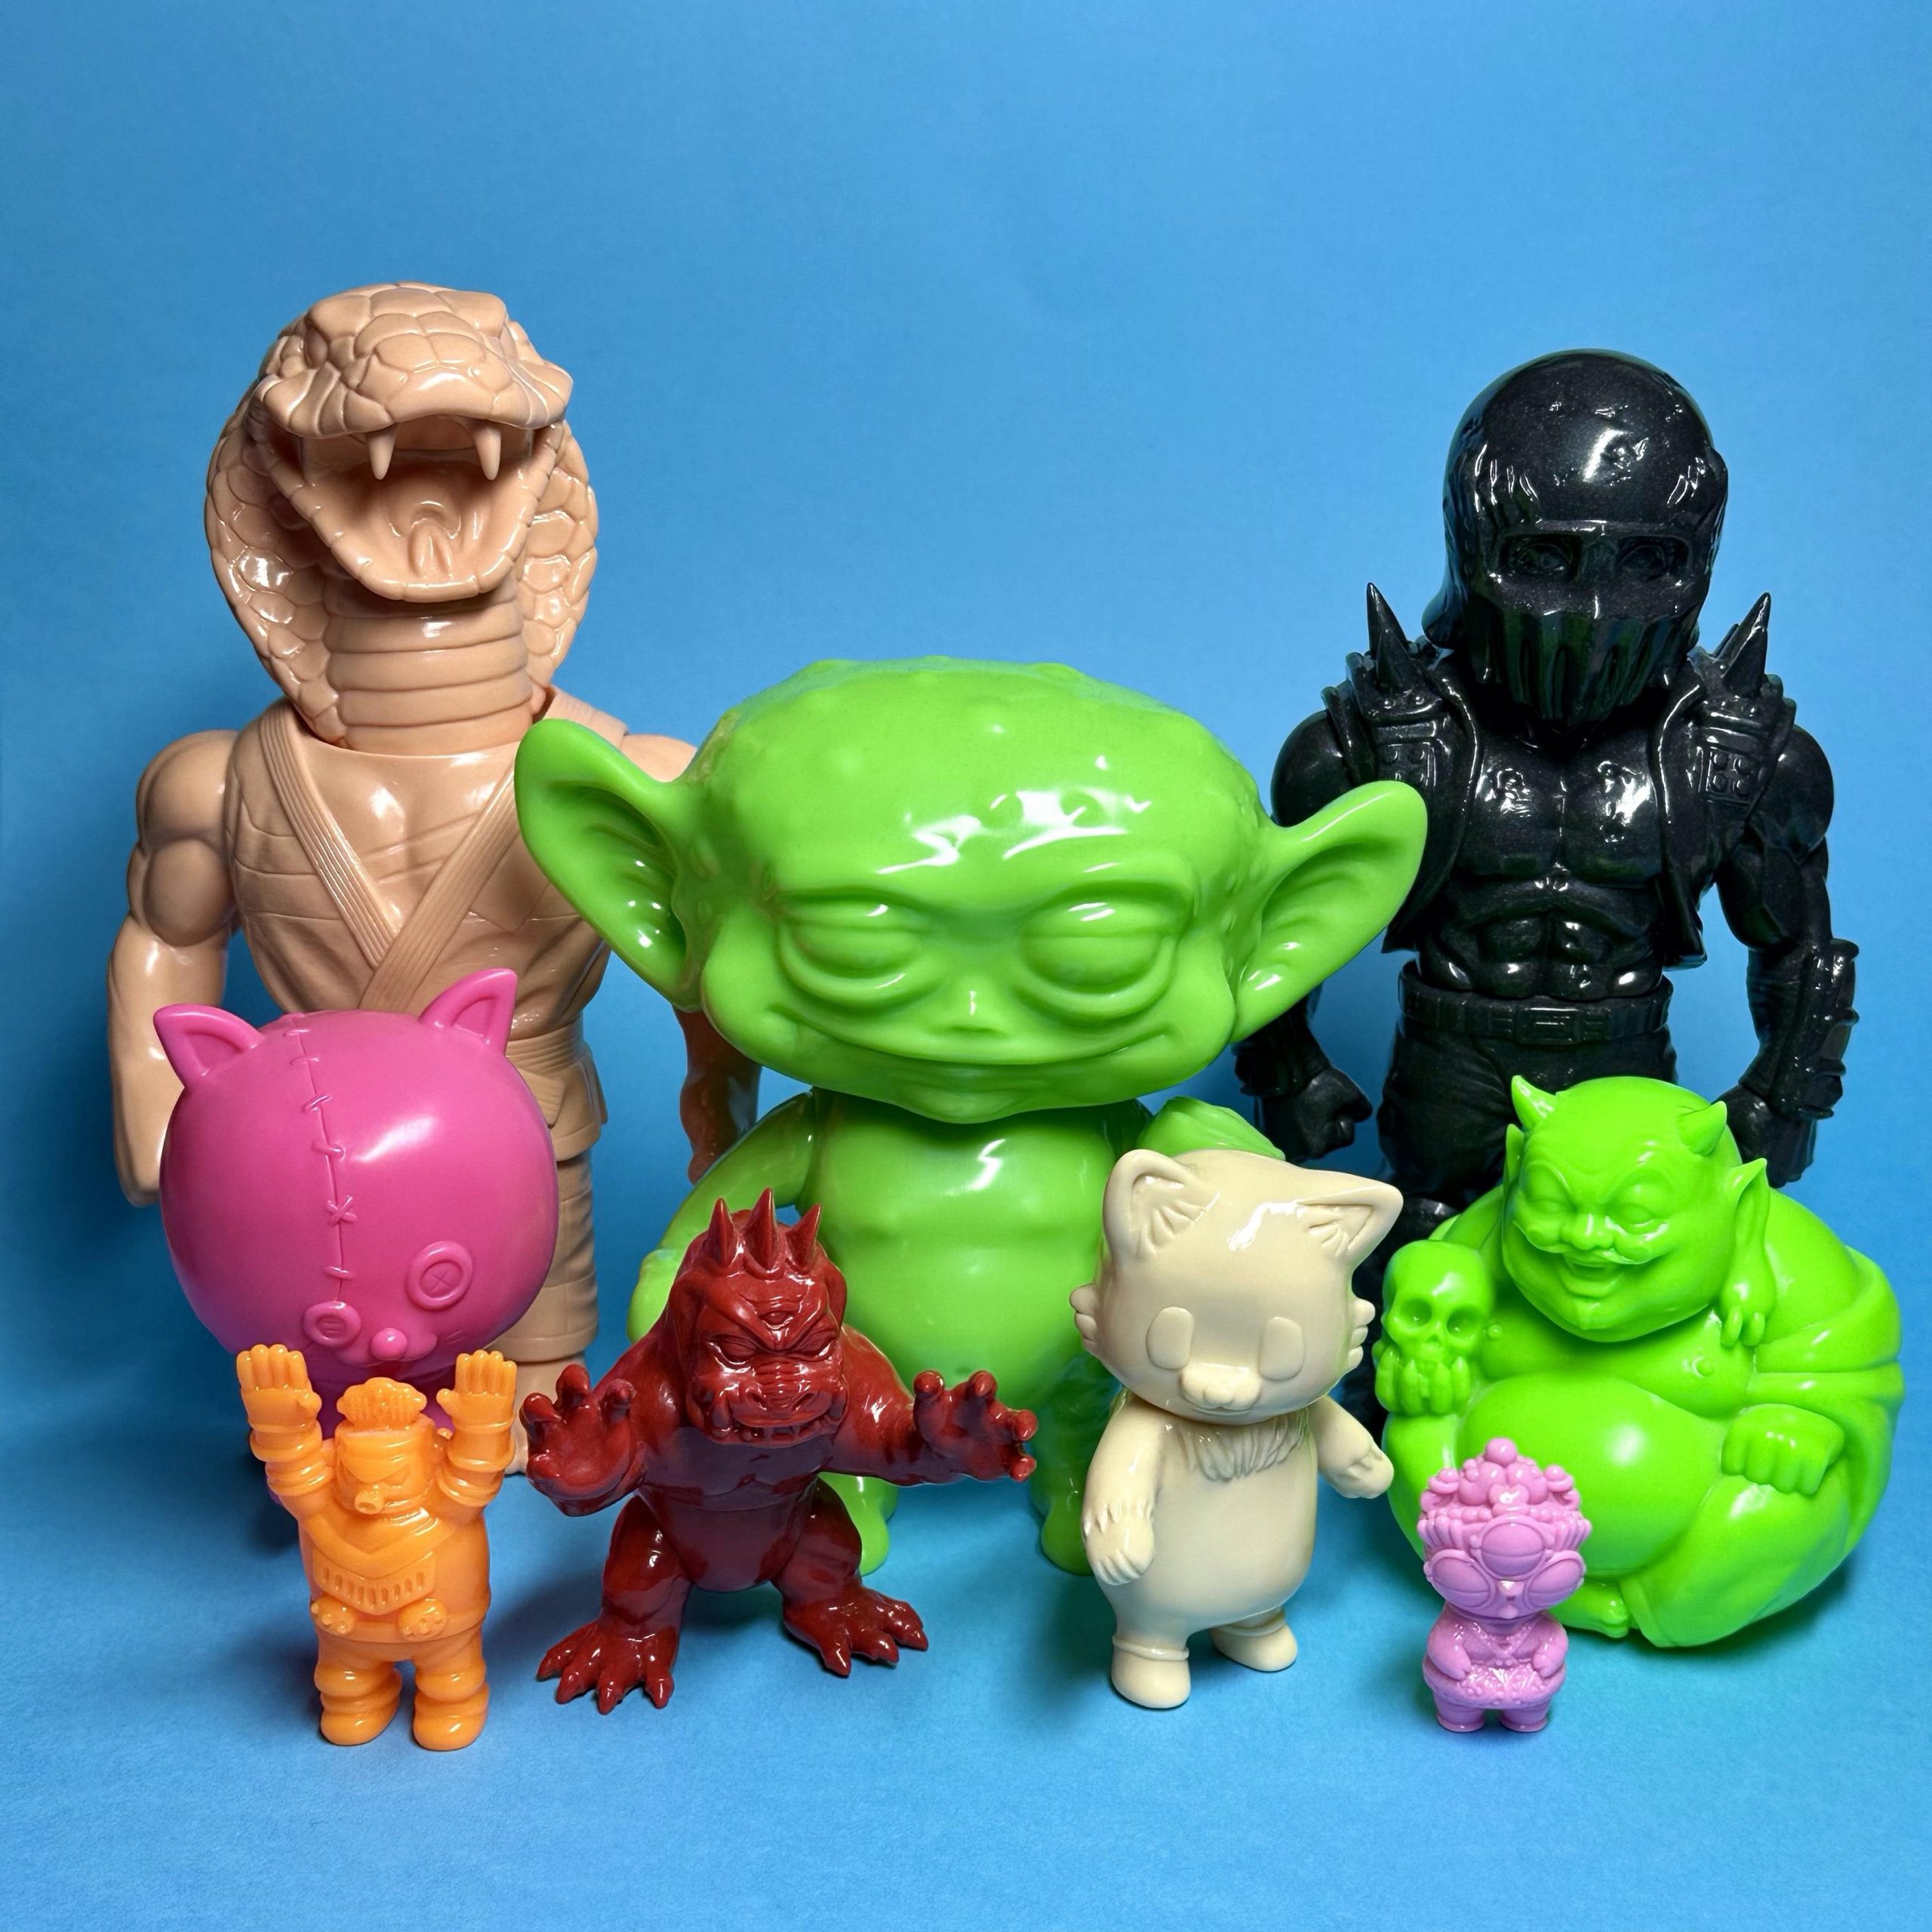
Sofubi offers a very wide variety of themes, sizes and colors!

> But what ultimately differentiates the sofubi from other toys?

Compared to toys that can be found on the market, I would say that a sofubi can appear extremely simplistic and sometimes give the impression of being one of those cheap toys that you see at fairgrounds.
It’s true: a sofubi is made of hollow plastic, is made up of few parts (this can range from two to at most ten) and is not very articulated (it is often the bare minimum: head, arms and legs).
And this is for good reason: each sofubi is made by hand using artisanal techniques that have not changed since the very beginning. We are therefore very far from mass production and in the end the number of copies of a sofubi will not exceed a few hundred (or even thousands for the most fashionable models) over several years.
On a sofubi the effort is focused on two aspects. First of all, the design: some artists produce phenomenal work of sculpture with incredible attention to detail. And then the painting: each piece being painted by hand, the sofubi leaves the door open to all possible and imaginable shades.
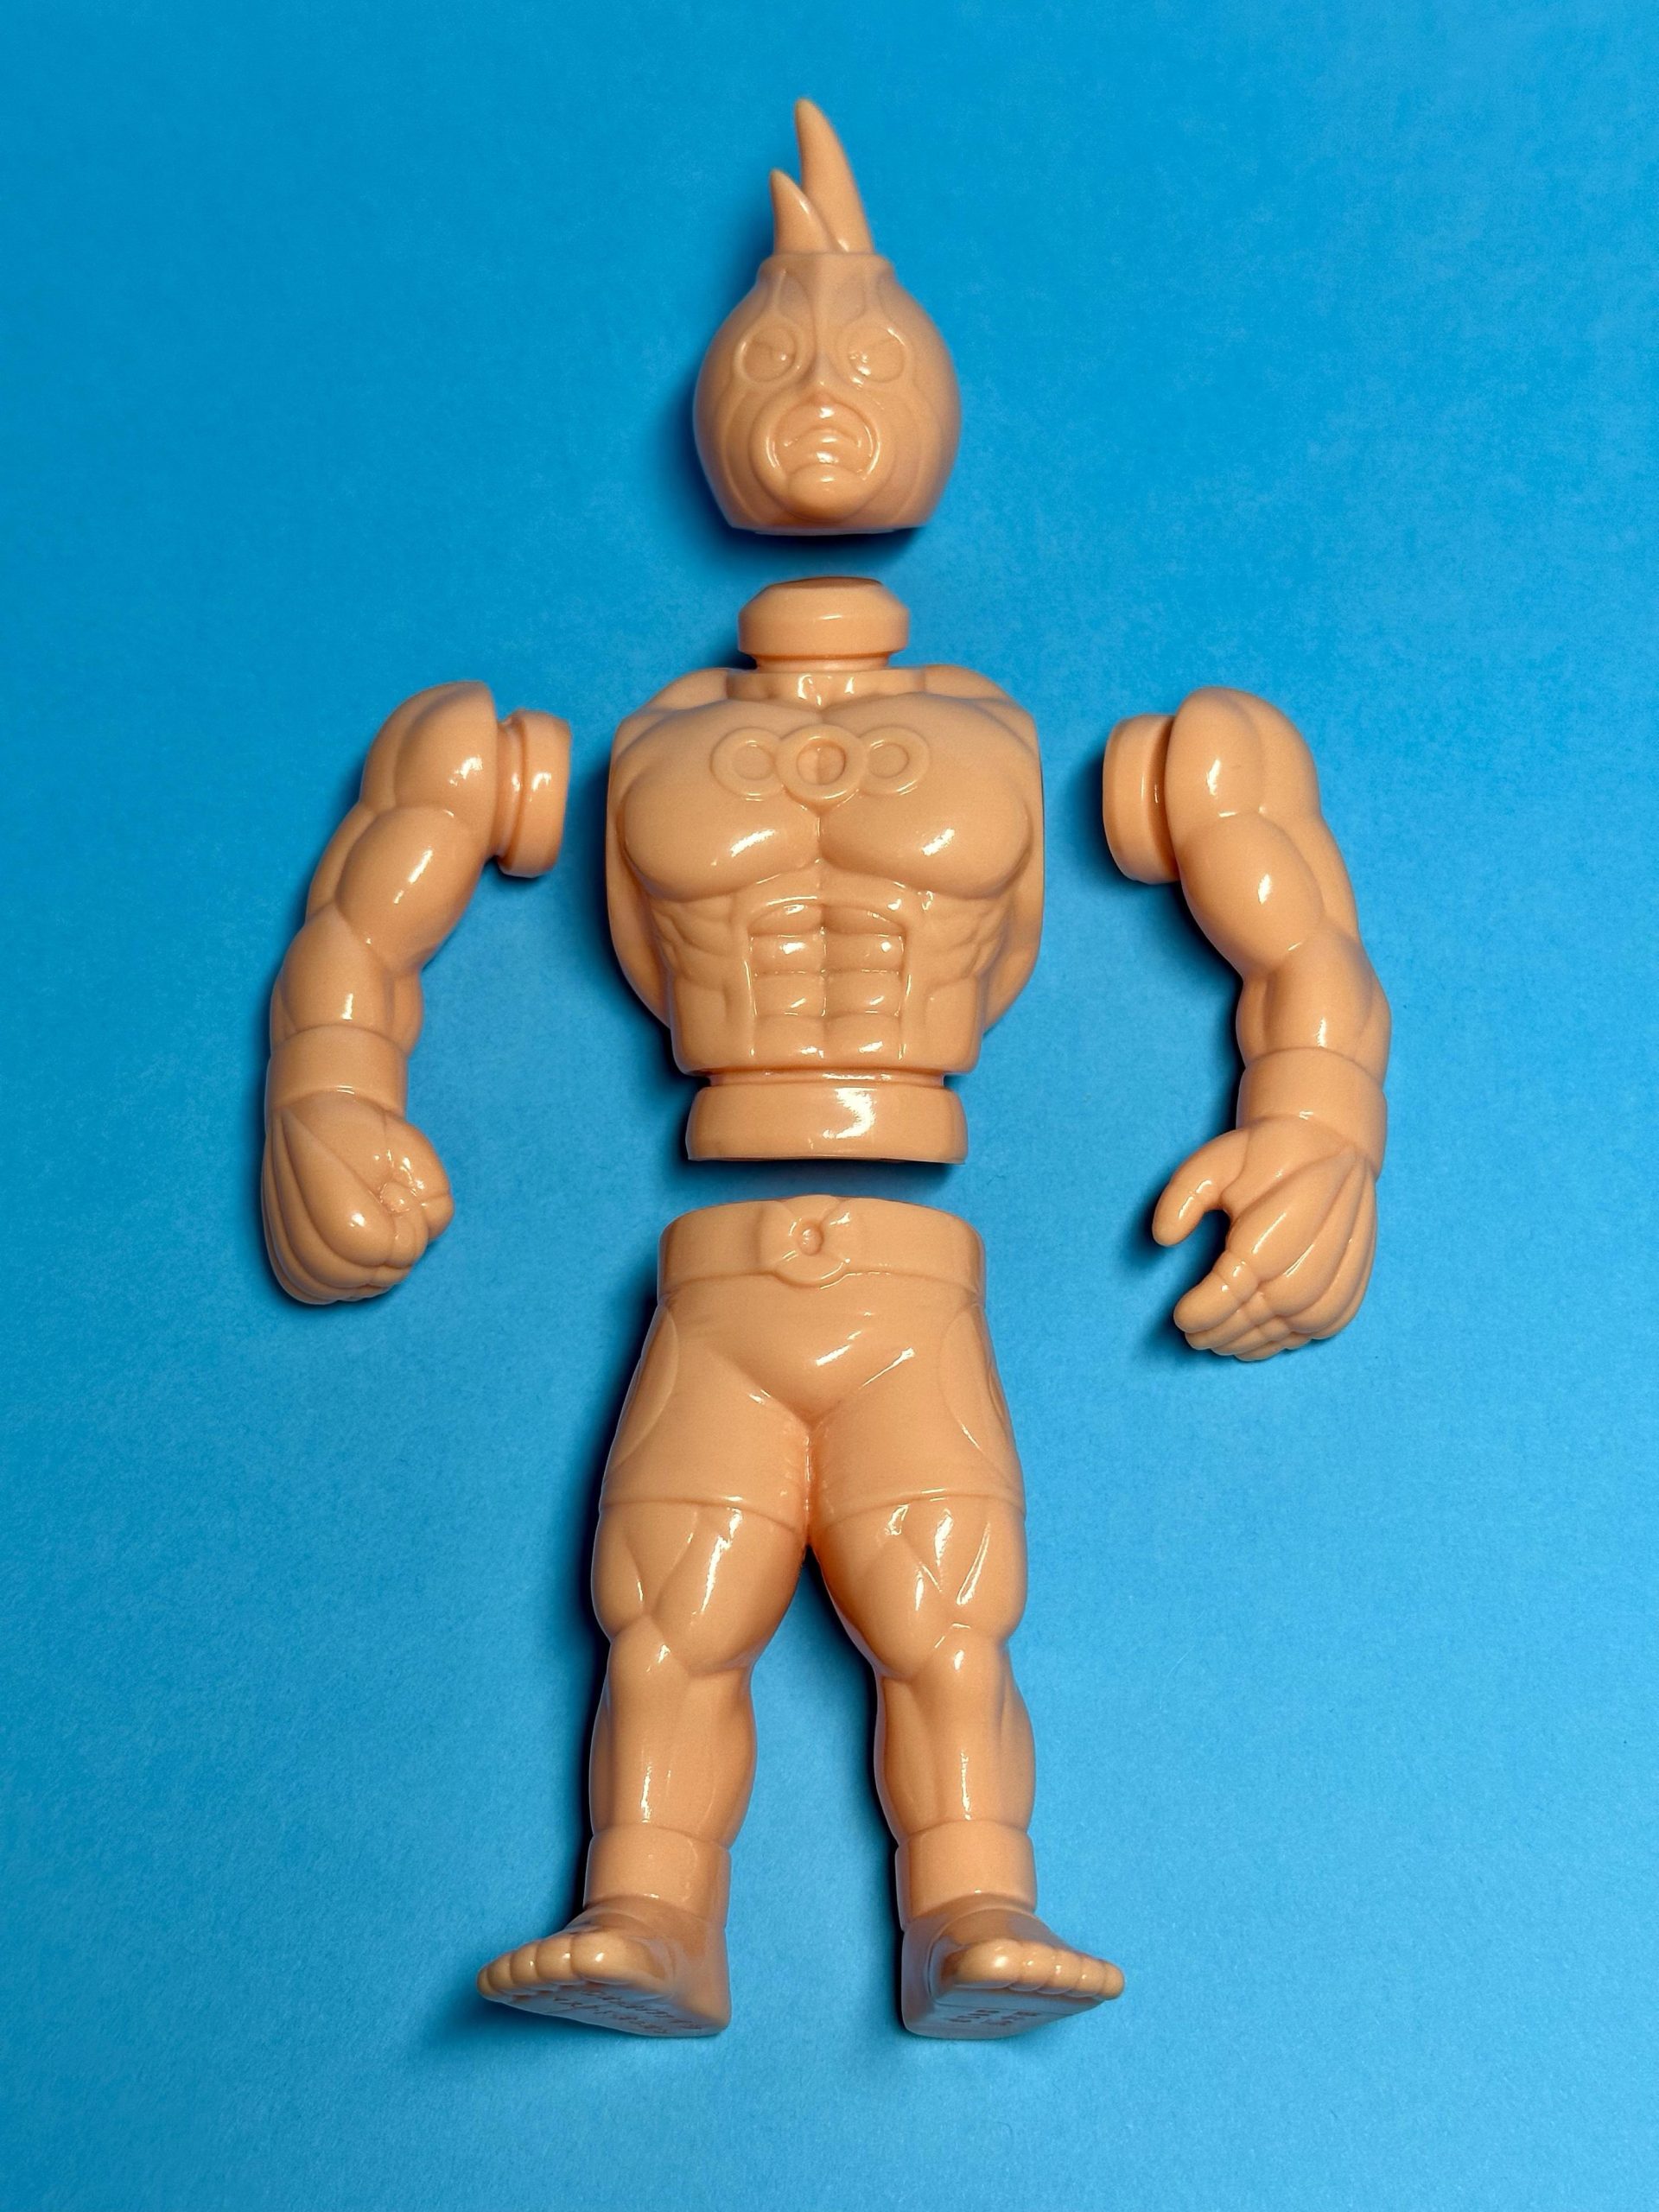
Anatomy of a sofubi

> Thank you for all these details and this transition to the theme of painting! What do you think is the main difficulty in painting a sofubi?

The main difficulty in painting a sofubi? I would definitely say it’s finding the right paint! (laughs)
More seriously, I think that before starting to paint any object (a plastic model, a resin kit or a sofubi), you have to “get to know it” to determine which paint will be the one. more suitable.
The case of sofubi is quite particular in the sense that it is the way in which it is designed which will dictate the choice of paint to use.
In fact, to paint a sofubi you have to start by dismantling it. To do this, we will soften the vinyl by heating it. So far so good.
Once the different parts have been painted, everything must be reassembled.
And this is where things get complicated: the painted parts will have to be softened again by heating them to fit them into each other.
We therefore need a paint that is both flexible to withstand the pressure that we will exert on the parts during reassembly and resistant to the friction that can occur in certain places of the sofubi (which I remind you is not necessarily perfect because it is made in an artisanal way).
The optimal solution therefore lies in a vinyl paint which combines these two properties, because it has the particularity of creating a chemical bond with the vinyl substrate of the sofubi.
Before StardustColors launched its HIKARI Toys for Soft PVC range, there was none of this in France or even Europe. The arrival of your paint was a real game-changer!
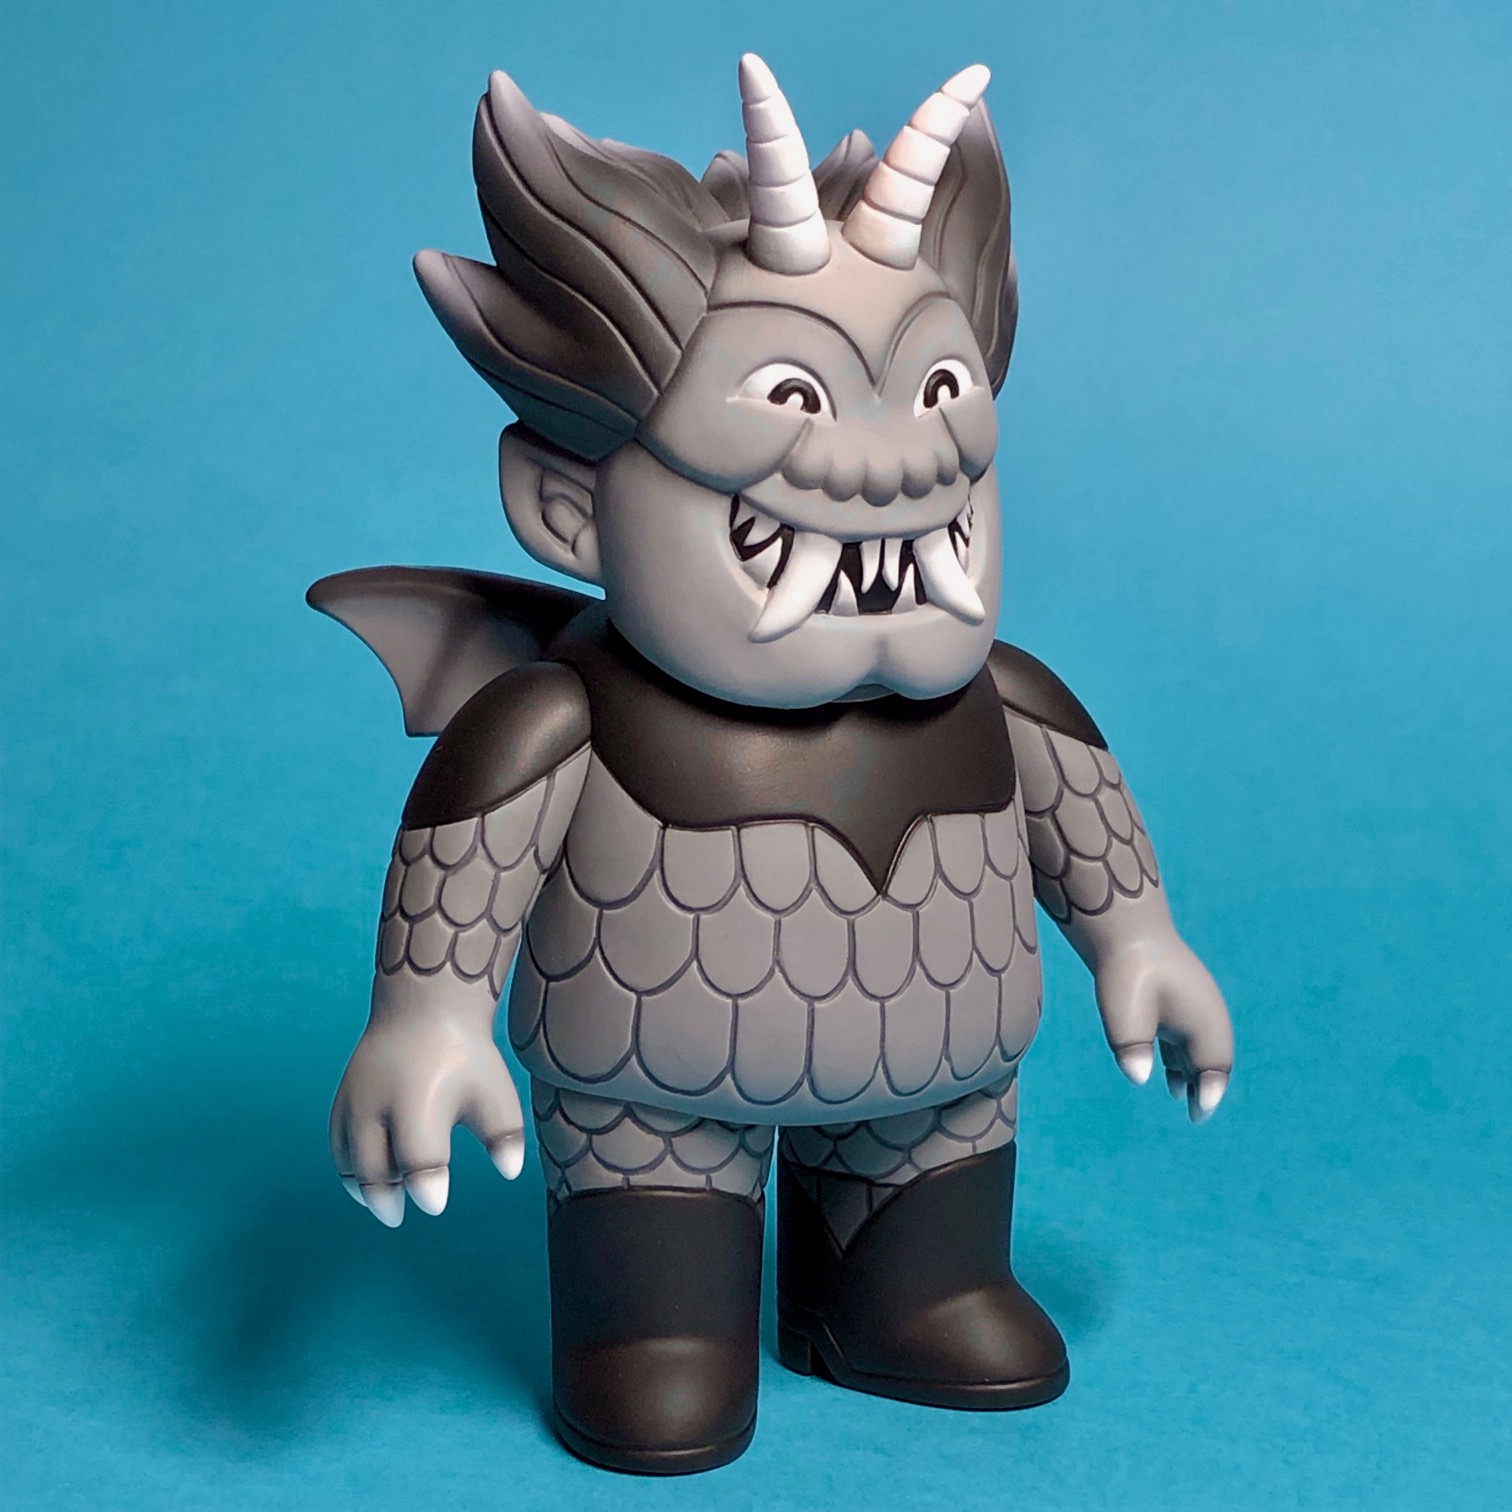
Hikari Toys paint with matte varnish from the Graphic range

> But then what did you do before HIKARI Toys for Soft PVC paints?

In principle, you can paint the sofubi with almost any type of paint other than vinyl paint: acrylic (water or alcohol base), solvent-based or enameled (enamel).
But they are not really suitable because none has the capacity to create the chemical bond with the vinyl substrate that I spoke to you about previously.
As for me, I used solvent-based paints for their quick drying and relatively good resistance to friction. I could quickly handle the part which was very quickly dry to the touch and continue working on it.
On the other hand, at the time of reassembly, if the paint is not suitable it can quickly turn into a nightmare: the paint can crack (or even jump), poorly resist the heat (resulting in fingerprints on the part) …I can’t count the number of times I’ve ruined hours of work in just a few seconds. I won’t hide from you that this type of mishap, which happened quite regularly, was extremely frustrating and even discouraging.

> Very good, but StardustColors is not the only company producing vinyl paints for sofubi. So why not use other brands?

Because the other manufacturers are either in Asia or in North America and in the best case scenario I could have bought the paint in concentrated form but not the thinner, due to international air transport regulations.
And I’m not going to teach you this: each paint has its appropriate thinner. Painting is above all chemistry! (laughs).
In short, without the thinner specially designed for paint, it is impossible to extract its full potential, especially knowing the rather particular properties of vinyl paint…but here I am starting to get into the technical details.

> That’s perfect, so let’s talk technical now! First of all, what materials do you need to paint sofubi?

Basically, a sofubi is painted with an airbrush because vinyl paint is not particularly suitable for painting with a brush.
You will need an airbrush that is absolutely equipped with Teflon (PTFE) seals to resist solvents….otherwise I won’t give you much of your equipment after a few uses. And of course add a compressor to it.
I advise you to choose airbrush brands whose reputation is well established: Japanese (Iwata, Wave, GSI-Creos) or German (Harder & Steenbeck). They are all very good, although I must admit that I have a slight preference for Japanese airbrushes.
I suggest you first opt for a versatile airbrush with a 0.3 mm nozzle. It will allow you to do just about anything you want. And if you decide to go further in detail work, then I advise you to add a 0.15 mm or 0.18 mm airbrush to your painting equipment.
Of course, using an airbrush with vinyl paints requires taking precautions for your health. So cartridge mask and paint booth with extraction to the outside are mandatory!
Finally, when it comes to cleaning my equipment, I use acetone or cellulose thinner and it does the job very well.
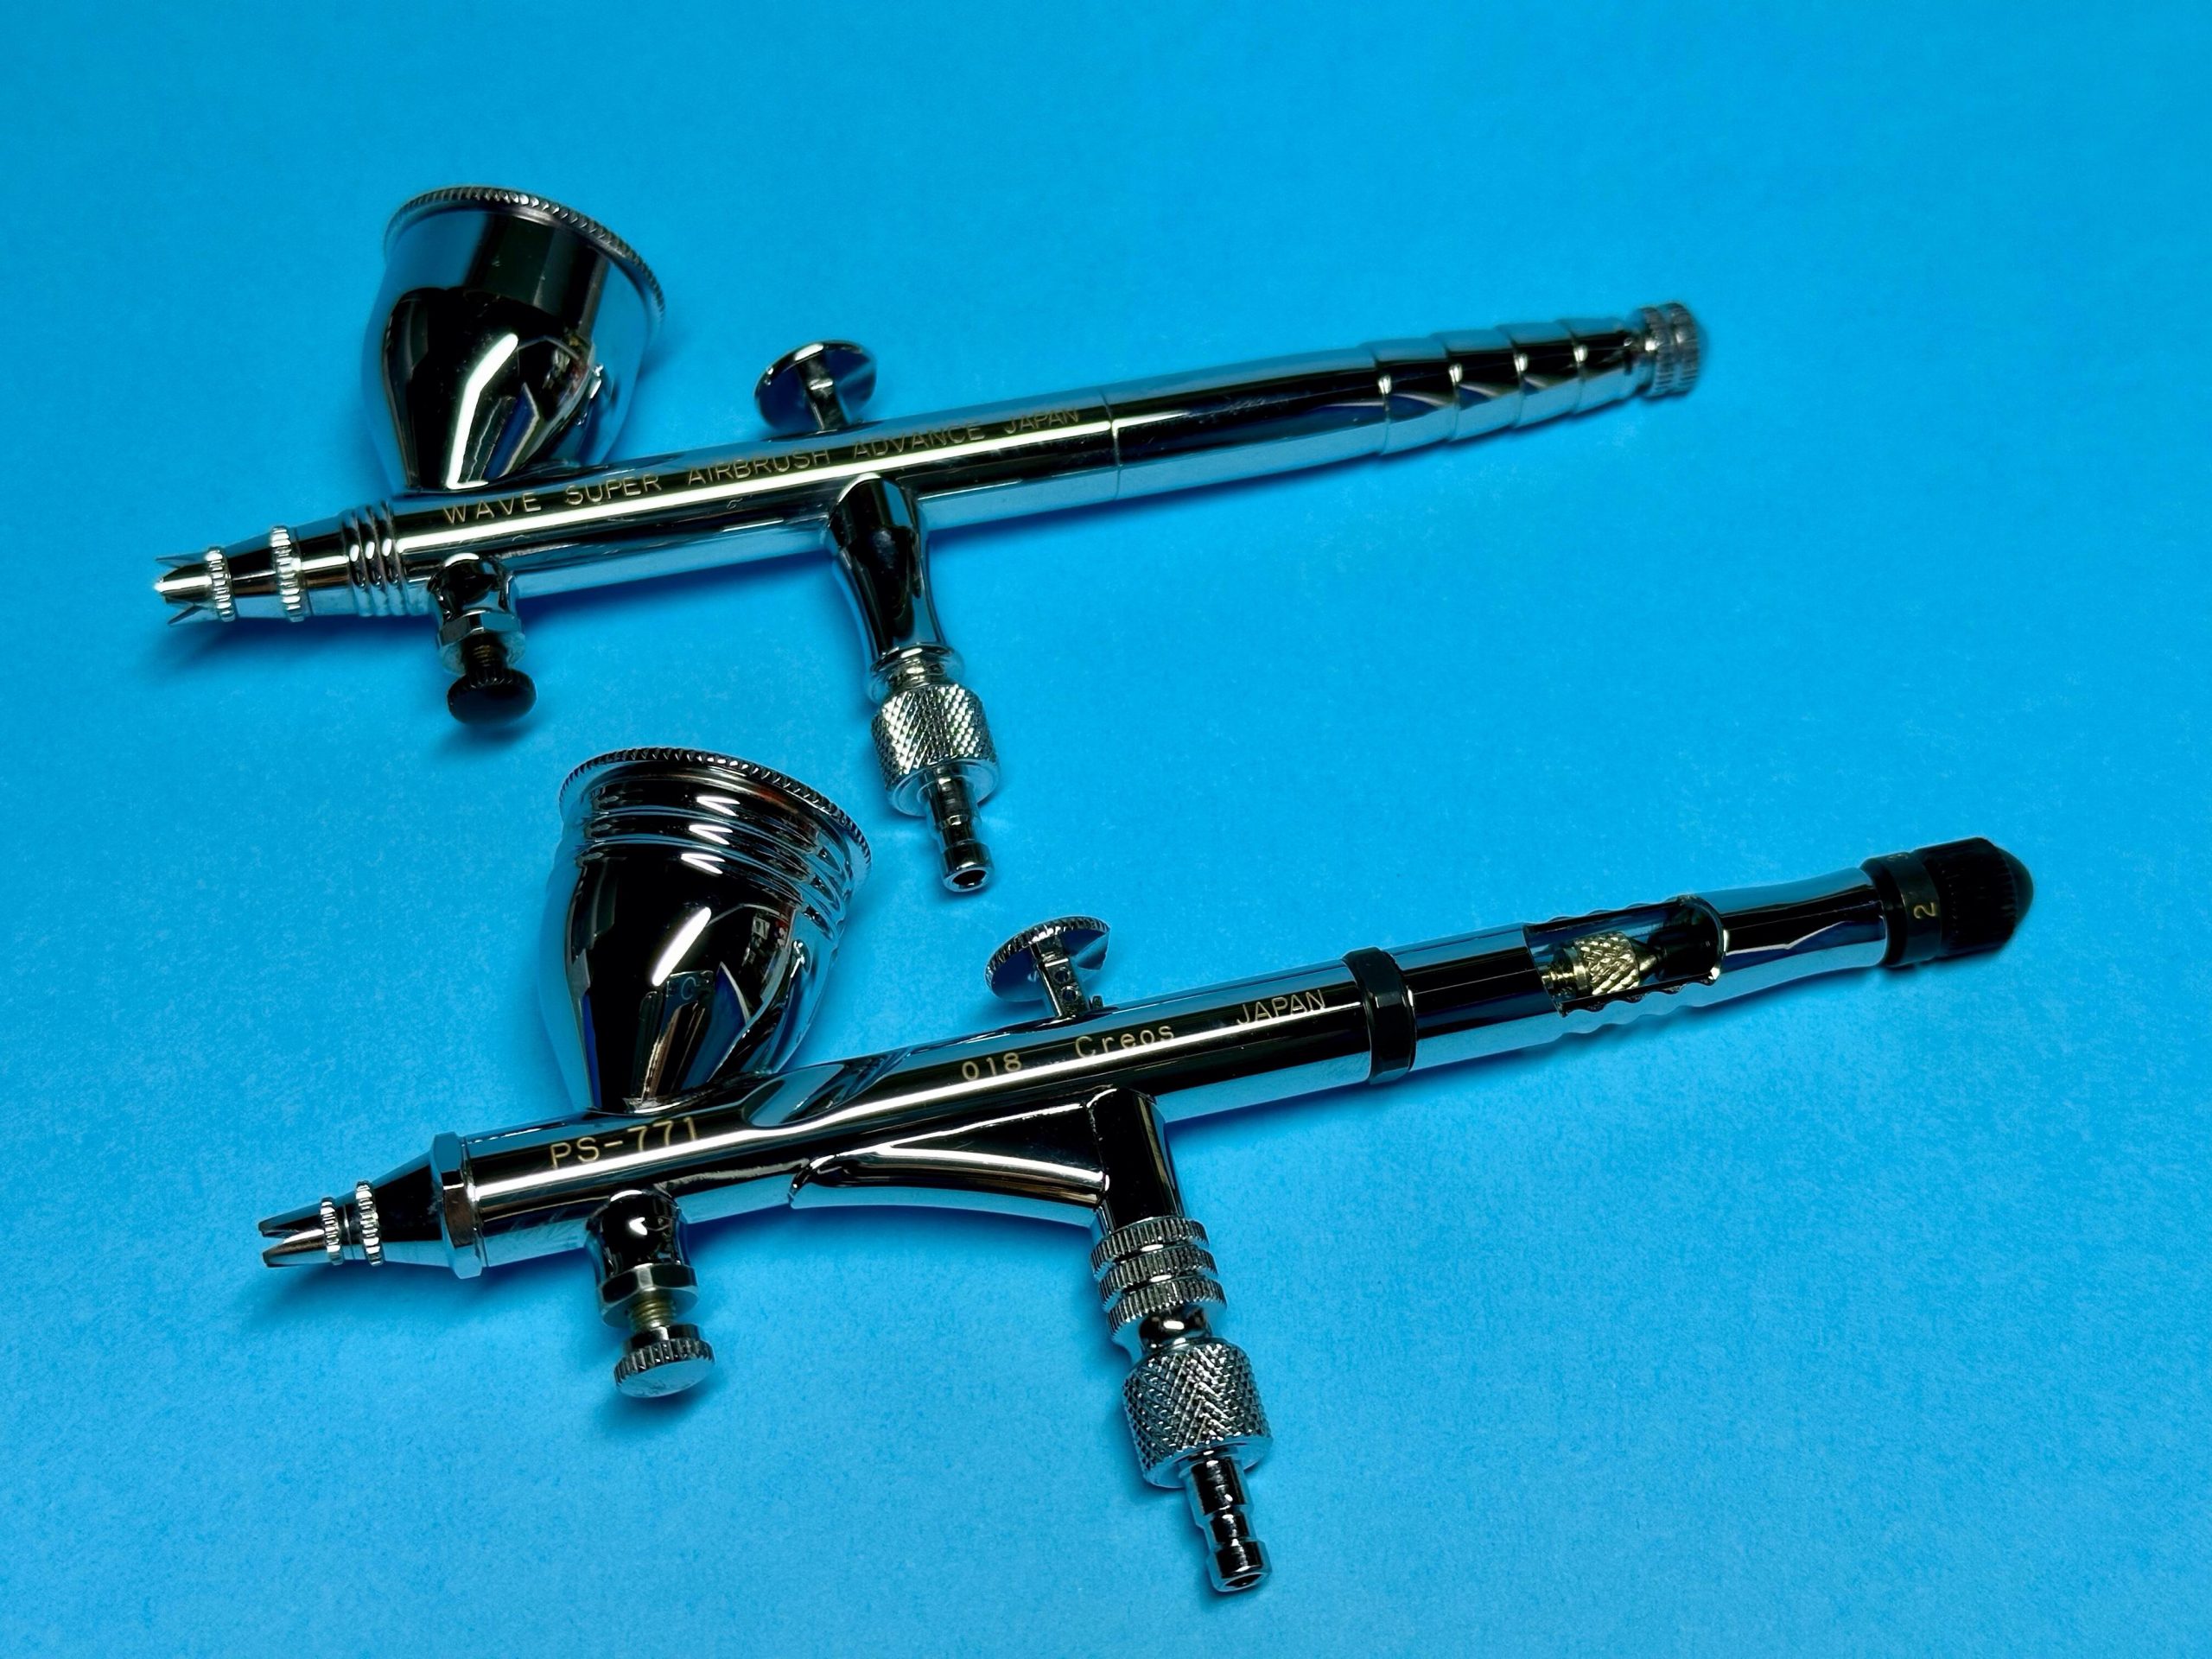
At the top the Super Airbrush Advance (0.3 mm) from Wave and at the bottom the PS-771 (0.18 mm) from GSI-CREOS

> Before starting to paint a sofubi, should we take any special measures?

Firstly, I degrease the toy because there are often residues of mold release products. Getting rid of it will help the paint stick.
For a plastic model or a resin kit I generally use soap or dishwashing liquid, but for a sofubi it is the paint thinner that will be used for cleaning.
Not only will this degrease the part but it also prepares the vinyl to be painted. Cleaning with thinner creates a temporary reaction in the vinyl (it will feel sticky to the touch) and this will promote the famous chemical bond with the paint.
As for me, I clean the part by rubbing it with a cloth soaked in thinner then I immediately apply the first sprays of paint to retain all the benefits of this cleaning.

> Now let’s talk about using HIKARI Toys for Soft PVC paints. What advice could you give to someone who is going to use them for the first time?

I have advice that can be summed up in just one word: dilution.
I consider this to be the essential thing to have in mind, not only when painting with an airbrush but even more so with a vinyl paint like HIKARI.
When it is not diluted enough, a vinyl paint will quickly let you know because it has the particularity of producing a “cobweb” effect. You will end up with filaments on the object when spraying the paint and I can tell you, the first time it feels funny! Increase the dilution and the problem will disappear instantly.
Vinyl paint is also sensitive to ambient temperature. Be extremely vigilant about this, otherwise you risk exposing yourself to another phenomenon: overspray.
Concretely, when spraying the paint you will notice around the painted area the appearance of a white powdery layer, often in the corners of the room. This is because the paint is already almost dry when it comes into contact with the part. If you have not changed the pressure at which you are working then this means that your dilution is not sufficient in relation to the temperature.
In short: for the same paint application, the dilution may vary depending on the season.
And to be really calm, I advise you to add HIKARI “retard” to your diluted paint. As its name suggests, this product will delay the drying of the paint and will therefore further limit the risks of overspray.
If, despite all this, you still have a slight residual overspray, I’ll give you a little tip: a veil of pure HIKARI “retard” quickly sprayed on the bleached area will solve the problem.

> Thanks a lot for the clarifications ! In the end, what dilution would you recommend?

Personally I work with a dilution between 1:1.5 and 1:2 by volume (the first number being the volume of paint and the second that of the thinner) with a pressure of 20 psi at my compressor.
If I ever have to paint small details or want to work transparently then I increase the dilution. This can go up to 1:5 or even 1:7 and I adapt the pressure accordingly.
As I always prepare bottles of previously diluted paint, another little tip: by default I always add between 2% and 3% by volume of HIKARI “retarder”. This is the price of a certain tranquility! (laughs)

> Before ending this interview, do you have a few last little secrets to share with us regarding sofubi painting?

With pleasure! First of all, the first will concern painting with the HIKARI Candy range on transparent vinyl sofubi.
Even if the dilution is appropriate, it is possible that at the transitions between the different Candy colors you will have some sort of tarnishing.
To remove this effect, I spray a fine veil of pure Hikari “retarder”.

My second tip will concern the final appearance that you want to give to your sofubi. Basically, HIKARI Toys for Soft PVC paints have a satin finish. To give your sofubi a matte appearance, apply a layer of Medium HIKARI and that’s it!

Finally, two tips for the sofubi reassembly phase.
First of all: patience! Even if HIKARI Toys for Soft PVC paints dry very quickly to the touch (a few minutes), wait at least 24 hours for them to be completely dry before reassembling your sofubi.
And then: moderation! HIKARI Toys for Soft PVC paints are certainly flexible and resistant, but they are no less heat-sensitive. So heating the room to too high a temperature risks having the opposite effect to that sought: certainly you will very quickly soften the painted vinyl but you also risk starting to melt the paint and damage it when you go. re-fit the parts.
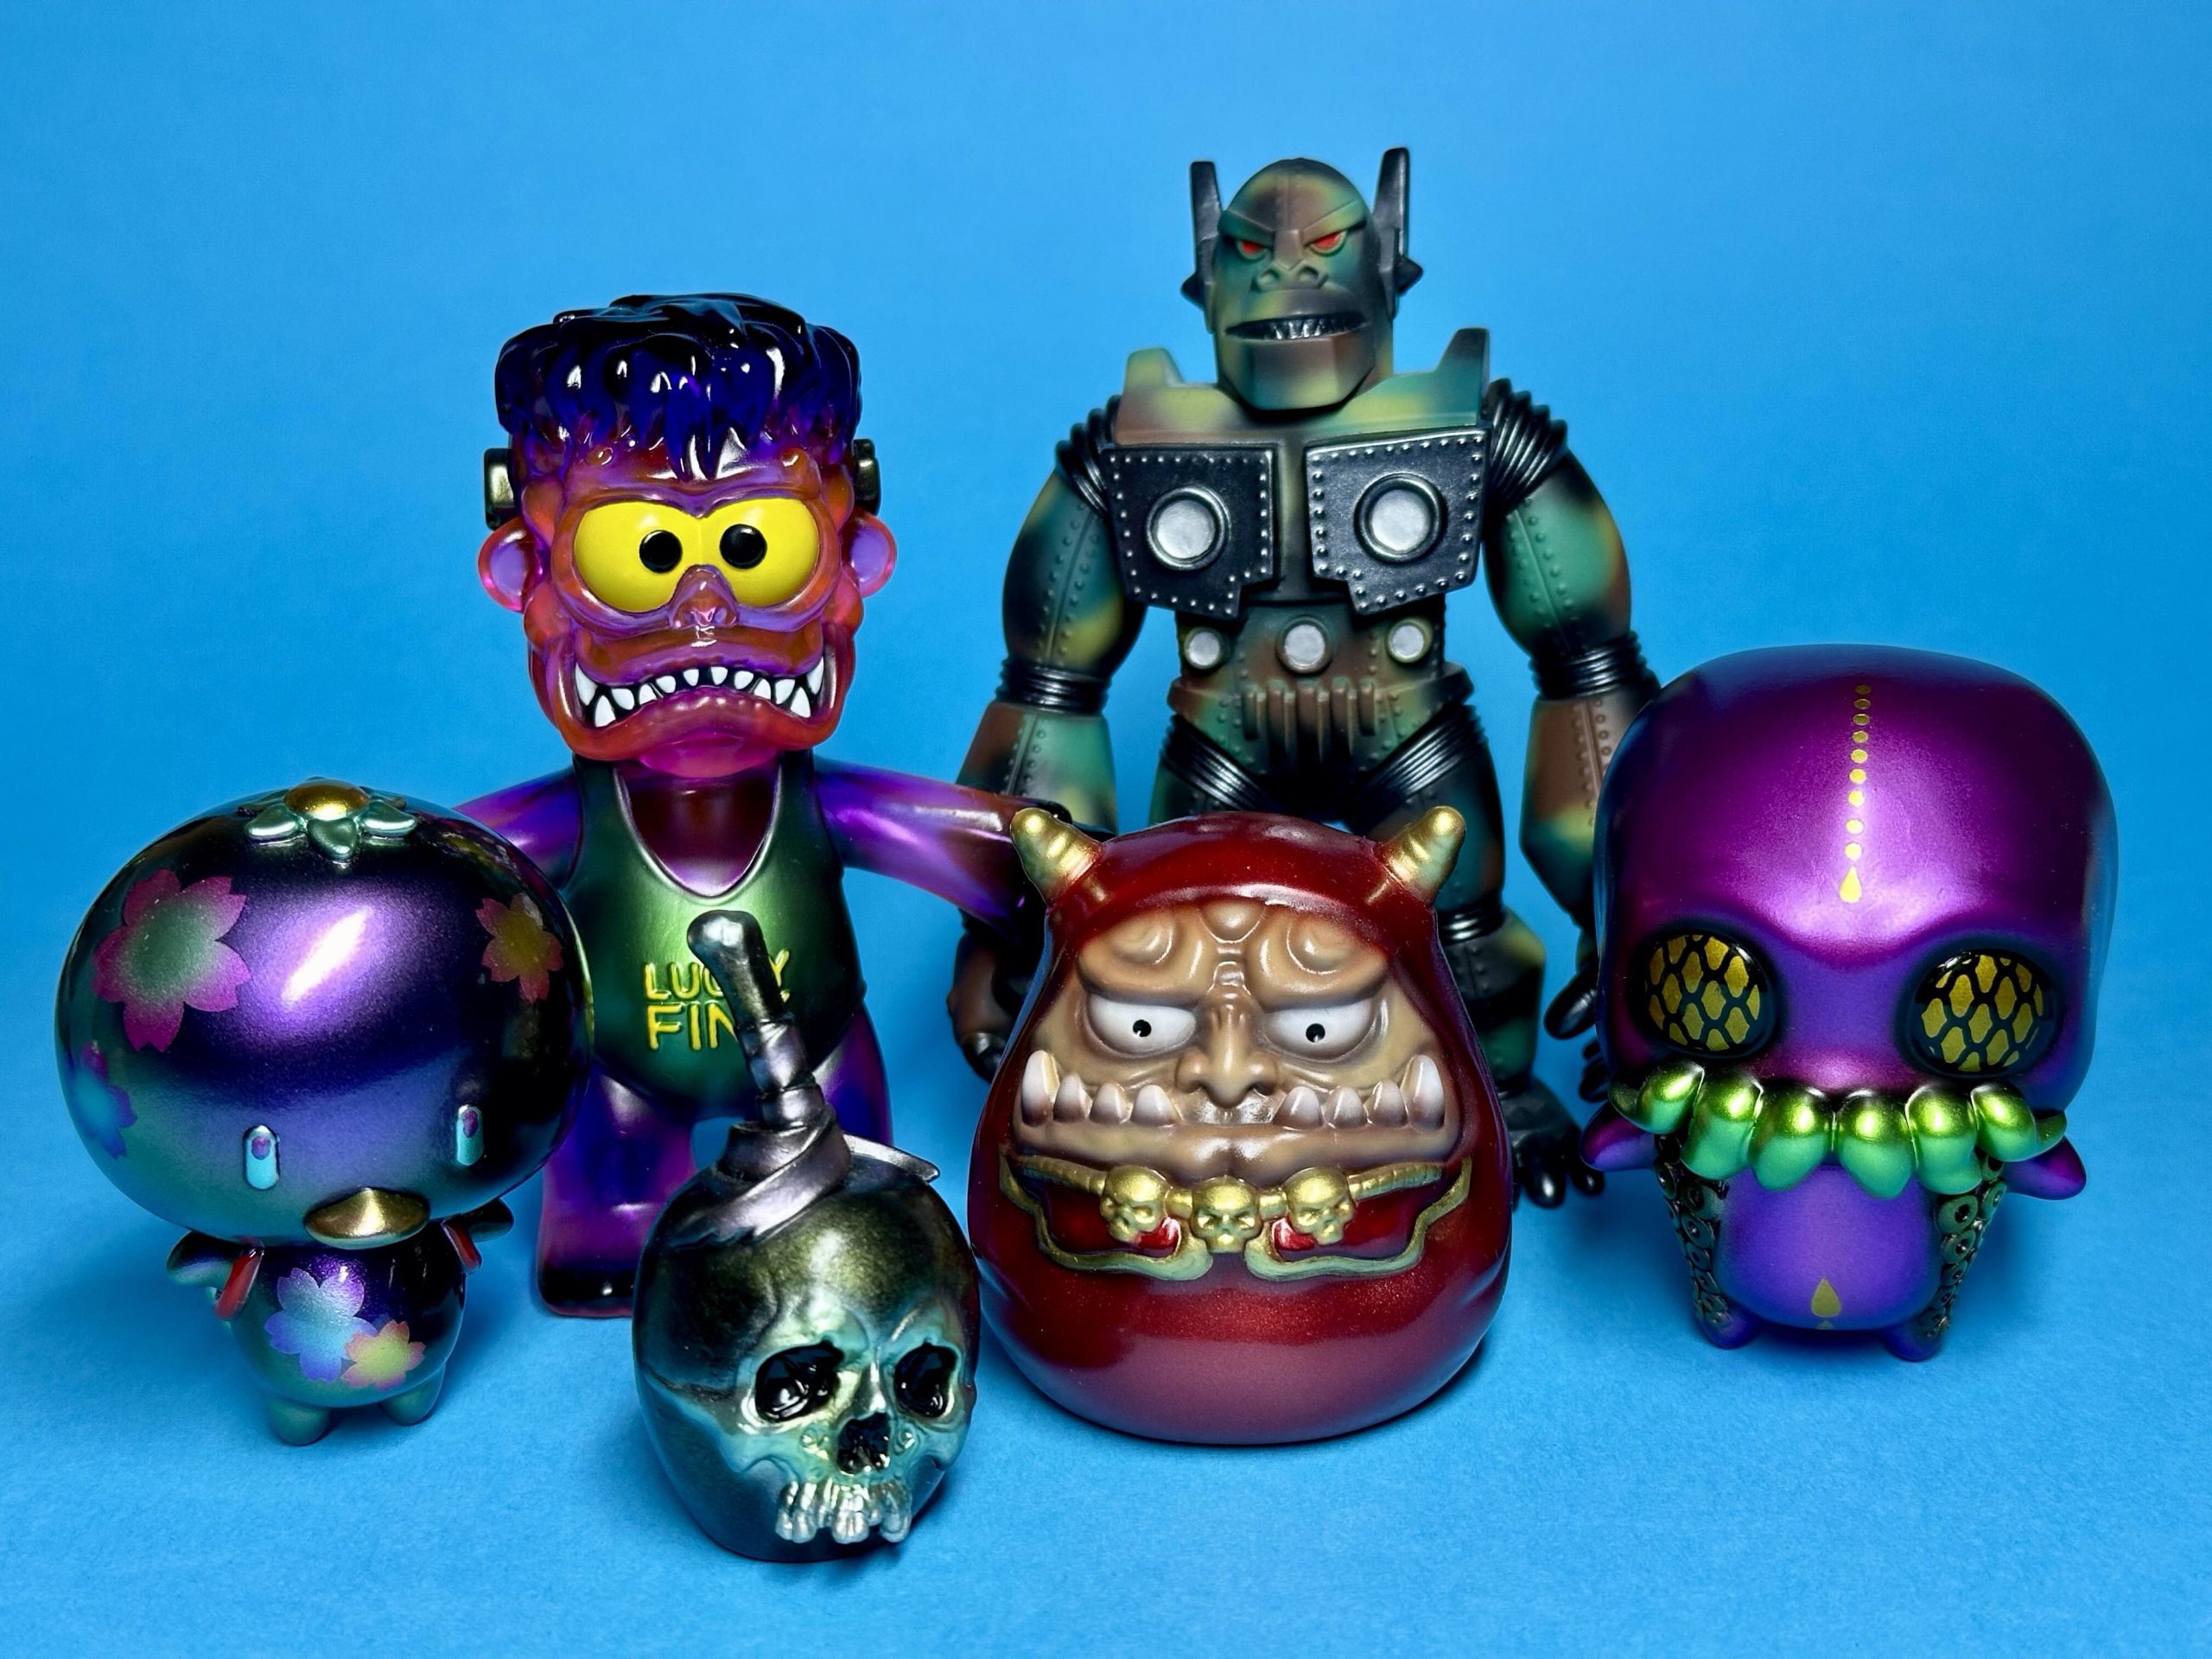
Sofubi made with HIKARI Toys for Soft PVC paints

> Thank you Stéphane for all this information! I think readers of the blog are now ready if they want to get started with sofubi painting!

Being a PLAMO builder: GUNDAM-GUNPLA plastic painting and modeling

Being a PLAMO builder: GUNDAM-GUNPLA plastic painting and modeling

Stardustcolors introduced you to modeling on PVC toys (SOFUBI), modeling on radio-controlled models (LEXAN), modeling of miniatures and figurines, and today here is another family of modeling: GUNPLA or GUNDAM modeling. Here too, paints are used to personalize the parts of miniature robots.

Several types of paints can be used for the world of GUNDAM:
► Solvent-based airbrush paints for PVC: HIKARI Toys range
► Water-based acrylic airbrush paints: Stardust Pro range
► water-based acrylic airbrush paints for plastics: HIKARI RC range


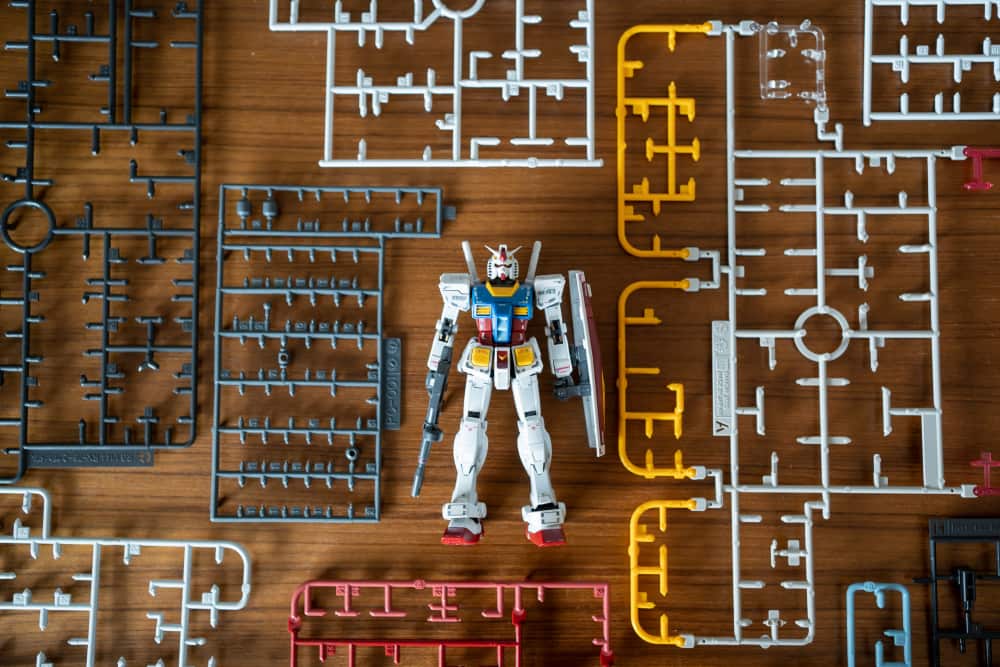
First of all, what is PLAMO? a Weapon of War? No no……The term PLAMO is a contractive term of Plastic Model. This refers to plastic models to be removed, for which you do not need glue or paint to have a finished result.

This hobby became popular with the “anime Mobil Suit Gundam” in 1979, which gave rise to a variant of GUNPLA. This notably designs the GUNDAM plamos. Then there is an abuse of language, because we say “gunpla” for all plamos…… “I fight regularly on that…. » explains André ( @aivon_lepgm ), specialist in PLAMO modeling
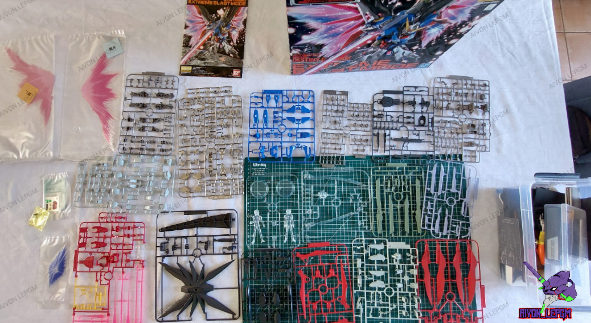
For the assembly of the different GUNDAM modeling figures, there is a notice with the number of the parts and each letter of each sprue.

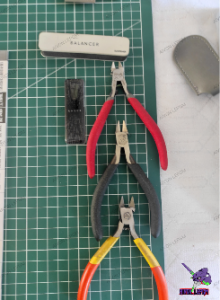
For assembly, a pair of precision tweezers, a glass file, do the job from the start. You should avoid low-end equipment anyway!
In the photo above, we can see a Dspiae pliers (red), a Tamiya pliers (black) and a no name pliers. There is also a Shave Plus file from Gunprimer. (It’s high-end.)

Afterwards, when it comes to cutting and editing, just take a look at YT where there are already so many videos on this…
As for the final result, we have the choice, either leave it as the kit provides at the end, with the stickers and other decals, or paint them. And to do this, there are a whole bunch of paints, my choice is Stardustcolors, a French brand. (I made my two YT and Instagram videos on it under the nickname Aivon_Lepgm.)

Interview with André, PLAMO modeling specialist

► André, do you have an idea of how many enthusiasts of the practice of GUNPLA/PLAMO are identified in France and around the world? What is the country where this art is most widespread?
Wow, a difficult answer, I even think that there are no official figures in this hobby. In the sense that there is no federation (there are associations) or anything else for the census. But I know from sources that Bandai has sold more than 500 million copies worldwide.
It is no surprise that the Asian continent is the must have. They are the ones who have the greatest potential, a custom expert with us is the equivalent of a beginner with them (that’s another dimension there). Japan wins the prize in sales, limit, this country alone accounts for the sales of the rest of the globe!

►What is a Nakamas?
Ahahah, I always say in my videos “hello nakamas”, this comes from my manga universe, and in particular One piece: or a nakama, is a crew member who has become more than that, who is part of the “family “. Otherwise it comes from Japanese: means colleague, compatriot, companion, or comrade.
► What is the material that different plastic Gundam models are generally made of? What type of plastic exactly?
The middle of the plamo is made of plastic, and in particular ABS and polystyrene ,
►Are you making Plamo today using 3D printing?
I just make the supports for my plamos, but you can find a lot of parts on different sites for that. But maybe one day yes, if I’m missing a part or for a big custom why not.
► In the field of GUNPLA paint, do we use solvent paints or Hydro paints when we want to personalize parts?
It depends on the builder, because some will only look at solvent-based paints, because their quality is still superior to “hydro”, but much more harmful. And on the contrary, some prefer hydro, for the ease of use, cleaning, and the odorless side.
I’m a fan of both, I don’t have a preference on that. Because both offer equivalent choices.
►For finishing paintings on GUNPLA, is glossy varnish or matte varnish preferred?
It all depends on the finish, we tend to varnish in gloss before applying panel line (enamel juice to accentuate the lines), to facilitate application and protect the parts (because the bandai plastic can crack with the uses panel line. Basically, it all depends on what the Builder wants to do.
►What shades do you prefer to personalize your GUNPLA models?
I like the chameleon effects, but that’s my side: “I love fast and furious Tokyo drift” (ahahaha). I like all the shades, I’m not very picky about it, the advantage of our hobby is this enormous freedom to do what you want quite easily, without a lot of space, and with the paints that ‘we want. I really liked the paints I used from Stardustcolors, I find that the ease of use saves us time. And that is not negligible.

Adhesive Masking Tips and Techniques

Adhesive Masking Tips and Techniques

Here is a blog article dedicated to one of the main techniques of custom painting on vehicles: applying adhesive to create masks.
Each multicolor painting project is the subject of a strategy, a plan carefully thought out in advance.

Here are the main consumables needed
Paper masking tape 24/48
Thin adhesive and flexible PVC lines 1.5 / 3 / 6 / 9 mm
Repositionable transparent adhesive film (30/60 cm)
Hikari Liquid Mask
Scalpel

Through 3 examples of production, with increasing complexity, we will see which was the technique used to achieve the final result (further down on this page)

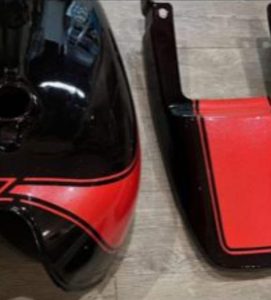
1 ► Two-tone decor with red line and pearly black background

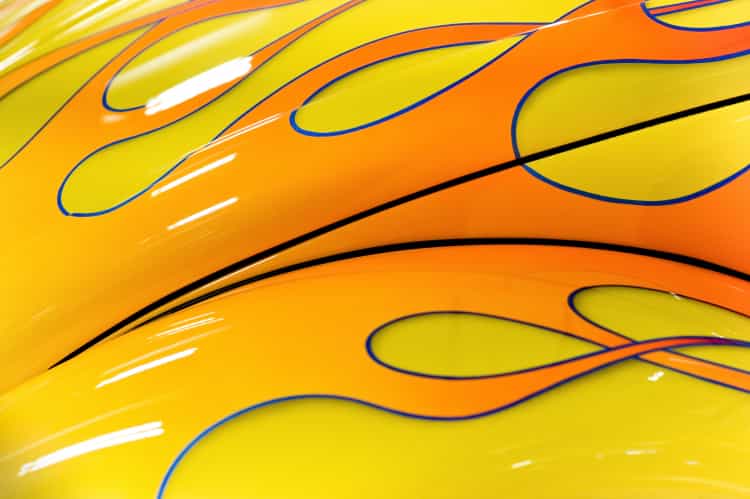
2 ► Flamming tricolor and Candy red

3 ► Flamming Red Candy and Freehand Decor

When creating layers and colors, there are 2 main rules:
→ Guaranteed adhesion between each layer (Painting must be completely dry then sanded with P500 paper before being covered with masking adhesives and paint)

→ Simplicity and logic (It is often the shortest path that must be favored. Above all, it is important to apply only one color per masking, so as not to create “staircases” and so not to show different color layers when removing the adhesives)

Tips and Advice
→ It may happen that you want to make curves at very acute angles with the flexible adhesive PVC lines. Unfortunately it is common for these fine adhesive lines to come off: did you know that by passing a flame or the heat of a heat gun very quickly over the surface of the line, it is possible to freeze its position and prevent it from warped or peeled off?

→ If you want to avoid the formation of a staircase due to the thickness of the border of a layer of color, there is a very effective method: with the airbrush or paint gun, direct the spray jet at the center of the masking, always avoiding painting directly on the edge of the adhesive. Try !

Example 1: Create a two-tone decor with a line and a pearl effect

How to achieve this decor in the simplest way?

Step 1 ► Apply a bench or light gray background or primer
Step 2 ► Paint the complete room red
Step 3 ► Let dry then sand with P500
Step 4 ► Apply a thin adhesive line and mask the area in red
Step 5 ► Paint the entire room black
Step 6 ► Remove Maskings
Step 7 ► Apply varnish with 5g of red diamond mother-of-pearl

Same case with this painting:

It is possible to draw the lines with a pinstriping brush
but it will be much simpler to:
Step A ► Paint a Blue Background
Step B ► Apply the adhesive lines
Step C ► Paint an all-over yellow paint
Step D ► Hide external areas
Step E ► Apply paint or Candy orange to the interior
Step F ► Remove adhesive lines then varnish

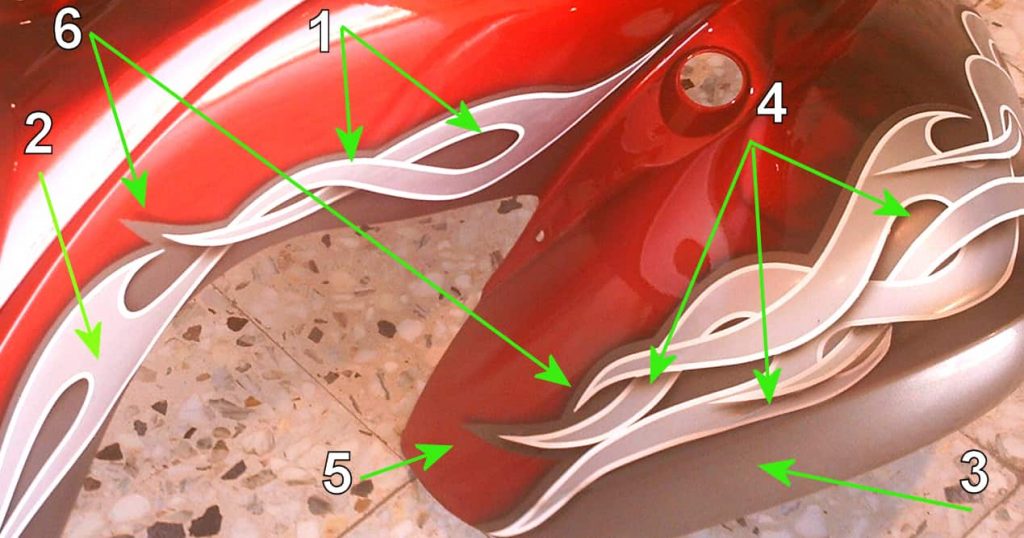
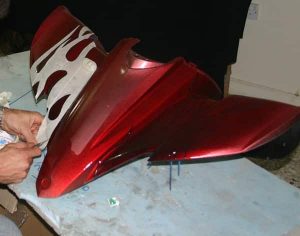
Example 2: painting a stylized tricolor Flamming

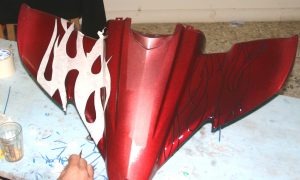
This custom painting consists of a metallic Candy red background, with a stylized “Flamming” decoration on the edges.

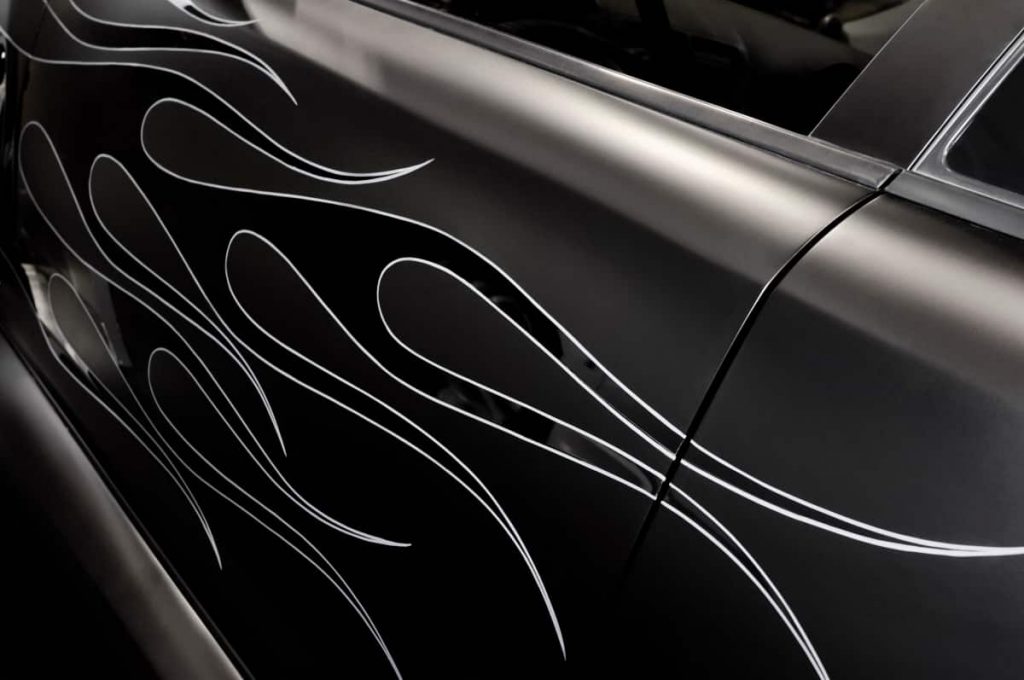
How to make the white lines?
In what order should you proceed to achieve the best result, as quickly and simply as possible?
Notice that “shading”, which gives an effect of depth, has been done to different areas of the flames.

Step A ► Paint a pure white background (paint or primer). Drying then sanding with P500.
Step B ► Create the Flamming decoration by applying the thin 3mm adhesive lines.
Step C ► Paint the light gray color (2). Drying then sanding with a gray abrasive sponge.
Step D ► Hide the inside of the flames with paper masking tape. Cut with a scalpel at the fine lines, then unhide the outer area of the flames.
Step E ► Apply the dark gray paint (3) to a strip of approximately 20 cm.
Step F ► Create the shadows with pure black using an airbrush, after removing some of the adhesive from the light gray flaming.
Step G ► Remove all adhesive masking. Perform light sanding with a gray abrasive sponge.*
Step H ► Using thin adhesive lines and paper masking tape, hide the entire part of the tricolor Flamming.
Step I ► Paint the area “Candy” red (5) Starting with a coat of aluminum paint then a few coats of “Candy” red*.
Step J ► Using an airbrush, spray a light, subtle shadow following the contours of the masking.
Step K ► After removing all adhesives, apply coats of clear gloss varnish.

* As mentioned previously at the start of the article, it is not recommended to apply several colors on a single mask, because when you remove the masks, 2 problems appear: these are a significant thickness, and the different layers of color visible on the slice. In this exceptional case, it is necessary to sand down this excess thickness then reapply the masking adhesives, and create the shade which will even out and hide the sanded aluminum and “Candy” layers**

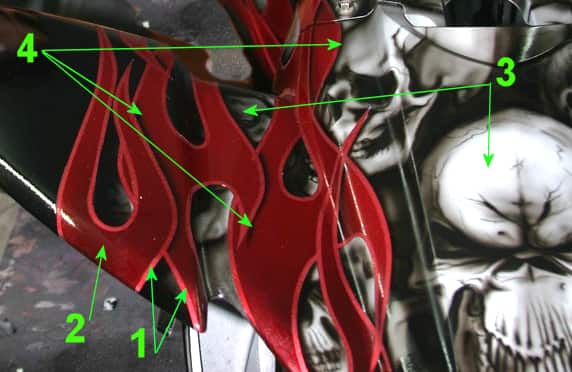
Example 3 ► Flamming Red Candy and Freehand Decor

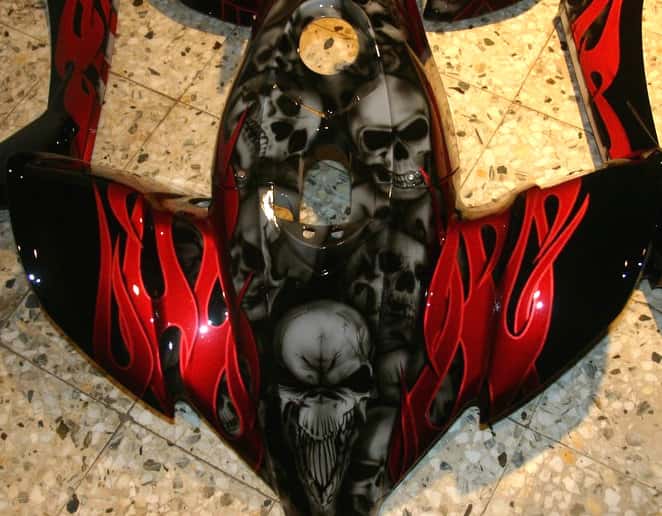
Here is a personalized painting which still uses the Flamming technique with superposition of layers. As with all painting jobs with layers and superimposed colors, the painter executes a plan prepared in advance, after having imagined all the possibilities.

Step A: Create a red Candy paint (1), with a metallic base and a “Candy” red varnish. Complete drying then sanding with P500.
Step B: Applying 3mm thin adhesive lines
Step C: Application of 1 or 2 additional layers of Candy red (2) + black in a light gradient.
Step D: Mask the Flamming with wide adhesive tape then cut with a scalpel.Step E: Application of light gray paint (3) everywhere. Drying and sanding with an abrasive sponge
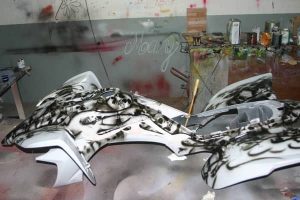
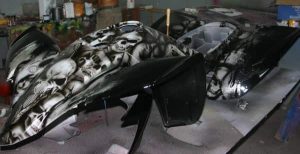
Step F: Drawing the skulls with airbrush and black color.
Step G: Creating shadows (4) On the decoration of the skulls to create an effect of depth, and also on certain areas of the flames after partial removal of the adhesives
Step H: Removal of all adhesives, and varnishing.


A golden tip

When you make complicated decorations and the adhesive lines intersect, it is not surprising to find defects when you remove the adhesives: liquid or sprayed paint naturally seeps everywhere and especially in the gaps at the crossroads of adhesives.

It is of course possible to press with the tip of your nail on the crossings to reduce the possibility of paint infiltration.

One of the most foolproof techniques is to spray clear binder on any areas suspected of being “weak spots,” where paint can seep through.

It is possible to use solvent-based transparent binder or Hydro transparent binder

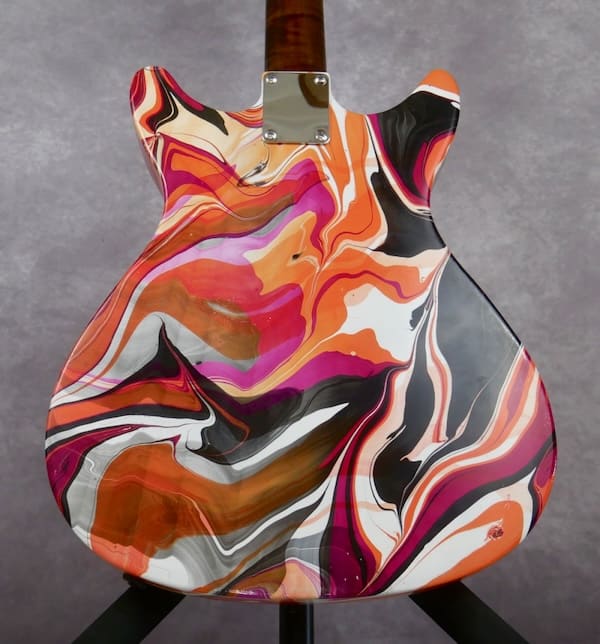
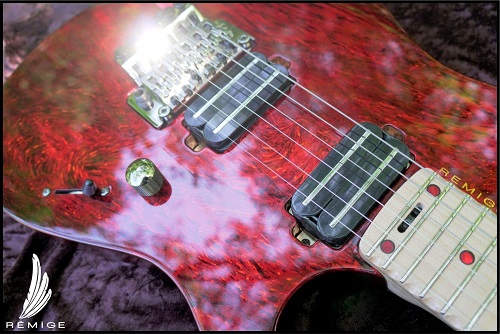
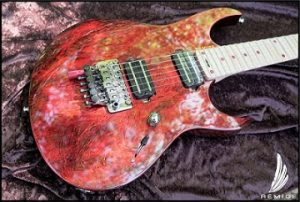
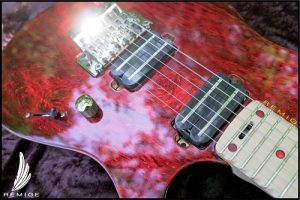
“Magma” guitar made with Marblizer and Candy Red paint

“Magma” guitar made with Marblizer and Candy Red paint

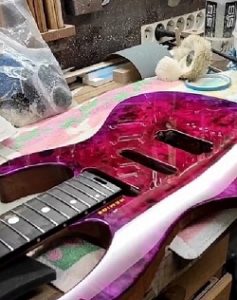
Here is a paint job done by the artisan luthier Remige Lutherie.

The Special effect chosen is the marbled effect “Marblizer” which is a relatively simple paint to apply and which gives an impressive visual effect. Its optical effect of depth is amplified when applying a colored varnish “Candy” to its surface

We invite you to discover all the stages of the work carried out with brillo by Remige Design in its video below.

Like every week, we have the pleasure of presenting to you, through an interview, a talented applicator who uses a special effect paint on a particular support.

@stardustpaints Marblizer – peinture marbrée avec candy rouge @remigedee ♬ son original  – stardustcolors

Applying the Marblizer

It is a manual application which is carried out with a sheet of cellophane which is dropped on the surface freshly covered with a thick layer of products. The plastic sheet can be removed and reapplied several times within the 30 second time interval after applying the marble effect, in order to modify and cross the patterns, or to remove material.
The product has a silver appearance and gives maximum contrast with the black background: the silver particles reflect the light, while the black background catches the light.

Applying Candy varnish

With a choice of twenty Candy colors available in the range of Candy Stardust paints, it is possible to color the Marblizer effect in any shade. In general, 3 coats are necessary to obtain intense color and a significant depth effect. If more layers are applied, the damage will continue to darken until it reaches a transparent black color.

Interview and presentation with Remige Lutherie

How many years have you been working as a luthier professionally? What is the name of your brand?

I have been operating since 2016 under the name Rémige Design/Lutherie.

Do you make instruments entirely? from A to Z ?

Yes it’s even my main activity, I work with clients on demand, no project is really alike!

What type of string instruments do you make?

I make electric and acoustic guitars and electric and acoustic basses.

About your customization work on a Guitar with Marblizer effects? What difficulties have you encountered? and what are some tips and advice that you can share with those who would like to try the “Marblizer candy” technique on their guitar?

I first had to discover the product that I didn’t know at all, I had to understand how to use it and what it allowed to do, it dries very quickly it’s not easy to do exactly the desired patterns before the latter freezes, it is also necessary to open the flow of the gun to avoid having only dry extracts which dry even faster.

How did you achieve this special finish on this Morphée Guitar?

Here it is a poplar burl table (a kind of tumor that grows on a tree) tinted with colored inks then varnished, the pattern of the wood being already very spectacular at the start, it takes little to create an exceptional finish

How many instruments leave your workshop each month?

I would rather say each year, an instrument takes on average 3 months to manufacture, it’s around 2/3 instruments per year, obviously these are unique and exceptional works.

Can we have an idea of price for a personalized instrument?

It’s very variable, there isn’t really an upper limit, the higher the range the materials and the violin making the more the price goes up, we can go from around 2000 euros for a very simple instrument with quality equipment, to 6000/7000 € for an instrument like the AFD which is made of exceptional woods and whose violin making is very complex. Inflation doesn’t help matters by pushing up absolutely all prices…

How do you make yourself known to your customers? Where can we see your physical or online store?

I started by making videos on Youtube, after a while and working hard with drastic quality requirements, people who appreciated my work helped me to make myself known, I then settled on Instagram which is ideal for the visually spectacular aspect of my activity; I am now also trying to establish myself on TikTok and evolve with different media, I always demand an atmosphere of sharing and kindness, my workshop is located in Olargues in Herault (34) and my website remigedesign.fr is for the moment only a means of contacting me because I have no commercial activity but only artisanal.

Instagram : remigelutherie

TikTok : RemigeDee

Chameleon Interference effects in painting

Chameleon Interference effects in painting

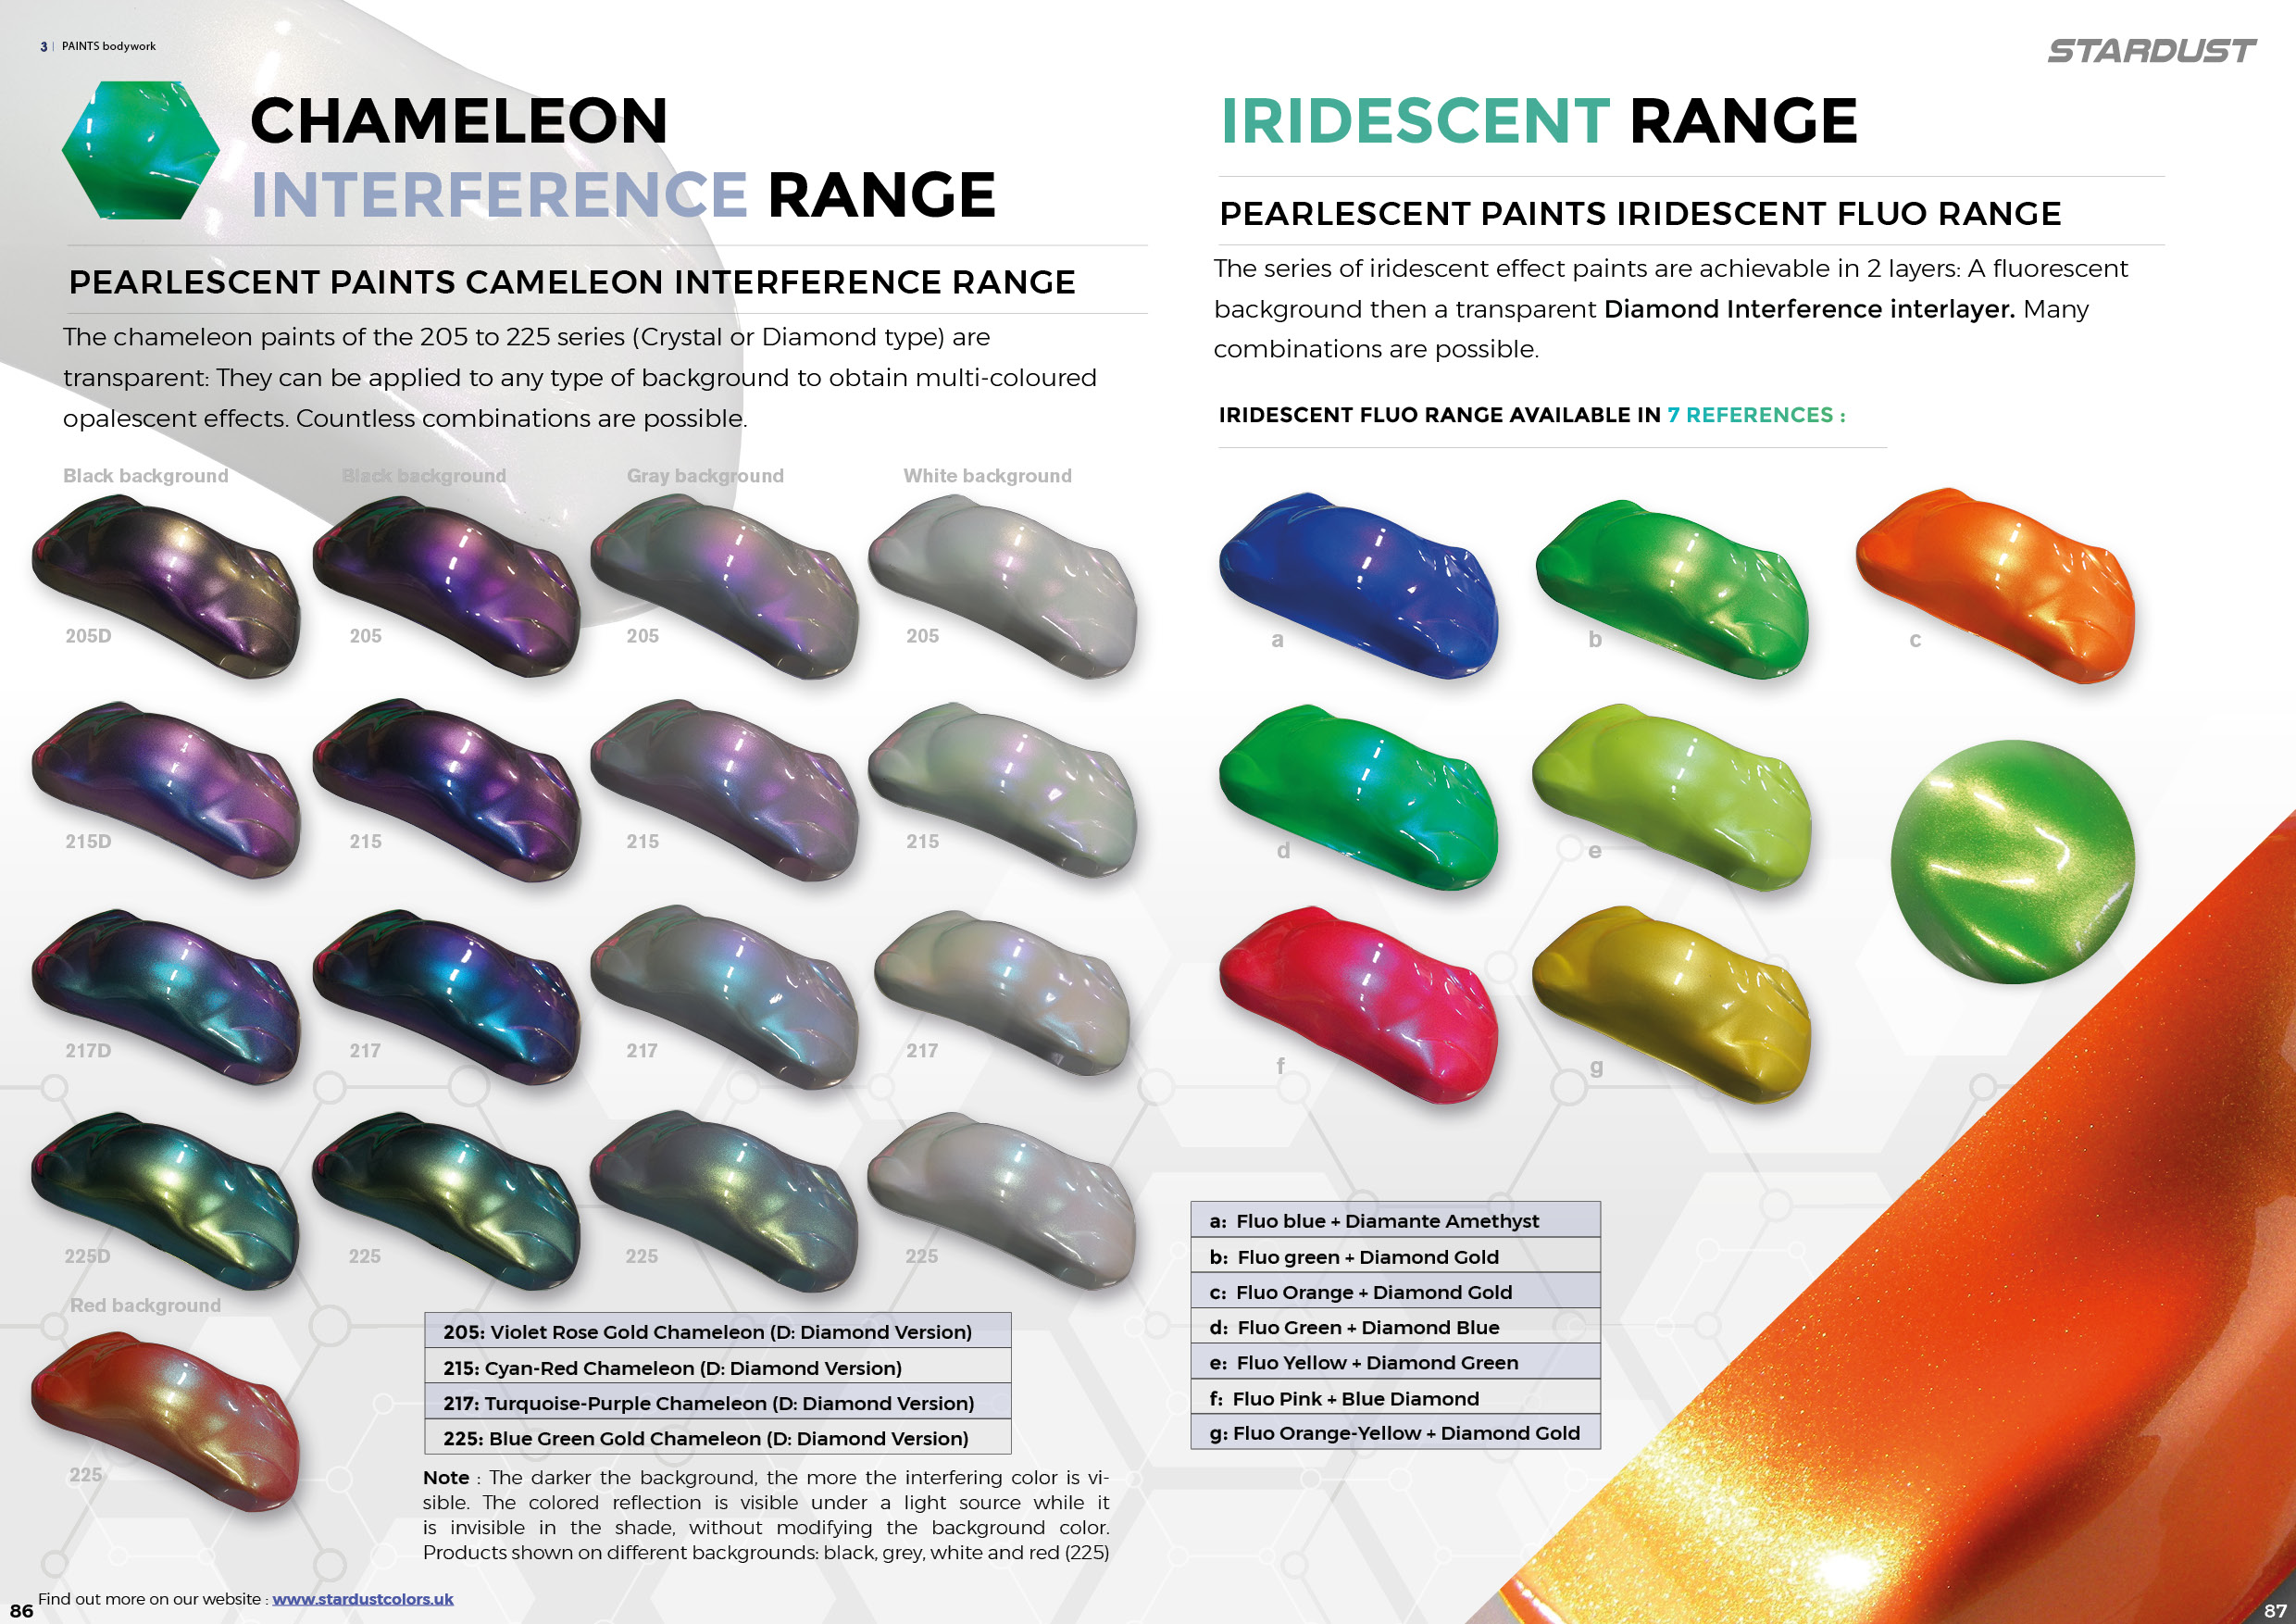
There is a unique collection of 38 references in the Stardust® range, leader and pioneer in Europe in the field of Chameleon colours.

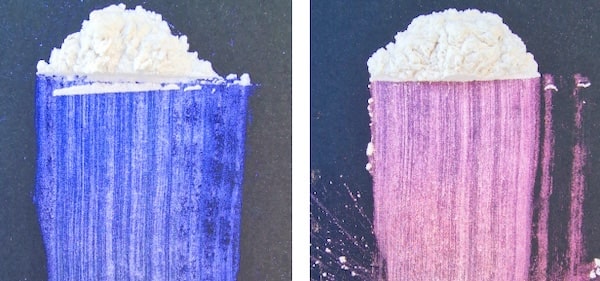
“Chameleon” paints, formerly known as “Beetle” paints, “Flip Flop” paints, or even “Colorshift” paints are pearlescent colors that offer changing color reflections depending on the angle from which they are observed.

Among the chameleon colours, there are a certain number which consist of transparent pearls*.

These chameleon paints then take on the appearance of a whitish liquid, which is in truth almost transparent when applied with an airbrush / spray gun.

*The transparent mother-of-pearl is made of a modern synthetic material imitating natural mica. It is more transparent, more reflective, and less yellowing.

Try changing the background color

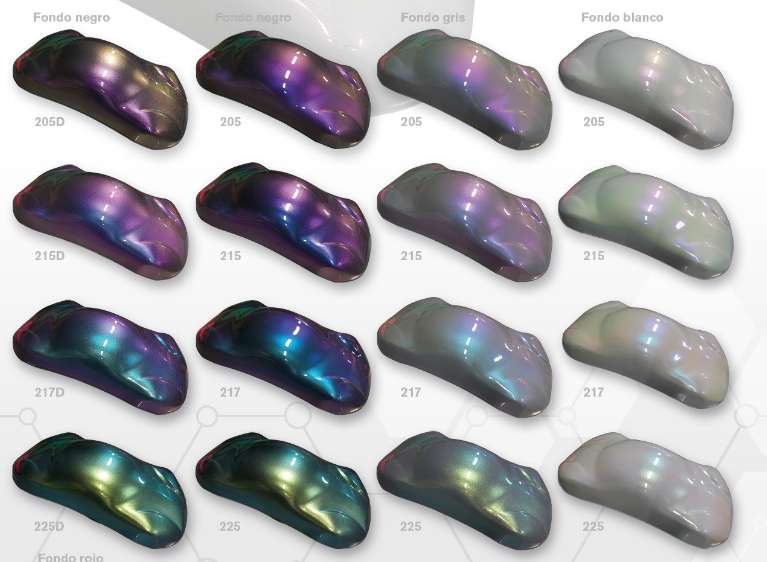
Usually applied on a black background, in order to reflect only the light of the mother-of-pearl that composes them*, transparent type chameleon paints can be applied on other background colors.

*the black color reflects little or no light.

We are not talking about a pearly or metallic background color here, because due to certain optical phenomena, a mother-of-pearl on another mother-of-pearl, or a mother-of-pearl on a metal pigment, see their effects cancel out.

We can therefore apply a transparent chameleon color on an opaque colored background, red, yellow, blue, gray… In truth, any color, white included.

The effects are quite interesting and surprising. These are innovative finishes in the field of bodywork or decoration, which are perfectly suitable for indoors or outdoors, thanks to the high resistance of chameleons to UV.

Multicolored interference mother-of-pearl

Interference is an optical phenomenon. In the field of painting, it designates the return of a single color, different from that of the background.

Example : a GREEN background + a RED interfering layer

Stardustcolors classic interference colors include red, green, blue, gold, and purple ; these effect products can be found either in powder form with Crystal interference pearlescent pearls, or in the form of clearcoats.

Transparent chameleons created richer effects in terms of reflections, with double, triple or quadruple colored reflections.

Depending on their purity and composition, they will modify the background color very slightly or not at all.

In truth, the darker the background color, the more the interfering chameleon reflection will dominate the visible appearance returned to the viewer of the painted piece.

Diamond-like interfering chameleons

Classic chameleons are composed of fairly fine particles, the size of which is in the average of the pigments used in the world of automotive paint. These transparent chameleon effects have been transposed onto the large diamond mother-of-pearl, which is made of glass, and which has much more iridescent and glittery properties.

Interference chameleon sequins from the COSMIC range

Here are flakes from the Metal Flakes family, made of polyester, which reproduce the same multicolored effects as chameleons. These COSMIC flakes are perfectly transparent and have an advantage over the large classic opaque Metal Flakes flakes : they are thinner and much easier to varnish.

There is yet another spangle, still polyester-based, and still 200µm in size, which is the transparent holographic spangle.

All these effects mentioned above belong to the family of “Interference effects”.

Print a photoluminescent fire safety plan

Print a photoluminescent fire safety plan

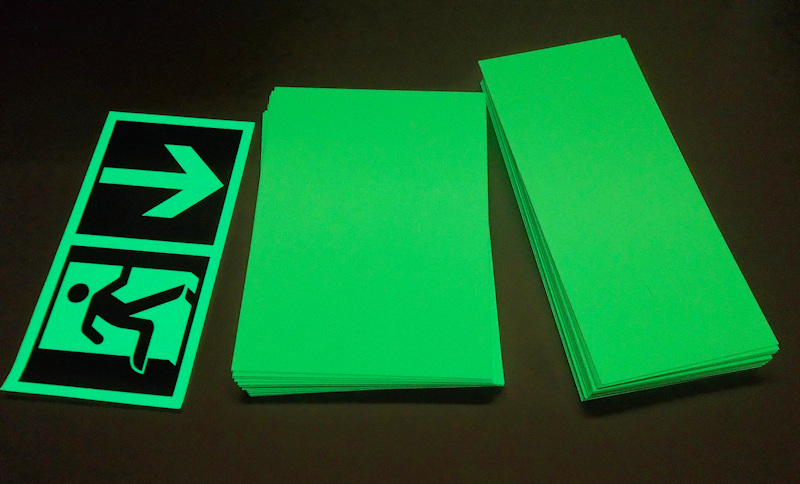
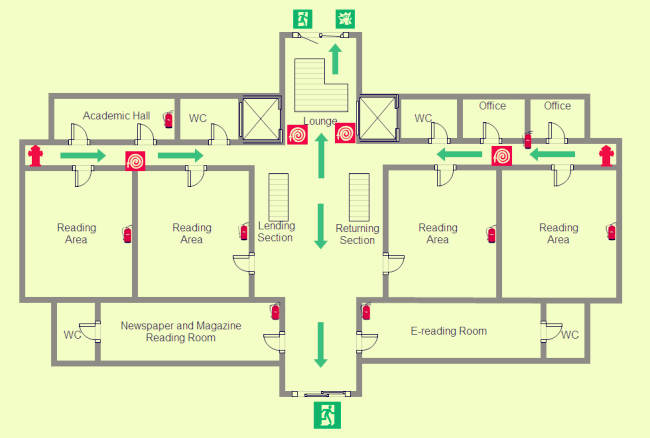
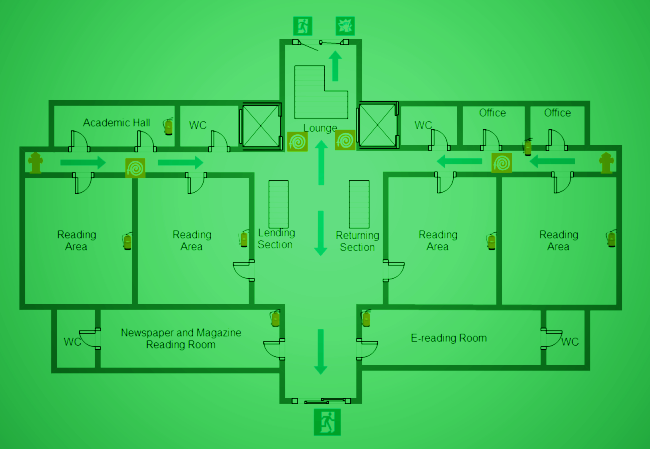
In establishments open to the public, such as gymnasiums, museums, hotels, ships but also in certain factories, it is required to install a Photoluminescent PVC evacuation plan in order to guide the occupants towards the exits in case of emergency and especially in the event of lighting cuts.
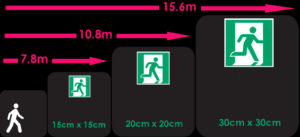
It can also be safety instructions for the use of fire-fighting equipment, the use of a machine or emergency contact.

A photoluminescent security plan stores ambient light energy, whether natural or electrical, and permanently releases it in the form of photoluminescence : that is to say, it glows in the dark.

European standards govern phosphorescence levels : luminance (intensity of phosphorescence) and remanence (duration of phosphorescence) must be of a class C level. These performance indications must appear on the photoluminescent safety plan.

General sizes

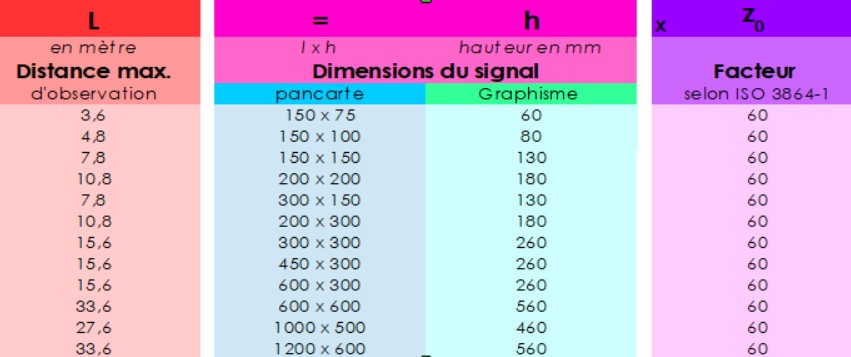
The most frequently printed size is A4. It is possible to print larger plans, depending on the observation distance, and also depending on the complexity and importance of the evacuation plan.

It is possible to order free sizes and formats.

Contact ARCO IRIS SAS at info@phosphorescent.fr for prices and to obtain the printing of a photoluminescent safety and evacuation plan.

The different mediums

In general, evacuation plans are always made on PVC panels. It is a light and economical material, easy to print, and suitable for all interior areas. It is rare to place a security plan in an outdoor area, however, when it is necessary to have an evacuation plan resistant to heat or weather, then more materials such as aluminum are used. or stainless steel as a support.

Printing modes

Screen printing is the method that has been used the most since photoluminescent planes have existed. It is particularly economical and practical when printing a large number of identical plans. It turns out to be less interesting when it comes to printing one, or even 2 or 3 plans, because you have to make a “screen” for each drawing, and each colour.

Today we use more the laser printing method, which allows four-color prints to be made which is quite economical.

The fixing method

The safety boards measure approximately 1-1.5mm thick and are easy to attach to walls or doors, with double-sided adhesive tape. It is also possible to screw them, or even to install them with frames.

The costs

For a photoluminescent PVC evacuation plan, the price varies according to the size, quantity and type of materials.

Initially, as for all printing works, If a single photoluminescent plan is printed, the work of setting up and adjustments will be equivalent to that necessary for the printing of 50 photoluminescent plans.

There is therefore a sliding scale of tariffs.

In addition to the price, which logically varies according to the size of the plan, there are also different costs for the material of the support :

Rigid PVC plans are by far the most economical.

The price range then goes up with the aluminum tops, and goes up again with the stainless steel plates.

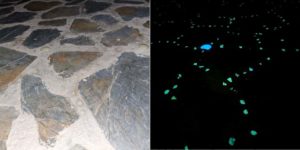
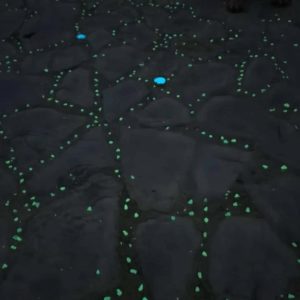
Make a phosphorescent outdoor floor with phosphorescent stones, pebbles and gravel

Make a phosphorescent outdoor floor with phosphorescent stones, pebbles and gravel

It’s very easy and the achievement is within everyone’s reach.
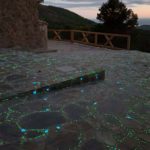
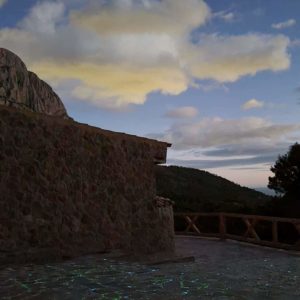
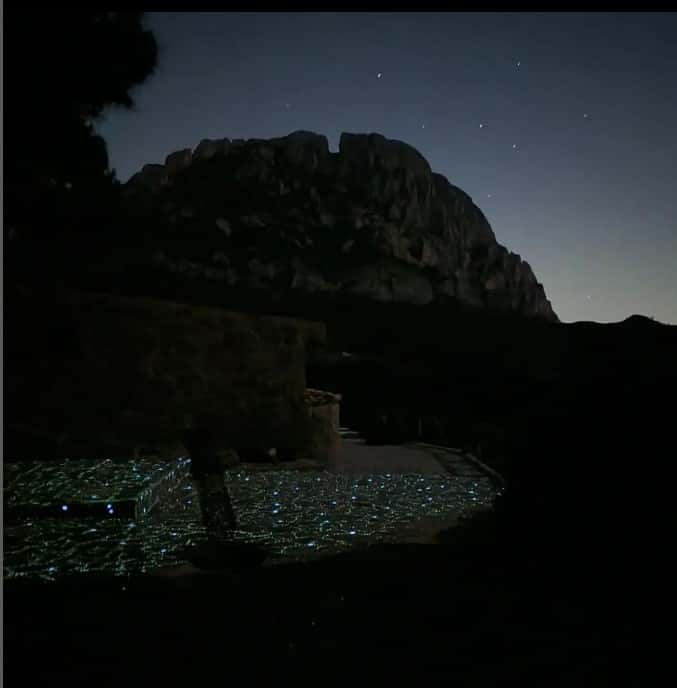
Above all, make sure that the area where you plan to embed these small phosphorescent stones is sufficiently dark during the night. If you live in a residential or urban area, with night lighting, then you can forget about this project, because the phosphorescence requires sufficient darkness to be clearly visible.

If, on the contrary, you have a house in the mountains or in the forest, then at night you will be able to see all these small luminous pebbles shining, until dawn.

It is only on a full night, when the luminosity is too high, that you will not be able to observe the phosphorescence.

On the contrary, on a dark night, you will have the impression of walking in the starry sky, when you walk on this floor encrusted with luminescent stones.

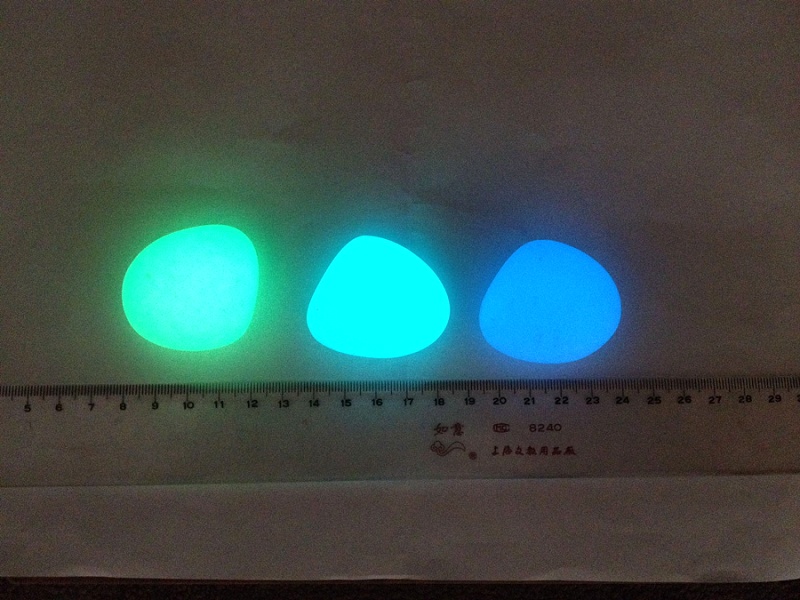
Glow-in-the-dark pebbles, how do they work ?

These small stones, gravel, fragments, pebbles contain synthetic and non-hazardous pigments, which are able to react and store ambient light. This energy is immediately converted into phosphorescence, which glows slowly and for a long time :

The release of the energy thus accumulated is done “drop by drop”, and can last up to more than 10 hours of time.

How to set up these phosphorescent stones
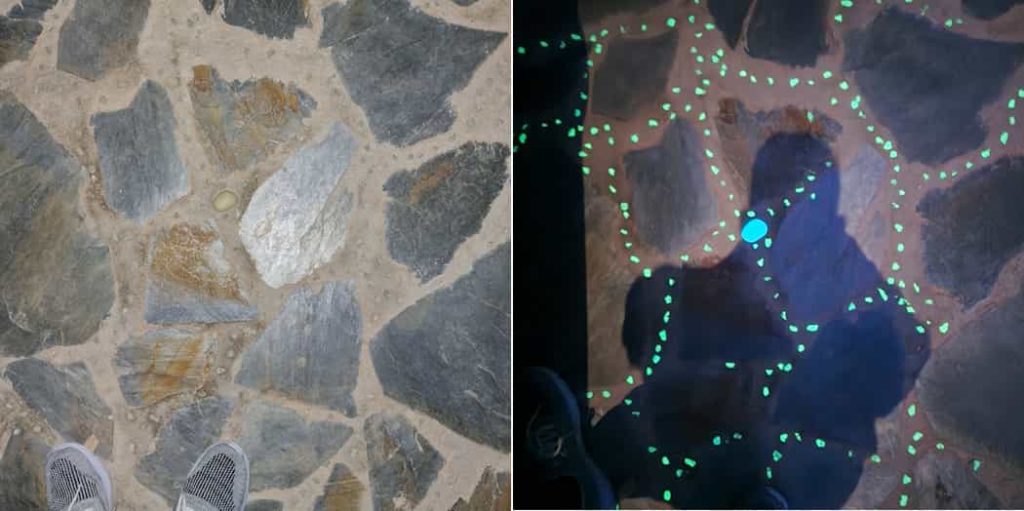
We advise you to embed them in concrete, mortar, plaster or cement when it is still fresh. The stone or gravel must be encrusted at least 2/3 of its thickness, in order to remain well fixed over time, and to resist trampling, or even bad weather, such as rain or frost.

When you want to incorporate these small phosphorescent gravels in an already existing construction, then there remains the solution of transparent or colored silicone glue.

It takes about 1 kg of these stones or its fragments to cover up to 3 m². Finally, it all depends on the concentration you want for your decor on the phosphorescent floor.

The different performance levels of luminescent gravels and pebbles
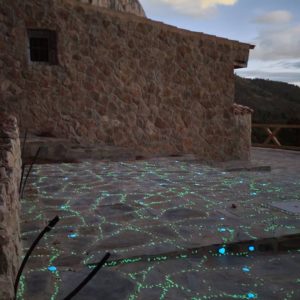
Stones and pebbles are often brighter and their phosphorescence lasts longer at night, compared to gravels.

You also have to take into account the color: by far, the green phosphorescent color is the most efficient, both in its luminous intensity and in the duration of its effect.

Often these materials are offered in 3 main emission colors: Green, Turquoise and Blue.

The company ARCO IRIS SAS, (site phosphorescentpaint.co.uk) offers up to 4 colors, with even purple phosphorescent stones.

The diurnal or nocturnal aspect

The materials have a slightly colorless, whitish, sometimes greenish appearance during the day.

We speak of “emitted color” to refer to the color of the light produced by the stone in the dark. It is indeed a luminous color which then emerges from this colorless stone during the day.

Resistance and composition

These stones and pebbles are relatively resistant, especially the gravels which are composed of glass (silica).

As for the stones, which are produced from plastics of the PS type, they can yellow slightly with the years, however the phosphorescence as for it, is almost eternal: that is to say that it does not drop in intensity with years.

Where to buy these stones here in England ?

The specialist in this field is ARCO IRIS, producer since 2010 : site phosphorescentpaint.co.uk


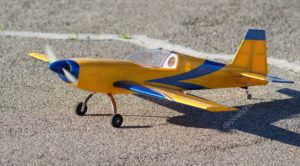
Advice and tips for painting flying models

Advice and tips for painting flying models

Here are some answers to frequently asked questions by model-makers who try to practice painting on their aircraft models!

Which paint should I choose to keep a miniature airplane lightweight?

When talking about flying models (not the static plastic models), or even real fighter jets or airliners, one central point is the total weight of the various layers of paints. Here are several parameters to consider:

Water-based or solvent-based paints?

First of all, a paint is composed of evaporable material and solid matter (solid content/kg of liquid product) which, after application, become microns thick (weight in g/m²)

Water-based paints have a higher solids content compared to solvent-based paints. Therefore, it’s better to choose solvent-based paints, which form a thinner and lighter final layer, for the same coverage rate.

Here is an example of solvent-based paints for modeling with the Graphic range.

The paint system:

Consider using versatile and efficient products to limit the number of paint steps and passes (primers, paints, topcoats): some products are two-in-one, or even three-in-one systems, as they provide adhesion, and can be used as paint and protective finish.

The thickness:

The wet thickness (from 50 to 150μm) is distinguished from the dry thickness (generally from 10 to 50μm). Apply as little paint as possible. To obtain a thin and well stretched coat, increase the thinning.

airbrush for painting flying models

For multi layer decoration with masking and colours:

Reduce the thickness to a minimum. Dry paint areas can be sanded gently with water to reduce “stairs” effect.

When painting on masked areas, it is recommended not to “load” paint on the edges around the adhesives.

Material and paint compatibility

Models made from wood, composites, polystyrene-type foam or other materials such as EPP or EPO are more resistant to solvents.

In case of doubt, there are two solutions:

  • Isolate the surface with a polyurethane acrylic water-based topcoat

  • Spray 2-3 ultra-thin “flash” layers of solvent-based paint or clear coat on the surface, then wet the surface with the paint without the risk of reaction.

Generally avoid the paints sold for the general public in supermarkets because they create reactions when they are coated with solvent-based paints.

Which tool to use? Spray gun, airbrush or aerosol?

Unquestionably, the mini (0.8 mm) or standard (1.4 mm) spray gun is recommended It allows to apply clear coat, prime or paint accurately.

Airbrush use is restricted for fluid products or thinned products, and for painting masked areas. It is not intended for painting or applying topcoat on an entire model!

As for the spray can, although practical and fast, it poses certain challenges: it doesn’t allow to control the spray or the pressure, and above all, it is not very productive, as it contains mainly gas, and little product!

Should we always apply a primer? If so, what type?

No. A primer should only be applied if necessary, in the following cases:

  • adhesion required on bare material difficult to adhere to > adhesion primer

  • need to fill, smooth, repair the surface > “filler” primer

These are the various types of primers that exist, and they have different functions.

When you have a wooden model already primed, it is quite useless to apply a primer. The same applies for the backgrounds with old sanded paints.

What is the resistance of paints and topcoats to fuels?

Experience shows that commercial and supermarket paints are completely contraindicated because they melt immediately.

As for polyurethane acrylic topcoats, although they are water-based products, they provide a good resistance if they come into contact, accidentally or occasionally, with gasoline, but not more!

For maximum resistance to fuels, a lacquer or solvent-based polyurethane topcoat must be applied.

Read more by checking this discussion on model making and model airplanes.