Adhesive Masking Tips and Techniques
Here is a blog article dedicated to one of the main techniques of custom painting on vehicles: applying adhesive to create masks.
Each multicolor painting project is the subject of a strategy, a plan carefully thought out in advance.
Here are the main consumables needed
♦ Paper masking tape 24/48
♦ Thin adhesive and flexible PVC lines 1.5 / 3 / 6 / 9 mm
♦ Repositionable transparent adhesive film (30/60 cm)
♦ Hikari Liquid Mask
♦ Scalpel
Through 3 examples of production, with increasing complexity, we will see which was the technique used to achieve the final result (further down on this page)
1 ► Two-tone decor with red line and pearly black background
2 ► Flamming tricolor and Candy red
3 ► Flamming Red Candy and Freehand Decor
When creating layers and colors, there are 2 main rules:
→ Guaranteed adhesion between each layer (Painting must be completely dry then sanded with P500 paper before being covered with masking adhesives and paint)
→ Simplicity and logic (It is often the shortest path that must be favored. Above all, it is important to apply only one color per masking, so as not to create “staircases” and so not to show different color layers when removing the adhesives)
♣ Tips and Advice
→ It may happen that you want to make curves at very acute angles with the flexible adhesive PVC lines. Unfortunately it is common for these fine adhesive lines to come off: did you know that by passing a flame or the heat of a heat gun very quickly over the surface of the line, it is possible to freeze its position and prevent it from warped or peeled off?
→ If you want to avoid the formation of a staircase due to the thickness of the border of a layer of color, there is a very effective method: with the airbrush or paint gun, direct the spray jet at the center of the masking, always avoiding painting directly on the edge of the adhesive. Try !
Example 1: Create a two-tone decor with a line and a pearl effect
How to achieve this decor in the simplest way?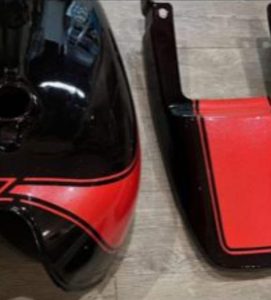
Step 1 ► Apply a bench or light gray background or primer
Step 2 ► Paint the complete room red
Step 3 ► Let dry then sand with P500
Step 4 ► Apply a thin adhesive line and mask the area in red
Step 5 ► Paint the entire room black
Step 6 ► Remove Maskings
Step 7 ► Apply varnish with 5g of red diamond mother-of-pearl
Same case with this painting:
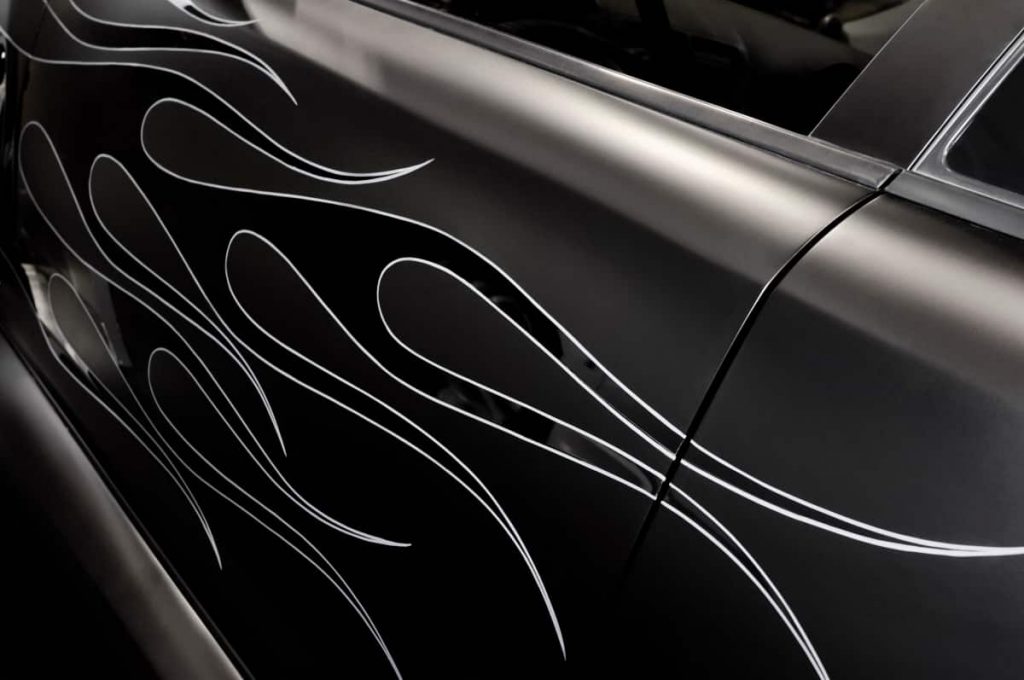
It is possible to draw the lines with a pinstriping brush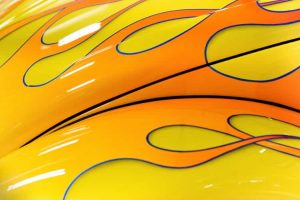
but it will be much simpler to:
Step A ► Paint a Blue Background
Step B ► Apply the adhesive lines
Step C ► Paint an all-over yellow paint
Step D ► Hide external areas
Step E ► Apply paint or Candy orange to the interior
Step F ► Remove adhesive lines then varnish
Example 2: painting a stylized tricolor Flamming
This custom painting consists of a metallic Candy red background, with a stylized “Flamming” decoration on the edges.

How to make the white lines?
In what order should you proceed to achieve the best result, as quickly and simply as possible?
Notice that “shading”, which gives an effect of depth, has been done to different areas of the flames.
Step A ► Paint a pure white background (paint or primer). Drying then sanding with P500.
Step B ► Create the Flamming decoration by applying the thin 3mm adhesive lines.
Step C ► Paint the light gray color (2). Drying then sanding with a gray abrasive sponge.
Step D ► Hide the inside of the flames with paper masking tape. Cut with a scalpel at the fine lines, then unhide the outer area of the flames.
Step E ► Apply the dark gray paint (3) to a strip of approximately 20 cm.
Step F ► Create the shadows with pure black using an airbrush, after removing some of the adhesive from the light gray flaming.
Step G ► Remove all adhesive masking. Perform light sanding with a gray abrasive sponge.*
Step H ► Using thin adhesive lines and paper masking tape, hide the entire part of the tricolor Flamming.
Step I ► Paint the area “Candy” red (5) Starting with a coat of aluminum paint then a few coats of “Candy” red*.
Step J ► Using an airbrush, spray a light, subtle shadow following the contours of the masking.
Step K ► After removing all adhesives, apply coats of clear gloss varnish.
* As mentioned previously at the start of the article, it is not recommended to apply several colors on a single mask, because when you remove the masks, 2 problems appear: these are a significant thickness, and the different layers of color visible on the slice. In this exceptional case, it is necessary to sand down this excess thickness then reapply the masking adhesives, and create the shade which will even out and hide the sanded aluminum and “Candy” layers**
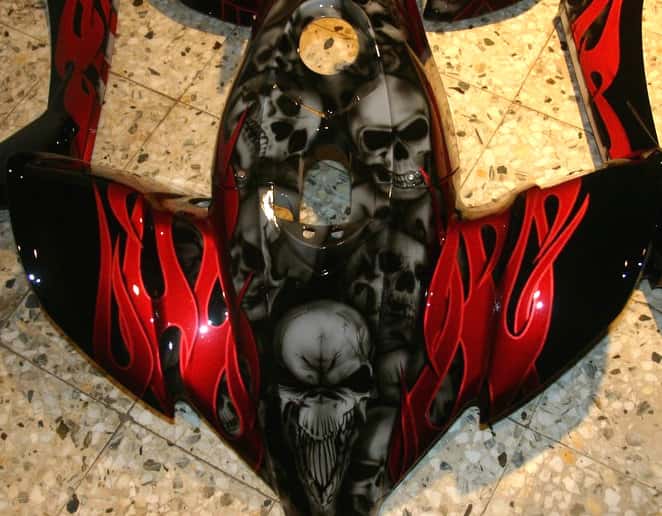
Example 3 ► Flamming Red Candy and Freehand Decor
Here is a personalized painting which still uses the Flamming technique with superposition of layers. As with all painting jobs with layers and superimposed colors, the painter executes a plan prepared in advance, after having imagined all the possibilities.
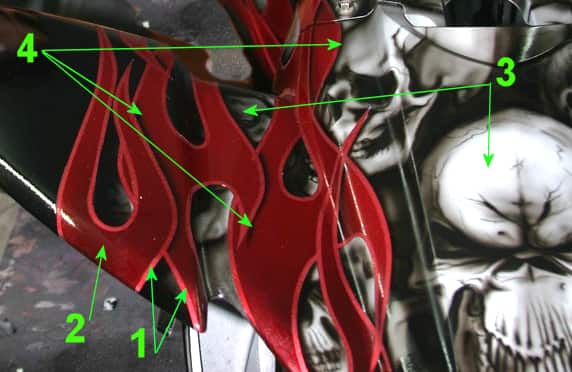
Step A: Create a red Candy paint (1), with a metallic base and a “Candy” red varnish. Complete drying then sanding with P500.
Step B: Applying 3mm thin adhesive lines
Step C: Application of 1 or 2 additional layers of Candy red (2) + black in a light gradient.
Step D: Mask the Flamming with wide adhesive tape then cut with a scalpel.Step E: Application of light gray paint (3) everywhere. Drying and sanding with an abrasive sponge 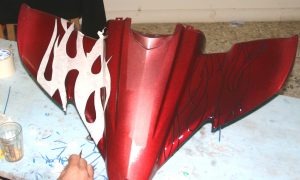
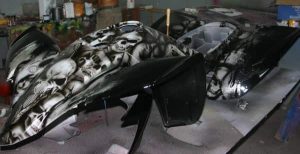
Step F: Drawing the skulls with airbrush and black color.
Step G: Creating shadows (4) On the decoration of the skulls to create an effect of depth, and also on certain areas of the flames after partial removal of the adhesives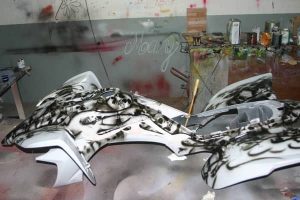
Step H: Removal of all adhesives, and varnishing.
A golden tip
When you make complicated decorations and the adhesive lines intersect, it is not surprising to find defects when you remove the adhesives: liquid or sprayed paint naturally seeps everywhere and especially in the gaps at the crossroads of adhesives.
It is of course possible to press with the tip of your nail on the crossings to reduce the possibility of paint infiltration.
One of the most foolproof techniques is to spray clear binder on any areas suspected of being “weak spots,” where paint can seep through.
It is possible to use solvent-based transparent binder or Hydro transparent binder