SCO Color System Chameleon/Opal

SCO Color System Chameleon/Opal

Paint combinations with color-changing effects

Some paints and special effects create a luminous color that changes depending on the viewing angle.

These chameleon paints create color by reflecting light. This phenomenon is made possible by the optical properties of certain chameleon paints made from synthetic mica. This reflection of luminous colors places itself in the background color.

The range of chameleon colors developed by StardustColors is certainly one of the largest in the world, with more than 44 color references (STANDARD range (20) and around twenty EXTREME colors (24)).

► There is a SEMI-OPAQUE type of chameleon paint and a TRANSPARENT type, as shown in the table below.

Stardust Chameleon Standard Series
Videos


Stardust Chameleon Extrem series
Videos

205 gold pink violetTRANS
L1009 ORIONIS Green Turquoise Blue Violet Red Orange
215 blue redTRANS
L1010 CENTAURI Tourmaline Orange Gold GreenTRANS
217 turquoise blue violetTRANS
L1020 DRACONIS Grey Green
225 gold green blueTRANS
L1022 POLARIS Red BlueTRANS


L1030 MAJORIS Aquamarine Silver
1001 green violetTRANS
L1040 RIGEL Green Violet Pink SilverTRANS
1002 turquoise pinklTRANS
L1050 AFRICA RED GREEN YELLOW
1003 orange greenTRANS
L1060 ANDROMEDA Violet Blue green gold
1004 blue greenTRANS
L1070 SAPPHIRE Blue VioletTRANS
1005 green violet orange

L1080 GAMMA LEONIS Gold GreenTRANS
1006 green silver violet

L1090 ​​NEBULAR Blue Gold GreenTRANS
1008 green brown

L1100 SIRIUS Blue Green
1345 turquoise violet pinkTRANS
L1210 ALPHA BOREALIS Green Blue VioletTRANS


L1230 EPSILON Turquoise Blue Violet Red Gold
82061 outremer blue violet red

L1280 SAGITTARII Blue Violet Red Gold
82062 turquoise blue violet red

L1830 HELIOS Red OrangeTRANS
82063 blue violet red gold

L1864 SCORPIUS Brown Gold Green BlueTRANS
82064 violet orange

L1866 ALDEBARAN Green Gold Pink
82065 red gold

L1868 ARCTURUS Green Gold Orange
82066 pink green

L1870 ANTARES Fire Orange GreenTRANS
OS32 green copper

L1890X PEGASUS Green Turquoise Blue Violet Red Orange G-Gold
CS32 green blue

HS1 HYPERSHIFT Black/orange Red/Gold


HS03 HYPERSHIFT Black/Violet Red/Gold


HS05 HYPERSHIFT Black/Blue

Chameleons should usually be applied on a black background.

Transparent chameleons, however, can create very interesting color effects when applied to white or even brightly colored or pastel backgrounds.

Basic colors (among 63 colors in the GRAPHIC range)

GPH001 Turquoise GPH011 Vivid red GPH022 Orange GPH061 Violet
GPH003 Vivid green GPH012 Pink GPH055 Grey GPH065 Orange
GPH005 Cyan Blue GPH013 Yellow GPH056 Amaranth  
GPH007 white GPH018 magenta GPH057 LILA  
GPH010 Black GPH020 Sienna GPH060 Ultramarine  

White Backgrounds
Chameleon colors are identified as “OPAL” when the background color is white or very light, making them resemble the color effects of certain seashells.
Find OPAL colors

Intermediate colors
When used as an undercoat, transparent chameleons create very interesting effects. The background color is little or not at all altered by the chameleon. The color-shifting reflection may only be visible under a direct light source; it remains invisible in the shade or under diffused light.

Black backgrounds and dark colors
They allow the chameleon to fully display its colors.
Find EXTREME colors

COLOR POSTERS
Three large-sized (A1 or A2) color chart posters showing all the transparent chameleon paints applied to different background colors of the SCO system
You can download the high-resolution images of these charts below, or order them in the Stardust poster category

It’s possible to create unique combinations on

  • bright colors such as orange, red, green, and yellow
  • light “pastel” colors
  • complex and subtle colors such as ochre, brown, and purple…
    ♣ Never use metallic or pearly bases; this will cancel out the pearlescent optical effect.
    Examples

L1210 ALPHA BOREALIS / OP121Q offers three cool-toned reflections: TURQUOISE BLUE VIOLET.
This is a highly transparent shade, among the strongest. It’s a great shade for creating contrasting effects (e.g., warm background/cool reflection).

L1864 SCORPIUS / OP864Q
This is a very powerful semi-transparent shade that creates colorful reflections ranging from PINK, ORANGE, GOLD to GREEN.

Economical Colors
There is a range of chameleon colors that are much more affordable than the EXTREM colors.
With highly effective colors such as:
♦ 215 BLUE RED
♦ 217 TURQUOISE VIOLET
♦ 225 BLUE GREEN GOLD
and finer, more subtle colors such as
♦ 1001 VIOLET GREEN and all the other references in the 1000 range.

The most remarkable SCO color combinations, coupled with Candy, have been grouped together in the LUNAR range, available very quickly.

Guitar painting: how to personalize your guitar?

Guitar painting: how to personalize your guitar?

3 ideas for tuning your guitar with special effect paint!
It is possible to personalize the painting of a car, a motorcycle, a helmet… But then, why not the painting of a guitar? What could be better than the surface of a guitar to apply a special and unusual paint?

This can be a phosphorescent paint, a fluorescent paint that becomes luminous under UV lamps, a chrome paint, or even a prismatic paint giving rainbow reflections.

Today we will present to you 3 customization ideas with effect paints for a guitar:

Guitar Tuning: how to paint a guitar?

The preparation :
Whether it is bare, raw wood, or even an old painted background, I advise you to apply a thick, covering primer, which can fill in all the micro-defects and create a perfect, smooth background. , ready to receive any effect paint.
For this, there is the filling primer in a pot or in a two-component aerosol.
These primers are available in several colors, including black which you will use to create guitar tuning ideas 2 and 3.
Sanding with P500 hydro abrasive paper.

DIPPING: guitar paint

It is in a way a Hydro printing or Hydro transfer technique, but carried out not with transfer films, but with transfer paints.
Start by making a hard base (2C primer) with the color of your choice.
Place the chosen colors on the surface of the water in a tray large enough to contain the body of the guitar. Use an interesting color combination, such as orange, purple and green with a few touches of black.

Dipping colors are specially made not to dissolve in water and to cling directly to the surface of the object being dipped.
It is possible to distort the position of colors on the water surface using a rod.

The guitar is therefore printed with your decor. All that will remain is to varnish with as many layers of varnish as is necessary to level and create a perfectly smooth and shiny surface.

artist : @burlsart

2/ Pearly and multicolored speckled effect

To achieve this beautiful effect, which produces bright, shimmering colors, you will need a hard (2C primer) and black base, perfectly black.
You can then take interfering pearls, which are available here in eight colors
And you can mix them in a little bit of transparent binder available here in small format.
Makes a liquid paste with the mother-of-pearl and the binder, which will allow you to dab with a piece of plastic or a sponge on the surface of the guitar. The pearls appear colorful on this black background. Of course, it is possible to use other background colors or even color gradients. The effects of the interfering pearls are very interesting on other background colors.

3/ The Chameleon Colorshift effect on a guitar

Here are some impressive colors that have the ability to capture attention and attract all eyes! These colors are particularly bright and intense in comparison to other metallic or pearl colors. And they have the particularity of changing appearance depending on the angle of view. So, you never really know what color they are!

It doesn’t matter if you don’t have a spray gun, you can apply them with an aerosol because they are available in the 38 colors of Stardustcolors, both in a pot or in an aerosol.
This is probably one of the most effective effects but also the easiest to achieve:
on the black background sanded with P500, you must apply thin layers, and repeat these thin layers until the black background disappears. Then we can varnish

There is a large choice of colors, with some shades changing up to two colors and even up to 8 colors depending on the viewing angle.

Hikari Toys for Soft PVC – Interview StardustColors

Hikari Toys for Soft PVC – Interview StardustColors

For two years now StardustColors has been offering the HIKARI Toys for Soft PVC range of paints specially designed for soft vinyl toys.

Today we welcome Stéphane, a user of the range since the start of its marketing, to tell us about his hobby: sofubi painting.

> Hello Stéphane and welcome. Before getting to the heart of the matter, can you introduce yourself in a few words?

Hello to the whole Stardust team! So Stéphane, I have been a sofubi collector since 2009. In 2016 I decided to take the plunge and start painting this type of toy to give an extra dimension to my hobby. I also have an Instagram account (https://instagram.com/_thechogokinjawa_) where I present, among other things, my projects trying as much as possible to present their WIP (Work In Progress) to show the different stages of painting until the final result.

> But what exactly is sofubi?

Sofubi is the phonetic contraction of the Japanese “sofuto biniru” which refers to PVC toys. In the hobby we use this word interchangeably or sofvi, the English contraction of “soft vinyl”… it’s quicker than talking about soft vinyl toys… and a little more flattering too (laughs).

> How long have these types of toys been around and where do they come from?

Originally these were Japanese toys which began to be produced after the Second World War for the American market. But from the 1960s, sofubi took on real importance in Japan with the marketing of toys based on films and TV series around Godzilla or Ultraman. Very quickly sofubi developed, mainly on the themes of monsters (kaiju), robots or creatures of traditional Japanese folklore (Yokai). At the end of the 90s, sofubi took on a new dimension when street wear stores such as Bounty Hunter decided to start selling soft vinyl characters. Since then, this phenomenon has continued to grow, sparking vocations beyond the street culture community and has even spread to other Asian countries (China, Hong Kong, Taiwan, Thailand). ) or the United States. Today the themes in sofubi are almost endless because it is an environment where everyone can give free rein to their imagination when it comes to creating a figurine. From very gory to very kawaii (which means cute in Japanese) there is something for everyone!

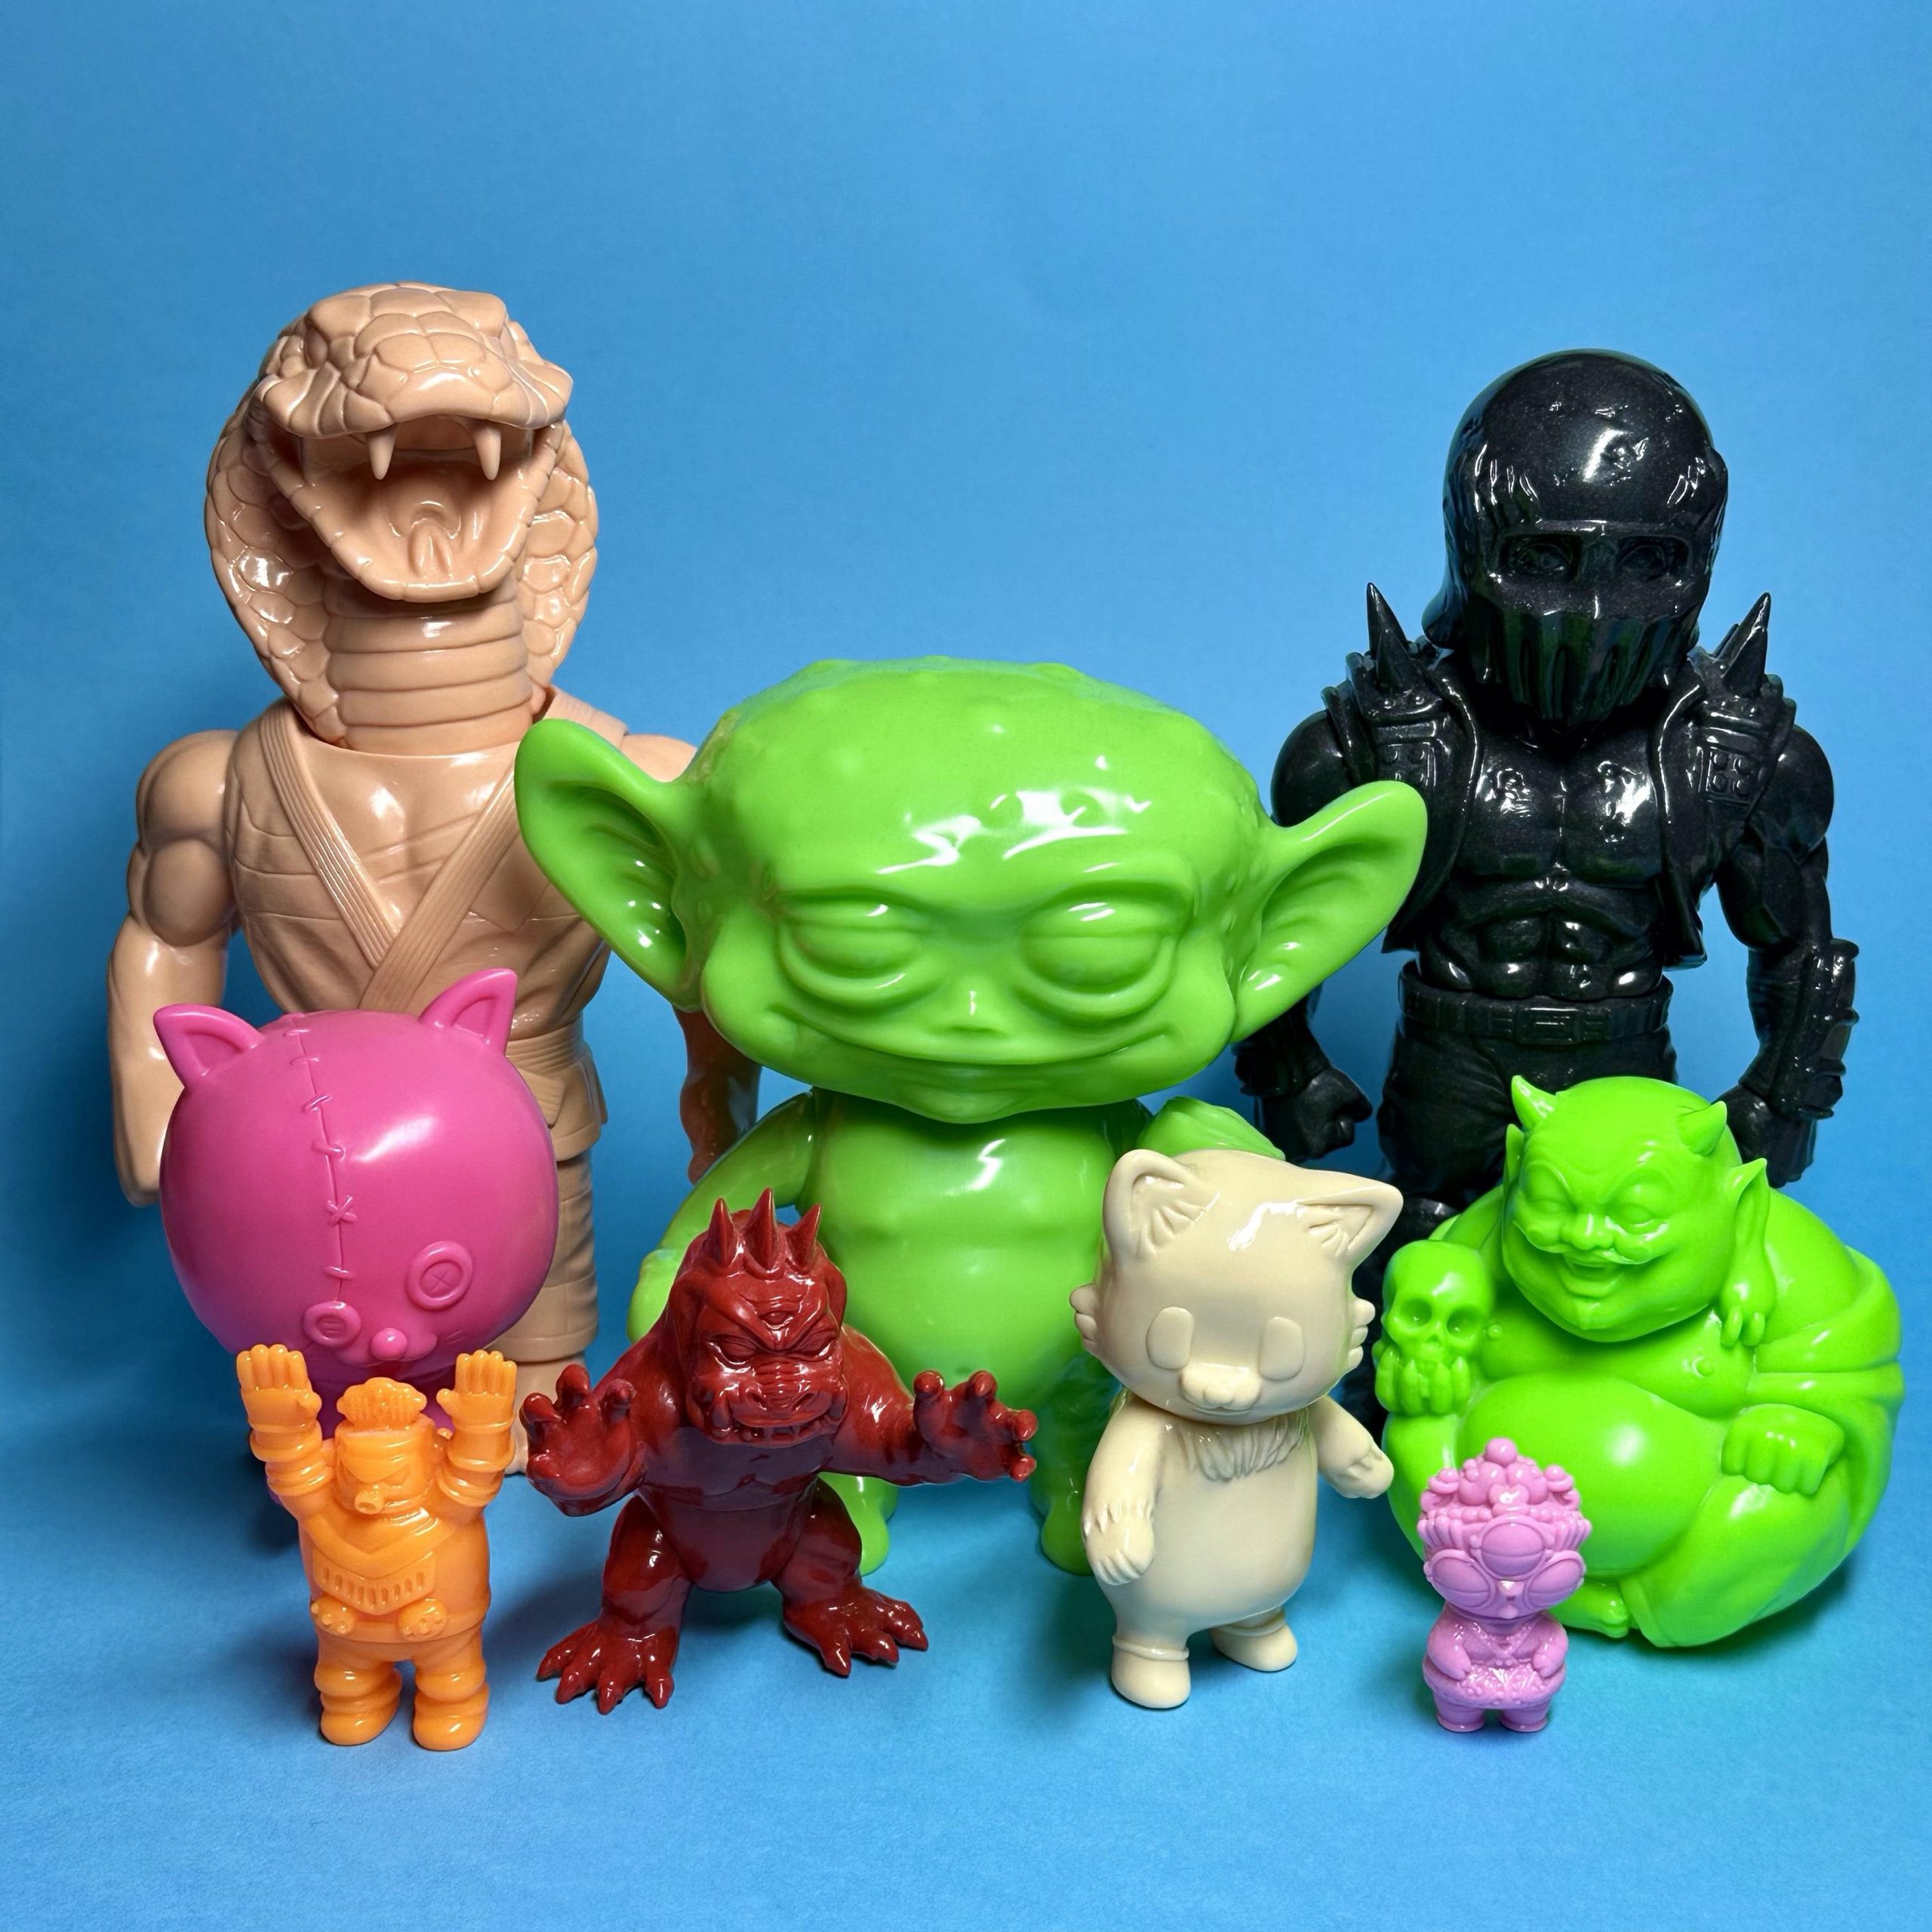
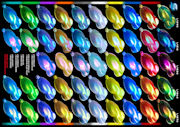
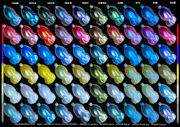
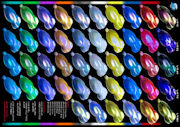
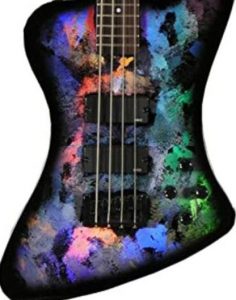
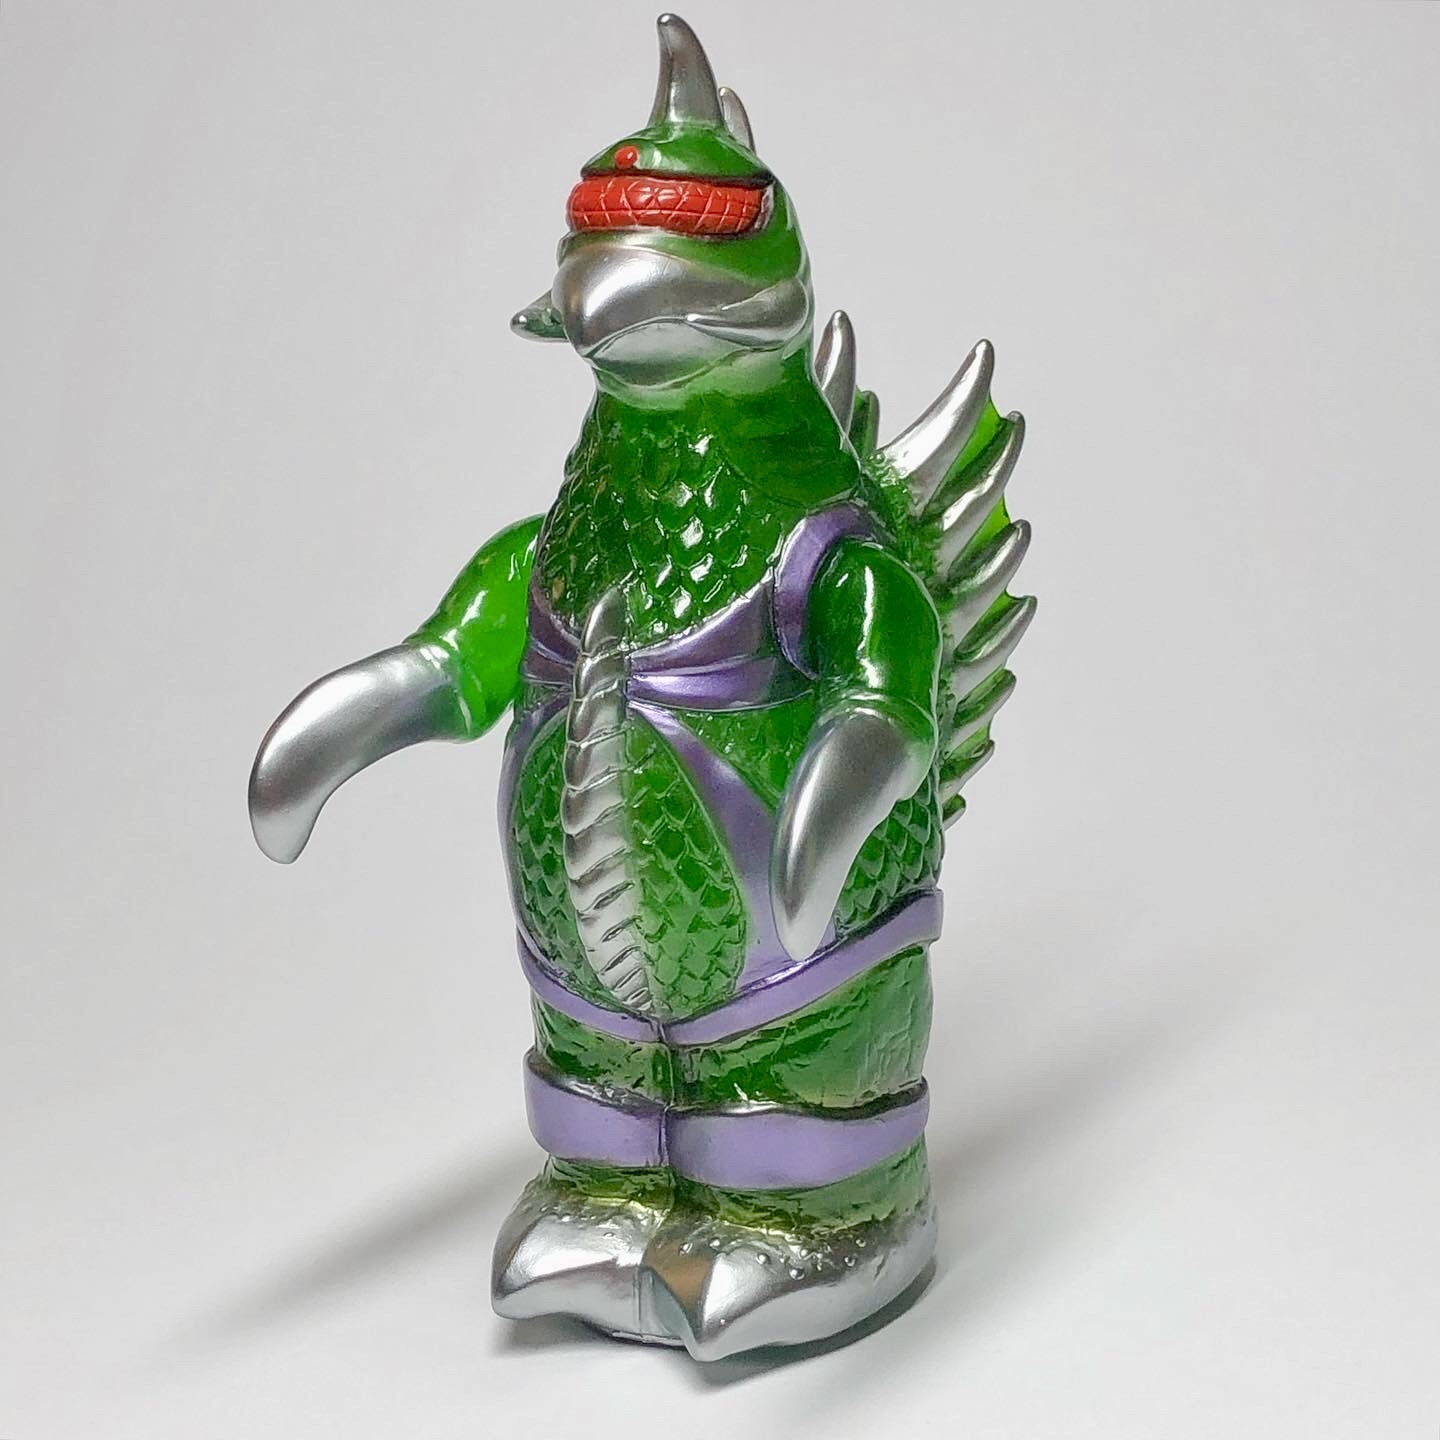
Sofubi offers a very wide variety of themes, sizes and colors!

> But what ultimately differentiates the sofubi from other toys?

Compared to toys that can be found on the market, I would say that a sofubi can appear extremely simplistic and sometimes give the impression of being one of those cheap toys that you see at fairgrounds.
It’s true: a sofubi is made of hollow plastic, is made up of few parts (this can range from two to at most ten) and is not very articulated (it is often the bare minimum: head, arms and legs).
And this is for good reason: each sofubi is made by hand using artisanal techniques that have not changed since the very beginning. We are therefore very far from mass production and in the end the number of copies of a sofubi will not exceed a few hundred (or even thousands for the most fashionable models) over several years.
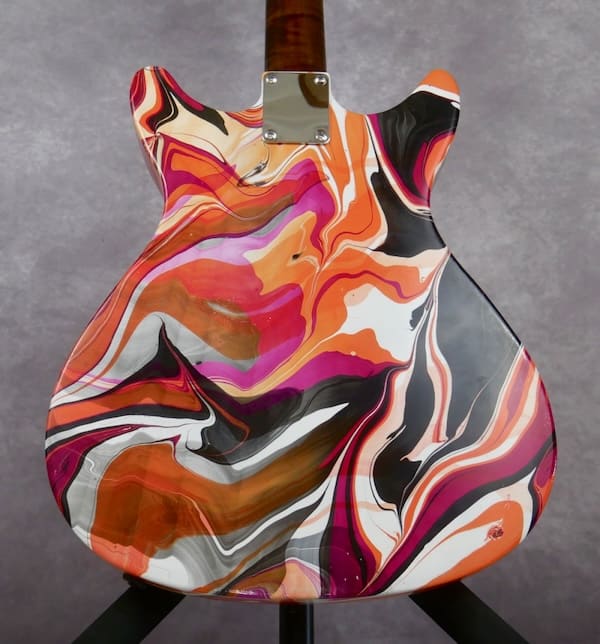
On a sofubi the effort is focused on two aspects. First of all, the design: some artists produce phenomenal work of sculpture with incredible attention to detail. And then the painting: each piece being painted by hand, the sofubi leaves the door open to all possible and imaginable shades.

Anatomy of a sofubi

> Thank you for all these details and this transition to the theme of painting! What do you think is the main difficulty in painting a sofubi?

The main difficulty in painting a sofubi? I would definitely say it’s finding the right paint! (laughs)
More seriously, I think that before starting to paint any object (a plastic model, a resin kit or a sofubi), you have to “get to know it” to determine which paint will be the one. more suitable.
The case of sofubi is quite particular in the sense that it is the way in which it is designed which will dictate the choice of paint to use.
In fact, to paint a sofubi you have to start by dismantling it. To do this, we will soften the vinyl by heating it. So far so good.
Once the different parts have been painted, everything must be reassembled.
And this is where things get complicated: the painted parts will have to be softened again by heating them to fit them into each other.
We therefore need a paint that is both flexible to withstand the pressure that we will exert on the parts during reassembly and resistant to the friction that can occur in certain places of the sofubi (which I remind you is not necessarily perfect because it is made in an artisanal way).
The optimal solution therefore lies in a vinyl paint which combines these two properties, because it has the particularity of creating a chemical bond with the vinyl substrate of the sofubi.
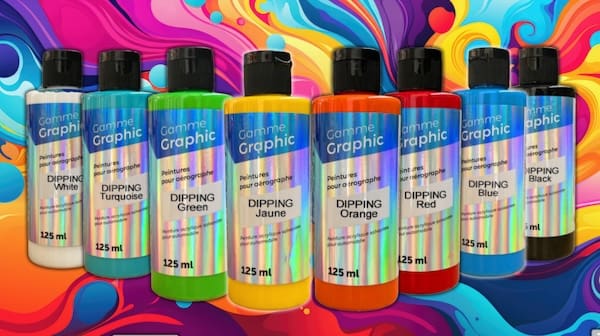
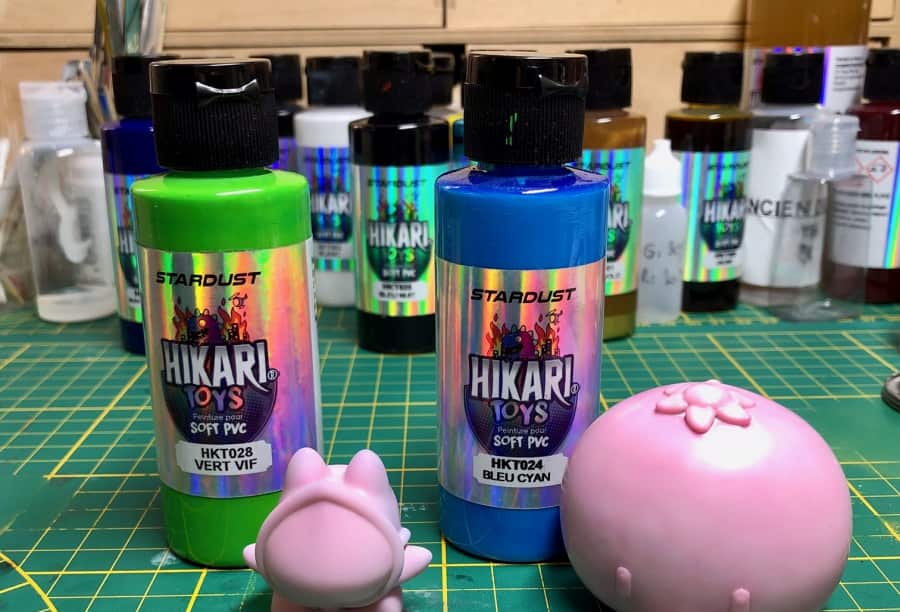
Before StardustColors launched its HIKARI Toys for Soft PVC range, there was none of this in France or even Europe. The arrival of your paint was a real game-changer!

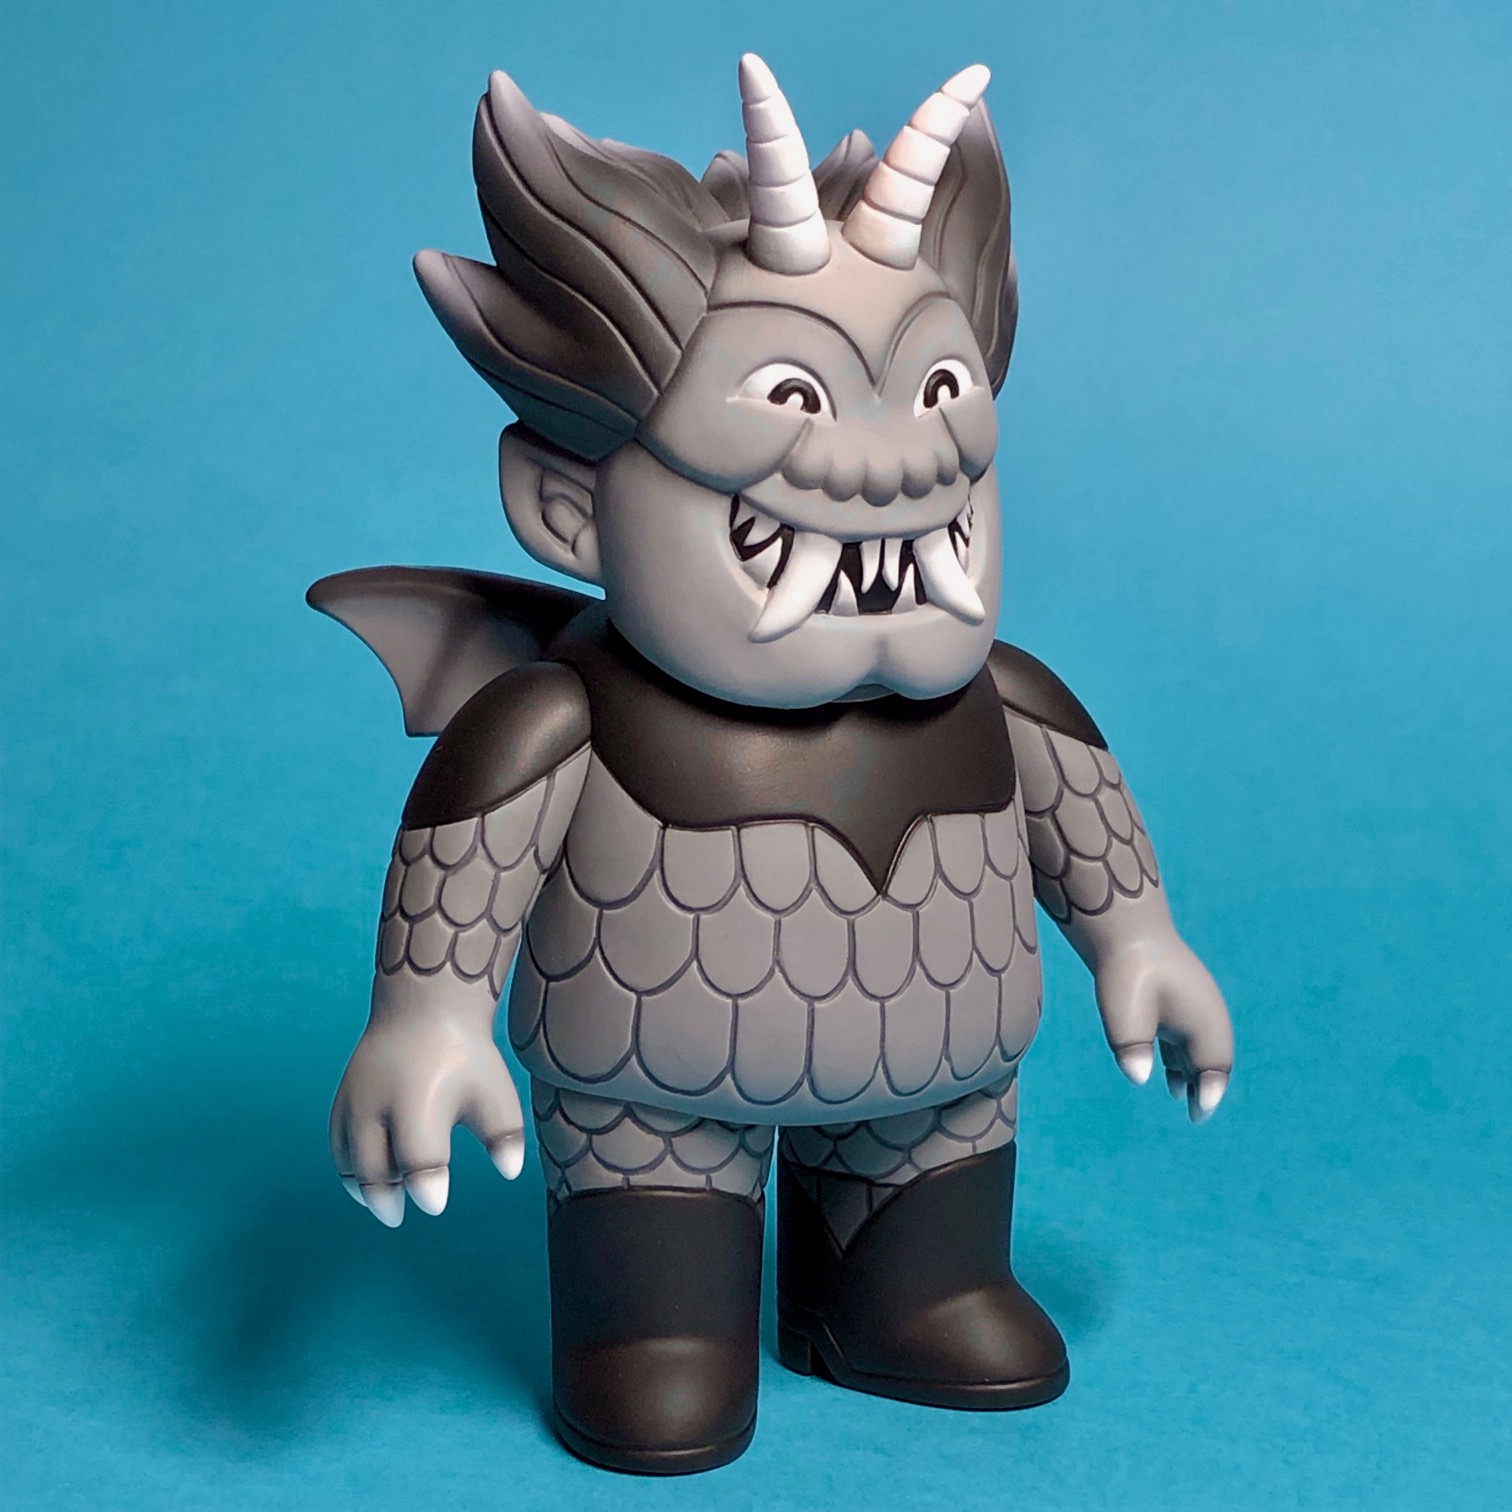
Hikari Toys paint with matte varnish from the Graphic range

> But then what did you do before HIKARI Toys for Soft PVC paints?

In principle, you can paint the sofubi with almost any type of paint other than vinyl paint: acrylic (water or alcohol base), solvent-based or enameled (enamel).
But they are not really suitable because none has the capacity to create the chemical bond with the vinyl substrate that I spoke to you about previously.
As for me, I used solvent-based paints for their quick drying and relatively good resistance to friction. I could quickly handle the part which was very quickly dry to the touch and continue working on it.
On the other hand, at the time of reassembly, if the paint is not suitable it can quickly turn into a nightmare: the paint can crack (or even jump), poorly resist the heat (resulting in fingerprints on the part) …I can’t count the number of times I’ve ruined hours of work in just a few seconds. I won’t hide from you that this type of mishap, which happened quite regularly, was extremely frustrating and even discouraging.

> Very good, but StardustColors is not the only company producing vinyl paints for sofubi. So why not use other brands?

Because the other manufacturers are either in Asia or in North America and in the best case scenario I could have bought the paint in concentrated form but not the thinner, due to international air transport regulations.
And I’m not going to teach you this: each paint has its appropriate thinner. Painting is above all chemistry! (laughs).
In short, without the thinner specially designed for paint, it is impossible to extract its full potential, especially knowing the rather particular properties of vinyl paint…but here I am starting to get into the technical details.

> That’s perfect, so let’s talk technical now! First of all, what materials do you need to paint sofubi?

Basically, a sofubi is painted with an airbrush because vinyl paint is not particularly suitable for painting with a brush.
You will need an airbrush that is absolutely equipped with Teflon (PTFE) seals to resist solvents….otherwise I won’t give you much of your equipment after a few uses. And of course add a compressor to it.
I advise you to choose airbrush brands whose reputation is well established: Japanese (Iwata, Wave, GSI-Creos) or German (Harder & Steenbeck). They are all very good, although I must admit that I have a slight preference for Japanese airbrushes.
I suggest you first opt for a versatile airbrush with a 0.3 mm nozzle. It will allow you to do just about anything you want. And if you decide to go further in detail work, then I advise you to add a 0.15 mm or 0.18 mm airbrush to your painting equipment.
Of course, using an airbrush with vinyl paints requires taking precautions for your health. So cartridge mask and paint booth with extraction to the outside are mandatory!
Finally, when it comes to cleaning my equipment, I use acetone or cellulose thinner and it does the job very well.

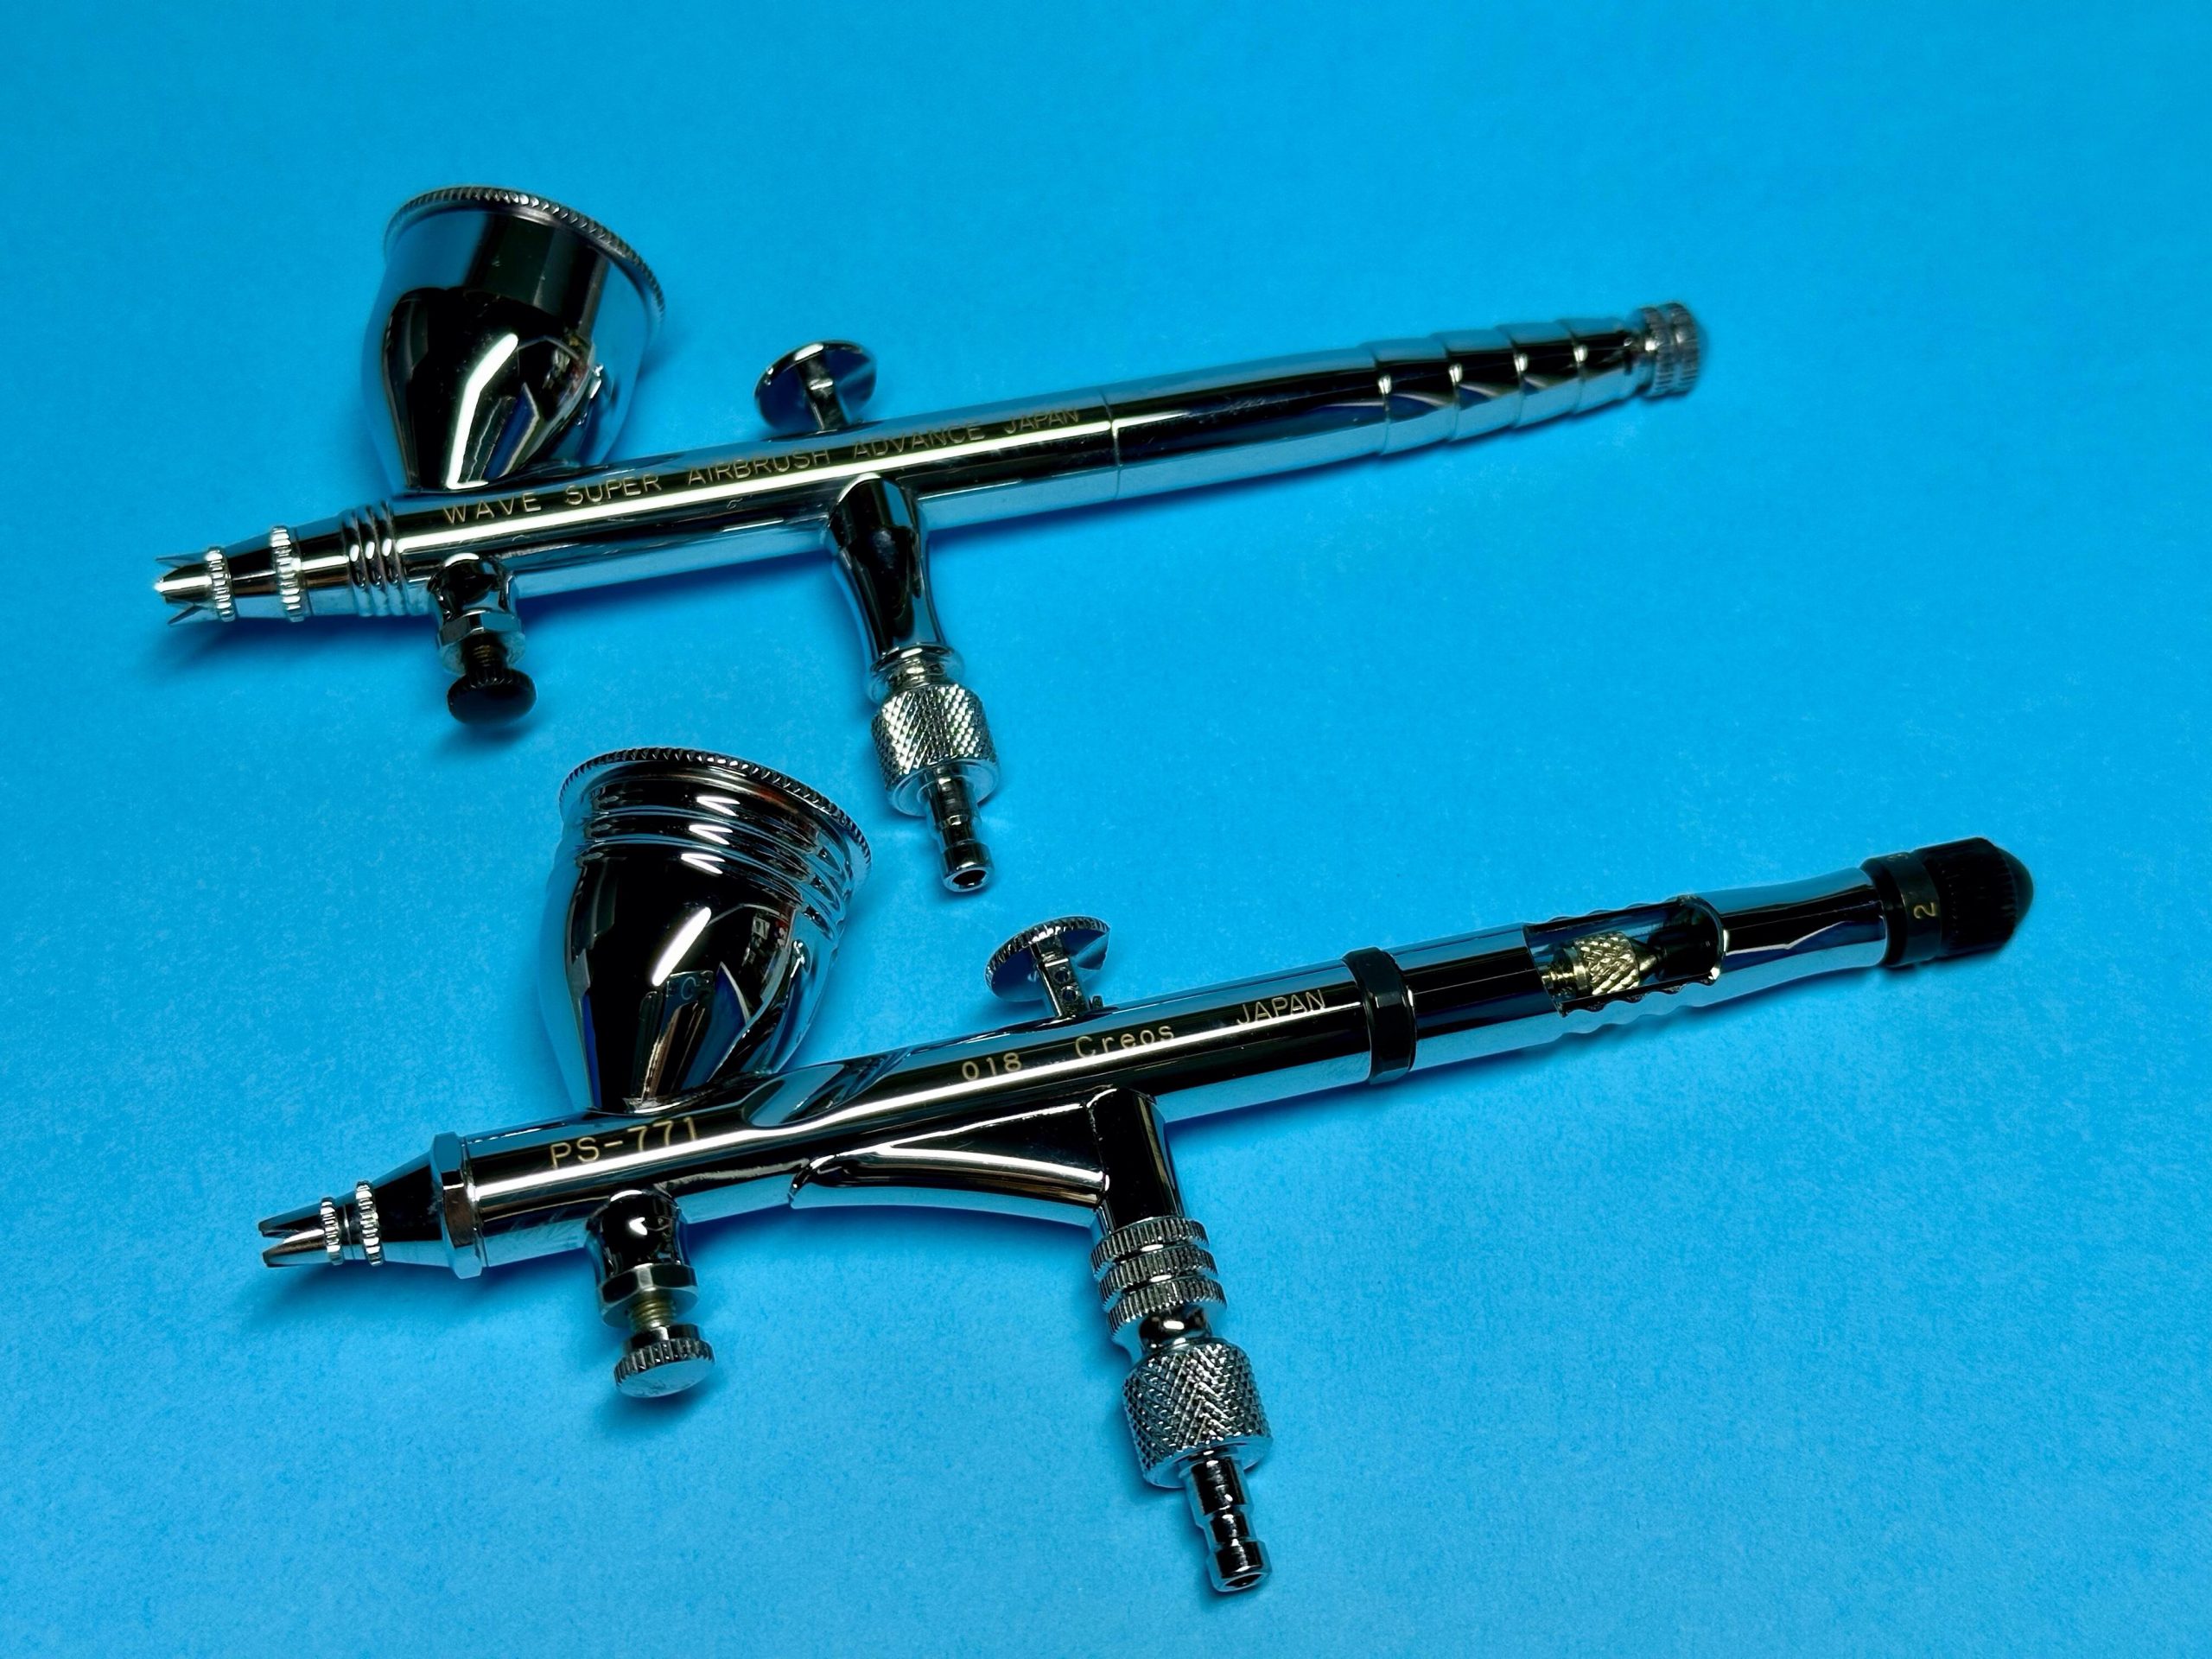
At the top the Super Airbrush Advance (0.3 mm) from Wave and at the bottom the PS-771 (0.18 mm) from GSI-CREOS

> Before starting to paint a sofubi, should we take any special measures?

Firstly, I degrease the toy because there are often residues of mold release products. Getting rid of it will help the paint stick.
For a plastic model or a resin kit I generally use soap or dishwashing liquid, but for a sofubi it is the paint thinner that will be used for cleaning.
Not only will this degrease the part but it also prepares the vinyl to be painted. Cleaning with thinner creates a temporary reaction in the vinyl (it will feel sticky to the touch) and this will promote the famous chemical bond with the paint.
As for me, I clean the part by rubbing it with a cloth soaked in thinner then I immediately apply the first sprays of paint to retain all the benefits of this cleaning.

> Now let’s talk about using HIKARI Toys for Soft PVC paints. What advice could you give to someone who is going to use them for the first time?

I have advice that can be summed up in just one word: dilution.
I consider this to be the essential thing to have in mind, not only when painting with an airbrush but even more so with a vinyl paint like HIKARI.
When it is not diluted enough, a vinyl paint will quickly let you know because it has the particularity of producing a “cobweb” effect. You will end up with filaments on the object when spraying the paint and I can tell you, the first time it feels funny! Increase the dilution and the problem will disappear instantly.
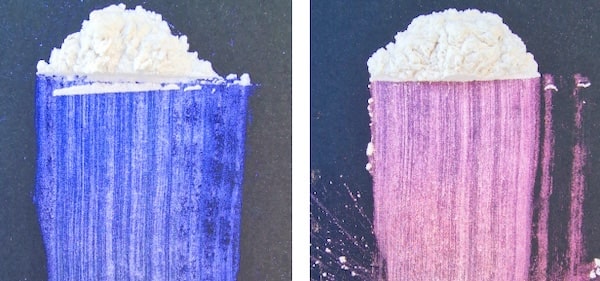
Vinyl paint is also sensitive to ambient temperature. Be extremely vigilant about this, otherwise you risk exposing yourself to another phenomenon: overspray.
Concretely, when spraying the paint you will notice around the painted area the appearance of a white powdery layer, often in the corners of the room. This is because the paint is already almost dry when it comes into contact with the part. If you have not changed the pressure at which you are working then this means that your dilution is not sufficient in relation to the temperature.
In short: for the same paint application, the dilution may vary depending on the season.
And to be really calm, I advise you to add HIKARI “retard” to your diluted paint. As its name suggests, this product will delay the drying of the paint and will therefore further limit the risks of overspray.
If, despite all this, you still have a slight residual overspray, I’ll give you a little tip: a veil of pure HIKARI “retard” quickly sprayed on the bleached area will solve the problem.

> Thanks a lot for the clarifications ! In the end, what dilution would you recommend?

Personally I work with a dilution between 1:1.5 and 1:2 by volume (the first number being the volume of paint and the second that of the thinner) with a pressure of 20 psi at my compressor.
If I ever have to paint small details or want to work transparently then I increase the dilution. This can go up to 1:5 or even 1:7 and I adapt the pressure accordingly.
As I always prepare bottles of previously diluted paint, another little tip: by default I always add between 2% and 3% by volume of HIKARI “retarder”. This is the price of a certain tranquility! (laughs)

> Before ending this interview, do you have a few last little secrets to share with us regarding sofubi painting?

With pleasure! First of all, the first will concern painting with the HIKARI Candy range on transparent vinyl sofubi.
Even if the dilution is appropriate, it is possible that at the transitions between the different Candy colors you will have some sort of tarnishing.
To remove this effect, I spray a fine veil of pure Hikari “retarder”.

My second tip will concern the final appearance that you want to give to your sofubi. Basically, HIKARI Toys for Soft PVC paints have a satin finish. To give your sofubi a matte appearance, apply a layer of Medium HIKARI and that’s it!

Finally, two tips for the sofubi reassembly phase.
First of all: patience! Even if HIKARI Toys for Soft PVC paints dry very quickly to the touch (a few minutes), wait at least 24 hours for them to be completely dry before reassembling your sofubi.
And then: moderation! HIKARI Toys for Soft PVC paints are certainly flexible and resistant, but they are no less heat-sensitive. So heating the room to too high a temperature risks having the opposite effect to that sought: certainly you will very quickly soften the painted vinyl but you also risk starting to melt the paint and damage it when you go. re-fit the parts.

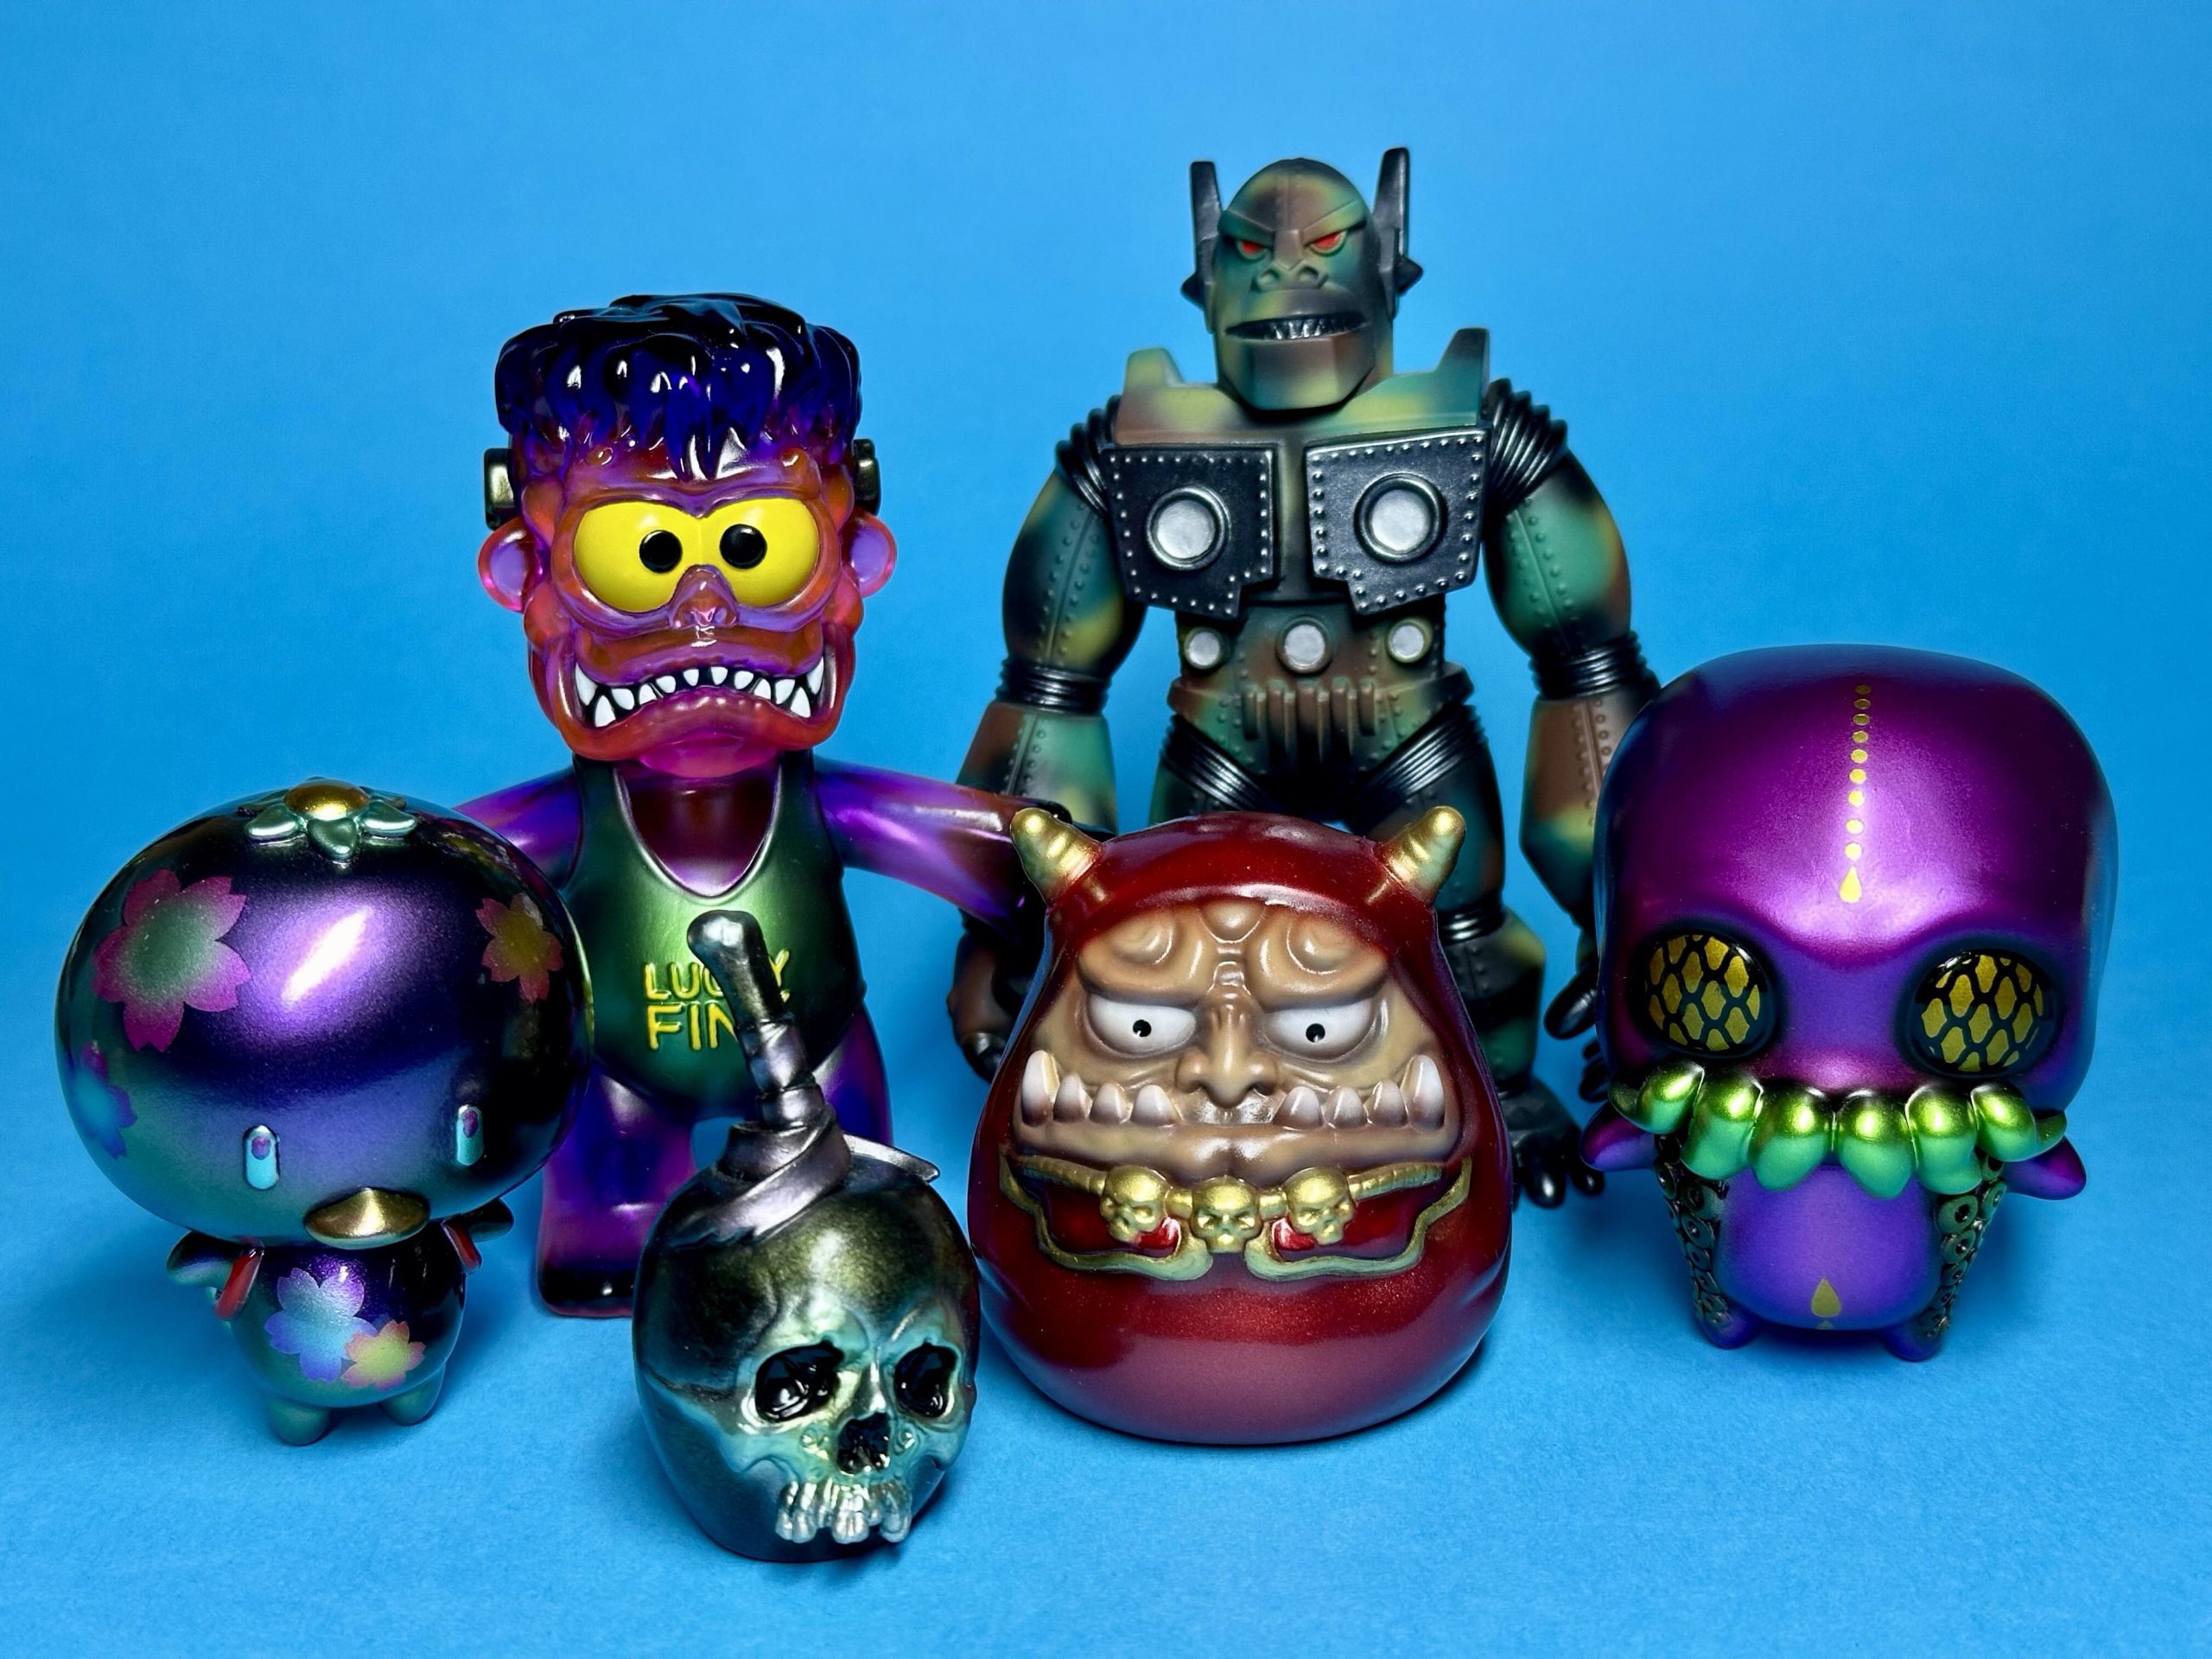
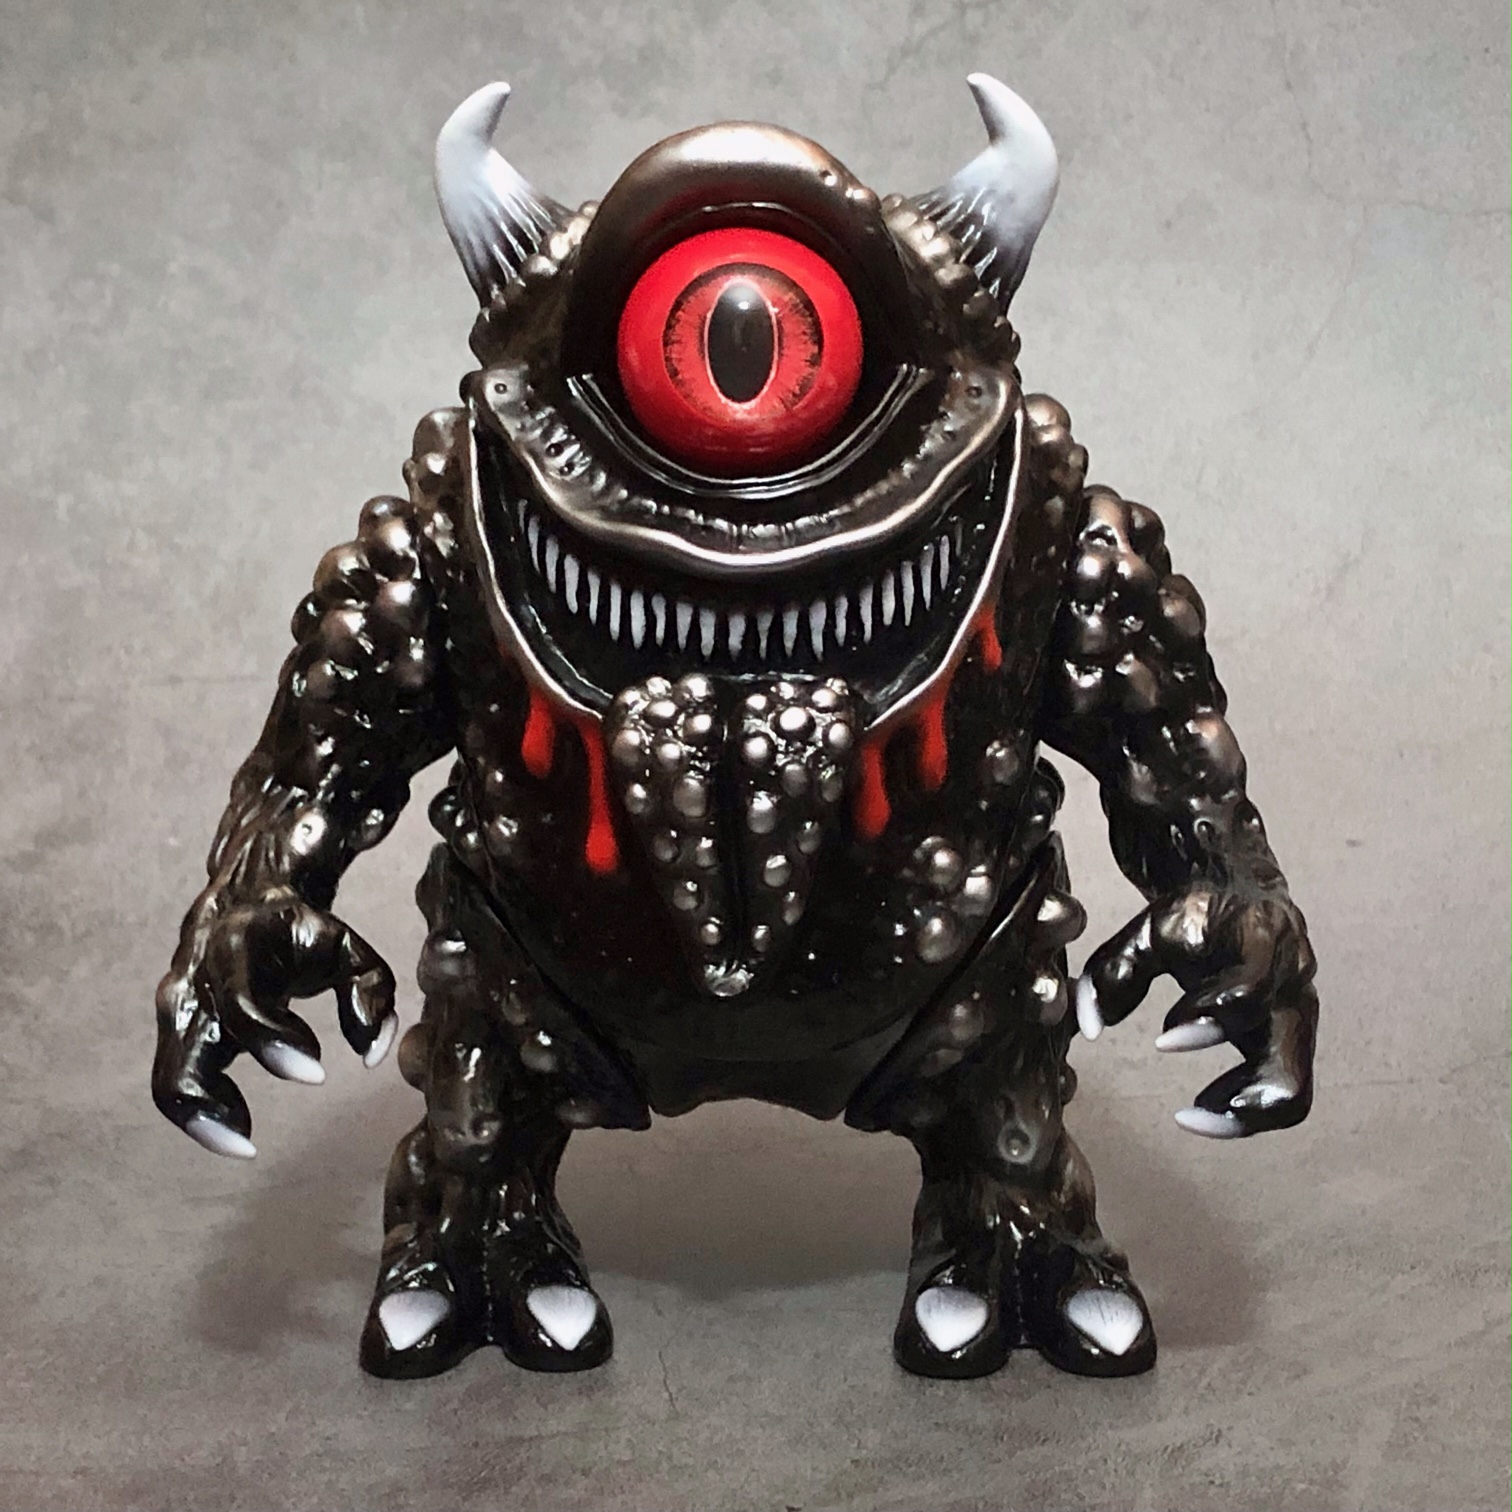
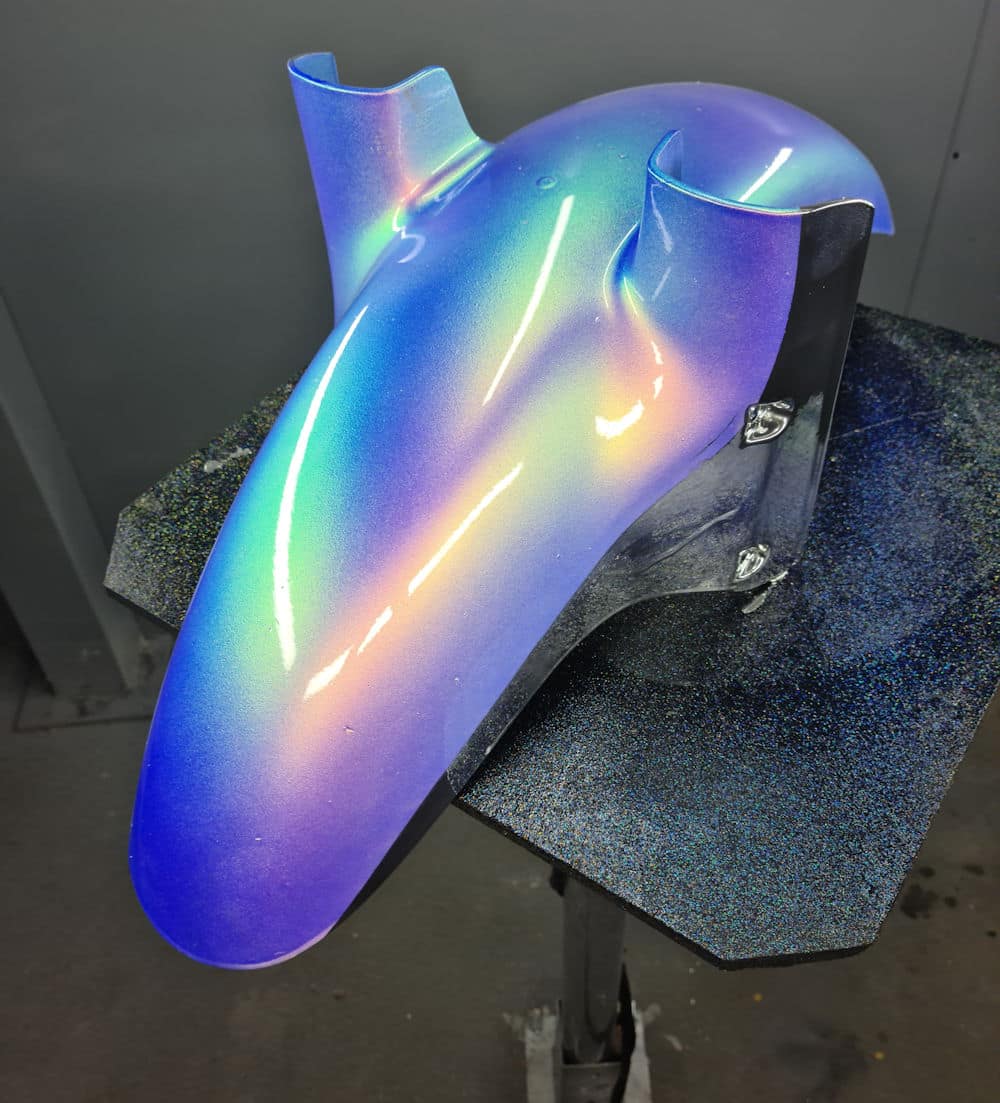
Sofubi made with HIKARI Toys for Soft PVC paints

> Thank you Stéphane for all this information! I think readers of the blog are now ready if they want to get started with sofubi painting!

Being a PLAMO builder: GUNDAM-GUNPLA plastic painting and modeling

Being a PLAMO builder: GUNDAM-GUNPLA plastic painting and modeling

Stardustcolors introduced you to modeling on PVC toys (SOFUBI), modeling on radio-controlled models (LEXAN), modeling of miniatures and figurines, and today here is another family of modeling: GUNPLA or GUNDAM modeling. Here too, paints are used to personalize the parts of miniature robots.

Several types of paints can be used for the world of GUNDAM:
► Solvent-based airbrush paints for PVC: HIKARI Toys range
► Water-based acrylic airbrush paints: Stardust Pro range
► water-based acrylic airbrush paints for plastics: HIKARI RC range


First of all, what is PLAMO? a Weapon of War? No no……The term PLAMO is a contractive term of Plastic Model. This refers to plastic models to be removed, for which you do not need glue or paint to have a finished result.

This hobby became popular with the “anime Mobil Suit Gundam” in 1979, which gave rise to a variant of GUNPLA. This notably designs the GUNDAM plamos. Then there is an abuse of language, because we say “gunpla” for all plamos…… “I fight regularly on that…. » explains André ( @aivon_lepgm ), specialist in PLAMO modeling
For the assembly of the different GUNDAM modeling figures, there is a notice with the number of the parts and each letter of each sprue.

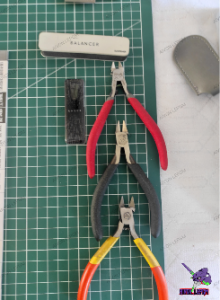
For assembly, a pair of precision tweezers, a glass file, do the job from the start. You should avoid low-end equipment anyway!

In the photo above, we can see a Dspiae pliers (red), a Tamiya pliers (black) and a no name pliers. There is also a Shave Plus file from Gunprimer. (It’s high-end.)

Afterwards, when it comes to cutting and editing, just take a look at YT where there are already so many videos on this…
As for the final result, we have the choice, either leave it as the kit provides at the end, with the stickers and other decals, or paint them. And to do this, there are a whole bunch of paints, my choice is Stardustcolors, a French brand. (I made my two YT and Instagram videos on it under the nickname Aivon_Lepgm.)

Interview with André, PLAMO modeling specialist

► André, do you have an idea of how many enthusiasts of the practice of GUNPLA/PLAMO are identified in France and around the world? What is the country where this art is most widespread?
Wow, a difficult answer, I even think that there are no official figures in this hobby. In the sense that there is no federation (there are associations) or anything else for the census. But I know from sources that Bandai has sold more than 500 million copies worldwide.
It is no surprise that the Asian continent is the must have. They are the ones who have the greatest potential, a custom expert with us is the equivalent of a beginner with them (that’s another dimension there). Japan wins the prize in sales, limit, this country alone accounts for the sales of the rest of the globe!

►What is a Nakamas?
Ahahah, I always say in my videos “hello nakamas”, this comes from my manga universe, and in particular One piece: or a nakama, is a crew member who has become more than that, who is part of the “family “. Otherwise it comes from Japanese: means colleague, compatriot, companion, or comrade.
► What is the material that different plastic Gundam models are generally made of? What type of plastic exactly?
The middle of the plamo is made of plastic, and in particular ABS and polystyrene ,
►Are you making Plamo today using 3D printing?
I just make the supports for my plamos, but you can find a lot of parts on different sites for that. But maybe one day yes, if I’m missing a part or for a big custom why not.
► In the field of GUNPLA paint, do we use solvent paints or Hydro paints when we want to personalize parts?
It depends on the builder, because some will only look at solvent-based paints, because their quality is still superior to “hydro”, but much more harmful. And on the contrary, some prefer hydro, for the ease of use, cleaning, and the odorless side.
I’m a fan of both, I don’t have a preference on that. Because both offer equivalent choices.
►For finishing paintings on GUNPLA, is glossy varnish or matte varnish preferred?
It all depends on the finish, we tend to varnish in gloss before applying panel line (enamel juice to accentuate the lines), to facilitate application and protect the parts (because the bandai plastic can crack with the uses panel line. Basically, it all depends on what the Builder wants to do.
►What shades do you prefer to personalize your GUNPLA models?
I like the chameleon effects, but that’s my side: “I love fast and furious Tokyo drift” (ahahaha). I like all the shades, I’m not very picky about it, the advantage of our hobby is this enormous freedom to do what you want quite easily, without a lot of space, and with the paints that ‘we want. I really liked the paints I used from Stardustcolors, I find that the ease of use saves us time. And that is not negligible.