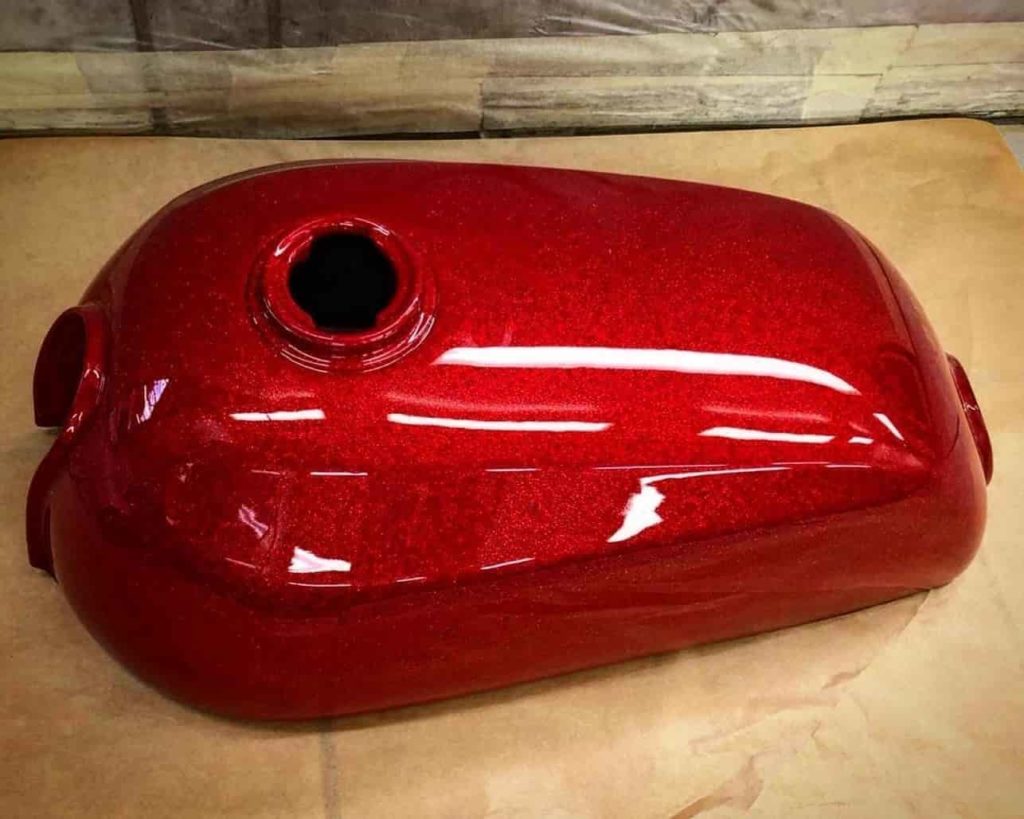
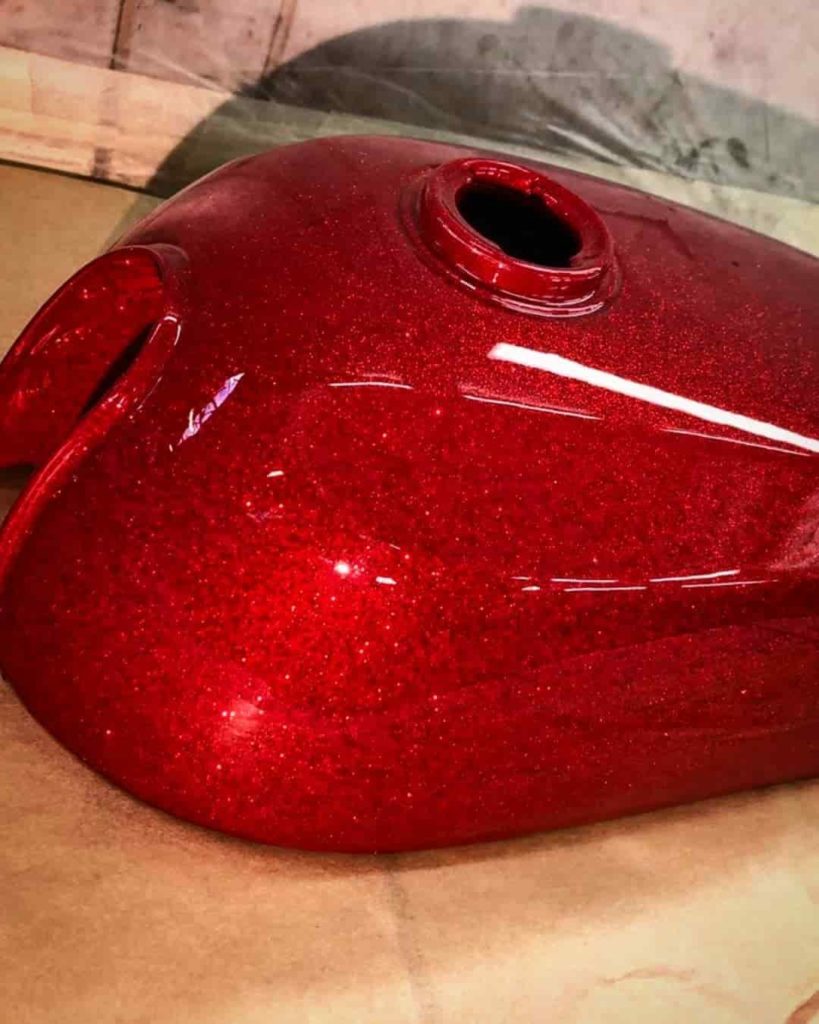
New red glitter look for a 1983 Yamaha XV1000 TR1
Complete tutorial for the realization of a Red Metal flakes motorcycle paint :
Our customer @Jerem_Motorcycles was pleased to send us the photos of the different stages of the complete makeover of this 1983 Yamaha XV1000 TR1. Discover their achievements on Instagram:
As you can see, the work is impressive and the result exceptional:
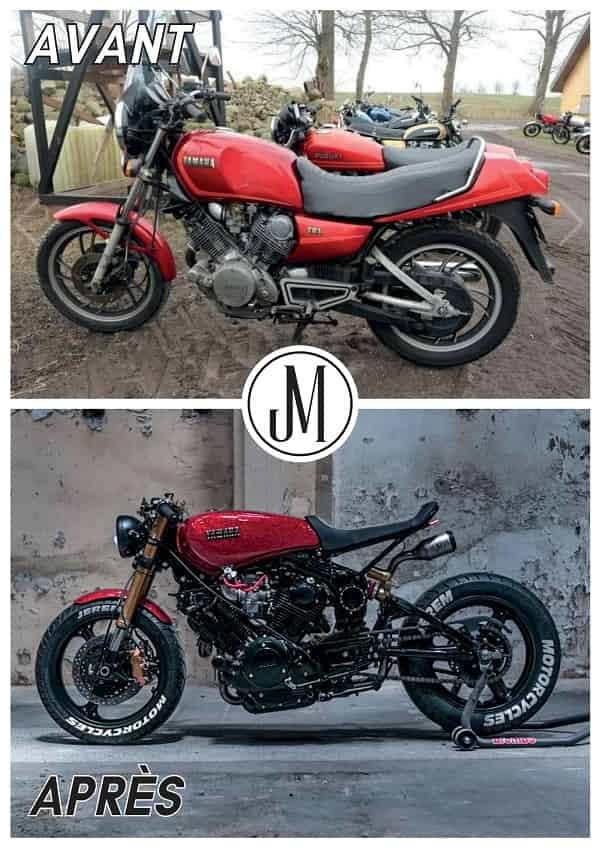
We can admire the work of preparation and transformation of the bike and just as much behind this glittery paint project with red Metal Flakes: first attempt, total success.
“.. I’m not a paint professional, I’m just a motorcycle preparer, it’s a friend of mine who paints me for the red glitter and the pure red glitter that we ordered from you with 12 coats of varnish”.
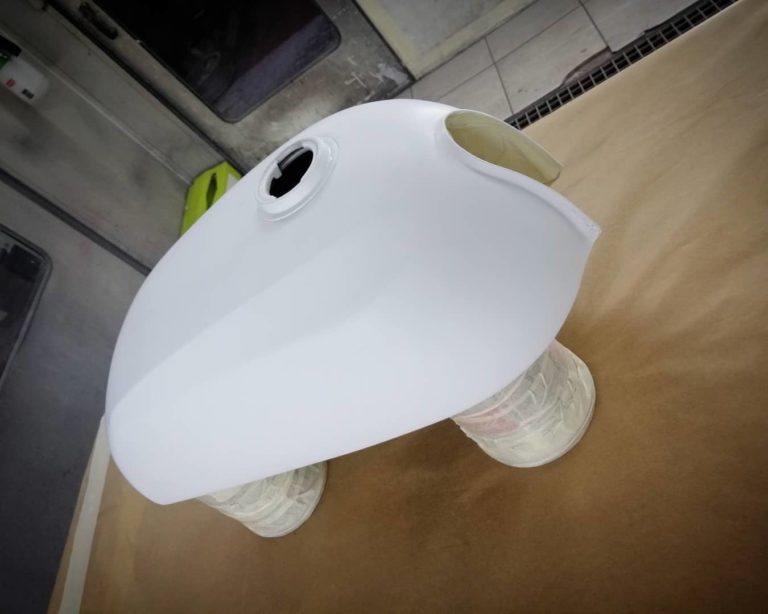
The first phase of the painting is the priming of the tank and fairing parts of the Yamaha XV1000. For this, a white two-component primer was used to stabilize and perfect the surface. After a few thick coats applied, wet sanding is carried out.
The tank is now ready to paint!
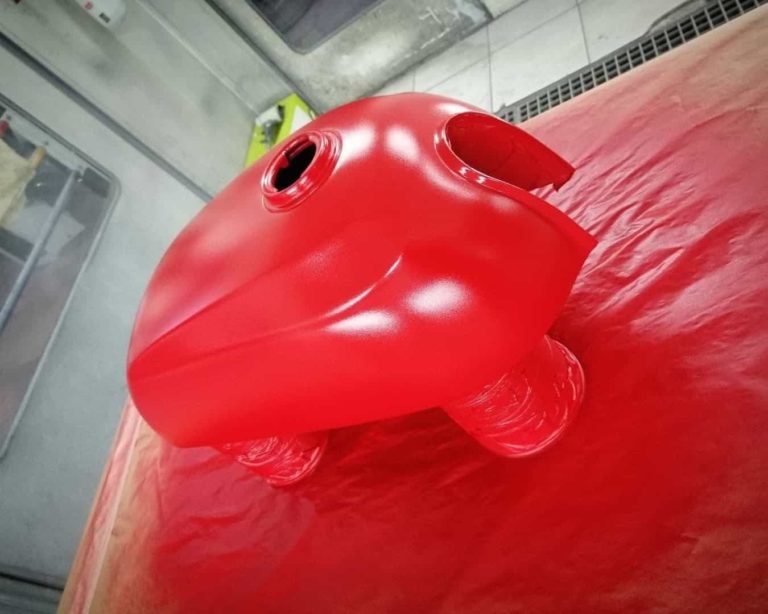
A red paint (base to be varnished) is applied.
Why ? This constitutes a red background.
Glitter, of any type, cannot form an opaque layer. Depending on their type, they are either transparent or opaque, but let the bottom be seen between each spangle.
For this reason, two types of background are recommended:
The black background to create a depth effect or the glitter color background to create a lighter effect.
A white background should never be used.
A first attempt was made with “transparent” type glitter with interfering colors (i.e. of a color different from the color of the background): this can be glitter from the “COSMIC” range or from the “DIAMOND“. Their advantage is a low thickness and therefore greater ease of varnishing.
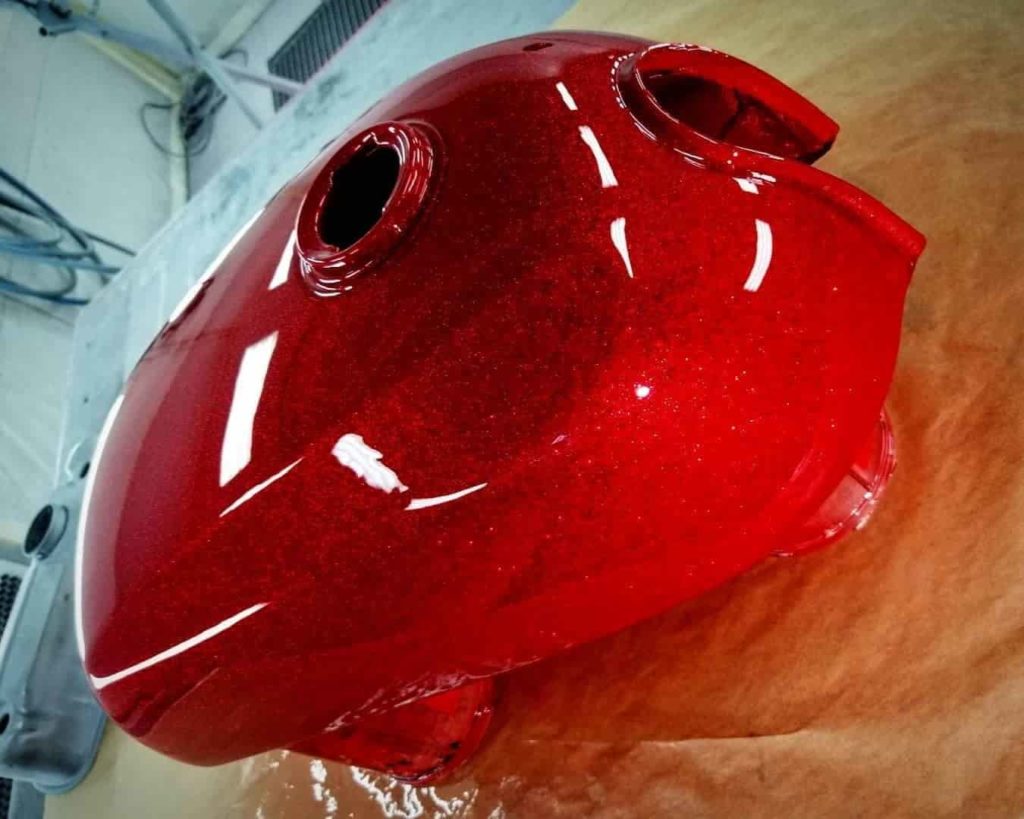
As the effect was not convincing, the choice was made to apply classic glitter, the famous “METAL FLAKES”.
There are basically two solutions or options for doing glitter paint on a motorcycle:
– apply silver glitter then a red “Candy” varnish
or
– directly apply red glitter
Option 2 was chosen.
To apply the glitter, there are also two operating mode options:
– Classic spraying, with a gun, with a mixture of binder or varnish + glitter
– “Dry” spraying glitter with a flakebuster on a tacky coat (varnish)
To apply glitter with a spray gun, make veils 30 cm from the support, crossing and covering, layer after layer, so as to cover the background as much as possible.
After the operation, we obtain a very irregular and rough surface, which will have to be varnished a certain number of times….

No less than 12 coats of varnish were applied to obtain this magnificent result.
A few tips for varnishing, for those who want to reproduce this result:
On the bare glitter, it is not useful to sand, because first of all, it is impossible and the varnish will naturally hang on this glittery background.
Then, it is not useful to limit yourself to two coats of varnish (the rule…) because you don’t worry about the loss of shine due to excess coats: in these first 5 to 7 coats, you simply seeks to garnish and cover the graininess.
Then, every 24 hours, after the varnish has completely dried and hardened, it is possible to sand with P500 then re-varnish.
It is in the last coats that we will seek to obtain a perfect and shiny varnish.
Kudos to the artists…!