How to make a marine decoration, with waves and beach using epoxy resin ?
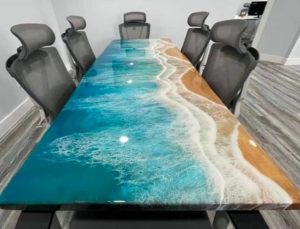
The sea and wave effect with epoxy resin is very easy to achieve and gives a very impressive result :
The epoxy resin is well suited for this magnificent marine trompe-l’oeil, which sparkles thanks to the mother-of-pearl powder and is transparent like water due to the « Candy » transparent dyes.
It is absolutely within anyone’s reach, as long as you follow the few tips and rules, but above all use the right products, such as not using the wrong resin.
[kad_vimeo url=”https://player.vimeo.com/video/520562294″ width=550 height=452 ]
What color of epoxy resin to choose for your sea and wave effect ?
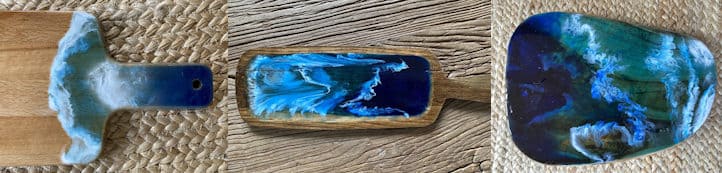
The warm, light wood-colored background will serve as a natural background imitating the warm color of sand.
It is very important to play on the transparency with the “wood” background and always use very transparent shades (Candy Inks) and never overload the resin.
The sea is a blue that varies according to the color of the sky, but also according to the depth, from dark navy blue or dark gray, to light green or turquoise, which is the result in reality of the superimposition of the light blue of the water on the yellow background of the sand.
The use of a dryer : it has the effect of “pushing” the color, as the wind does on the surface of the waves, without touching the surface and the hot air allows a perfect debubbling of the epoxy resin.
Preparation of the substrate :
In order to work without surprises, it is important to have a primed and prepared background.
The wood must have been sanded with 180 then 320 and must have been varnished, either with a water-based topcoat or with an impregnating resin (Resoltech 1010 water-based epoxy resin) .
After complete drying, you can start decorating, after a light sanding to ensure a good adhesion.
Ingredients to be prepared
The resin :
Choose a fast resin and intended for low thicknesses.
(Because the cast thickness will be only 1 to 2 mm).
If a conventional casting resin is chosen, then the surface will not harden for days ! Resin 4000 is perfectly suitable.
For the quantity : calculate the volume, e.g. 1 Litre = 1 m² on 1 mm thickness.
7103 WHITE MIKA
6040 OCEAN BLUE
Or / and
67635 BLUE LAGOON
Only 25g per liter of mixture will be needed.
Transparent dyes compatible with all types of epoxy resin :
Candy Ink 06 Cyan Blue
Candy Ink 01 Black
Candy Ink 05 Navy Blue
Candy Ink 20 Turquoise
Only 5g per liter of mixture will be needed.
Opaque colorant compatible with epoxy resin :
Titanium white
Tools :
A brush for resin or impregnation varnish.
A dryer or heat gun : to create natural foam and wave effects resembling those of the moving sea.
An electronic scale to accurately weigh the resin + hardener mixture.
At what point should the resin mixture be prepared ?
Different mixtures will be prepared at different times, to prevent the mixture from heating up and hardening before having time to use it.
As we are working with a fast resin, it is important not to keep the mixture in a pot (in a high thickness, which will allow it to heat up very quickly) and to use it immediately.
Mixture by weight (Resoltech 4000/4005) : 100 g resin + 38 g hardener
Important ! It is advisable to add the dyes and pearlescent materials before applying the hardener so that you don’t delay once the hardener has been added !
STEP 1 : The sea in resin
Prepare the mixture resin 4000 + mother-of-pearl Ocean Blue reinforced with a little transparent shade of Candy Ink 06 Cyan Blue or 05 navy blue depending on the shade of blue chosen.
10-25g of mother-of-pearl / Litre of resin
It is good to have two mixtures with two shades of blue (Cyan and navy blue) and pour the navy blue mixture on the “deep sea” part and the cyan blue or turquoise on the clear part. Before adding the hardener, wait until you have made the following mixtures :
 STEP 2 : The Deep Blue
Prepare the “black” resin mixture made of 7103 WHITE MICA mother-of-pearl + Candy Ink 01 Black transparent ink.
5-10g of mother-of-pearl / Litre of resin
Be careful with the black tint, you must not use too much of it, otherwise you will quickly lose transparency ! (2-5g per Litre)
STEP 3 : Casting
Pour the different mixtures on the surface at the same time so that they can mix and spread over the surface.
Once the gradation from light blue to deep blue is well established, one can proceed to the realization of the waves of white scum, in a fast way so that the flows melt before freezing.
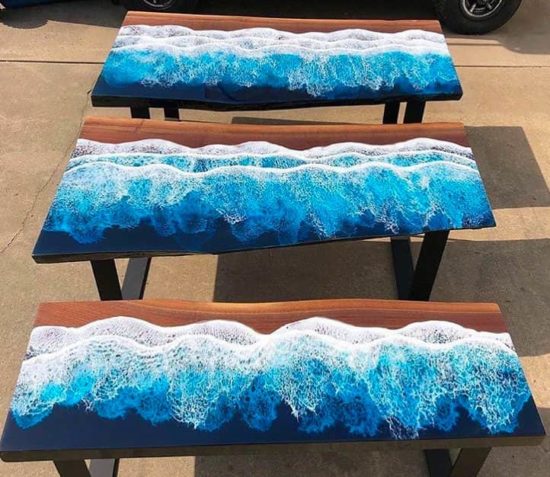
STEP 4: The Scum
This consists of one part resin + one part (5-10%) opaque white colorant.
The process is simple :
Pour a horizontal line of white resin.
Then do not touch manually or with a brush, but immediately blow with the heat gun or dryer.
We will make as many white lines as we want, until the last wave that runs aground on the sand.
Once the decoration has been made, the resin must be allowed to ” harden “. For this, it is important to have chosen a fast resin :
Why should I choose a fast resin ?
Epoxy resins work the opposite of paints : the thinner their coat is, the slower they harden and, on the contrary, the thicker their coat (or casting), the faster they harden.
This is why Resoltech 4000 resin, which is basically an epoxy glaze varnish, is the most suitable product, thanks to its very fast hardening in thin coats.
Varnishing
Once the wave and sea decoration in resin hardened to 50% ( it is possible to insert the nail), then we can make a new varnish cast, a glaze with a thickness of 1 mm, still with resin 4000, in order to create a beautiful smooth and shiny surface.
It is also possible to use a Stardust food clearcoat if desired.